There is more to life with TurboRenault.co.uk

Register a free account today to become a member! Once signed in, you'll be able to participate on this site by adding your own topics and posts, as well as connect with other members through your own private inbox!

3 Door 5 Campus

Remind me the sequence of events:

Find rust
Clean/cut out rust
Weld
Bilt Hamber (Do you put this on new metal or only cleaned up old metal?)
Prime
Paint

That right?
Yep, but I bilt into anywhere that I'll not be able to get to before I weld, then bilt it all after, new and old, give new a crosshatch with 80 grit, it etches in nice.
My mate did a full 1948 shell in bilt, after sanding it back to metal, because of pitting, and he works in bodyshop training, still perfect nearly ten years on.
Primer is you're choice, if it's gonna be finished, then I'd rattle etch it to be double safe then prime and final finish, if it's gonna have seam sealer and gravitex, then i brush Zinc 182 on first.
Make sure it all gets cavity waxed.
I use what I trust, and my old man paints a bit of whatever we discover, or get recommended onto a clean test piece and a rusty test piece, and sticks them out in the elements.
He's done it for years, then we can see what holds out and what doesn't........why the winter evenings fly by.
 
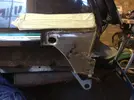
Inner done, bit messy but magic grinder soon sorts.....

2018-12-22 134002-1381882.webp

Ground up and treated for now, zinc it later, wait till new outer is trimmed and do it all at once.

2018-12-22 151645-1741781.webp

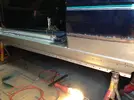
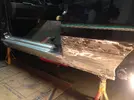
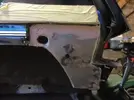
Door pins drifted out, door off ( loads of slop in them, might bush car holes out instead of drilling door out to take M8s ) Drill all spots, then along seam with hack knife and hammer, knock it along, drill spot....POP ... off it comes, all good inside at front....into jacking point all perfecto !!

2018-12-22 164306-1395890.webp

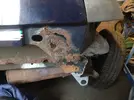
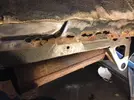
But notice rusty streak bang centre under pillar, think the rot starts when door post sealer gets brittle, runs down seam on post, rot through inner, then into JP.
Pic below shows rot under sealer and the path it takes in between inner sill and outer join......you've been warned .....get some cavity wax into door post and sills.

2018-12-22 162301-1506171.webp

Next, clean inner rusty bits to bright, Bilt and then offer new sill up and start trimming and fettling, weld it on and then there's some on floorpan, but I've worried it .....I'll make this fecker lie down....
 
There's a a lot of work involved in replacing rotten bits, ' new sills' just slides off peoples tongues, as if you take the old ones off, and pop the new ones on. Couple of hours labour.

And anyone with any experience knows that's never the case, rot on a car always happens somewhere on a seam, or convergence of several panels, so just replacing one panel is hardly ever going to be the case, plus to do it properly you've got to protect the areas you've welded....which will no doubt involve areas you can't reach after you've set fire to it. So using the best primers and coatings you can, plus waxing everywhere after is a must, or you may as well not bother.

I'm in no doubt I bought badly, I jumped in, I can weld and fabricate so the grot didn't bother me, but the expense of time and effort, given the resulting car, is probably not justified.
I could have done a GT at the right price and made money.
But I've dug deep into this car, not hidden it's faults, others can see where and how they go , and make their own judgements ..............and I'll leave it at that.

But perhaps people can appreciate the work that's involved in a restoration.......especially when budgeting, two sill panels and five hundred quid won't turn that raggy, bubbley, pitted shell into something worth putting 2.....3....4...5k's worth of paintwork on.

But at the end of the day, the boy wanted a Five, I got him a five, he'll have something different and I'll not feel guilty when he's changing my man nappy and feeding me soup in bed when I'm old...................
 
Love the couple of hours to replace sills statement and soooo much truth in your post

I am building toward aggressive plan for restoration of shell eary next year and while friend offered me space in his unit to do repairs, short term store and bonus of a free to use spray booth in the next unit its a 90min drive each way v struggle in my small garage at home. Have a friend helping me with worst of metal repairs but is way up north and 4.5 hrs away so only going to get a couple of visits and try to make it a work catchup rather than beer session lol

Your thread has given me some good food for thought in terms of prep bits and products to treat but also worried how much I will actually acheive in allocated time. Even with a few days off work and tip toe out the house at 5am need to be bk for 6pm with the kids
 
Great work as all ways , another lucky little car.
reading your above comments about the sills and time it takes to do a good job and getting a customer to realise a good job and a get it through the MOT .. When I was on the spanner s in the late 80s early 90s welding was a big part of the job . We found back then ( myself and an apprentice) team work was the key , so if you have a mate to kick your arse and get it done I would go down that route .
Have looked right back from the start of the thread it's a cracking read ,almost be sad to see it finished . I know you probably don't feel the same way, nearly there now .
 
Love the couple of hours to replace sills statement and soooo much truth in your post

I am building toward aggressive plan for restoration of shell eary next year and while friend offered me space in his unit to do repairs, short term store and bonus of a free to use spray booth in the next unit its a 90min drive each way v struggle in my small garage at home. Have a friend helping me with worst of metal repairs but is way up north and 4.5 hrs away so only going to get a couple of visits and try to make it a work catchup rather than beer session lol

Your thread has given me some good food for thought in terms of prep bits and products to treat but also worried how much I will actually acheive in allocated time. Even with a few days off work and tip toe out the house at 5am need to be bk for 6pm with the kids

Looks like you've got options, none perfect, but options.
In your position, think I'd be looking at tackling a percentage of the work at home, try and tick a good amount of areas off, sills for instance could be done on stands one at a time, even in a narrow garage tight up on one side?
Taking it's silver GT we're talking about?, screen surround.... I'd be considering cold weld replacement in, they'll be people more talented than me to comment but modern cars use a multitude of methods to build up the shells, Bentley SUV behemoth is ally, glued and self tapped together I was told, certain beemer sussy turrets are bonded in etc
Free spray booth use can't be sniffed at!
 
Rebuilt the garage last summer and old 1930's funky brick wooden pitched roof jobbie and while a nice bit wider than standard single a touch shorter. Have a rotisserie for the 5 but still snug :) will be taking advantage of a few late hours mid week to get things started.

Yep silver GT with surround needs, but will go old school stick metal method ;) knowing vx220's really well certainly dont doubt the power of glue :)

I have the draft chassis design done for the crazy 5 last week and will be double wishbone front and back. Will be collecting bits in the background but dont expect much fabrication until late summer
 
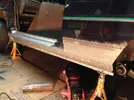
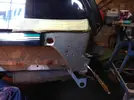
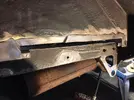
Couple of afternoons over Christmas hols, triming and fettling new sill panel, etchweld all seams and zinc 182 on all existing inner and reverse of new sill panel.

2018-12-27 113417-1642433.webp

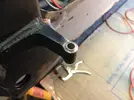
Really wanted to try door before I fired it all on, but I'd drilled worn hinges on car out to 8mm, as I was going to do same as O/S and use M8 part threaded bolts......but I'd done that because someone already drilled that side and wanged some 8mm roll pins in.....but only drilled part way and ground pins down at one end...real mish mash.
So, I decided rather than drill door out to 8mm, I'd sleeve car back down to 6.5ish......using some steel fuel pipe, and get Turbell the eldest of all....to turn me some M8 bolts down to said 6.5, and add an M6 thread on the end.............sounds like a fuckabout I know, but I hate roll pins in doors, farting about trying to knock them in or out, with a bolt you can drop them in, or push it up with plenty of lube on......fnarrrr...and then nip your nuts up to make it a tight ....
Anyways, point is with sill off you can get drill up the bottom........

2018-12-27 120858-1950265.webp

I put a little counter sink in top and bottom,knocked the sleeves in and welded them up,, they'll probably need a little reaming, but better tight than sloppy.....
Sill tacked on, door trial fit with a couple of M6 dropped in, all bob on, so plugged welded. Just continuous weld to do on door shut to rear quarter, and bottom of A post.

2018-12-27 162511-2019163.webp

Happy chappie, walk away for today,
 
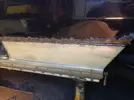
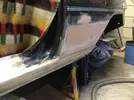
Welded all sill joins up,................. ground,................. filled.

2018-12-29 154440-1284217.webp

2018-12-29 164016-1917292.webp

2018-12-30 160152-1431475.webp

Three skims, about there.
In between, filling, flatting, waiting for filler to go off, I ticked rear bumper mount off.
Started off like this,

2018-12-30 111123-1533787.webp

Make a cardboard template, chop out, clean and treat, make a plate,

2018-12-30 133954-1631197.webp

Weld her up, top had to have a double pass, I didn't leave enough of the old on, blowing through cos of angle of existing bending away.....pah...you live and learn...

2018-12-30 152332-1310535.webp

Bit of filler smudged in, think get sill and this 99% and blow some primer on, then boot floor arch shite you can see above sexy temporary back box.

2018-12-30 160306-1207919.webp

Dusty, messy business, but I can have an hour after proper work at it, move it along sharpish.
 
awesome work as always. would love to be able to weld up and prep body work

I'd like to really good at it, when you see people tig weld a panel, and it's that neat , they can run a file over it a couple of times and then dolly it flat.
I like a bit of GRP work as well, bit of moulding and bonding...............basically turning shitty broken things into good things is my bag, the cheaper the better.

Bit mental really........
 
N/S rear inner arch/boot edge next up, skimmed sealer off so dog could see rabbit...........

2019-01-04 155406-1629810.webp

Poor rabbit.......next pics, chop out, right angled piece in on boot floor outer edge.

2019-01-04 165440-1564741.webp

2019-01-05 124915-1469573.webp

Boot floor is so thin though, had a bit of bother welding in through into new, even though I tacked it in first, on the runs the old was lifting and then ending up not welded here and there....so I had to grind it back and revisit little bits. Sip welder has only toggle power settings........i think it won't go low enough, floor measures with my spazzy eyes at about 0.7, new is 0.9 cos that's what I can get easily, but even on lowest settings welding old into new the reverse of the weld is nearly as big as the top such is the penetration.........more points into the TIG welder bag.....but think that'll mean more gas and expense, think TIG is pure argon?,,,need to read..
Anyhow, next pics are putting it all back together, long runs also bring a little distortion into this thin plate, but it can't be helped, a little dressing and then it'll get primed ready for sealer.

2019-01-05 135533-1397566.webp
2019-01-05 140640-1540093.webp
Made outer in two sections , so I can replicate the shape easier as there's a swage in there, also there is a little cut out at the bottom directly above the brake pipe ......not sure why it exists....unless at full squat it's there to clear something?

2019-01-05 152400-1515332.webp

2019-01-05 153648-1449562.webp

There's some seams grotty between floor pan and where the chassis leg tapers to a stop, but that'll have to wait as I out of steel big enough, so next stop tidy top of door post.
 
This wouldn't break the bank, 50 sheets cheaper than ebay here as well, just not sure on reg/gas ATM, I'd jump in if I could use my existing.

SIP HG1800 DC Inverter Welder - 05775 - SIP UK

My SIP mig has been fine for what I use it for, I know I could spend more......a lot more, but it's having that balance between what you actually NEED now, and what will survive the harshest use and last forever, and probably not ever need it's true potential ......but cost an arm and a bollock.
Some late night interweb staring needed, I think.
 
Back
Top