There is more to life with TurboRenault.co.uk
You are using an out of date browser. It may not display this or other websites correctly.
You should upgrade or use an alternative browser.
You should upgrade or use an alternative browser.
21 Turbo 21 Turbo Quadra joins Renault 5 stable!
- Thread starter r5gordini
- Start date
Kondas21
Active Member
Thank you. But we'd have to get it from Hungary or wherever you are(!) and my other 'box was supposedly working too, but was more broken than the original!
The box is in the UK in Basingstoke and it's from a reliable source. I say supposedly because I never tested it. If it doesn't work, I would accept returns for a full refund
DaveL485
Staff member
Ouch.Yep. Sadly nothing I can do about it because the car is in at my favourite garage and they subcontracted the work to a transmission specialist. He has already spent time stripping down two boxes and the garage needs it back ASAP. I wouldn't choose to do things this way in the future, but it does have the advantage that I should get the car back pretty quickly.
I say again.
Ouch.
r5gordini
Well-Known Member
Yes At least you're not having to pay for it!
I now have a clutch master cylinder and hose from the brake reservoir on order so that's all the clutch bits accounted for!
I'll be visiting my garage tomorrow - I don't know if there'll be any forward progress, but here's hoping!
I now have a clutch master cylinder and hose from the brake reservoir on order so that's all the clutch bits accounted for!
I'll be visiting my garage tomorrow - I don't know if there'll be any forward progress, but here's hoping!
DaveL485
Staff member
Yes At least you're not having to pay for it!
I now have a clutch master cylinder and hose from the brake reservoir on order so that's all the clutch bits accounted for!
I'll be visiting my garage tomorrow - I don't know if there'll be any forward progress, but here's hoping!
Don't miss the pin that goes through the pedal and Master actuating rod (and a split pin but the garage will have new ones), and remember the slave rod that sits in the slave and pushes on the fork is different. Use the one from your current setup, but get them to wrap tape around the body to make it a bit thicker so it fills out the dust cover hole over the slave front. Also make sure you keep the plastic head on the rod or it'll wear through the fork.
r5gordini
Well-Known Member
I've just heard back from the garage. They have timed it to TDC, no. 1 piston.
Another question - I bought new front wishbones. They are pressed rather than cast. Can I still use them? The garage seems to say they look different? And the brake cooling duct thingys don't fit...
Thoughts?
Thanks!
Andrew
Another question - I bought new front wishbones. They are pressed rather than cast. Can I still use them? The garage seems to say they look different? And the brake cooling duct thingys don't fit...
Thoughts?
Thanks!
Andrew
DaveL485
Staff member
Yes, TDC on number 1 (flywheel end). There is a mark on the flywheel that meets up with the timing marks on the gearbox bellhousing too (if it were attached). The cam looks in the right position there.I've just heard back from the garage. They have timed it to TDC, no. 1 piston.
Another question - I bought new front wishbones. They are pressed rather than cast. Can I still use them? The garage seems to say they look different? And the brake cooling duct thingys don't fit...
Thoughts?
Thanks!
Andrew
Wishbones are interchangeable yes, pressed to cast. The cooling deflectors you'd need from the relevant wishbone though.
r5gordini
Well-Known Member
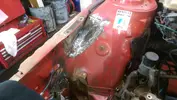 Progress! Engine and box are reunited, with a new clutch nestled between the two. My guy didn't change the turbo oil feed so I asked him to do so. Don't want to take risks although the old one looks in great condition. Looks like it was replaced as part of the recall, but the blue sticker was not present and I now don't trust the vendor when he told me it had been done!
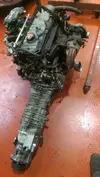
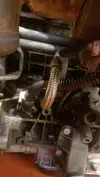
The old gearbox bearings definitely look past their best!
Here's the race of the worst one:
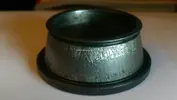
There were others that were a bit rough. I just don't understand how this could happen?
Maybe oil contamination or low oil or something got chewed up inside? The worst bearing could have totally failed at some point, don't you think? I have no idea what would have happened then.
I've also got a box of box bits from the spare gearbox. It was totally shafted, pun intended! The vendor had greased up the bearings and put it in some bin liners and left it outside. Not good enough! It was totally rusty inside. I will post some photos another time but just about allowing that's saveable is the diff and the transfer unit. And maybe the casing! So now I have a load of precisely machined rusty cogs fit for the bin!
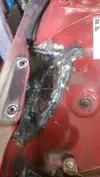
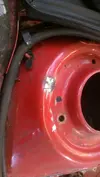
Welding has started on the offside inner wing.



r5gordini
Well-Known Member
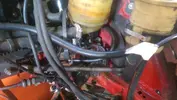
I noticed that there's a rubber hose from the bottom of the brake reservoir. It drops down and connects to a rigid green pipe. It seems to come across the engine bay and then be connected to the steering rack? I don't understand what it's for! At any rate, it's perished. I think that's a potential safety issue? If it lets go, presumably I lose all the brake fluid??
Andrew
Andrew
DaveL485
Staff member
Yes, replace it. Engine bay fire risk right there. They often perish, but as they are not pressurised don't leak until disturbed.I noticed that there's a rubber hose from the bottom of the brake reservoir. It drops down and connects to a rigid green pipe. It seems to come across the engine bay and then be connected to the steering rack? I don't understand what it's for! At any rate, it's perished. I think that's a potential safety issue? If it lets go, presumably I lose all the brake fluid??
Andrew
The pipe feeds fluid to the accumulator pump under the expansion tank, which is returned under pressure via a standard size brake line higher up (1600-2150psi).
As regards the oil feed pipe, you also need to check the inside of the metal pipe. This is where the carbon builds up and chokes the feed up.
r5gordini
Well-Known Member
Ok! Today's update! The work rate has slowed somewhat due to various issues...
I got a clutch master cylinder but unfortunately the end had been chopped down which meant that there was insufficient thread for the banjo bolt:
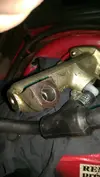
Thanks to Dave's encyclopaedic knowledge of the 21 I was able to buy the right size tap (M12x1.0, not a common size in people's toolboxes). I have successfully extended the thread down and the banjo bolts up nicely now!
The low pressure brake hose has arrived. The clutch slave and pedal have arrived.
My garage is not keen on doing the strut top bearings so I have bought some spring compressors and I'm going to do the job this weekend! I'm pretty nervous about the job but again, Dave has kindly offered some advice and guidance.
I got a clutch master cylinder but unfortunately the end had been chopped down which meant that there was insufficient thread for the banjo bolt:

Thanks to Dave's encyclopaedic knowledge of the 21 I was able to buy the right size tap (M12x1.0, not a common size in people's toolboxes). I have successfully extended the thread down and the banjo bolts up nicely now!

The low pressure brake hose has arrived. The clutch slave and pedal have arrived.
My garage is not keen on doing the strut top bearings so I have bought some spring compressors and I'm going to do the job this weekend! I'm pretty nervous about the job but again, Dave has kindly offered some advice and guidance.
DaveL485
Staff member
One more nugget: Video yourself doing it, so if it does go wrong and you don't die, at least you'll earn £250 from You've been framedI'm pretty nervous about the job but again, Dave has kindly offered some advice and guidance.

...and we get a laugh out of it!
r5gordini
Well-Known Member
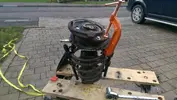
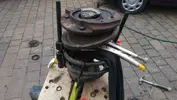
No laughs required! I did it! I nearly made a blunder right out of the blocks (decided to undo the nut at the top of the shock a little bit first because I thought it would be easier to undo with the strut on the ground) but the impact driver was a bit more efficient than I thought and it came undone a bit more than I wanted! I think I was a bit tired as I did that late on Saturday night... So after that I thought it better to wait until the morning so I was less tired (!)
So I thought again and did it properly this morning after scaring myself.
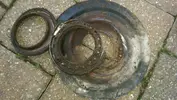
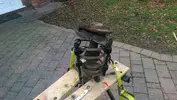
Here are the photos. The second spring was much easier as I'd learned how to do it. I struggled a bit with reassembling the first one but found the second one much easier. I found that using the spring compressors upside down seemed to work better, and using three compressors really helped. It meant I could easily leave two in place and reposition another as I worked things out. It also gave me an additional sense of security!
Main thing is I am relieved to have done the job and even more relieved to have done it safely.
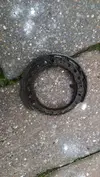
The driver's side bearing was absolutely knackered! I am sure it was affecting the steering geometry and feel. The passenger side was better but still way past its best. It was of a different design so must have been replaced at some point.
If I did it again in the future I would definitely use a more robust bench. I am not sure it would have survived if the spring let go. And I'm not sure if the ratchet straps would have saved me because the bench would have failed. But they were helpful for stabilising the strut. The third spring compressor was invaluable...


r5gordini
Well-Known Member
At least! I couldn't believe it! Well, I could...
I think I'd like to have a spare strut in stock. The top plate was a bit bent and damaged due to the bearing failing and the large cast part is a bit rusty!
This was the driver's side.
As for today, I visited the car. The clutch master is installed. The clutch pedal is fitted, as is the slave. The low pressure brake hoses from the reservoir to the accumulator are fitted.
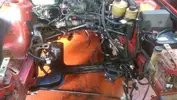
The engine bay and subframe have been cleaned. Front suspension struts are fitted. I believe the engine may be in now. I'll visit again on Friday!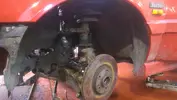


DaveL485
Staff member
Easy way to test it, drive around in a circle in 1st gear on full lock, on tarmac. You should feel/hear the inside rear wheel ker-chunking as its forced to turn on the spot with the same rotational speed as the outside rear wheel.Ha! I think it does work but I don't know. The switch is broken though, the previous owner used a razor blade (!) to hold the switch in!
Andrew
BIG MVS
Well-Known Member
Sorry to hear about the bad luck with the car, on paper it looked like a pampered one.
Well done for persevering with it and doing a restore. Really nice to see the 21 being appreciated and not raped for it's gearbox and tossed away like a rhino for it's horns.
Keep up the good work!
Well done for persevering with it and doing a restore. Really nice to see the 21 being appreciated and not raped for it's gearbox and tossed away like a rhino for it's horns.
Keep up the good work!
Similar threads
- Replies
- 4
- Views
- 361
- Featured
- Replies
- 82
- Views
- 2K
- Replies
- 2
- Views
- 68

