There is more to life with TurboRenault.co.uk
You are using an out of date browser. It may not display this or other websites correctly.
You should upgrade or use an alternative browser.
You should upgrade or use an alternative browser.
Steve Swan
Well-Known Member
It's a post Brexit thing....So no metal on the front end? Just the fibreglass panel?
Is that EURO-NCAP rated?
Steve Swan
Well-Known Member
Steve Swan
Well-Known Member
Steve Swan
Well-Known Member
Paint defects a quick lesson
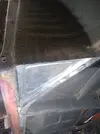
Yesterday I started to flat the shell and doors, the paint is completely flat and displays 2 distinct colours meaning it has been painted, as I started flatting the doors I noticed microblisters as the top layer came off see photo

As you look at the pic the bare metal is obvious , next around this is the Red oxide primer then Grey surfacer primer and finally the dark red topcoat if you look to the left you will see more grey primer and more red, this is the respray. If you look at the edge where the red goes to grey you can see spots which is where the paint has not adhered properly, any adhesion issues must be gone or your new paint is not stuck to the car, so it has to come off. Deep joy..........
Next up a cautionary tale for patina lovers.
The roof was original, thankfully the dodgy respray is only the bottom half (top swage down) it had a few spots on it and a couple of scrapes, but once into the surface the corrosion is much worse than the outside view suggested, once again this means going back to bare metal to find all the corrosion
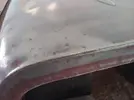
Patina may be cool in Southern California where the sun has burnt the paint off, but here in Blighty it's the damp that lifts and flakes paint and it's better off all gone, so it can be properly sealed up again
This is the current state of play, then all the replacement panels need the treatment. Good news was only 1 repair found on the drivers doors although there are about a dozen dents needing remedied.
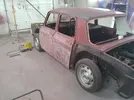
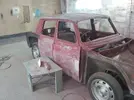
Invisible repair!!!! #roughastoast #rustyraftsRus
More soon........................
Yesterday I started to flat the shell and doors, the paint is completely flat and displays 2 distinct colours meaning it has been painted, as I started flatting the doors I noticed microblisters as the top layer came off see photo

As you look at the pic the bare metal is obvious , next around this is the Red oxide primer then Grey surfacer primer and finally the dark red topcoat if you look to the left you will see more grey primer and more red, this is the respray. If you look at the edge where the red goes to grey you can see spots which is where the paint has not adhered properly, any adhesion issues must be gone or your new paint is not stuck to the car, so it has to come off. Deep joy..........
Next up a cautionary tale for patina lovers.
The roof was original, thankfully the dodgy respray is only the bottom half (top swage down) it had a few spots on it and a couple of scrapes, but once into the surface the corrosion is much worse than the outside view suggested, once again this means going back to bare metal to find all the corrosion

Patina may be cool in Southern California where the sun has burnt the paint off, but here in Blighty it's the damp that lifts and flakes paint and it's better off all gone, so it can be properly sealed up again
This is the current state of play, then all the replacement panels need the treatment. Good news was only 1 repair found on the drivers doors although there are about a dozen dents needing remedied.


Invisible repair!!!! #roughastoast #rustyraftsRus
More soon........................
Chris74#
Well-Known Member
I feel your pain! Loving this build!Paint defects a quick lesson
Yesterday I started to flat the shell and doors, the paint is completely flat and displays 2 distinct colours meaning it has been painted, as I started flatting the doors I noticed microblisters as the top layer came off see photo
View attachment 199014
As you look at the pic the bare metal is obvious , next around this is the Red oxide primer then Grey surfacer primer and finally the dark red topcoat if you look to the left you will see more grey primer and more red, this is the respray. If you look at the edge where the red goes to grey you can see spots which is where the paint has not adhered properly, any adhesion issues must be gone or your new paint is not stuck to the car, so it has to come off. Deep joy..........
Next up a cautionary tale for patina lovers.
The roof was original, thankfully the dodgy respray is only the bottom half (top swage down) it had a few spots on it and a couple of scrapes, but once into the surface the corrosion is much worse than the outside view suggested, once again this means going back to bare metal to find all the corrosion
View attachment 199015
Patina may be cool in Southern California where the sun has burnt the paint off, but here in Blighty it's the damp that lifts and flakes paint and it's better off all gone, so it can be properly sealed up again
This is the current state of play, then all the replacement panels need the treatment. Good news was only 1 repair found on the drivers doors although there are about a dozen dents needing remedied.
View attachment 199016
View attachment 199018
Invisible repair!!!! #roughastoast #rustyraftsRus
More soon........................
gordini stu
Well-Known Member
Surprising what you find when you start this process .
Keeping an eye on this one , not had much to do with this era of Renault but they are becoming more appealing , a little bit different, just to keep the grey matter stirring,
Top stuff
Keeping an eye on this one , not had much to do with this era of Renault but they are becoming more appealing , a little bit different, just to keep the grey matter stirring,
Top stuff
Love this car… keep it coming Steve
Steve Swan
Well-Known Member
I have not been to the bodyshop this week, as the 8 is getting welded and there is nothing I can help with at this stage, so no point being in the way. I went out today to have a look see.
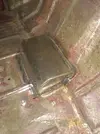
The transmission tunnel is fitted.
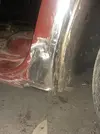
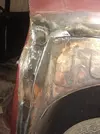
The whole bottom corner of the N/S C- post disappeared, this is looking good.
Thats the N/S rear done
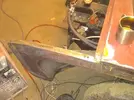
New O/S rear mounting rail is in. In fact the back of the car is done leaving about another half dozen or so small repairs, so It should all be done for the end of the week .
Onward..........

The transmission tunnel is fitted.

The whole bottom corner of the N/S C- post disappeared, this is looking good.

Thats the N/S rear done

New O/S rear mounting rail is in. In fact the back of the car is done leaving about another half dozen or so small repairs, so It should all be done for the end of the week .
Onward..........
Steve Swan
Well-Known Member
Back at the bodyshop today, so a couple more pics
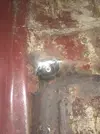
Floor reinforced where the clutch rod becomes a cable, a known weak point
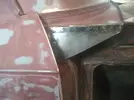
Later type 8G gusset plates to tie the scuttle to the A post, This is a very flexible part of an R8 shell and if it is getting a cage, it would be a good idea to brace the front leg to the scuttle under the dash, all my own cars have this mod, the front screen pillars are very upright and provide no resistance to rotation induced by front suspension loads. Modern cars are not like this for a reason.........
This is the part where the inner wing meets the chassis leg and floor triangles and is a rot hotspot this is a minimal as it gets and the other side is OK. never seen that before
Front lower triangles are a defo rotspot on all 4cv, Dauph and 8 & 10, they were not too bad, but Dave thought it just as easy to make and replace than patch up, as good as the originals as far as I'm concerned. One small area of corrosion to fix on the leg where the chassis is joined..?? Drunk French muppets
It should be welded up by close of play today, then making a mess can really commence
Stay tuned................

Floor reinforced where the clutch rod becomes a cable, a known weak point

Later type 8G gusset plates to tie the scuttle to the A post, This is a very flexible part of an R8 shell and if it is getting a cage, it would be a good idea to brace the front leg to the scuttle under the dash, all my own cars have this mod, the front screen pillars are very upright and provide no resistance to rotation induced by front suspension loads. Modern cars are not like this for a reason.........
This is the part where the inner wing meets the chassis leg and floor triangles and is a rot hotspot this is a minimal as it gets and the other side is OK. never seen that before

Front lower triangles are a defo rotspot on all 4cv, Dauph and 8 & 10, they were not too bad, but Dave thought it just as easy to make and replace than patch up, as good as the originals as far as I'm concerned. One small area of corrosion to fix on the leg where the chassis is joined..?? Drunk French muppets
It should be welded up by close of play today, then making a mess can really commence
Stay tuned................
Steve Swan
Well-Known Member
Steve Swan
Well-Known Member
Steve Swan
Well-Known Member
@DaveL485 . Just to keep an old joke alive, today I went mad and made a momentous purchase
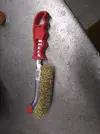
Two and a half quid ! It had better be good. I need 10 years out of this!
It was bought because @paule78 's new outer rims arrived and I was going to re-rim them
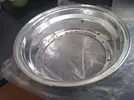
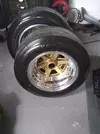
SO Start with one Image RA 5.5" wheel
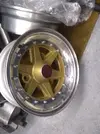
All of these are based on Compomotive dimensions. Undo all the bolts and split the rims, easier to say than do, use a blade and keep going and eventually they part.
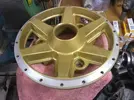
Clean the centre and remove the centrecap.
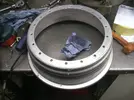
Now the Fun bit removing the old silicone, once again, start with a blade then the heel of your hand ( if its as rough as mine) finally the NEW wire brush once its done which ain't 5 minutes wash with solvent to make sure it's all clean
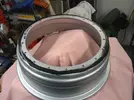
Everyone has their own way of doing this. My method is to sparingly coat both rims , but staying outside the bolt holes, so you just clip the flat face and do not use a lot!!
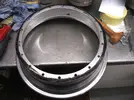
Now assemble it and bolt it up. Torque it up crosswise and run a bead of sealer into the join and smooth off. make sure it is stuck down to the ally all the way round
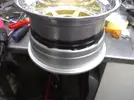
After that leave to set
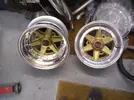
Cooler than a Penguin's cold bits. Better without the centrecaps
More soon.......

Two and a half quid ! It had better be good. I need 10 years out of this!
It was bought because @paule78 's new outer rims arrived and I was going to re-rim them
SO Start with one Image RA 5.5" wheel

All of these are based on Compomotive dimensions. Undo all the bolts and split the rims, easier to say than do, use a blade and keep going and eventually they part.

Clean the centre and remove the centrecap.

Now the Fun bit removing the old silicone, once again, start with a blade then the heel of your hand ( if its as rough as mine) finally the NEW wire brush once its done which ain't 5 minutes wash with solvent to make sure it's all clean

Everyone has their own way of doing this. My method is to sparingly coat both rims , but staying outside the bolt holes, so you just clip the flat face and do not use a lot!!

Now assemble it and bolt it up. Torque it up crosswise and run a bead of sealer into the join and smooth off. make sure it is stuck down to the ally all the way round

After that leave to set

Cooler than a Penguin's cold bits. Better without the centrecaps
More soon.......
Steve Swan
Well-Known Member
Very nice! What width and backspace did you and PaulE decide on?That's another job off the list or maybe its 2. Anyway only another 9999 to go.
View attachment 200067
More soon...
Steve Swan
Well-Known Member
Image supplied 4" inner rims front and rear and 2" outers making 6" on the rears and inch and a half outers on the front making 5.5 inch. They need spacers to fit on the front,so I would be tempted to go 4 inner and 2 outer making 6 on the back and go 3.5 inner and 2 outer making 5.5 on the front.
Steve Swan
Well-Known Member
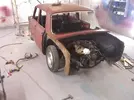
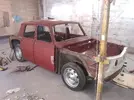
Short update. The usual bodyshop story, but he is a friend and works alone, so can sympathise with the day to day problems of keeping a set of ever changing circumstances under control. However its back in the prep area on the stands with all of the dents dealt with. It is ready to be primed, then the big flat, probably a coat of wet on wet and the colour
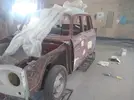
and the other side
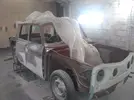
More soon I hope ...................

and the other side

More soon I hope ...................
Steve Swan
Well-Known Member
Its Happened
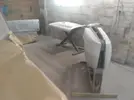
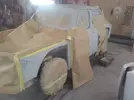
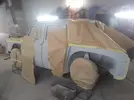
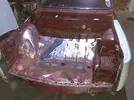
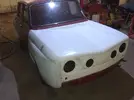
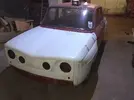
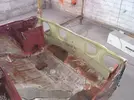
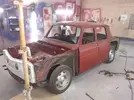
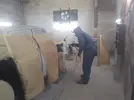
It has been Etched and primed
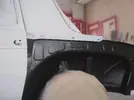
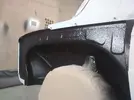
Next job Stone chip the arches with Pickup bed 2k in the schutz gun
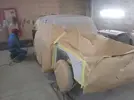
This gives a really nice finish
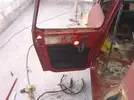
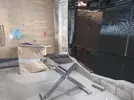
Next up was to give the insides of the GRP panels a coat of Black High solids 2K as the internal finish on GRP panels is not great and @paule78 's pockets are not bottomless
Day off tomorrow then Flatting for paint commences Mon.
More soon...............


It has been Etched and primed
Next job Stone chip the arches with Pickup bed 2k in the schutz gun


This gives a really nice finish


Next up was to give the insides of the GRP panels a coat of Black High solids 2K as the internal finish on GRP panels is not great and @paule78 's pockets are not bottomless

Day off tomorrow then Flatting for paint commences Mon.
More soon...............
Similar threads
- Replies
- 4
- Views
- 373
- Featured
- Replies
- 86
- Views
- 2K

