There is more to life with TurboRenault.co.uk
You are using an out of date browser. It may not display this or other websites correctly.
You should upgrade or use an alternative browser.
You should upgrade or use an alternative browser.
paule78
Active Member
Not guilty!Mystery of the squint rear axle unravelled. Some silly sod has used it as a Jacking point with predictable disastrous results
View attachment 159019
The centre section is supposed to be straight. Well it had all been going quite nicely, maybe too nicely. Should be fun straightening it out........................
Mark_L
Well-Known Member
Coming on very well,Having remembered to put the N/S spring pan in the car I went to the Garage. The N/S assembled no problem, so I decided to break out the trammel bar and start primary set up. These simple tools are copies of the original Renault special tooling of the time.
View attachment 159006
The points fit into the various holes in the shell helpfully provided by Renault for accident repair measurement
View attachment 159007
Next up a cheapo 26mm spanner ground down and bent for the purposes of castor adjustment
You put one point in the centrepoint hole in the middle crossmember and set the distance from there to one of the 6mm bolts on the bottom balljoint with a bit of manipulation of the adjusters I equalised both sides to the maximum castor setting
View attachment 159008
N/S finished for now
View attachment 159009
Same for O/S
Couple general shots of the front end
View attachment 159010
View attachment 159011
I then decided to check the rear axle for square. It is not, so that's tomorrow night's job
More soon.....................
Just shows that your years of experience, simplifies the job as you know exactly what needs to be done.
I'm afraid it's not coming through nowadays, we're struggling to find a competent mechanic here.
Steve Swan
Well-Known Member
I'm off to my mate's engine reconditioning shop to borrow the press. As it is one gentle curve I am not sure heat will do any good, so I will go with vee blocks and the press and see what happens, localised damage would benefit from heat.
Wish me luck..........
Wish me luck..........
Steve Swan
Well-Known Member
Progress report
Vee blocks and the press was the correct answer. Stripping off what I have always believed to be some sort of harmonic damper, I realised that it is the exact shape for the press, maybe that's why Renault fitted them, so as you could straighten them after bending them.
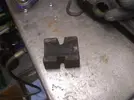
Then on the press and it all went beautifully

There are very odd times when I surprise even myself !
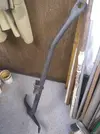
Now it is straight again
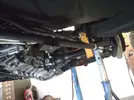
Get it back on the motor and have a square rear axle
Thankyou and goodnight...................
Vee blocks and the press was the correct answer. Stripping off what I have always believed to be some sort of harmonic damper, I realised that it is the exact shape for the press, maybe that's why Renault fitted them, so as you could straighten them after bending them.

Then on the press and it all went beautifully

There are very odd times when I surprise even myself !

Now it is straight again

Get it back on the motor and have a square rear axle
Thankyou and goodnight...................
Steve Swan
Well-Known Member
It took very little force. It's the fact you can brace and push in the right place that does it. A pleasant surprise I can tell you.That went better than expected! Sometimes the simple solutions (brute force) are the right solutions haha
Steve Swan
Well-Known Member
Question
What do you do when you've nearly got it all together again?
You take the rest of it apart.
This is because it's getting a slack handful of panels put on it plus other bits
Nothing to see here............
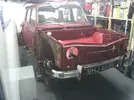
or here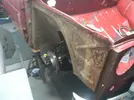
Or here
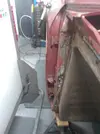
This looks a bit iffy
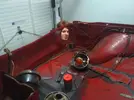
Ok here too.
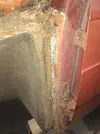
If there is going to be any issues its going to be inside or at the back. I'll find that out over the weekend..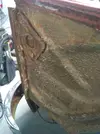
More soon........................
What do you do when you've nearly got it all together again?
You take the rest of it apart.
This is because it's getting a slack handful of panels put on it plus other bits
Nothing to see here............

or here

Or here

This looks a bit iffy

Ok here too.

If there is going to be any issues its going to be inside or at the back. I'll find that out over the weekend..

More soon........................
Last edited:
Steve Swan
Well-Known Member
It's a no photo update today
It has had all its panels removed. 4 wings, back panel and Bonnet. Good news is that there is rot, but it is not as bad as it could have been. The rear floormat is out and again, a couple of holes, but no rot.
Next get the front seats and mat out , then the bodyshop is on the horizon Perhaps???????????
Steve Swan
Well-Known Member
R is for Renault, or is it, R is for Rust. To be fair Renault were no worse than any other cars of the period. They were all rusty scrap!!
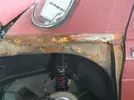
Usually this is just one big long hole
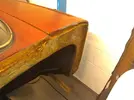
N/S slightly better and still has the wing mounting rail, but does have holes in the C pillar the O/S C pillar is good
Then the Child in me took over and I started to stick bits on
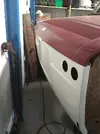
And around the front
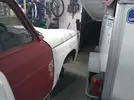
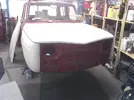
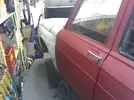
Lots of work to get this lot Fitting
Stay tuned...................

Usually this is just one big long hole

N/S slightly better and still has the wing mounting rail, but does have holes in the C pillar the O/S C pillar is good
Then the Child in me took over and I started to stick bits on

And around the front


Lots of work to get this lot Fitting
Stay tuned...................
Steve Swan
Well-Known Member
Back to reality tonight
The clutch was all together , but just felt shit , further investigation revealed a crack in the floor where the anchor bracket attaches with a shitload of welding doing nothing. I decided to remove the anchor bracket to see what was up....
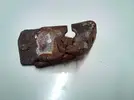
Never in the field of dodgy car repairs was so much weld expended
On doing absolutely fuck all
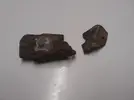
Time to start again on this .............
The clutch was all together , but just felt shit , further investigation revealed a crack in the floor where the anchor bracket attaches with a shitload of welding doing nothing. I decided to remove the anchor bracket to see what was up....

Never in the field of dodgy car repairs was so much weld expended
On doing absolutely fuck all

Time to start again on this .............
DaveL485
Staff member
Ah, clearing up other peoples mess, delightful!Time to start again on this .............
Steve Swan
Well-Known Member
Lovely. I have had too many of these in the past, have become more adept at avoiding them.
Steve Swan
Well-Known Member
Progress
The clutch bracket is repaired. This has been the usual floor cracks and starts flexing, bracket now not secured starts flexing, bracket snaps. Muppet repair co. cover in weld spatter. Job done
Simple enough repair: Grind all the weld off re weld cut re-enforcing strip and weld on, Paint, admire and post up on here. Just got all the weld to grind off the floor and make a spreader plate to weld to the floor to stiffen.
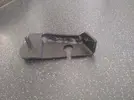
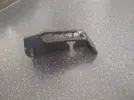
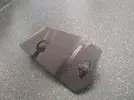
EEESss Nice.
Also been transferring all the mounting holes into the GRP panels (deep joy) Maybe go to the car after tea and stick bits on to cheer myself up............
The clutch bracket is repaired. This has been the usual floor cracks and starts flexing, bracket now not secured starts flexing, bracket snaps. Muppet repair co. cover in weld spatter. Job done
Simple enough repair: Grind all the weld off re weld cut re-enforcing strip and weld on, Paint, admire and post up on here. Just got all the weld to grind off the floor and make a spreader plate to weld to the floor to stiffen.


EEESss Nice.
Also been transferring all the mounting holes into the GRP panels (deep joy) Maybe go to the car after tea and stick bits on to cheer myself up............
Steve Swan
Well-Known Member
Good progress, but no pics due to the nature of the work
Cleaned up the split floor and still need to make a spreader plate to weld on, however a repair washer is being used as a standby and the Clutch now feels much better
Big news is we have brakes! The hydraulics are finished and bled, pedal feels good once bedded in will be dynamite. This is a major job off the list
I am still transferring all the fixtures and fittings to the GRP bits, a time consuming job. The body man has seen it with all its clothes off. I need to get all the GRP dressed and fitted then he comes back to assess how many hours in the new panelwork which is easier to do with the car built again. I am trying to keep as much of the original as possible, there are 3 things to juggle Looks v time v cost. I hate cutting corners here, but when someone else is paying you have to keep the time element down, some non original bits are also going into the mix to keep costs down, but I am fairly confident that, if I don't tell, no-one will notice.
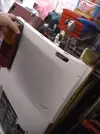
Surprising just how many holes there are to put in
Then all the other fittings
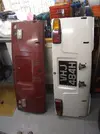
Starting handle hole not required
More soon...................
Cleaned up the split floor and still need to make a spreader plate to weld on, however a repair washer is being used as a standby and the Clutch now feels much better
Big news is we have brakes! The hydraulics are finished and bled, pedal feels good once bedded in will be dynamite. This is a major job off the list
I am still transferring all the fixtures and fittings to the GRP bits, a time consuming job. The body man has seen it with all its clothes off. I need to get all the GRP dressed and fitted then he comes back to assess how many hours in the new panelwork which is easier to do with the car built again. I am trying to keep as much of the original as possible, there are 3 things to juggle Looks v time v cost. I hate cutting corners here, but when someone else is paying you have to keep the time element down, some non original bits are also going into the mix to keep costs down, but I am fairly confident that, if I don't tell, no-one will notice.

Surprising just how many holes there are to put in
Then all the other fittings

Starting handle hole not required
More soon...................
Steve Swan
Well-Known Member
Still Fighting with GRP today, but I'm winning, I think
Went to the car and put the anti-roll bar on to measure up for reshaping it, should be dandy.
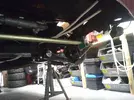
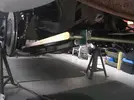
I also checked the brake light switch, I have ditched the original pressure switch, as they only bring the lights on when you are actually slowing down, I prefer a mechanical switch on the pedal which brings the lights on as soon as you touch the pedal
The top leg needs to be longer though, so back to the workshop for a small Mod.
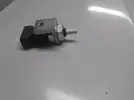
Humble Mk2 Escort switch
more soon.................
Went to the car and put the anti-roll bar on to measure up for reshaping it, should be dandy.


I also checked the brake light switch, I have ditched the original pressure switch, as they only bring the lights on when you are actually slowing down, I prefer a mechanical switch on the pedal which brings the lights on as soon as you touch the pedal
The top leg needs to be longer though, so back to the workshop for a small Mod.

Humble Mk2 Escort switch
more soon.................
Steve Swan
Well-Known Member
Steve Swan
Well-Known Member
And if that was not enough for one day.........
Malcolm is away for the weekend, so managed to talk Liz into coming out to the workshop so I can check the Anti-roll bar ends for clearance from the tyres. You can imagine her sitting in a dead car turning the steering form left to right for 10mins or so at minus 1 was not her idea of an ideal Saturday evening. You should see me when I really try!!!
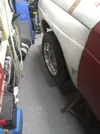
That is a 61/2" Front rim with a 185/60x13 on it (one of my wets)
More soon.............
Malcolm is away for the weekend, so managed to talk Liz into coming out to the workshop so I can check the Anti-roll bar ends for clearance from the tyres. You can imagine her sitting in a dead car turning the steering form left to right for 10mins or so at minus 1 was not her idea of an ideal Saturday evening. You should see me when I really try!!!

That is a 61/2" Front rim with a 185/60x13 on it (one of my wets)
More soon.............
Similar threads
- Replies
- 4
- Views
- 371
- Featured
- Replies
- 86
- Views
- 2K

