There is more to life with TurboRenault.co.uk

Register a free account today to become a member! Once signed in, you'll be able to participate on this site by adding your own topics and posts, as well as connect with other members through your own private inbox!

Alpine Renault 8 GTT

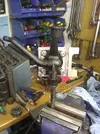
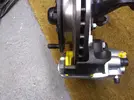
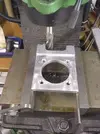
With the uprights ready to build, the next job is to make the caliper mounting plates a fairly simple affair in 1/2" ally plate which gets a trip in the 4 jaw followed by various ops in the mill

R8TT 7th NOV (1).webp

With those finished off they are fitted to the upright

R8TT 7th NOV (2).webp

R8TT 7th NOV (3).webp

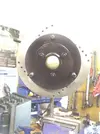
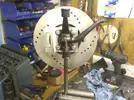
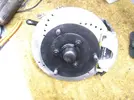
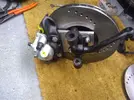
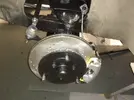
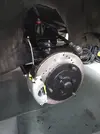
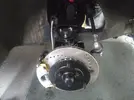
Then the modified disc is fitted to the spout and the hub assembled

R8TT 7th NOV (4).webp


R8TT 7th NOV (5).webp

Then rinse and repeat for the other side. Next job is to drill and tap the 2 bolt holes for the steel caliper carriers fit the brakes and the hubs are ready to refit.
More soon....................
 
No Pics today. Spent part of the day repeating the other hub and the evening routing new heater hoses and fuel flow and return plus tiding up the main battery cable. A good productive day.
Maybe news from the powdercoater tomorrow.
It's different this, trying to cram 30 years of development into 30 days. Stay tuned..........
 
No pics today and no powdercoater either. However the steering rack is back in and centred, I have tweaked the circle of gears a bit more to my liking and sorted a dodgy captive in the heater hose clip department . This however has exposed a couple of holes in the rear floor at the C crossmember , plus the dreaded split floor at the clutch cable anchor point which has been repaired by a blind man with a broken MIG welder. Some grinder/welder action needed here..................
 
I should have finished that mainshaft today, but as it was like Xmas morning I had an attack of shinythingitus and decided to start assembling bits instead, it is the most rewarding part of a job.

R8TT 11th Nov (2).jpg

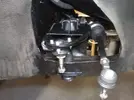
Even painted the balljoints

R8TT 11th Nov (4).jpg

They are going back on the car tonight then the steering rack gets finished off. That will give me the Psychological advantage.

R8TT 11th Nov (3).jpg

Calipers are new, but no lube, so stripped them and lubed them..

R8TT 11th Nov (6).jpg

Caliper carriers are back, so the hubs need finished off

R8TT 11th Nov (5).jpg

These adjustable bushes are super trick and a super PITA to fit. I had a bad feeling about them which I will explain later
More soon............
 
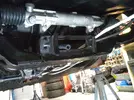
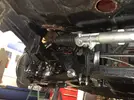
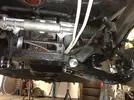
Went to the car after tea and fitted the top wishbones and secured the rack that is the easiest way to fit the bits - Steering rack connector - top wishbones - rack mounts

R8TT 11th NOV (7).webp

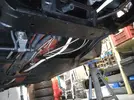
Still got the heater hoses to re-connect to the heater and I'm done under here for now

R8TT 11th NOV (8).webp

I'll be happy to get off my back on this floor I can tell you

R8TT 11th NOV (9).webp

More soon.................
 
I have spent most of today avoiding that Mainshaft again and turning @paule78 's pile of parts from Pending to goods outwards
Finished off the uprights and brake conversion, then realised I'd forgot about the anti rattle shims (Ebay later)

R8TT 12th Nov (3).webp

Looking good The next pic shows the general lack of clearance between the caliper and the hub spout (which is the joy of large diameter 3 stud spouts)

R8TT 12th Nov (4).webp

It has also all got to fit inside a reverse rim 13" wheel which is tightish. I am sure you will agree it is a big change from the originals a few posts ago

R8TT 12th Nov (5).webp

Simple is beauiful.............

Now the not so simple. Amongst the stash of parts that came with the car was a copy of the original Dangel camber adjusment bushes for the lower wishbones. R8's were donors of chassis parts, engines and gearboxes to many other French Kitcars and specials. Dangel were a bit like Mallock I think and engineered some tricky bits for the front Suspension

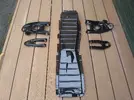
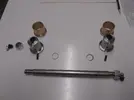
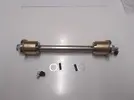
Here is 1 side of the kit

R8TT 12th Nov (1).webp

Very nice

R8TT 12th Nov (2).webp

Once assembled the rollpins lock the bushes which can be turned with a special spanner from either end.

The issue here is clearance (or the lack of ) The Renault wishbones get the oilite bushes pressed into them. I set one up and hit it with the rubber mallet and it bounced, so I decided to hone out the steel sleeve on the wishbone and did so until they were a nice press fit in the vice. Is impossible to measure accurately, as the wishbone sleeves are not really that round, but I thought a had about a quarter thou interference (quite light) Fit.
As I suspected the steel offset bushes would not fit into the oilite bushes (as they had closed up a bit) so I then had to hone them out to fit, which takes ages. I still have one to finish, it takes ages.

* This kit is not suitable for a beginner to fit to their vehicle *
More soon..............
 
I have spent most of today avoiding that Mainshaft again and turning @paule78 's pile of parts from Pending to goods outwards
Finished off the uprights and brake conversion, then realised I'd forgot about the anti rattle shims (Ebay later)

View attachment 158950

Looking good The next pic shows the general lack of clearance between the caliper and the hub spout (which is the joy of large diameter 3 stud spouts)

View attachment 158951

It has also all got to fit inside a reverse rim 13" wheel which is tightish. I am sure you will agree it is a big change from the originals a few posts ago

View attachment 158952

Simple is beauiful.............

Now the not so simple. Amongst the stash of parts that came with the car was a copy of the original Dangel camber adjusment bushes for the lower wishbones. R8's were donors of chassis parts, engines and gearboxes to many other French Kitcars and specials. Dangel were a bit like Mallock I think and engineered some tricky bits for the front Suspension

Here is 1 side of the kit

View attachment 158953

Very nice

View attachment 158954

Once assembled the rollpins lock the bushes which can be turned with a special spanner from either end.

The issue here is clearance (or the lack of ) The Renault wishbones get the oilite bushes pressed into them. I set one up and hit it with the rubber mallet and it bounced, so I decided to hone out the steel sleeve on the wishbone and did so until they were a nice press fit in the vice. Is impossible to measure accurately, as the wishbone sleeves are not really that round, but I thought a had about a quarter thou interference (quite light) Fit.
As I suspected the steel offset bushes would not fit into the oilite bushes (as they had closed up a bit) so I then had to hone them out to fit, which takes ages. I still have one to finish, it takes ages.

* This kit is not suitable for a beginner to fit to their vehicle *
More soon..............
Fascinating work! I've been following closely to see what I might be able to do to my R8. I just finished replacing my suspension bushing with new SilentBlocs. The only problem I encountered was removing the stuck upper bolts. I ended up having to drill them out. Ugh! The front end is now much stiffer with the new bushings. I also slotted the upper ball joint attachment holes to reduce the stock positive camber. Camber went from 1.5 deg posititve to near zero. This should improve handling (maybe?) and help fit 13 inch Image wheels, eventually. Oh those beautiful Image wheels!
 
Fascinating work! I've been following closely to see what I might be able to do to my R8. I just finished replacing my suspension bushing with new SilentBlocs. The only problem I encountered was removing the stuck upper bolts. I ended up having to drill them out. Ugh! The front end is now much stiffer with the new bushings. I also slotted the upper ball joint attachment holes to reduce the stock positive camber. Camber went from 1.5 deg posititve to near zero. This should improve handling (maybe?) and help fit 13 inch Image wheels, eventually. Oh those beautiful Image wheels!
There is a guy here in the UK who is working on 3 piece Deltamics which should be very cool and available in 13 and 14 inch.
 
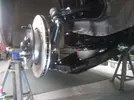
Busy weekend,So here is the update. I got the o/s lower wishbone finished and fitted, so decided to fit the spring and pans , then the upright
Lookin good

R8TT 14 Nov (2).webp


Pleased with how this is sitting

R8TT 14 Nov (3).webp

I have laid in the Aeroquip front brake lines which are siting where I would like them and fitted up the undertrays to check for clearance

R8TT 14 Nov (1).webp

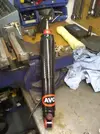
Clearance is all good , so decided to fit the o/s shock and got one

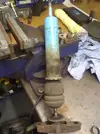
Fun fact. R8 std front dampers are upside down units to reduce unsprung weight

R8TT 14 Nov (4).webp

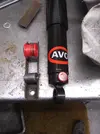
No such Advanced features on the AVO adjustables though.

R8TT 14 Nov (5).webp

In fact they can't even make the bush fit the bracket, it is 4mm too wide send for the man with a saw..........

R8TT 14 Nov (6).webp

I hope to have the last n/s lower wishbone bush honed out tomorrow, which means I can finish up the n/s tomorrow. I need to locate a couple of grommets for the brake lines where they pass through the old flexi to crossmember mountings. My target is to get it back on the floor for next weekend. What could go wrong. Erm plenty actually
Stay tuned...................
 
It is a no photo update today. As the sort of retired house husband, Monday is the day the house gets it whether it needs it or not (I hate dusting) So after that I packed up the mainshaft and set about cutting down the shock bushes to fit the brackets. Once that was done I finished off the other lower wishbone bushes , What a nightmare , but I got there in the end. After tea I went to the car and finished off the O/S and started on the N/S. It was all going swimingly until I realised I had forgot to bring the top spring pan. Cursing my own stupidity I got done what I could and came home and am typing this up in the huff with myself.
More soon................
 
I got done what I could and came home and am typing this up in the huff with myself.
The moment of realisation is horrible isnt it. I remember once getting a phone call off a mate who had rebuilt his engine only to find a sole liner seal left over on the bench... safe to say he wasn't too happy haha.
 
Having remembered to put the N/S spring pan in the car I went to the Garage. The N/S assembled no problem, so I decided to break out the trammel bar and start primary set up. These simple tools are copies of the original Renault special tooling of the time.

R8TT 16th Nov (1).webp

The points fit into the various holes in the shell helpfully provided by Renault for accident repair measurement

R8TT 16th Nov (2).webp

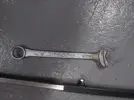
Next up a cheapo 26mm spanner ground down and bent for the purposes of castor adjustment
You put one point in the centrepoint hole in the middle crossmember and set the distance from there to one of the 6mm bolts on the bottom balljoint with a bit of manipulation of the adjusters I equalised both sides to the maximum castor setting

R8TT 16th Nov (3).webp

N/S finished for now

R8TT 16th Nov (4).webp

Same for O/S

Couple general shots of the front end

R8TT 16th Nov (5).webp

R8TT 16th Nov (6).webp

I then decided to check the rear axle for square. It is not, so that's tomorrow night's job

More soon.....................
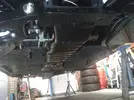
 
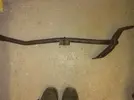
Mystery of the squint rear axle unravelled. Some silly sod has used it as a Jacking point with predictable disastrous results

IMG_20211117_213825130.webp

The centre section is supposed to be straight. Well it had all been going quite nicely, maybe too nicely. Should be fun straightening it out........................
 
Back
Top