There is more to life with TurboRenault.co.uk
You are using an out of date browser. It may not display this or other websites correctly.
You should upgrade or use an alternative browser.
You should upgrade or use an alternative browser.
paule78
Active Member
Well I have some fibreglass panels to fit so thinking is that new panels get painted in the factory colour but with a matt lacquer to compliment the original bodywork ... would like to do something different with the front and rear panels though@paule78 I really hope you keep the body faded red against the mint wheels
Steve Swan
Well-Known Member
paule78
Active Member
Not sure about going that far but if you have a bodyshop we should look to use itI think we should stop pissing about and do this.................
We've got the right bits
View attachment 158263
You think I should have speaks with my Bodyman?????
Steve Swan
Well-Known Member
Ok well loose the splitter cuz we don't have one and paint the bonnet Matt black
paule78
Active Member
Nice but thinking more this ...
Steve Swan
Well-Known Member
You've taken that too far .....
Steve Swan
Well-Known Member
It's never going to look like this with group F wings, that's what you have got in the box they are meant to have 8" wheels on the back to fill the arches. 245 maybe a bit big, but 225 will be dandyNice but thinking more this ...
paule78
Active Member
I will let you figure what Image needs to send me and we will get those rear wheels stretched a littleIt's never going to look like this with group F wings, that's what you have got in the box they are meant to have 8" wheels on the back to fill the arches. 245 maybe a bit big, but 225 will be dandy
Steve Swan
Well-Known Member
This is what the sides of your car will look like in profile with the wings on ( pinched direct from MC racing site)

With the wheels sorted it will look awesome (those wheels are awful and the wrong size I think they are 6" )
Anybody have any experience how the big slightly wobbly compound curves will look in a satin finish?? I am a shallow guy who likes shiny things..

With the wheels sorted it will look awesome (those wheels are awful and the wrong size I think they are 6" )
Anybody have any experience how the big slightly wobbly compound curves will look in a satin finish?? I am a shallow guy who likes shiny things..
paule78
Active Member
That looks amazing!This is what the sides of your car will look like in profile with the wings on ( pinched direct from MC racing site)
View attachment 158265
With the wheels sorted it will look awesome (those wheels are awful and the wrong size I think they are 6" )
Anybody have any experience how the big slightly wobbly compound curves will look in a satin finish?? I am a shallow guy who likes shiny things..
In fairness a matt lacquer on those won't produce any reflections that highlight the wobbles in the fibreglass
Steve Swan
Well-Known Member
Steve Swan
Well-Known Member
paule78
Active Member
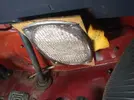
Looks less stealth audio more tea strainerToday I found the custom stealth ICE installation.
View attachment 158282
Pretty cool huh...
The more observant among you will also see the corrosion on the scuttle drain behind the steering column
Steve Swan
Well-Known Member
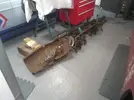
I took the much Maligned and often misunderstood pedalbox to the workshop and cleaned it all up, it's a simple design and works well if maintained, but the issue is that this is the only greasing point on the chassis, so it gets missed and they are nearly always partially seized, basically it's all good, no wear, apart from the clevis pins. I'll get it de- greased and I've found a 20.6mm AP Racing master cyl in stock, so that will go into the mix.
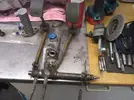
I'll get it together and clean up the area of the floor where it fits. Looks like it will be the first bit to go back together again
Happy motoring.
It's funny, but late 8's are supposed to have 19mm masters this one had a 20.6mm master. I have had this before and am beginning to think the manuals are wrong
Last edited:
Steve Swan
Well-Known Member
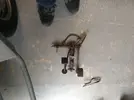
Back on the Pedalbox today. A replacement R8 type master cylinder is about £100 and there is no info on quality, so having an AP Racing Master in stock was a no brainer. The issue however is that it has a 5/16 unf control rod which is male to accept a female clevis. The R8 is 8mm x 1mm, exactly backwards in this respect and space for length is a premium. Out with the odd taps and dies box and make an adapter to join the bits together
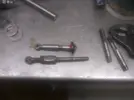
Then put it together and check against the original. You have to watch the travel to cutoff, if you get it wrong then the brakes will not bleed

Then put it all together using washers to get the spacings correct and the pushrod absolutely straight
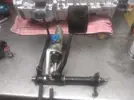
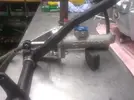
That's Sunday evening taken care of. There was Bugger all on the Telly anyway. More to follow............

Then put it together and check against the original. You have to watch the travel to cutoff, if you get it wrong then the brakes will not bleed

Then put it all together using washers to get the spacings correct and the pushrod absolutely straight


That's Sunday evening taken care of. There was Bugger all on the Telly anyway. More to follow............
Steve Swan
Well-Known Member
Not much to report other than a failed attempt to get a working handbrake, so took the bits back to the workshop and altered them to suit. Today was spent collecting parts
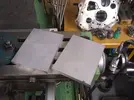
Caliper carrier mounting brackets ( or they will be when I get through with them)
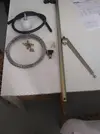
Order from Rally Design arrived Pity I forgot the anti-roll bar blades were single and not a pair DOH !
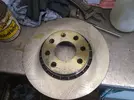
Local factors had Discs in stock, sensible price too just need a little bit of chopping up too.
Went back out after tea and we now have a working handbrake, Result. Stripped out the gearstick to convert to Quickshift and sort out linkage then paint the pedalbox area and get it re-installed
Never a dull moment ..

Caliper carrier mounting brackets ( or they will be when I get through with them)

Order from Rally Design arrived Pity I forgot the anti-roll bar blades were single and not a pair DOH !

Local factors had Discs in stock, sensible price too just need a little bit of chopping up too.
Went back out after tea and we now have a working handbrake, Result. Stripped out the gearstick to convert to Quickshift and sort out linkage then paint the pedalbox area and get it re-installed
Never a dull moment ..
Steve Swan
Well-Known Member
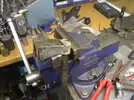
Yesterday sorting my neighbours garden took priority, however it is nearly finished and will be one less job to finish soon. I did steal a bit of time in the workshop to find all the bits to make the quickshift.
This is done by extending the Gearstick approx 1 inch below the pivot point and then building up the floorpan by the same amount. This should give 3 benefits: it should decrease the stick travel, it will keep the same position under the car where space is a premium and it will lengthen the stick inside the car as it is too short, unless you are very small.
First find some alloy to lift the floormounting
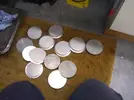
Check. These are a by product from making hybrid boxes, these and the ones on the bench makes 18 plus the other 10 or so chopped up for other things, amazing how they mount up over the years.
Been a while since the big drill dept. was in action. It' oddly satisfying watching the large swarf trails it makes.
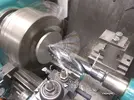
More soon.........
This is done by extending the Gearstick approx 1 inch below the pivot point and then building up the floorpan by the same amount. This should give 3 benefits: it should decrease the stick travel, it will keep the same position under the car where space is a premium and it will lengthen the stick inside the car as it is too short, unless you are very small.
First find some alloy to lift the floormounting

Check. These are a by product from making hybrid boxes, these and the ones on the bench makes 18 plus the other 10 or so chopped up for other things, amazing how they mount up over the years.
Been a while since the big drill dept. was in action. It' oddly satisfying watching the large swarf trails it makes.

More soon.........
Similar threads
- Replies
- 4
- Views
- 368
- Featured
- Replies
- 86
- Views
- 2K


