There is more to life with TurboRenault.co.uk
You are using an out of date browser. It may not display this or other websites correctly.
You should upgrade or use an alternative browser.
You should upgrade or use an alternative browser.
Renault 11 Turbo Phase 2 Restoration
- Thread starter Big Steve - Raider
- Start date
Got one of the OE wheels out for a looksie to see how they look:
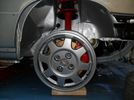
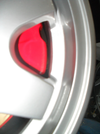
Chuffed to bits with them, but couldn't believe how NARROW the whells were when I checked, they're only 5.5 inches wide?? No wonder the OE wheel is a 175/65/14. Will be ordering the tyres soon, so I can get the wheels on. As I suspected very early on in this build thread.. these Renault 19 16V Calipers are tight like a tiger
  with the the wheels... I definately need to ensure two of the wheels have no weights on the front edge..
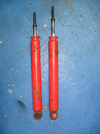
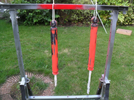
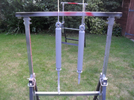
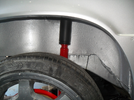
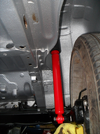
Next was to dig out the rear shock absorbers, and give them the same loving as the fronts:
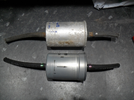
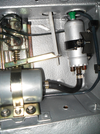
I then re-fitted the fuel filter and pump:
I also got my Turbo back from Midland Turbo's who I eventually chose to re-build the unit following a lot of recommendations from the Facebook group. I tried to get it rebuilt by one of the guys who come highly recommended near the Dartford Bridge... but he just wasn't interested in responding to my messages, so I went with Midland Turbo who I found thru Facebook and I can't recommend them highly enough!! They were super quick at responding to messages, turned the Turbo round in less than a week door to door, and only charged me £330 for a full rebuild with new exhaust housing, and paint the OE actuator up so it all looks super clean and fresh... like the car!!
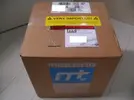
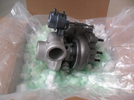
They also sent me a full gasket kit with the Turbo. Thoroughly Recommended!!
Thanks for reading

Chuffed to bits with them, but couldn't believe how NARROW the whells were when I checked, they're only 5.5 inches wide?? No wonder the OE wheel is a 175/65/14. Will be ordering the tyres soon, so I can get the wheels on.

Next was to dig out the rear shock absorbers, and give them the same loving as the fronts:


I then re-fitted the fuel filter and pump:


I also got my Turbo back from Midland Turbo's who I eventually chose to re-build the unit following a lot of recommendations from the Facebook group. I tried to get it rebuilt by one of the guys who come highly recommended near the Dartford Bridge... but he just wasn't interested in responding to my messages, so I went with Midland Turbo who I found thru Facebook and I can't recommend them highly enough!! They were super quick at responding to messages, turned the Turbo round in less than a week door to door, and only charged me £330 for a full rebuild with new exhaust housing, and paint the OE actuator up so it all looks super clean and fresh... like the car!!


They also sent me a full gasket kit with the Turbo. Thoroughly Recommended!!
Thanks for reading
Last edited:
Chris Smith
Well-Known Member
All that dirt is original to the car 
All that dirt is original to the car
gordini stu
Well-Known Member
Cracking job , I ran a 12mm spacer when I ran standard rims . Just pushed the backs out that little bit .
What make rubber are you thinking of ?
What make rubber are you thinking of ?
Cracking job , I ran a 12mm spacer when I ran standard rims . Just pushed the backs out that little bit .
What make rubber are you thinking of ?
My go to rubber is always Michelin, for all my cars, but for the 11, I’m going to go for some Continental Eco Contact 6’s as they seem to be the newest design available for the OE 11 size.
Like your suggestion for the 12mm spacers, I’ll look at that
gordini stu
Well-Known Member
Had to use vw wheel bolts if I remember correctly with covers on because they were 17mm nut size . Still have a spacer now I modified to fit my slide hammer to pull rear drums off .
DaveL485
Staff member
Warning! Very High Content of OE Lovliness
So in preparation for tonights activities, I've been busy rubbing down, priming and painting all of the suspension components.
Shock Absorbers first. These units are were the last set of KONI Adjustable Items that Prima Racing were selling a number of years ago, so I grabbed them when they came up. As they were still in good condition (albeit a little rusted and rotton) I gave them some loving. First to rub them down:
View attachment 143797
Then treat the rust with my usual RUSTBUSTER:
View attachment 143798
Then Prime:
View attachment 143795
And finally paint:
View attachment 143796
Before doing the all the same process to the springs as-well:
View attachment 143794
I sent away the spring base supports to be shotblasted and powdercoated, as they looked in a right state, needless to say, they came back looking great:
View attachment 143792
Next it was a case of re-assembling the shocks before. . . . . . . . . . . . . . . . . . . . . . . . . . . . . . . .
View attachment 143799


CHUFFED to bits with the final results!!
I've only installed everything finger tight for the moment to allow me to remove it all and re-fit the drive shafts when I get them ready. I've even used tape to stop the shock fixing screws from marking the paintwork on the suspension turrets!!
View attachment 143793
After I finished, I took a few pictures of the finished assembly:
View attachment 143801
View attachment 143802
View attachment 143803
Thanks for reading
Pass the tissues.
The stripping has ultimately made it the car what it is now.... but would I do it again on another car in the future... hard to say, it was a royal pain in the ass, and when I look at your thread @NRG , you can get some great results by tacking the small point bit by bit 
When I stripped the car, I didn’t realise the Sealing up would be such a LOOOOOOOONG process
When I stripped the car, I didn’t realise the Sealing up would be such a LOOOOOOOONG process
I bought a couple of larger brake boosters (Servo’s) but the bolt spacing was different, so they wouldn’t fit without some extensive modifications.its possible to upgrade brake booster and master cylinder ? or just OEM ?
Therefore I just fitted a larger 19mm dia master cylinder (OE is 17mm)with the Original Brake Servo which I checked was working well. The thinking is to move more fluid for the same brake pedal movement.... so hopefully give me better brakes.... but the risk is now they could feel too grabby..?
The brakes on this 11 we’re next to woeful before I rebuilt it, so I can only imagine that’s why you’re asking @niconkk
DaveL485
Staff member
Unlikely, the bigger piston area in the cylinder will move more fluid but with less pressure over the piston surface area, you would have to press harder for the same brake pressure in the caliper, but the pedal sweep/movement will be less as you move more fluid.now they could feel too grabby..?
niconkk
Member
Here in argentina in 95, came like we called here R9 turco, they have a rare servo with regular clio1/2 etc master cylinder, in Europe you might find that easy to source one servo wich enables all king of master cylinders
Here in argentina only in 95, Renault imported R9 turco, they have a rare servo with regular clio1/2 etc master cylinder (OEM), in Europe might be easy to find that servo wich enables all kind of more modern master cylinders
I bought a couple of larger brake boosters (Servo’s) but the bolt spacing was different, so they wouldn’t fit without some extensive modifications.
Therefore I just fitted a larger 19mm dia master cylinder (OE is 17mm)with the Original Brake Servo which I checked was working well. The thinking is to move more fluid for the same brake pedal movement.... so hopefully give me better brakes.... but the risk is now they could feel too grabby..?
The brakes on this 11 we’re next to woeful before I rebuilt it, so I can only imagine that’s why you’re asking @niconkk
Here in argentina only in 95, Renault imported R9 turco, they have a rare servo with regular clio1/2 etc master cylinder (OEM), in Europe might be easy to find that servo wich enables all kind of more modern master cylinders
Things are really starting to come together FAST now on the outside of the car!! I'm amazed at the progress.. 

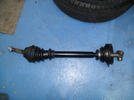
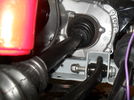
I had a new N/S Driveshaft, so following a quick lick of paint to ensure it looked it's best... I fitted it to the car:
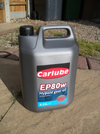
Then I could add the oil to the Gearbox as it was all sealed up. The OE recommendation is an 80W and on my Raider I fitted a 75W - 90W oil which has been great. But I did another quick google and found Mr @ratmangta posted a thread elsewhere saying that the 80W takes some beating.. and this Carlube EP80W works well for the price... so I took the plunge:
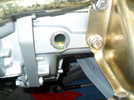
Poured it in the gearbox... until it started to pour back out:
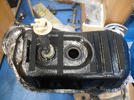
I then got the Fuel tank back from getting it Refurbished and the Re-Nu process applied to ensure it's all cleaned up and there's no Rust spots left in & around the tank. They basically cut a hole in the tank, and then clean it all out, before pouring an Epoxy resin in, that sets to ensure nothing rusts again. It came back looking great... but they'd also covered it in a black underseal... which I didn't really want applying, as it's all black and gooey... but it's done now, so
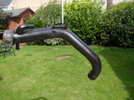
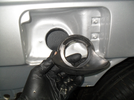
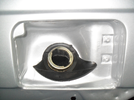
First I refurbished the fuel filler neck and fitted it to the car:
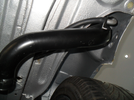
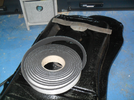
Then I re-fitted the pipe protector guide and new sponge spacers that were originally fitted:
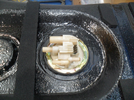
Next I made a new fuel level sensor seal *out of a sheet of rubber I have), and fitted the fuel level sensor:
Then It was a case of connecting up the pipes, and fitting the tank to the car:
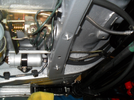
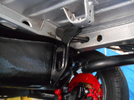
Whilst I was under there, I also fitted the spare wheel cage supports, and cage. I had 2 sets from the 2 cars I broke.. and they were different.. but thankfully I kept both as they were definately different designs, so it was obvious which ones were going to fit my car:
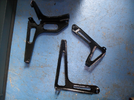
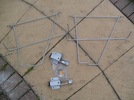
Again I had 2 spare wheel cages, and fitted the one that didn't look like it was at the bottom of the sea for 100 years (one on the right):
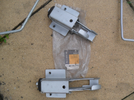
And I also found I'd bought TWO spare wheel cage support brackets, so have fitted one original one, before I paint up another:
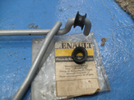
I remembered I also bought some new spare wheel cage rubber bushes... so dug them out, and ensured I fitted them as well:
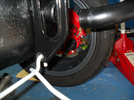
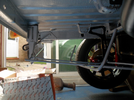
Then everything was finished at the back of the car:
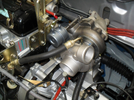
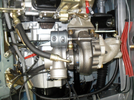
Last thing today, I loosely fitted the refurbished turbo to the Engine, now I had some new water connecting elbow pipes arrive. The old ones had a Pin hole in which I spotted before I fitted it! So that would have been a real kick in the ass if the water was squirting out of those holes when I filled the engine with Coolant!
I think the remaining things to be done to the underneath of the car is now:

I had a new N/S Driveshaft, so following a quick lick of paint to ensure it looked it's best... I fitted it to the car:


Then I could add the oil to the Gearbox as it was all sealed up. The OE recommendation is an 80W and on my Raider I fitted a 75W - 90W oil which has been great. But I did another quick google and found Mr @ratmangta posted a thread elsewhere saying that the 80W takes some beating.. and this Carlube EP80W works well for the price... so I took the plunge:

Poured it in the gearbox... until it started to pour back out:

I then got the Fuel tank back from getting it Refurbished and the Re-Nu process applied to ensure it's all cleaned up and there's no Rust spots left in & around the tank. They basically cut a hole in the tank, and then clean it all out, before pouring an Epoxy resin in, that sets to ensure nothing rusts again. It came back looking great... but they'd also covered it in a black underseal... which I didn't really want applying, as it's all black and gooey... but it's done now, so

First I refurbished the fuel filler neck and fitted it to the car:


Then I re-fitted the pipe protector guide and new sponge spacers that were originally fitted:

Next I made a new fuel level sensor seal *out of a sheet of rubber I have), and fitted the fuel level sensor:

Then It was a case of connecting up the pipes, and fitting the tank to the car:

Whilst I was under there, I also fitted the spare wheel cage supports, and cage. I had 2 sets from the 2 cars I broke.. and they were different.. but thankfully I kept both as they were definately different designs, so it was obvious which ones were going to fit my car:


Again I had 2 spare wheel cages, and fitted the one that didn't look like it was at the bottom of the sea for 100 years (one on the right):

And I also found I'd bought TWO spare wheel cage support brackets, so have fitted one original one, before I paint up another:

I remembered I also bought some new spare wheel cage rubber bushes... so dug them out, and ensured I fitted them as well:


Then everything was finished at the back of the car:

Last thing today, I loosely fitted the refurbished turbo to the Engine, now I had some new water connecting elbow pipes arrive. The old ones had a Pin hole in which I spotted before I fitted it! So that would have been a real kick in the ass if the water was squirting out of those holes when I filled the engine with Coolant!


I think the remaining things to be done to the underneath of the car is now:
- O/S Driveshaft (Waiting for it to arrive)
- Fit brake pads all round
- Fill and bleed braking system
- Handbrake cable assembly
- Exhaust
Last edited:
Duncan Grier
Well-Known Member
Nice update Steve, as you say moving forward fast now  some serious clean going on in those pics
Are you going to grease the bush for the cage with silicon grease or alternative? Yes you are into this level of details now

Agree with you view on the tank, but cant see it ever rusting
Are you going to grease the bush for the cage with silicon grease or alternative? Yes you are into this level of details now
Agree with you view on the tank, but cant see it ever rusting
gordini stu
Well-Known Member
I can hear it running all ready .
Similar threads
- Featured
- Replies
- 84
- Views
- 2K
- Replies
- 4
- Views
- 362
- Replies
- 6
- Views
- 269
- Replies
- 2
- Views
- 264

