There is more to life with TurboRenault.co.uk
You are using an out of date browser. It may not display this or other websites correctly.
You should upgrade or use an alternative browser.
You should upgrade or use an alternative browser.
Renault 11 Turbo Phase 2 Restoration
- Thread starter Big Steve - Raider
- Start date
Got any pics of a 19 16v shock?That's not a 19 16V shock, if it's from a 19 it was a non-16v one. It's not a trivial difference either, they are fundamentally different designs.
Neal R19
Well-Known Member
Sure.
16V struts are very much like clio 172/182 struts with the exception of the top mount. So parallel, offset spring, bearing up top, damper, spring and top spring seat all turn together. The top mount offsets the damper shaft to the outside of the turret.
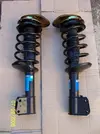
non-16V struts have the bearing at the lower spring seat, the damper turns but the tapered spring and lower spring seat all stay stationary to the top mount.
The only part that's interchangeable between the 2 types is the rotation bearing
16V struts are very much like clio 172/182 struts with the exception of the top mount. So parallel, offset spring, bearing up top, damper, spring and top spring seat all turn together. The top mount offsets the damper shaft to the outside of the turret.

non-16V struts have the bearing at the lower spring seat, the damper turns but the tapered spring and lower spring seat all stay stationary to the top mount.
The only part that's interchangeable between the 2 types is the rotation bearing
:ai:####WARNING RENAULT ANORAK ALERT#### :ai:
Yesterday when I was digging through all the front axle options for this build I was reminded about the stickers on the driveshafts and remember that many moons ago I found something that explained the background to these stickers?
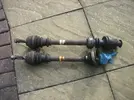
Trouble was I couldn't for the life of me remember where it was I saw the details.... :an: So today I tore through all of the old Renault Tech documents I have and was just about to give up when finally I found what I was looking for!! :bo:
Close up, the stickers look like this:
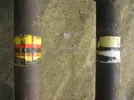
And although they are a little worn from years of living next to the road, you can just about see the different colours and stripes on each shaft. The Left hand shaft (Near/Passenger Side) has a Red Black and Brown stripe on a Yellow background, and the Right Hand Shaft (Off/Drivers Side), has a Black stripe on a Yellow Background.
When you look at the below "Driveshaft Colour Markings" document, you can see what these meanings represent and I have outlined my two driveshafts in GREEN so you can spot them easier:
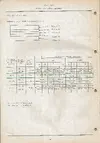
When you look up the relavent gearbox in your car (R11T has JB3 Gearbox) the Coupling at Wheel End is a "GE86", The gearbox plate colour marking is "BLACK" so the correct colour stripes are:
- LEFT Driveshaft YELLOW, RED, BLACK, BROWN, YELLOW
- Right Driveshaft YELLOW, BLACK, YELLOW (With weight See note 2 at bottom of page)

So needless to say, I've now taken dimensions of these two stickers now, to get some reproduction ones made for the driveshafts, after I have had them fully refurbished! :af:
Thanks for reading
Duncan Grier
Well-Known Member
Very sad Steve and yet impressed 
Great info!
Great info!
Sounds like a bag of nails !
Love it :af:
Brigsy
Media Mogul. Instagram legend.
there are also 2 types of clio wishbone, the only ones available new now are cup items. theypush the wheel forward to give more castor. i wouldnt worry too much bout the wheel no sitting central unless it gives you issues with body work contact.
Kangoo has cup wishbones & more castor as wheels are furthur to the front of the arches. Works great for better turn in. The old trick on the gtt cup cars was to knock the arm along the bushes a bit to get the same result
Started looking at the R19 16V Rear Beam I got to fit to the R11T at the weekend. It appears that someone has had a go at a home-made restoration of it sometime before as it seems to be covered in a black Hammarite type paint whilst there is rust happily bubbling away underneath it... 
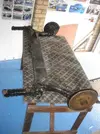
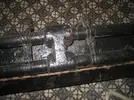
I started to pick away at it gingerly and made a start by stripping down the discs and backing plates first, which came off very easily after a few dugga dugga's of my Impact Driver:
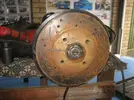
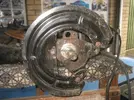
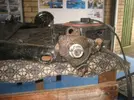
The nearside ones came apart easily enough.. but the offside disc backing plate had a broken bolt stuck in the hub, so I had to drill that out (You can see the broken bolt on the right hand side of the pic) :
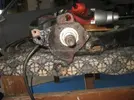
Once I stripped those parts off, I thought I would have a look at the nemesis of all these fecking Renaults... the Torsion bars:
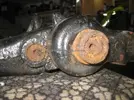
HOLY SH1T!!! That's me FUC*ED then...


Of course I didn't start to panic immediately... first I gave things a bit of a clean up to try & get a bolt into the end of the Torsion Bar..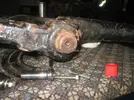
that was a bit of a struggle but thanks to a nice set of Cheapy Chinese Taps I've got, I managed to get a bolt in: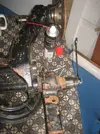
Then I had a go at winding the Torsion Bar out.. and as you can Imagine... NOTHING MOVED :cf: So I think it's going to take a combination of a Gas axe and Brute Force to get this axle apart.... or a:bb:
If that doesn't work I may have to be on the look out for another R19 rear axle... any suggestions ??
So after that job beat me... I thought I would pack a load of the parts into the back of the car nice & neatly like... :ah:

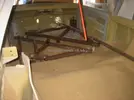
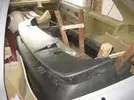
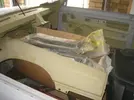
Thanks for reading


I started to pick away at it gingerly and made a start by stripping down the discs and backing plates first, which came off very easily after a few dugga dugga's of my Impact Driver:


The nearside ones came apart easily enough.. but the offside disc backing plate had a broken bolt stuck in the hub, so I had to drill that out (You can see the broken bolt on the right hand side of the pic) :

Once I stripped those parts off, I thought I would have a look at the nemesis of all these fecking Renaults... the Torsion bars:

HOLY SH1T!!! That's me FUC*ED then...


Of course I didn't start to panic immediately... first I gave things a bit of a clean up to try & get a bolt into the end of the Torsion Bar..

that was a bit of a struggle but thanks to a nice set of Cheapy Chinese Taps I've got, I managed to get a bolt in:

Then I had a go at winding the Torsion Bar out.. and as you can Imagine... NOTHING MOVED :cf: So I think it's going to take a combination of a Gas axe and Brute Force to get this axle apart.... or a:bb:
If that doesn't work I may have to be on the look out for another R19 rear axle... any suggestions ??
So after that job beat me... I thought I would pack a load of the parts into the back of the car nice & neatly like... :ah:


Thanks for reading
Brigsy
Media Mogul. Instagram legend.
The torsion bar will probably go but you will need the big guns on it to get it to move. To my suprise the kangoo one is the same and its only 11 years old. I would dose that inside & out in plusgas for a few weeks and use a slidehammer/big hammer on it. If that does not work more plus gas and bigger hammer/hot spanner. Im probably going to pull the rear beam off the kangoo if slide hammer wont crack it.
Chris Smith
Well-Known Member
Same place that did Al's CSL??
YesSame place that did Al's CSL??
Chris Smith
Well-Known Member
That work look flawless, hopefully the 11 will get the same treatment
Now the 11T has gone to the bodyshop for a bit, I need to get cracking on preparing all the parts to go back in/on the car that are currently stored in various boxes (in no particular order) in the roof of my garage:
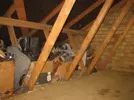
I decided to start at one end and just work through the parts as I come across them. The plan is to compare what parts I have, discard what parts I don't need, and then keep/restore the parts I do have. The first batch of parts were pulled down out of the loft for a sift thru:
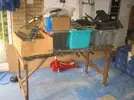
The first box was full of wheel arch/engine bay mouldings, I sorted the parts out into matching pairs and then compared the parts to see which was the best. Here you see the one on the left has damage from a tyre rubbing the moulding moreso than the one on the right hand side:
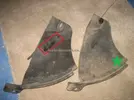
Next on the rear of the parts, one of the components was missing
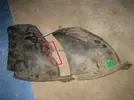
The good part was then put into the box, and the old part discarded.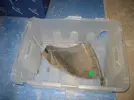
I compared all the parts I had, and picked out the best ones:
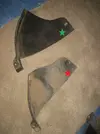
These two parts looked in similar condition from the top: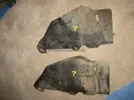
But when you compare the components side by side, you could see that one of the parts was a lot more warped than the other...
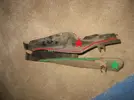
And again on the reverse side, it looks like the distortion of the bad component had been rubing the tyre of the car:
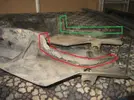
I managed to get hold of a BRAND NEW one of these wheel arch mouldings, which was the one at the bottom of the pile, however when I compared it to the original ones, I found it was missing some clips? So I think the ones with the clips would be better:
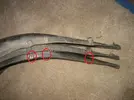
Of the two remaining, there were a number of holes drilled in one of the components, so that one was discarded:
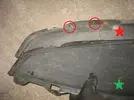
There was a massive part missing of one of these two mouldings, so this made the decision very easy: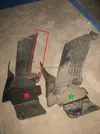
These two parts were both good, so I just picked the cleanest looking one..
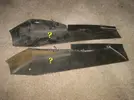
One of these two parts that goes next to the radiatorwas missing more from the "Flaps" at the side..
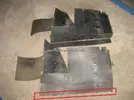
But the part with more "Flap" was split.. so I went with the part missing the flap:
Not before long, I had a pile of parts to discard:
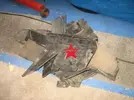
And a box full of good parts:
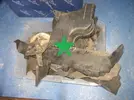
It was then time to utilise the little bit of sun we had at the weekend, get a bucket of soapy water, the winning stool so favoured by @Mart and a cup of splosh and get scrubbing!!
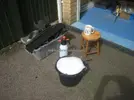
The parts came out a lot better following a good wash, but they need a detailed going over with a tar remover in many places, and then potentially I may spray some?? Not decided yet..?

Thanks for reading

I decided to start at one end and just work through the parts as I come across them. The plan is to compare what parts I have, discard what parts I don't need, and then keep/restore the parts I do have. The first batch of parts were pulled down out of the loft for a sift thru:

The first box was full of wheel arch/engine bay mouldings, I sorted the parts out into matching pairs and then compared the parts to see which was the best. Here you see the one on the left has damage from a tyre rubbing the moulding moreso than the one on the right hand side:

Next on the rear of the parts, one of the components was missing

The good part was then put into the box, and the old part discarded.

I compared all the parts I had, and picked out the best ones:

These two parts looked in similar condition from the top:

But when you compare the components side by side, you could see that one of the parts was a lot more warped than the other...

And again on the reverse side, it looks like the distortion of the bad component had been rubing the tyre of the car:

I managed to get hold of a BRAND NEW one of these wheel arch mouldings, which was the one at the bottom of the pile, however when I compared it to the original ones, I found it was missing some clips? So I think the ones with the clips would be better:

Of the two remaining, there were a number of holes drilled in one of the components, so that one was discarded:

There was a massive part missing of one of these two mouldings, so this made the decision very easy:

These two parts were both good, so I just picked the cleanest looking one..

One of these two parts that goes next to the radiatorwas missing more from the "Flaps" at the side..

But the part with more "Flap" was split.. so I went with the part missing the flap:

Not before long, I had a pile of parts to discard:

And a box full of good parts:

It was then time to utilise the little bit of sun we had at the weekend, get a bucket of soapy water, the winning stool so favoured by @Mart and a cup of splosh and get scrubbing!!

The parts came out a lot better following a good wash, but they need a detailed going over with a tar remover in many places, and then potentially I may spray some?? Not decided yet..?

Thanks for reading
Similar threads
- Featured
- Replies
- 82
- Views
- 2K
- Replies
- 4
- Views
- 362
- Replies
- 6
- Views
- 269
- Replies
- 2
- Views
- 264


