Just had a guy round to look at painting my bedroom and he was full of love for the old R11T and Raider in the Garage... Tempted to spend a couple of hours on the sh1tbagging thing this weekend..?
There is more to life with TurboRenault.co.uk
You are using an out of date browser. It may not display this or other websites correctly.
You should upgrade or use an alternative browser.
You should upgrade or use an alternative browser.
Renault 11 Turbo Phase 2 Restoration
- Thread starter Big Steve - Raider
- Start date
DaveL485
Staff member
Ive had two randoms come up and ask me if I would part with the 9 Turbo in the last week, one while I was out front and the other banged on my door! I politely declined as I loaded the shotgunJust had a guy round to look at painting my bedroom and he was full of love for the old R11T and Raider in the Garage... Tempted to spend a couple of hours on the sh1tbagging thing this weekend..?
Looks like I had better pull fingers out of anus then and get cracking again.. :cl:
Well I have oficially started to get a little more interested in the R11T today and actually did an hour on the car this afternoon!! :dr:
A few months when we collected it from the sh1tbag bodyshop from hell "Melton Accident Repair Centre" @Nick Kettle commented that there were a few small pieces of rust bubbling through on the front crossmember, so I got busy today and gave them a lick of my rust proofer (see later thread for the details)
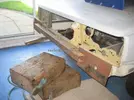

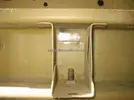
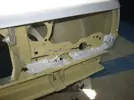
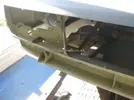
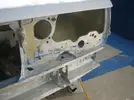
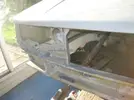
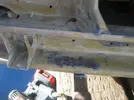
Thanks for sticking with me on this project! :aj:
gtmatt
Well-Known Member
@Big Steve - Raider get the lads round be done in no time ,glad your still working on it
Had another cheeky hour in the garage today and thought i'd make a start in re-cleaning up some of the rust spots that have appears following the car being sat around for a year in primer having no top-coat applied (Thanks Janky Painter..)
However as the front crossmember for the rotisserie was off I thought I'd offer the front bumper up to see how it looked... However when I tried to put the bumper on... it was clear it wasn't going to go...
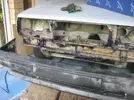
After a bit of headscratching, I realised that some of the ejection marks from the moulding were fouling on the cars slam panel, so I started to nibble them down with the Dremmel:
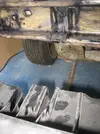

That got the bumper on, of a fashion, but I then realised it was no-where in the right location and no matter how much persuesion I tried, it would not go on properly... It wouldn't go back enough to align with the wings..
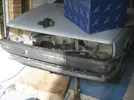
So another stand back and look at the situation made me realise that I've got to cut back many of the ribs on the back of the bumper to allow it to sit flush... I've marked the distance it needs to go back, and where the material needs to be removed:
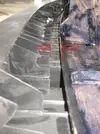
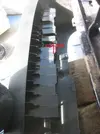
Bloody car continues to fight me... still at least I've found this out now, and I'm not buggering about getting stuff to fit after it's been painted!!?
Thanks for reading!
However as the front crossmember for the rotisserie was off I thought I'd offer the front bumper up to see how it looked... However when I tried to put the bumper on... it was clear it wasn't going to go...

After a bit of headscratching, I realised that some of the ejection marks from the moulding were fouling on the cars slam panel, so I started to nibble them down with the Dremmel:


That got the bumper on, of a fashion, but I then realised it was no-where in the right location and no matter how much persuesion I tried, it would not go on properly... It wouldn't go back enough to align with the wings..


So another stand back and look at the situation made me realise that I've got to cut back many of the ribs on the back of the bumper to allow it to sit flush... I've marked the distance it needs to go back, and where the material needs to be removed:


Bloody car continues to fight me... still at least I've found this out now, and I'm not buggering about getting stuff to fit after it's been painted!!?
Thanks for reading!
Duncan Grier
Well-Known Member
These little jobs can really eat up time and test the patience
Good stuff Steve
I have a friends track beastie in for a slight tweak to raise engine and box for clearance turns into a full sr20det / 7 styleee conversion - sump / box fouling road
Soo many minor things that as your thread show eat up many hours bit if your going to do it.......do it right
DG
Good stuff Steve
I have a friends track beastie in for a slight tweak to raise engine and box for clearance turns into a full sr20det / 7 styleee conversion - sump / box fouling road
Soo many minor things that as your thread show eat up many hours bit if your going to do it.......do it right
DG
Still got the OE Bumper, but it's in a bit of a state, with bolts snapped off in the dog light holes and some of the fixing bolts spinning when turned in their housings... that's why I bought a new one..?I've never had to trim an OE bumper to fit before....what happened to the original that came off it Steve?
:ck:
DaveL485
Staff member
That was the implication, obviously Steve hasn't rubbed his two brain cells together hard enough todayI think he meant you should compare the places where it snags to see if there are differences between them.
:bh:Its not an OE Bumper as I can make out, think it's a pattern part? For sure I'm going to get the Original Bumper and compare the two when time allows.
Im off to rub my two brain cells together to see if I can get a spark to set this bloody sh1tbag 11 on fire.. :bb:
Im off to rub my two brain cells together to see if I can get a spark to set this bloody sh1tbag 11 on fire.. :bb:
I think he meant you should compare the places where it snags to see if there are differences between them.. I would take a look on that at least.
Pulled the old bumper out of my storage garage yesterday and brought it over to offer up to see how it compared to the "New" bumper I had. :dy:
Put it on the car and just immediately fitted better:
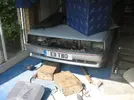
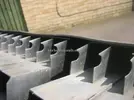
But when I looked at the line of ribs inside the bumper that I thought was the reason the "new" one was not fitting so well, I realised that again even on the OE bumper the ribs were not sitting flush against the crossmember, as you would suspect they would do? (You can compare to the picture in my previous post)
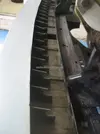
So I thought I would then try & do a head to head comparison of both bumpers to see if I could notice where the difference was... didn't take me too long to spot the issue...
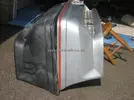
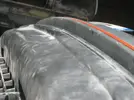
WTF!?:cg: It would appear this pattern bumper I have is a shocking reproduction and way too small somehow?! Still looking on the bright side, I'm now finding all this out BEFORE it's all painted now..
So it looks like I've got to use my OE Bumper that's looking a little worse for wear and the painter is going to have to spend a few hours filling/sanding/smooting/preparing the bumper before it's painted, and I'm also going to lose the OE texture to the bumper that I was going to gain by using the pattern bumper.. Never mind, I had to do the same to the Raider's bumpers when I got that painted, and it makes it a lot easier to polish the bumpers when they're smooth.. You can see there's a fair few battle scars on the OE Bumpers:

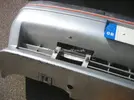
To make a start, I spent a few minutes removing the red trim from the bumper, which I managed to get out by breaking about 50% of the fixings... so I'm thinking I may have to silicone it back in if/when the time comes to re-fit.
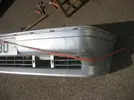
The one thing i've got to figure out though is how I'm going to flatten the top surface of the bumper that's become rippled due to previous crash damage. I can see that I could stick the top surface to the reinforcing substrate which would solve the problem, but I also know that sticking PolyPropylene to one another is not an easy task..?

Thanks for reading
Haz
Well-Known Member
I can't check as my bumper is in the loft. Iirc it's a snug fit and has to be whacked in which gets it sitting nice as only has the side bolts.
I don't think there's much difference as you think with those bumpers as both are distorted. The silver looks like it's pulled in at the sides thus peaking in the middle?
Are the turbo bumpers stippled? Most I've seen are smooth.
Stipple effect is easy to achieve though. Repair, prep, prime and flat as usual. I use a upol textured paint, dust/drop coat it from about 30cm away and allow to skin over. Repeat until even coverage. Apply basecost for colour and laquer thus stipple is visable but smooth finish for polishing.
Trim strips are probably faded and brittle. I'm sure you could get some on the roll which has double sided tape attached. Warm up with a heat gun while applying to help follow the contours of the bumper.
A MASSIVE amount of love for this 11 Turbo I saw at the weekend at the PR2S event in France.... 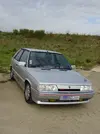
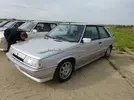
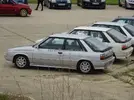
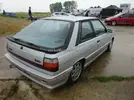
Brought back that FUZZY feeling...


Brought back that FUZZY feeling...

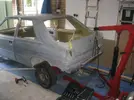
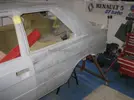
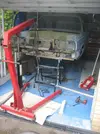
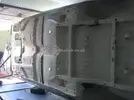
Got the car mounted back on the Rotisserie today to have a look at the bottom again. Takes a fair amount of time to get the car on the rotisserie single handed. 
What I thought after i'd finished...
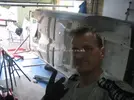
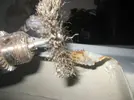
Now I got it mounted and turned over again, I could see a few spots of rust that came back following it sitting in the bodyshop for so bloody long without having anything done.... :dg:
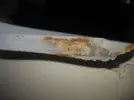
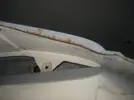
So same procedure as before, quick rub down and then paint over with my rust protector..
Thanks for reading


What I thought after i'd finished...

Now I got it mounted and turned over again, I could see a few spots of rust that came back following it sitting in the bodyshop for so bloody long without having anything done.... :dg:


So same procedure as before, quick rub down and then paint over with my rust protector..


Thanks for reading
Similar threads
- Featured
- Replies
- 84
- Views
- 2K
- Replies
- 4
- Views
- 362
- Replies
- 6
- Views
- 269
- Replies
- 2
- Views
- 264
