There is more to life with TurboRenault.co.uk
You are using an out of date browser. It may not display this or other websites correctly.
You should upgrade or use an alternative browser.
You should upgrade or use an alternative browser.
Renault 11 Turbo Phase 2 Restoration
- Thread starter Big Steve - Raider
- Start date
gordini stu
Well-Known Member
Thats ok if you have spare seats but if not I would want to keep a stock set up to put back to standard if ever required
DaveL485
Staff member
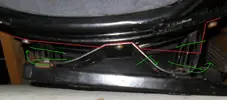
Worth a bash Steve? We only need the zigzaggy bit to modify. Come over and we can give it a go.I have have some complete front seats doing nothing if you wanted them £££
And only down the road from you Stamford
I have have some complete front seats doing nothing if you wanted them £££
And only down the road from you Stamford
Thanks very much @R5turbo2 !! I’ll have a look in the garage and see what I’ve got. I may well take you up on that generous offer
Been scratching my head recently about the interior fan... when I connected the battery up I was checking thru a few things and noticed that the Interior fan would only run at position #3 on the switch, when it was at positions #1 and #2 the fan wouldn’t move..
I had a quick search and the first thought was the fan could be a bit seized, so there was not enough power to run it at the lower speeds.. so out come the fan unit and following a little 3in1 oil, she was soon spinning as free as a wheel. Re-fitted and still no joy..
So I started to think that the Rheostat/Thermistor in the heater box was knackered... so figured I should look at it now before I got too further involved in re-fitting stuff.
Didn’t want to, but eventually pulled the dash out again, together with the heater box (don’t know why I was putting it off, now I know what’s involved it came out in a heartbeat!)

With the dash back on the table and a pikey power supply connected, I again found that the fan would not run on position no’s 1 and 2 of the switch.
I looked at the Rheostat/Thermistor and wondered if it was duff.. but considering the whole HVAC box is brand new, I thought it unlikely.
I have a new switch to fit to the car, so tried that and still it wasn’t working. These are the connections to the new Heater Box Rheostat/Thermistor. Notice how there are 4 connections but there is also a 5th where the terminal is clipped...?
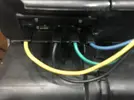
I pulled the OLD heater box out of the spares garage again and noticed that again there were 4 connections, but this time there were only 4 terminals. I refitted the old heater box and tried the switch:
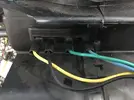
This time everything worked well and the fan was working at all 3 speeds.. I also then noticed that the fan was turning a different direction to how it was originally... and actually the way it was turning now, was indeed the right way..!
So I started to compare the different Rheostat/Thermistors and couldn’t really see much of a difference. I didn’t want to split the new Heater Box really to change the Rheostat/Thermistor so was considering to use the old original heater box.
One last thing to try though, was a little bit of a change of the wiring, as I could see there was definitely a difference between the two Rheostat/Thermistors...
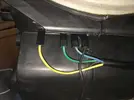
I moved all of the connections one space to the left, and moved the black wire over to the right...
Well bugger me if that didn’t fix it all and now the new heater box and fan are working well on all 3 positions of the switch...!!
Thanks Renault for changing the design!!!!
Anyway, no harm, no foul, now that the Dash is back out, I have another cunning plan for the security of the car, and this will give me the opportunity to fit it.
Thanks for reading
I had a quick search and the first thought was the fan could be a bit seized, so there was not enough power to run it at the lower speeds.. so out come the fan unit and following a little 3in1 oil, she was soon spinning as free as a wheel. Re-fitted and still no joy..
So I started to think that the Rheostat/Thermistor in the heater box was knackered... so figured I should look at it now before I got too further involved in re-fitting stuff.
Didn’t want to, but eventually pulled the dash out again, together with the heater box (don’t know why I was putting it off, now I know what’s involved it came out in a heartbeat!)

With the dash back on the table and a pikey power supply connected, I again found that the fan would not run on position no’s 1 and 2 of the switch.
I looked at the Rheostat/Thermistor and wondered if it was duff.. but considering the whole HVAC box is brand new, I thought it unlikely.
I have a new switch to fit to the car, so tried that and still it wasn’t working. These are the connections to the new Heater Box Rheostat/Thermistor. Notice how there are 4 connections but there is also a 5th where the terminal is clipped...?

I pulled the OLD heater box out of the spares garage again and noticed that again there were 4 connections, but this time there were only 4 terminals. I refitted the old heater box and tried the switch:

This time everything worked well and the fan was working at all 3 speeds.. I also then noticed that the fan was turning a different direction to how it was originally... and actually the way it was turning now, was indeed the right way..!
So I started to compare the different Rheostat/Thermistors and couldn’t really see much of a difference. I didn’t want to split the new Heater Box really to change the Rheostat/Thermistor so was considering to use the old original heater box.
One last thing to try though, was a little bit of a change of the wiring, as I could see there was definitely a difference between the two Rheostat/Thermistors...

I moved all of the connections one space to the left, and moved the black wire over to the right...
Well bugger me if that didn’t fix it all and now the new heater box and fan are working well on all 3 positions of the switch...!!
Thanks Renault for changing the design!!!!
Anyway, no harm, no foul, now that the Dash is back out, I have another cunning plan for the security of the car, and this will give me the opportunity to fit it.
Thanks for reading
DaveL485
Staff member
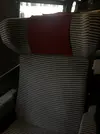
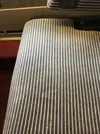
They are pretty horrible!Must have been the height of seat design fashion in the 80’s..?
Picked up my headlining from a local trimming shop I’d asked to glue on some new fabric so (hopefully) I can now cover the back of the headliner up when it comes time to fit.

Now all I’ve got to do is find the right stuff to stick it up there... I’m estimating that there is a little bit of a gap behind the back of the headliner board and the roof-skin so am wondering if some Sikaflex/no more nails sort of stuff will work best, or I will go with some foam tape which will be a lot cleaner and easier to use??? Any suggestions From you guys???
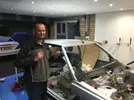
In other news, I had Chris Porter pop round to the 11-Den this week to drop off a couple of missing turbo brackets I was looking for:
Thanks for reading

Now all I’ve got to do is find the right stuff to stick it up there... I’m estimating that there is a little bit of a gap behind the back of the headliner board and the roof-skin so am wondering if some Sikaflex/no more nails sort of stuff will work best, or I will go with some foam tape which will be a lot cleaner and easier to use??? Any suggestions From you guys???
In other news, I had Chris Porter pop round to the 11-Den this week to drop off a couple of missing turbo brackets I was looking for:

Thanks for reading
DaveL485
Staff member
I'd use numberplate tape if it will bond to the headliner ok, that stuff is superb and doesnt drop off if it gets damp/condensation around it.
Also gives you a fighting chance of getting it off if you ever need to, with glue you're basically going to make it a one-use headliner.
Also gives you a fighting chance of getting it off if you ever need to, with glue you're basically going to make it a one-use headliner.
clarky_gtt
Well-Known Member
i have a new one of those brackets for you when i return the brake bits Steve, it's the one in chris' right hand.
still in its Renault packaging
still in its Renault packaging
gordini stu
Well-Known Member
I got told to use expanding foam when I reshelled a 5 a few years back , it worked a treat and you would get it out if you needed to . Try it out on a bit of card board first see what you think . The tape back then wasn’t great and wouldn’t stick to The headlining but there’s some great products about now.
Good luck and loving the updates and progress.
Good luck and loving the updates and progress.
Duncan Grier
Well-Known Member
Looks like a cheeky slk55 amg in the background....friend had one sounded great but was Autumn / Winter and swear electrics nearly melted keeping you on the road, and proper handful without  lol
lol
Im with Dave either some form of decent double sided foam tape or poss velcro options. Any real adhesive could be fun if you ever removed....what was used originally?
Im with Dave either some form of decent double sided foam tape or poss velcro options. Any real adhesive could be fun if you ever removed....what was used originally?
I'd use numberplate tape if it will bond to the headliner ok, that stuff is superb and doesnt drop off if it gets damp/condensation around it.
Also gives you a fighting chance of getting it off if you ever need to, with glue you're basically going to make it a one-use headliner.
I got told to use expanding foam when I reshelled a 5 a few years back , it worked a treat and you would get it out if you needed to . Try it out on a bit of card board first see what you think?
Im with Dave either some form of decent double sided foam tape or poss velcro options. Any real adhesive could be fun if you ever removed....what was used originally?
Yeah I’m leaning more towards some thick double sided foam tape that can take up some of the “gap” I believe will be behind the headliner board and the roof.
I’ve just made an offer on a load of rolls of this:

5M Black Double Sided Sticky Foam Tape 20mm Wide x 5mm Thick Self Adhesive | eBay
Find many great new & used options and get the best deals for 5M Black Double Sided Sticky Foam Tape 20mm Wide x 5mm Thick Self Adhesive at the best online prices at eBay! Free delivery for many products!
rover.ebay.com
Originally the headliner was glued to the roof of the car, but I just can’t be arsed trying to mess about with a load of sticky glue and end up with it all daubed over me

Looks like a cheeky slk55 amg in the background....friend had one sounded great but was Autumn / Winter and swear electrics nearly melted keeping you on the road, and proper handful without
Yes @Millie_Bee treat herself to it earlier this year, fancied a change from the Porker, excellent car and just does everything so well!!
Spray glue like this https://go.skimresources.com/?id=78...tz=-60&xuuid=a64104b91d6c018ccf9ca4f39a3a8a86with a load of sticky glue and end up with it all daubed over me
works well.
Yes that would work, if the roofliner fitted like a glove... unfortunately it’s a bit more cock in a sock
Sorry to keep yanging on about this bloody headliner gents... I've got a real complex about it going on and being a success...  given it's a one shot chance to do it right..
I had a few minutes in the garage on saturday mornign and did some adhesion tests on the rooflining with some double sided tape I had, and soon found that the double sided tape would not stick to the roof-liner as strongly as I would have liked... I was having a proper panic and thinking I would have to go with a tube of No-More Nails or sikaflex and then wondered how the double sided tape would then stick to the aluminium that's on the roof of the car, on the soundproofing???
I stuck a bit on the sound deadening and it stuck like bloody sh1t to a blanket!!! So realising that it likes sticking to Aluminium, I soon put 2 and 2 together and came up with this:

Got some big sheets of sicky backed aluminium from my Clio 182 build left over, so thought I would lash some of that on.. Stuck well, so we're all set for the double sided tape... as & when it arrives from China.. (Could be a few weeks)
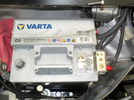
I then fitted a new multi-pole connector to the battery positive terminal that comes with a little plastic protector, liked this option as the plastic cover is more of an insulator against the bonnet:
BiggRed finally returned my leading rear caliper, so I also fitted that back on, and now fully bled the brake system:
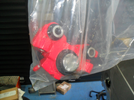
Last job of the weekend, was change over the fuse board cover as I found the other one I had was a lot more complete, and meant I wouldn't have to have a pikey wood screw holding it up:
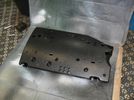
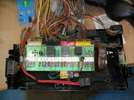
The R11 Fuse board is a right low cost Piece of sh1t....
Thanks for reading
I had a few minutes in the garage on saturday mornign and did some adhesion tests on the rooflining with some double sided tape I had, and soon found that the double sided tape would not stick to the roof-liner as strongly as I would have liked... I was having a proper panic and thinking I would have to go with a tube of No-More Nails or sikaflex and then wondered how the double sided tape would then stick to the aluminium that's on the roof of the car, on the soundproofing???
I stuck a bit on the sound deadening and it stuck like bloody sh1t to a blanket!!! So realising that it likes sticking to Aluminium, I soon put 2 and 2 together and came up with this:

Got some big sheets of sicky backed aluminium from my Clio 182 build left over, so thought I would lash some of that on.. Stuck well, so we're all set for the double sided tape... as & when it arrives from China.. (Could be a few weeks)
I then fitted a new multi-pole connector to the battery positive terminal that comes with a little plastic protector, liked this option as the plastic cover is more of an insulator against the bonnet:

BiggRed finally returned my leading rear caliper, so I also fitted that back on, and now fully bled the brake system:

Last job of the weekend, was change over the fuse board cover as I found the other one I had was a lot more complete, and meant I wouldn't have to have a pikey wood screw holding it up:

The R11 Fuse board is a right low cost Piece of sh1t....

Thanks for reading
davemaygtt
Well-Known Member
Good thinking Steve, very tidy solution
DaveL485
Staff member
They are awful, but also wonderfully simple!The R11 Fuse board is a right low cost Piece of sh1t....
Similar threads
- Featured
- Replies
- 82
- Views
- 2K
- Replies
- 4
- Views
- 362
- Replies
- 6
- Views
- 269
- Replies
- 2
- Views
- 264

