There is more to life with TurboRenault.co.uk

Register a free account today to become a member! Once signed in, you'll be able to participate on this site by adding your own topics and posts, as well as connect with other members through your own private inbox!

Renault 11 Turbo Phase 2 Restoration

Now just roping my Niece into making me a proper image of the design I want for the material.

Neice was fully roped into making the designs, and I've now just sent them off to be manufactured into samples. Should hopefully have them back by the weekend.. the place I use are fast as F**K!!

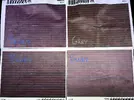
Scan1.JPG Scan3.JPG

Scan2.JPG Scan4.JPG

They obviously look the same on here, but they are slightly different background colours with a BRIGHT red line.. Look forwards to seeing the results!!

Thanks for reading :)
 
Been doing a few small jobs recently, so a fairly lengthy picture heavy update today chaps...

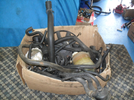
First was to Dig out the old Box-O-Pipes:
SAM_0160.webp
to start looking at which ones were good to go back into the engine bay. Thankfully I've got 2 lots of most pipes.. so i've got a choice:
SAM_0162.webp
SAM_0164.webp
Now just to clean up the set I've chosen.. :aggressive.gif:

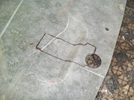
Following my removal of the sound deadening on the headlining, I started to have a closer look at the new headliner I've got from a Renault 9 to see how it would fit... Initial thoughts are I think I can get it to work... but as always... there is a few steps to do before I get there.. First thing to do is to modify the front cut-out to match the old R11 Headlining, so the "PLIP" central locking housing, can go back in. The new headliner didn't have the cut-out. So ti was a case of laying the old one on top of the old, marking out:
SAM_0149.webp
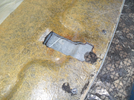
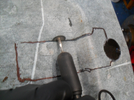
And then cutting out the gap for the plip wiring:
SAM_0151.webp
SAM_0154.webp
SAM_0155.webp
Next job is to get the headliner board re-covered so I've got enough material to cover the gap at the back of the R11 Roof, that the R9 headliner doesn't reach.

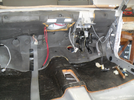
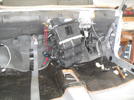
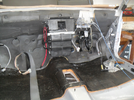
Next job was to re-fit the new heater-box I found, into the car:
SAM_0156.webp
SAM_0158.webp
SAM_0159.webp

Continuing the work on the inside of the car, I turned my attention to the dashboard. It's in generally really good order, but of course needs a little sprinkling of my magic. First was to sort out the windscreen vent foam seals that had all broken down:
SAM_0138.webp
I removed the old foam
SAM_0139.webp
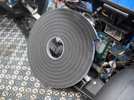
... and then ordered some new foam in a 15mm x 15mm strip:
SAM_0173.webp
Then it was just a case of applying the foam strip around the back of the windscreen vents:
SAM_0174.webp
SAM_0176.webp
SAM_0178.webp
Next I spent about 2 hours repairing a crack that had appeared in the dashboard armature, just above where the centre console fits. It was a real pain, as I knew I would need a small, but strong repair:
SAM_0141.webp
Top right hand corner of the gap, If you can't spot it:
SAM_0142.webp
Next little repair was to the glovebox. There was a broken clip on the back of the glovebox, that is used to hold the fuseboard into the bottom of the dashboard:
SAM_0143.webp
So given that I have a spare glovebox from the Red 11 Breaker... I decided to change them over. The job was fairly easy overall, drill out the pop rivets:
SAM_0144.webp
Broken glovebox out:
SAM_0145.webp
New and old glovebox's compared; you can see the broken clip on the one at the top right of the photo, compared to the complete one at the bottom:
SAM_0146.webp
Glovebox back into the dashboard, with Rivets:
SAM_0147.webp
Job done!!

When it was all done, I was wondering where the best place was to store the finished dashboard... after a little bit of thinking, I concluded:
SAM_0184.webp
I can't believe just how well the dashboard went back in, and following my little repair, it's SOOOOOOOO well fixed and solid!! Feels like you could lift the car up using it!! Time will tell if/when any creaks start appearing!!

She's coming together awfully fast now!!

Thanks for reading :)
 
Material samples have arrived and the results are good!!!!!

Interesting how the picture of the materials you see here look NOTHING like the real thing.... 3 of the materials definitely have a bluey tint to them, but one looks SUPER grey!! I’ve marked the pictures to help you see:

C79CBAC6-0143-42B3-A24E-90D97FB9537F.webp
16F9241E-2908-4F88-8461-9683A7BC08A5.webp

Unfortunately my dear Neice, took the seat base away with her for reference.... so i cant show you a sample against the original material until i get into the garage tomorrow..

Thanks for reading :)
 
What's the plan for the underside of the roof?
I ended up turning the clock back, and putting soundproofing back onto the roofskin... :punish.gif:

I was concerned that the new headliner would not actually stiffen the roof sufficiently... so I went back to some FatMat thanks to the help of old @jas_racing :
output_XYxvNO.gif

As I uploaded on Saturday, whilst he was there, we had a play with some of the wiring, and managed to get some life out of the electronics system :declare.gif:

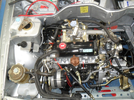
We also finally got some oil into the engine:
SAM_0206.webp

...so i cant show you a sample against the original material until i get into the garage tomorrow..
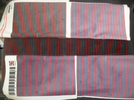
I managed to compare the new samples to an OE seatbase on Saturday... as you can see, the GREY coloured one is the best match to date... but it still looks a little too light. Need to find a darker grey, without it being blue:
SAM_0185.webp

Thanks for reading :)
 
Got some more sound deadening, and gave the rear quarters a good going over:
output_8fzUem.gif
output_0LELOb.gif

Also managed to get a pair of new OE Roof Gutter Strips off a Turkish guy living in France, who's a member of the Facebook R9/R11 Group, and managed to source some new ones from Turkey somewhere. Got them posted over to me in plastic tubes to protect them and they look great on the car:
output_MWwKX1.gif

Thanks for reading :)
 
I need some help suggestions from all you fabrication Guru's...

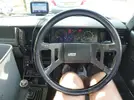
The driving position on the R11 Turbo is not exactly as I like it... The steering wheel sits too low on your lap and actually rubs my legs a little bit as I drive the car:
P1010036.webp
My original plan was to fit an adjustable steering column to the car and give the ability to "Tilt" the steering wheel up, so I got a Column from a R19 16v, but it's not as easy as bolting it in, because I would have to find somewhere for the ajustment mechanism etc...

So I'm now thinking that the best way to improve this is to lower the seat-base in the car.

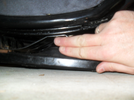
When I look at the way the seat is mounted in the car I can see that there is about 30mm of room (or two fingers I have shown here) I could move the seat-base down by modifying the bracket a little bit, but I'm struggling to figure our HOW I could modify the bracket and bring the seat base down??
SAM_0242.webp
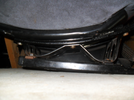
If you look at the way the seat it mounted onto the base, there's three bolts used to bolt the "Reclining Frame" onto the intermediate bracket, and then this intermediate bracket is then bolted to the rails that allow you to slide the seat forwards & backwards in the car:
SAM_0239.webp
SAM_0240.webp
SAM_0241.webp

I'm struggling to figure out how I can take some height out of this frame....

HELP!! :help.gif:
 
Think I'd class myself more of a fool with a angle grinder and a welder....

Looking at the pics , because you can unbolt it all, my plan would be some heavy-ish strip, bent to mimic the shape you have looking side on at the existing bracket, but as low as you can......little hills instead of big hills....you'd have to bolt it to the seat, then it looks like you could then bolt it to the runners, 'cos you bolt it up through the runners from underneath....so no problem with the access you're losing 'cos you lowered it, if it worked, you could weld a profile plate to it on the outer end....make any sense?
 
How thick is the bracket? Fold up a new one . I have a six foot pan folder that would fold up to 3mm in mild steel . I can’t remember but can you set the runners wider or was that on a 5 ?

Think I'd class myself more of a fool with a angle grinder and a welder....

Looking at the pics , because you can unbolt it all, my plan would be some heavy-ish strip, bent to mimic the shape you have looking side on at the existing bracket, but as low as you can......little hills instead of big hills....you'd have to bolt it to the seat, then it looks like you could then bolt it to the runners, 'cos you bolt it up through the runners from underneath....so no problem with the access you're losing 'cos you lowered it, if it worked, you could weld a profile plate to it on the outer end....make any sense?

Aaaah yes.... I see it now...! Something like this..
SAM_0239a.webp
 
Yeah, though you need to leave some space for bolt heads etc, you might be able to drop the nose another ten mill as well, I always thought there was loads of travel on the tilt, so you can adjust the seat back level with the tilt if you lowered the front that bit more.
Some 3-4 mm strip would probs be man enough , with the same but smaller bends forces will be pushed towards the fixings, so it takes the weight on its length, obvs need to keep an eye on runner position, cos existing bracket dictates width.
 
We are on the same page I think . Take the bracket off and hover it in place to see if it’s enough.
Been mucking about with the folder strengthening flat steel with slight kinks etc for my old mans vintage tractors .
 
Back
Top