There is more to life with TurboRenault.co.uk
You are using an out of date browser. It may not display this or other websites correctly.
You should upgrade or use an alternative browser.
You should upgrade or use an alternative browser.
5 GT Turbo R5 GT Turbo - Complete strip down and re-build #1
- Thread starter Chris74#
- Start date
-
- Tags
- gt turbo r5 gt turbo turbo
Wheelers Workshop
Active Member
Wow that shell corrosion/voids reminds me of my many old rear engined shells that I have repaired in the last 50 years mainly R8 and Dauphine, when panels were hard to find with no internet available in those days.
Lots of Gas welding was usually undertaken and wings cobbled together with non rusty patches , uk over cills were available and as these were removed everything is revealed and there is usually more rust in the chassis to deal with.
I spent a whole winter in the 1980s welding my R8 shell chassis members from bumper to bumper on both sides, the wing tops and floors , after competing in the Coronation Rally on Epynt in 83 [second overall and my first rally], the shell felt soggy on the road and when jacking up it groaned around the door seals. After the repair it could be jacked up at any point without any groaning .
Previously to owning numerous R8 cars, I had Dauphines , and in 1976 I built a Proto with ex works Alpine A110 suspension and big brake parts and an R17G 1605cc motor running on Weber DCOE carbs. The shell was a 1964 12volt but it succumbed to chassis failure behind the air intakes , at that time I did not know about the Queron built Dauphines in France with multiple steel tubing strengthening in the engine bay to stop the rear end of the chassis moving about.
I now have a 1958 Felec Dauphine project that I am on with this time I will add the Queron tubing as the Steve Swan Proto uses .
I intend to retire the R8 Gordini hill climb/sprint car and put it back to standard 1300G spec, then the big Sacco motor and 5 speed Wheeler box can then go into the much lighter and more aerodynamic Dauphine shell.
My R8 has alloy door skins which I fabricated, but the Dauphine doors are compound curved and may be a challenge to fabricate.
I see today that a French specialist offers 4 polyester doors, boot, bonnet and big wings to take the 7inch rims, Mk1 Escort big wings are close in design.
Cheers
Dave Wheeler
Chris74#
Well-Known Member
Update received from Tony today - all other parts now painted, just got the backs of the mirrors to chrome paint!!

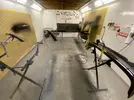
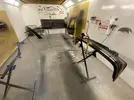
It all looks bang on from the pictures!!
Thanks for following this guys, the support and comments have really helped me get to this point! Further advice will be required as I get into stripping and rebuilding the engine!


It all looks bang on from the pictures!!
Thanks for following this guys, the support and comments have really helped me get to this point! Further advice will be required as I get into stripping and rebuilding the engine!
Last edited:
Chris74#
Well-Known Member
Got out there today and started to remove some parts off the engine to take to the powder coaters.
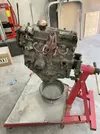
I started off with the sump which had more silicone around it than the bath in my house!
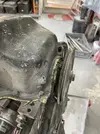
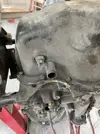
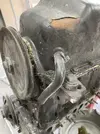
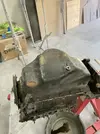
Managed to get it off with the help of a blade and chisel!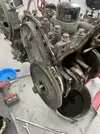
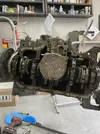
I then got the pulley wheel off and removed the timing chain cover!
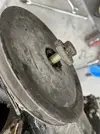
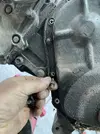
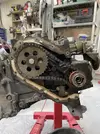
I then got the rocker cover off!
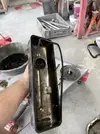
I put them all through the parts washer ready to go to powder coat! Then on to repairing the dashboard! This just fell to bits as I took it out of the car so I have bought a few spares to make a frankenstein version! also bought a plastic staple/ welding kit!
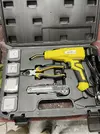
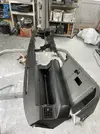
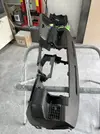
I started by bonding the black upper section to the grey lower section!
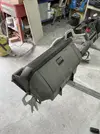
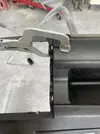
Once this had set, I got on with the staples!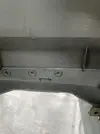
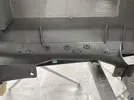
There was lots of broken bits stuck in the dashboard, had a right game getting them out, bloody silicone everywhere!
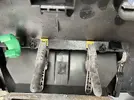
Had to take bits from the other dashboards, to make a complete one!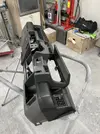
Got there in the end! Its probably more solid now than it was originally!
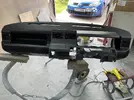
Hopefully get the car back tomorrow!

I started off with the sump which had more silicone around it than the bath in my house!


Managed to get it off with the help of a blade and chisel!


I then got the pulley wheel off and removed the timing chain cover!


I then got the rocker cover off!

I put them all through the parts washer ready to go to powder coat! Then on to repairing the dashboard! This just fell to bits as I took it out of the car so I have bought a few spares to make a frankenstein version! also bought a plastic staple/ welding kit!


I started by bonding the black upper section to the grey lower section!


Once this had set, I got on with the staples!


There was lots of broken bits stuck in the dashboard, had a right game getting them out, bloody silicone everywhere!

Had to take bits from the other dashboards, to make a complete one!

Got there in the end! Its probably more solid now than it was originally!

Hopefully get the car back tomorrow!
Chris74#
Well-Known Member
Thanks Andy!!Amazing work, again!
Brigsy
Media Mogul. Instagram legend.
I personally wouldnt powdercoat any engine parts. They will shot blast them before coating, and if any shot accidently gets left then it will wreck your new engine. The rocker cover baffle is more or less impossible to clean out so chances are some shite will be lingering inside.
Clean all the bits up and wet coat would be a better option, you have all the kit to get a nice finish on it.
Also make sure the stud goes back in the correct place on the timing chain cover as there is a gallery behind it (poss water? Forget now) and easily cracked if a bolt is fitted.
Clean all the bits up and wet coat would be a better option, you have all the kit to get a nice finish on it.
Also make sure the stud goes back in the correct place on the timing chain cover as there is a gallery behind it (poss water? Forget now) and easily cracked if a bolt is fitted.
Chris74#
Well-Known Member
Thanks for the steer @Brigsy I did notice that there were two studs that came out of the timing chain cover, the one in my hand and the one above!I personally wouldnt powdercoat any engine parts. They will shot blast them before coating, and if any shot accidently gets left then it will wreck your new engine. The rocker cover baffle is more or less impossible to clean out so chances are some shite will be lingering inside.
Clean all the bits up and wet coat would be a better option, you have all the kit to get a nice finish on it.
Also make sure the stud goes back in the correct place on the timing chain cover as there is a gallery behind it (poss water? Forget now) and easily cracked if a bolt is fitted.
I will give it a go painting the covers! Might go for Tungy! Hmmmmmmmm!!!
Chris74#
Well-Known Member
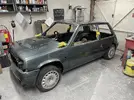
Got the car back today!!!! Tony also posted a video on the painting on his channel!
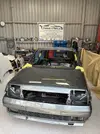
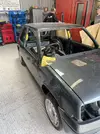
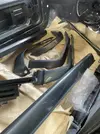
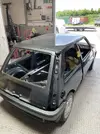
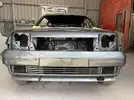
Well happy with it, a bit disappointed with myself on the drivers door, there is a bit of a ripple! Ill get that back to Tony once I'm further in and get him to straighten it out! Still the rest of the car looks really good!
The smoked chrome on the mirrors looks the bol***ks!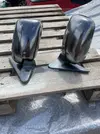
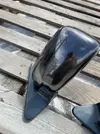
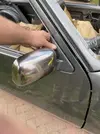
I dropped the bloody mirror as I got it out of the van and scratched it!! Grrrrrrrr!!
Got the car loaded up and home without incident! Phew!
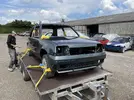

A few pics once back at home!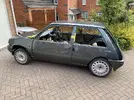
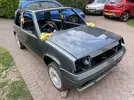
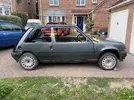
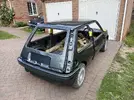
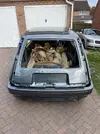
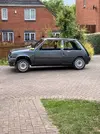
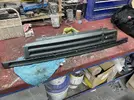
The grille looks great too!!
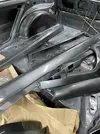
Then put the car back in the garage and unwrapped all of the plastic bits!
Thanks for reading guys!


Well happy with it, a bit disappointed with myself on the drivers door, there is a bit of a ripple! Ill get that back to Tony once I'm further in and get him to straighten it out! Still the rest of the car looks really good!
The smoked chrome on the mirrors looks the bol***ks!


I dropped the bloody mirror as I got it out of the van and scratched it!! Grrrrrrrr!!
Got the car loaded up and home without incident! Phew!


A few pics once back at home!


The grille looks great too!!

Then put the car back in the garage and unwrapped all of the plastic bits!


Thanks for reading guys!
Duncan Grier
Well-Known Member
Well thats the easy bit done with welding and paint out the way 
Now the joys of applying your same level of detail to putting back together ❤
Does look great, I would be mega chuffed. On fence with door mirrors bit let you off until I see it in the flesh
Now the joys of applying your same level of detail to putting back together ❤
Does look great, I would be mega chuffed. On fence with door mirrors bit let you off until I see it in the flesh
Chris Smith
Well-Known Member
Bloody hell, haven’t read this thread for a few weeks… so much change, amazing work. 
clarky_gtt
Well-Known Member
If it makes you feel any better, I have new doors and they just aren't possible to have 100% straight. The strengthener bonded to the skin on the centre of the panel gives them wobbles. I even skimmed mine.... Still not perfect!
Chris74#
Well-Known Member
Clarky, that does ease my pain a little!!If it makes you feel any better, I have new doors and they just aren't possible to have 100% straight. The strengthener bonded to the skin on the centre of the panel gives them wobbles. I even skimmed mine.... Still not perfect!
clarky_gtt
Well-Known Member
I cut mine off and rebonded it because I was so annoyed at the straightness. Made no difference
Chris74#
Well-Known Member
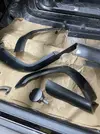
Went out there today and fitted the rear plastics and lights, just to get them out of the way. Lost my mojo with it today tbh. Waiting for EBC to deliver rear discs and pads, and I have the pedal box and pedals in powder coat! I thought about getting on with some sound deadening but wasn't feeling it at all. I decided to have look at the wing mirrors and get them on the car for now!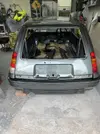
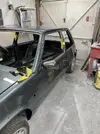
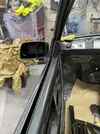
I gave the drivers side some attention, I will need to do the same to the passenger side. I then decided to get the cloths from under the bonnet and fit the bonnet buffers! I got them out and they were minging!
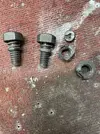
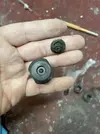
I had a mooch about and found a couple of unbroken screw-in pieces and gave them all a spruce up! I took the buffers apart and gave them some attention!
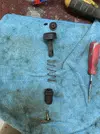
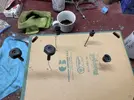
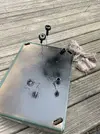
I wire brushed the screws and then galve painted them!

Once all cleaned up and painted, I put them back together! I remembered that I have some sticky backed neoprene so I cut a couple of circles for the top of the buffer - should be a little rubber insert, but the neoprene will do just as good!
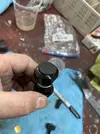
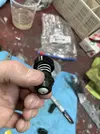
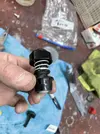
I then fitted them to the car and left them high for now!
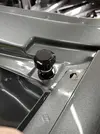
Its the little things
Before & After........
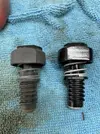
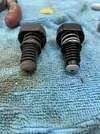
Thanks for reading guys!!


I gave the drivers side some attention, I will need to do the same to the passenger side. I then decided to get the cloths from under the bonnet and fit the bonnet buffers! I got them out and they were minging!


I had a mooch about and found a couple of unbroken screw-in pieces and gave them all a spruce up! I took the buffers apart and gave them some attention!


I wire brushed the screws and then galve painted them!

Once all cleaned up and painted, I put them back together! I remembered that I have some sticky backed neoprene so I cut a couple of circles for the top of the buffer - should be a little rubber insert, but the neoprene will do just as good!


I then fitted them to the car and left them high for now!

Its the little things
Before & After........


Thanks for reading guys!!
Similar threads
- Replies
- 4
- Views
- 361
- Featured
- Replies
- 82
- Views
- 2K
- Question
- Replies
- 8
- Views
- 679
- Replies
- 6
- Views
- 268

