There is more to life with TurboRenault.co.uk

Register a free account today to become a member! Once signed in, you'll be able to participate on this site by adding your own topics and posts, as well as connect with other members through your own private inbox!

5 GT Turbo My C1J Forged build

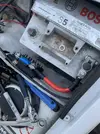
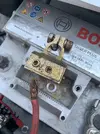
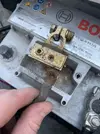
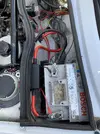
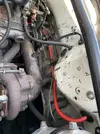
Heres a quick write up of todays task,

All parts came from Altec Automotive as i found them the best priced and use fast dpd delivery for free.

35mm2 cable ALT/PVC35
8mm stud straight terminals for 35mm2 cable pack of 4 - ALT/BSE35-8
90 degree starter terminal pack of 1 - ALT/BSE90B-35-8 - i ordered a few incase of crimp issues.
Mega/midi fuse box - ALT/FH260158
200amp genuine mega fuse - ALT/MF200
Positive battery terminal - ALT/BT4POS-02

I already had a single midi fuse holder with a 50amp feeding a fusebox for my megasquirt, aem uego and coil pack etc - ALT/FUSEMIDI50

I recommend you fuse the interior feed, its not fused from factory. Currently still trying to figure out what fuse to fit. for now i have removed a lower stud in the fuse box and wire gone straight to the top busbar.
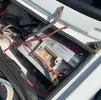
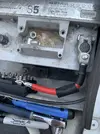
A9E045DC-30BC-4DED-BE22-EE496BEC3AB7.webpIMG_5314.webpIMG_5315.webpIMG_5316.webpIMG_5317.webpIMG_5320.webpIMG_5321.webp

It starts a lot better as expected and mostly i have proper voltage into the car and no volt drop now so hopefully the interior/ speedo etc are less temperamental

I really need to paint the engine bay but its function over form and a very last thing on my list of jobs

Next up is to freshen up the steelies, enjoy any of summer if lockdown lifts and plan the jenvey fuel injection setup
 
So i'm drawing up plans for the fuel injection system and Adaptronic loom

Sequential fuelling and ignition is something i am determined to make work on a C1J,

The project brief is simple, compact, reliable, low cost

Previous knowledge is it can be done off the mechanical fuel pump lobe but its not the best, the variation between cams also leads to issues for others if i made a bracket.
So were back to the classic camshaft distributor drive

Using the stock drive body cut down with a 1.8t camshaft single hole rotor on it and the 1.8t cam sensor housing

for ideas of pricing

The sensor on ebay £10

The single rotor - working to find a breaker or cheaper supplier atm

Idea for the rotor is to weld in a washer to fit the shaft of the R5 but who knows probably be able to get it custom made cheap
 
Sequential fuelling and ignition is something i am determined to make work on a C1J,

If you need a sensor on the cam for seq fuel, why not just have a pickup on the cam sprocket and mount the sensor in the timing cover? *assuming* you can get a sensor that doesn't mind it's nose having a bit of oil on it.
 
I don’t really want to open the engine up tbh I have thought the use of the sprocket bolts but most changing efi or ignition only will have a dissy body left over to use
 
Its surprisingly easy tbh,

the printer is the fiddly bit, if the bed isnt level or high enough stuff dont stick well. Filament is the biggest variable, i just brought some eryone pla 1kg black at same time as printer and wish didnt.The filament that comes with the machine is really decent, I only changed the filament and had numerous tweaks to make to get it the same quality as before
 
So I’m working on a camshaft sensor kit which will use the standard distributor body,

it’ll be a single tooth trigger wheel on a boss so it can be rotated however desired

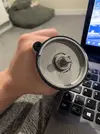
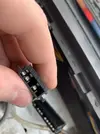
The “cap” will house the sensor, the sensor in the picture won’t be used, I’m moving to a push in a hole style sensor

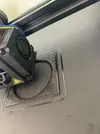
The cap I’m going to print in ASA filament for testing on my car then send off to make out of aluminium

if anyone is interested in one in the future please let me know cause atm I’m running quite slow on getting it made

D01A5270-A097-42B4-A8CD-29B714CD4023.webp

805035F0-3398-4673-B30C-FB3554463BC3.webp
 
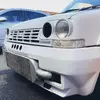
So I brought a phase 1 grill mostly because I prefer the look and scared of breaking my original grill which is getting put away in the loft for a retirement fund haha

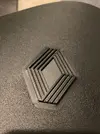
so why not make a badge.... printed out of ASA filament which is a prick to get right, wet sanded the face and polished where possible

pretty happy with the out come

EB932C98-B24F-4BE2-A725-67C75A9CA7DC.webp

A440E3F8-9756-4009-84BA-87AD50B22348.webp

5B122B10-3019-489B-B805-14194B6FAC1F.webp
 
Sanded it down on the face lines with wet n dry from 400-1200 then rubbed some polish on it
Took me a few attempts in pla filament to get the size right. Luckily ASA can handle outdoors heat n uv
 
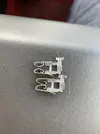
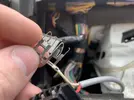
Here you go sports fans, I found a terminal that works with minor modification on our dash and other places

Its called a Lucas rists flag terminal
Link to where I brought from - here Lucas Rists Flag Terminal Female 1.1-2.0 mm - automotiveconnectors.com

You only have to use a small flat blade in the curly part to make it a flatter contact,
I also bent the fixing tab down on the side as the original doesn’t have that, it uses the hole in the middle to secure it in the housing

Didn’t fix my speedo not working so I’m off to get wet and oily messing with gearbox sensors

Also looking to order all the diodes and capacitors for the dashboard control board behind the rpm gauge and rpm gauge diodes etc etc as I’ve found my rpm gauge spikes when window switch use whilst at top or bottom one dash unit I’ve got doesn’t do it and one does

4405A0BA-708B-4BB4-883D-470F47AFF1A0.webp

CB3F44C1-67F7-42A8-BA24-B720B2590ABA.webp

EEA0B679-5D90-4800-9947-E5FDEFC5E519.webp
 
Forgot all about this thread. Time for an update Fordy!

I’m going to continue with MS2-Extra on my build (the longest in the world!). I also came up with Cam Trigger converted dizzy. My first attempt was cool, but bulky. I think the best option fit me is to throw it in a lathe and turn in down to work with a more compact setup. I’ll try to get some pics up when I’m back on the laptop.
 
Back
Top