There is more to life with TurboRenault.co.uk
You are using an out of date browser. It may not display this or other websites correctly.
You should upgrade or use an alternative browser.
You should upgrade or use an alternative browser.
Marks RX7 - lets break a rotary.
- Thread starter Mark Davis
- Start date
Mark Davis
Brapmaster extraordinaire
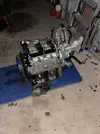
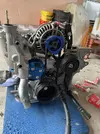
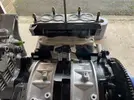
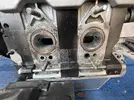
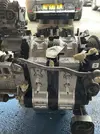
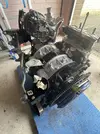
A few more daylight pics.
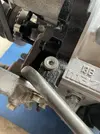
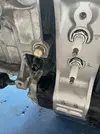
Things to note - lowered LIM for clearance of strut brace, oil fitting blocked on top of front plate and moved to the side to allow for the solid dowel helping with rotational torque for all the boost.
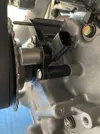
Oh swanky sump, single crank sensor instead of two using Full Function trigger wheel kit.
I’m planning on swapping the fuel rails for my Radium ones if they fit.
Oh and thanks to @Adey for lending me his engine crane today.


Steve Swan
Well-Known Member
T- minus to Blast off...
Mark Davis
Brapmaster extraordinaire
Mark Davis
Brapmaster extraordinaire
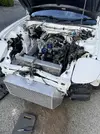
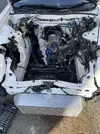
After a little trip to drop @Adey engine crane back this morning I managed to get a few hours on the car.
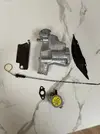
Started off fitting this lot. A dipstick, swapped thermostat housing so I can run without air separator tank, gasket for oil return plus two dust covers. One for side of gearbox and one on top of gearbox/engine. Will need to purchase a black rattle can to tidy them up tomorrow.
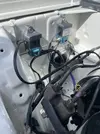
Then set about mounting the 2 x MAC valves I’ll be using for boost control. I bought a couple of 3D printed brackets which seem to fit. Looks neat and easy to plumb from this position.
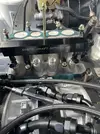
Next up I started messing about with the fuel system. I managed to get the 2200s mounted in the secondary rail but In order to fit the 2 x central injectors I need injector extenders which are now on order. These injectors aren’t actually used and are just there as a dummy to prevent a massive leak.
The primaries are nice and simple - sticking with 1650s.
I think I have enough injector but if I ever needed two more at least I’m future proofed.
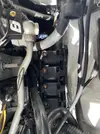
I started thinking about mounting the CDI coil packs. I planned ahead and bought a bracket from a company in Aus. Looks like I can mount neatly here on chassis leg, i just need to drill a hole to mount the second fixing point. Should work well with a set of custom leads.
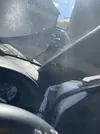
Finally I realised that I no longer need the pillar boost and AFR gauge as the dash will provide that data. I set about removing them, the wiring under the dash is a mess, it’s had all sorts wired in it’s time, will get this tidied up when the chap does the loom.
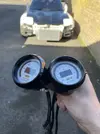
I’ve already sold these along with my spare secondary fuel rail. At least I can recoup some money back, it’ll just get ploughed back in as I still need more KA sensors which aren’t cheap.
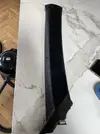
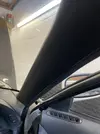
Sad thing is my A pillar has a big hole in it where someone has fitted the dual pod and gauges, need to source a new one.
Not sure if I mentioned that I’m going to be using Matt from Level Motorsport Wiring for my loom, his work looks amazing.
So a big list of jobs to do but getting stuck in now. Two more weeks for Thermomet bits at which point car will be 90% done.
Started off fitting this lot. A dipstick, swapped thermostat housing so I can run without air separator tank, gasket for oil return plus two dust covers. One for side of gearbox and one on top of gearbox/engine. Will need to purchase a black rattle can to tidy them up tomorrow.

Then set about mounting the 2 x MAC valves I’ll be using for boost control. I bought a couple of 3D printed brackets which seem to fit. Looks neat and easy to plumb from this position.

Next up I started messing about with the fuel system. I managed to get the 2200s mounted in the secondary rail but In order to fit the 2 x central injectors I need injector extenders which are now on order. These injectors aren’t actually used and are just there as a dummy to prevent a massive leak.
The primaries are nice and simple - sticking with 1650s.
I think I have enough injector but if I ever needed two more at least I’m future proofed.

I started thinking about mounting the CDI coil packs. I planned ahead and bought a bracket from a company in Aus. Looks like I can mount neatly here on chassis leg, i just need to drill a hole to mount the second fixing point. Should work well with a set of custom leads.

Finally I realised that I no longer need the pillar boost and AFR gauge as the dash will provide that data. I set about removing them, the wiring under the dash is a mess, it’s had all sorts wired in it’s time, will get this tidied up when the chap does the loom.

I’ve already sold these along with my spare secondary fuel rail. At least I can recoup some money back, it’ll just get ploughed back in as I still need more KA sensors which aren’t cheap.
Sad thing is my A pillar has a big hole in it where someone has fitted the dual pod and gauges, need to source a new one.

Not sure if I mentioned that I’m going to be using Matt from Level Motorsport Wiring for my loom, his work looks amazing.
So a big list of jobs to do but getting stuck in now. Two more weeks for Thermomet bits at which point car will be 90% done.
Mark Davis
Brapmaster extraordinaire
A few little jobs today.
First off a little rattle can job on the gearbox/engine dust cover.
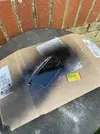
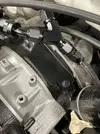
Then a trip to Gloucester for a little bonnet clip, little things like this satisfy me for some reason.
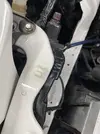
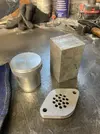
Then added knock sensors, KA fuel pressure sensor and moved to a combined Bosch pressure and temp sensor for oil. Fitted some filters on to the MAC valves too.
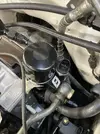
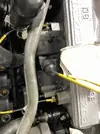
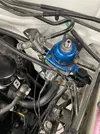
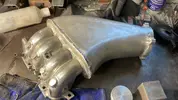
Upper inlet is nearly complete, he just needs to weld WMI bungs to runners. He’s also sorting me a custom filler neck too with ports for catch can. Getting closer !
First off a little rattle can job on the gearbox/engine dust cover.


Then a trip to Gloucester for a little bonnet clip, little things like this satisfy me for some reason.

Then added knock sensors, KA fuel pressure sensor and moved to a combined Bosch pressure and temp sensor for oil. Fitted some filters on to the MAC valves too.


Upper inlet is nearly complete, he just needs to weld WMI bungs to runners. He’s also sorting me a custom filler neck too with ports for catch can. Getting closer !


Last edited by a moderator:
Mark Davis
Brapmaster extraordinaire
Mark Davis
Brapmaster extraordinaire
Mark Davis
Brapmaster extraordinaire
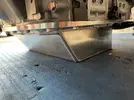
With my magical wallet. I bought a new panel.How did you do this?
Paul Ribera
Member
I could do with a magical wallet myself lol!! I hope all the money you are spending reaps all the rewards and performance you hope to achieve
Mark Davis
Brapmaster extraordinaire
Thanks Paul, the reality is it will cause me more misery, turmoil and money yet I’ll do it all over again.I could do with a magical myself lol!! I hope all the money you are spending reaps all the rewards and performance you hope to achieve
Paul Ribera
Member
You are as bad and as stubborn as me lol!! best of luck and look forward to hear it firing up!!Thanks Paul, the reality is it will cause me more misery, turmoil and money yet I’ll do it all over again.
Mark Davis
Brapmaster extraordinaire
Steve Swan
Well-Known Member
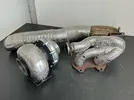
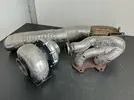
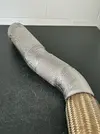
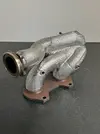
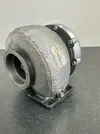
Looks great! Is there a soft Refractory material between the pipework and the hard shell coating? Back in the 70's Steam pipe was often used in performance Rotary applications Exhausts as it could absorb and dissipate heat much better than the usual tin Exhaust pipe of the time which would fail very quickly. I assume your header pipework is Inconel or similar to deal with the heat? So many questions, so little time....
Mark Davis
Brapmaster extraordinaire
Looks great! Is there a soft Refractory material between the pipework and the hard shell coating? Back in the 70's Steam pipe was often used in performance Rotary applications Exhausts as it could absorb and dissipate heat much better than the usual tin Exhaust pipe of the time which would fail very quickly. I assume your header pipework is Inconel or similar to deal with the heat? So many questions, so little time....

Thermo Met - Heat Management Solutions
Thermo Met - Heat Management Solutions. Specialists in the design and manufacture of insulation blankets, exhaust lagging, turbo blankets, insulation muffs and bespoke engineered products
Here, check their site, it explains the process but yes it is a material that insulates the heat with a wrapping of stainless or inconel on top.
Turbo is inconel, the rest is steel. It’s already managed with a 1000c so hopefully it will be ok. We will see.
Similar threads
- Replies
- 78
- Views
- 3K
- Replies
- 0
- Views
- 73
- Replies
- 0
- Views
- 101

