There is more to life with TurboRenault.co.uk

Register a free account today to become a member! Once signed in, you'll be able to participate on this site by adding your own topics and posts, as well as connect with other members through your own private inbox!

How (not) to make your Dauphine Handle

Going to be a busy week ahead
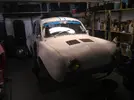
The Dauph is going to get straightened out a bit this week, which involves moving it around various places
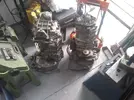
Also these arrived on Sun. It is great having your own courier.
IMG_20220814_191412393.webp

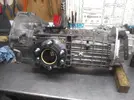
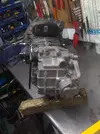
It is going to be an R8/5G based 5 speed conversion and I spent all yesterday afternoon and evening stripping them. They have the right bits and seem to be in sound condition, so let battle commence.


In other news Malcolm sent me this from the Rccc Facebook page

293487067_143791238305818_6907470320448041714_n.webp

That bonnet must be Hot!
Funny, but I always thought Ladies wore more undergarments at this time Period

Nice to be wrong sometimes..........
 
Both boxes stripped and casings away for cleaning. New toy arrived

IMG_20220815_200251564.webp

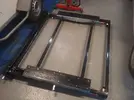
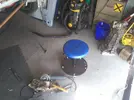
It's a bit bigger than I thought, works well lifting me up and down. Do I use as intended, by rolling under the car and lifting, or do I leave it in one place and build up the floor to make it a drive over....
 
If it will roll under ok then use as is. I seen somebody using similar albeit oldskool one to change a clutch on a fwd car, looked quite good.
 
Going off at a Tangent. This isn't Rocket Bunny, but it is as cool as FCUK..


298869991_151321304219478_5397613959309802656_n.webp

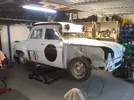
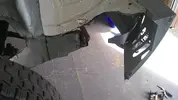
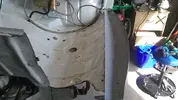
Today was D day. D for Dozer. Dave (Glenalmond refinishing) and I went to see an old mate of mine who has the Equipment for straightening cars. It was easier than I thought it would be, a pleasant surprise if I'm honest.
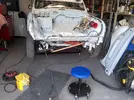
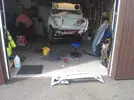
We Did eventually snap the front end off the leg, but given the state it was in its no surprise and its all back where it should be. It is now back in my workshop on my new ramp, which has proved to be quite straightforward to use, to get the damaged bits cut off ready for the replacements.

IMG_20220817_193631455.webp

IMG_20220817_193644704.webp

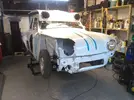
The bonnet is back on 3 pins without any force needed, so I am calling that a win. Starting to feel happier about this now. The bike wheels are not a good look !

Before today

IMG_20220809_193207610.webp

Definite win there

More Soon.........
 
Hmmm.....it is quite sobering when I think when I'm bowling along at 60 on a dual carriageway surrounded by SUVs and HGVs that my feet are only a foot to eighteen inches away from the bumper irons in my 750/4cv.....with no seatbelts
 
Going to be a busy week ahead
The Dauph is going to get straightened out a bit this week, which involves moving it around various places
Also these arrived on Sun. It is great having your own courier.

View attachment 206623

It is going to be an R8/5G based 5 speed conversion and I spent all yesterday afternoon and evening stripping them. They have the right bits and seem to be in sound condition, so let battle commence.


In other news Malcolm sent me this from the Rccc Facebook page

View attachment 206624

That bonnet must be Hot!
Funny, but I always thought Ladies wore more undergarments at this time Period

Nice to be wrong sometimes..........

As to the Gearboxes that arrived, nice to see them in the picture.

As to the lady on the bonnet, she sells Renaults to Older gentlemen........
 
Fast Forward 30 odd hours and we are done
Ended up swapping the gearset due to wear on the Donor (an all too often occurrence nowadays)

IMG_20220826_200956220.webp

IMG_20220826_201009276.webp

If I had lived in Ancient times, I think I may have been able to put Mummification on my stone tablet CV.

IMG_20220826_202333104.webp
This is Leaving Perth, Scotland bound for Perth, Western Australia. There is a thriving classic Renault Scene there and less Rust....
more soon.....
 
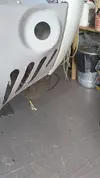
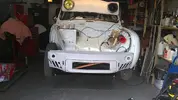
Back at it today, N/S wing back on , Dressed up the boot floor a bit and self tappered the front panel on.

IMG-20220828-WA0008.jpg

More complex dressing out above my pay grade, left for now

IMG-20220828-WA0006.jpg

Generally happy with the boot floor, given how squashed it was

IMG-20220828-WA0007.jpg

How I left it

IMG-20220828-WA0002.jpg

I'm calling that a win for now. next is getting the new bonnet on the back pins to see how the front looks. Then confer with Panelbeater about final cutting on Chassis and inner wing , then self tapper the whole front end up, then body shop, then Nothing for Months!!!!!!!!!
 
Some noisy pictures for you today.
Went up to see Iain the engine tester today, armed with Malcolm for the transferring of files, off phones and on to others, the mission was a success, so here you are
The noise from the Dry Lobro joint is mildly terrifying...


Malcolm was amazed at the amount of Engine clips Iain has on his phone. Iain said to him that when he is in the care home, he will be able to listen to them on his phone all day by way of entertainment!! maybe not a bad idea.......................
 
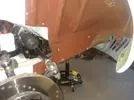
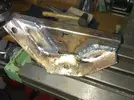
Slow progress. Main issue is that trying to overlap a joint on 2 boxes the same size won't work, esp. when the original has welded repairs, so I nicked the bottom corner of the original leg with the grinder which allowed the bottom face to move up and the rear face in . This was successful and can be got at to weld both sides of the overlap. Hooray...
Crash repair odds (29).webp

slight gap at the top but this is not original as was cut out for R8 type turret boxes to clear R8 front suspension.

Crash repair odds (30).webp

This is much better and access for welding is good

Crash repair odds (31).webp

That'll do for now
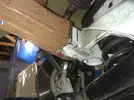
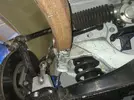
I had forgotten how much of a pain it is really modifying a bodyshell. Most of today was spent removing the front Anti-roll bar mount from the annihilated original leg and making a new carrier bracket. Welding 3mm steel to 1mm steel is always fun (not) I am hoping to spot weld the carrier to the leg as it should look tidier

IMG_20220917_203240715.webp

It's done now just need to tweek it about a bit to be a nice snug fit on the leg.
Deep Joy...................
 
A Vanity Project:

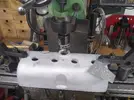
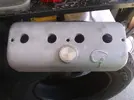
I have got one of Paul Green's Excellent Rocker covers. These make your 5Gordini engine look more like an 8Gordini unit plus the big G (for Grief) on it
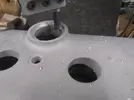
Only issue for me is that I don't need a filling point so it has to go. Luckily I got mine removed from the production line before the breather points were machined.

IMG_20220926_160147607.webp


Scrap Ally sheet used to prevent marking (just my luck)

IMG_20220926_160143246.webp

Cutting a rebate to centre the hole up for the plug.

IMG_20220926_164442352.webp

Ready for the Welder.........
 
Back
Top