There is more to life with TurboRenault.co.uk

Register a free account today to become a member! Once signed in, you'll be able to participate on this site by adding your own topics and posts, as well as connect with other members through your own private inbox!

How (not) to make your Dauphine Handle

Mixing metric and imperial is against the law! :D :D :D
I can't help it, it's my age. When I go into small numbers esp. sub 1mm, I go into thou its easier to visualise. I try to stay in mm as most people prefer that and can visualise it. Going sub 1mm its all bits of things, like 0.1mm=4 thou=1 Rizzla Green (other cigarette papers are available)
All pert of the fun
 
@Turbell 1934 Morgan 3 wheeler with V-twin motor modified with 2 JAP speedway barrels and heads on 14:1 compression running on dope and castor . Lightened to within an Inch of its life and running on superbike radials Yeee Fekkin HA.
Sadly not, although I can't fault your imagination !
Morgan three wheeler would defo be in collection if I'm ever discovered as Britain's most talented chef/ice skater/ballroom dancer/business fool/singer/potter/frock maker.............
Late seventies jap muskle bike, keep me from banging my head against walls for a while.
 
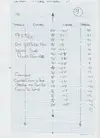
Nearly there just needs a little more. There are conical spacers under the Track rod ends to stop them binding through their arc of motion as made they were around 7.5mm thick. I removed it and took it to 6mm on the lathe built it up and measured it yet againTest sheet 11 001.webp
 
Close Enough for now. I have also been checking and adjusting the wheel alignment throughout this process with the trusty old Dunlop tracking gauges. If you didn't know the tracking adjustment affects the camber settings (because of castor and KPI) and potentially steering errors, so, unfortunately you have to keep checking-adjusting-checking-adjusting till you get there. The good news is once you have endured the pain, it is easy to go back to your start point. Also as a double check I use string pulled tight through the centrelines of the wheels to ascertain whether the wheel is toeing in or out as the gauges only give an axle total, so yet again by check-adjust-check we have the steering giving about 1mm toe in total, split evenly on both front wheels with the steering wheel centred. Just need to drive it up the road to check it runs straight hands free, it won't be more than a half turn out on one side or the other, or a touch of both.
One other point in all of this is that I have managed to confirm my workshop floor is not as flat as I would like it, corner to corner it is pretty good but it is not flat. When the weather warms up next year there will be a date with the cement mixer and 250kg of self levelling compound
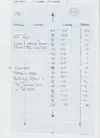
Here is the FINAL PRELIMINARY SET UP sheet showing both sides for steering error and camber. its not single seater accurate, but for a 60 year old French tin can its not badTest sheet 12 Final Prelim set up 001.webp
 
As my bumpsteer gauge is homemade the DTI is fixed at one end meaning a negative reading on the N/S should be a positive reading on the O/S which it is, this means both sides are doing the same thing
With the springs and dampers refitted and the car settled on the ground. I got my unpaid assistant to assume Battlestations at the helm and measured the rest of the cars vital statistics
I have checked this about 3 times since Sept and have made a couple of small spring platform adjustments ( I have screw adjust lower rear spring platforms)
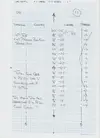
The set up sheet is shown below, and once again for a 60 year old car with a lot of welded repairs it has come out quite good. Please ignore the diference in front ride heights as one lower flange is about an inch larger than the one on the other side hence the difference. What matters as the test sheets build up is any changes in numbers, I suppose that is the point in all of this. There is not a set of ideal numbers for you to adjust your chassis to (I wish there were) what you are trying to achieve is a flat, level and square vehicle with good weight distribution, about 60/40 rear to front in this case, and with no unwanted and variable movement in the suspension geometry.
Next jobs are to brace the steering rack and make a Z bar in a warmer workshop
Happy Motoring
SteveChassis sheet 1 001.webp
 
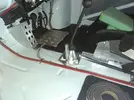
There are a couple of little chores to be ticked off the snagging list. The first being rack securing mounts,the rack is a Titan made to measure job with 2.5 turns lock to lock which is a lovely piece of engineering and comes with 2 shoulders turned into the body for you to invent you own mounting clamps. This is easy enough to do with the mill and 4 bits of Ally plate. Before I fitted the R8/10 front crossmember into the Dauph shell, I removed the original rack mounting fingers and slotted the crossmember on the mill giving me the opportunity to raise and lower the rack in the shell.
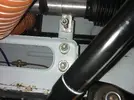
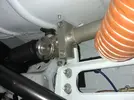
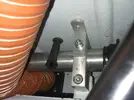
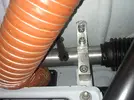
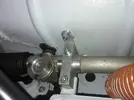
I am not keen on the rack fingers as they are quite long and have the opportunity to flex, so I hit on the idea to brace the rack onto the boot floor, so it is tied to the shell above and below
The pictures show the idea better than I can Describe
Front rack reinforcing (1).jpg

Pic 1 shows the set up with the front of the clamp removed to be drilled and tapped (note to self need to do something about the rust on the seams)

Front rack reinforcing (2).jpg
 
Today I have been avoiding going out to the workshop as it's bloody cold here. Other than reading some of the inspiring stuff on this forum I need to bring this up to date
I modified the o/s rack clamp and fitted the rack bracing brackets. One more job off the list
IMG_20201202_194009272.webpIMG_20201202_194014108.webp
 
Well great minds think alike, problem is my workshop is about 20 foot to the apex of the roof and My space heater does a great job of heating the attic as it were. Jobs for next year now include flattening off the floor and fitting a ceiling at about 10 foot height, so I can heat it in winter. This week I'm in the machine shop in the back garden which is 12' x 9' and all insulated and much more bearable at this time of year. I just feel the cold more these days, never felt it when I was young and keen.
 
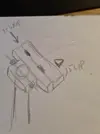
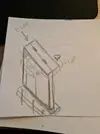
I'm looking for some inspiration here people. I am trying to sort out the reverse lockout. This also has to double for the end of gate for 1st and 2nd, or to put it another way, when the lock is in you move the lever up to the lock and that is 1st/2nd gate, if you need reverse you flip the lock and you get the extra travel for reverse
Anyway I have got as far as the riser post, but have got creative block for the lock itself. The picture shows where I'm at. The one I had on the 8 was spring loaded and worked well, more by good luck than good judgement. Simple is beautiful on these things
Reverse lock (1).webp
 
You have a good idea there. I think I will have to mock up something with a thread on it to find exactly where I want to be, then change it to something like your suggestion, as it is easy to use and physically strong and simple. When downshifting from 3rd to 2nd I want to be able to wang it across to the rail and pull back for second, and indeed slam it forward for first if need be. Cheers
 
I'd do it like this personally as that little round pillar will rotate if you bash it when stirring the gears. (Obv ignore the pillar thing that wouldn't be there I just drew over it)
20201207_140555.jpg
 
Yep I get what you mean, for now I'm going to find the settings I need with something that will screw adjust , then once that is decided then I can finalise it. The whole linkage has been a pain in the neck , and I am beginning to think it is a material choice issue. The linkage under the car is heavy wall stainless tube , which is actually quite flexible . I think I would be better off using a thinwall carbon steel tube which would be much more rigid and get rid of some of the slop in the system. Just need to find a local supplier. My local branch of Pirtek used to be excellent , but changes in staff have changed it completely, and not for the better. I have a DC tig, so welding steel , stainless and titanium is fine , wish I had the money for an AC/DC machine it would make fabrication much easier
 
Slight change of tack today
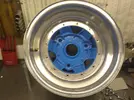
I have had most types of 3 stud Alloys over the years. For me the cream of the crop are Madin, and Gotti for looks and lightness. PLS are also nice, as are Image, and their quality is good, but there is a real weight penalty to pay. I got a set of GR.4 Alpine Gotti X13 when I sold Liz's 8 and they lay on the shelf while I decided their fate. The Dauph had a set of Image Billet 60's on it but they are twice the weight of the Gottis, so I decided to rebuild the Gottis. The main reason for this was finding Mike Barnby of MB Racing Wheels who can make proper lightweight wheel rims at a fraction of everyone else's prices MB Racing Wheels . The original wheel sizes were 7" front and 9" rear which were tight on the rear arches, so I decided to refurb them as 7" and 8". I had a new outer front left over from the 8G, so ordered 4 rims from Mike and built up the wheels. The fronts are basically new, just the centres are original and the rears were built out of the best leftovers, and I was pleased with the result. All was well for about 4 weeks when 1 of the rears stopped holding air. I then decided to get another pair of rear outer rims, so that I now basically have new wheels. They arrive today, so I set about fixing the leaker.
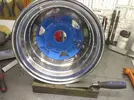
Pic 1 is the new outer rim

Gotti rim (1).webpGotti rim (2).webp
 
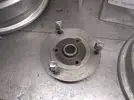
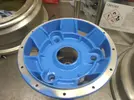
The out of focus pic above shows the state of the old outer, which I spent a bit of time and effort on. The one below shows the mandrel I made from an old rear hub when I made my own Deltamic copies years ago. I clocked it up true in the lathe and skimmed the old Gotti centres to true them up the next pic shows the centre with about 3-4 thou removed.


Gotti rim (4).webp
Gotti rim (5).webp
Next job is to bolt it all together using high quality bolts, washers and nuts work diagonally on torquing them up
then its a bead of silicone along the join making sure it is well stuck to both parts (this is where I had got it wrong last time and had a tiny blowhole)
Gotti rim (7).webp

And Finally the best in Wheel PornGotti rim (8).webp
Now Tyre on and balance it
Happy Motoring
 
Back
Top