There is more to life with TurboRenault.co.uk

Register a free account today to become a member! Once signed in, you'll be able to participate on this site by adding your own topics and posts, as well as connect with other members through your own private inbox!

Bumblebee 2 featuring LY R26

The lad with the Meglio in Misha's latest Nurburgring video uses an Allloy Radiator off a Megane. I think its just a run of the mill GT Performance one off eBay and it seems to hold the temps down a bit better than the old OEM one does in my car.
 
The lad with the Meglio in Misha's latest Nurburgring video uses an Allloy Radiator off a Megane. I think its just a run of the mill GT Performance one off eBay and it seems to hold the temps down a bit better than the old OEM one does in my car.
Aye i recall Nathan using one. The alloy ones look to be similar construction to oem my mate ran one years ago in his r26 and seemed ok.
 
Updates

Super busy but managed an hr on the r26 to sort the drivers side window.

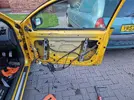
The window was working when i bought it but failed. Stripped it down and briefly worked when the wiring was moved. Assumed temic module or motor was knackered so stuck it back together and purchased a 2nd hand loom and reg.

Stripped down today to fix, plugged new reg in and still not working. Plugged new door loom in and tested new reg, working. Plugged in the original reg in and worked so faulty loom.

20231111_151324-jpg.webp


Was going to simply swap door loom out but the one i have is from a dci 175 so no light on doorcard. To save adding wiring to the new loom as bit of a carry on, i had a look at the old loom.

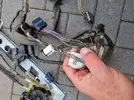
Stripped back the tape on the old loom starting at the regulator wiring as noted a new plug had been spliced on but joints hidden under tape. Once tape was removed, the fault was pretty obvious.
20231111_151339-jpg.webp

Chopped off the corroded end of wire back to good copper and spliced a new piece of wire in.

Plugged in and working straight away so was potentially a free fix. Still good drivers door temic and regulator are fairly hard to find so handy to have spares as they are a known weak point on the megs.

All back together and drama over.

Thanks for reading!!
 
Updates.

In earlier updates i changed the lower part of the turbo return pipe due to oil leaking onto the manifold. Not enough for massive concern but enough to cause a whiff of oil when pulling up at traffic lights.

When lower part of oil return pipe was replaced, noted chemi metal all over the top part from a previous bodge. Replaced lower pipe and little difference and still weeping a bit as i reused the old gasket.

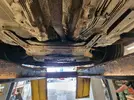
The problem with diagnosing this leak is visibility is terrible from top and bottom.

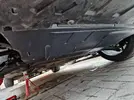
This is the view from the bottom when on a lift.
20231007_170048-jpg.webp

Access looks ok in pic but subframe is right in the way.
20230819_165720-jpg.webp

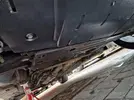
Exhaust and driveshaft, and gearbox too.
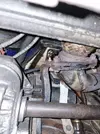
20230819_164942-jpg.webp

In reality its a right carry on to gain access to inspect and even harder to change parts.

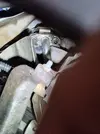
Close up of return pipe join separating the two pipes with phone wedged in.
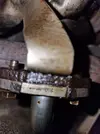
20231105_133325-jpg.webp

As seen wet with oil. I tried to borescope the return area, but was inconclusive to what was the source of the leak as again, access terrible.

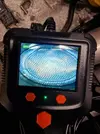
To check turbo i took the pre cat lambda out and used the borescope to inspect the turbine wheel to see if it was weeping oil and any oily deposits, to see if the rear turbine seal was leaking.
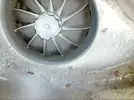
image_2023-11-04-12_46_43_196-png.webp

Looked pretty dry so assumed OK.

Came to the conclusion that the leak was either the top part of the oil return pipe or the top return pipe gasket. The top hard pipe can crack and is right above the exhaust manifold so was a candidate.

As above access is terrible so quickest route was to take the cold side of the turbo off which is not too bad to do. Half hour and the turbo core is out.
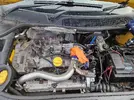
20231118_143258-jpg.webp


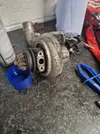
With turbo removed i was still not 100% if it was the gasket, oil return pipe or core leaking as basically oil all over. The top part of the oil return pipe had tons of burnt oil on the outside and a dent in it for some unknown reason as somebody has been in the area before.

Turbo after clean up.
20231118_143315-jpg.webp


Took a gamble on it being the gasket leaking and dripping onto the manifold.

I had a spare top return pipe in good nick, so cleaned the joint faces up so they were perfectly clean and fitted new oem gaskets on both joins and torqued to suit. All back together in 2.5hours total.

Took it for test drive, giving it a few miles to burn the oily residue off. Was skeptical if fixed or not, but seems to be OK and no more oil fumes on idle. Done 50miles and checked the return pipe as can get hand down the back and all seems to be dry so will run it and monitor. If it comes back ill change the turbo core.

A few parts have been arriving so more work to do soon.
20231114_130750-jpg.webp


Thanks for reading!!
 
Updates

Intercooler on the r26 was a crap tube and fin gpi, chinas finest which looked terrible and performed as s**t as it looked from datalogs, 20+deg above ambient temps on boost. On turbo cars low charge temps are always king to keep the engine happy with nice cool dense air, which releases more power and keeps the engine away from detonation.

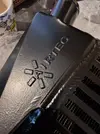
Upgrade was needed. Bar and plate are always king for cooling. Browsing 70mm airtec on ebay and got an offer on one new for a great price so hit the switch.

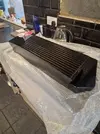
Arrived a few days later. Nice bit of kit, good quality welds and nice air duct.
20231114_130758-jpg.webp
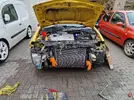
Had a good used oem valeo rad to fit so done it all in one shot.

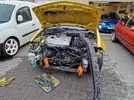
Front end off and stripped in half an hr.
20231125_140252-jpg.webp
Parts all over as usual.
20231125_140256-jpg.webp
Rad fitted, also replaced thermostat and filled with fresh type d coolant. Fitted an 83deg meg 250 stat as thats what i run in all my f4r's.
20231125_142648-jpg.webp
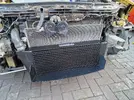
Airtec intercooler fitted, straight on no mods required. Was going to replace aircon condensor but the aftermarket one was wrong so had to refit the original. Ill revisit that before summer.
20231125_150606-jpg.webp
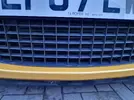
Back together in 1hr30, looks nice and discreet.
20231125_155910-jpg.webp

Main reason for changing rad was due to the higher coolant temps on boost. I had an aftermarket valeo rad with less bars than oem rad, temps were around 89-92 on cruise which is acceptable, but shooting up to around 100 when on it. Dash temp gauge never moved but they never do unless stupidly hot.

Its typical for the aftermarket rads for megane to cause overheating when used hard. Oem are quite hard to find now so good used had to do. Coolant temps appear to be bang on now on datalogs, around 83-87deg on cruise and into the low 90s on boost. That will do.

The Airtec works excellent from the datalogs. Charge temps 1-2deg higher than ambient temp on boost.
20231125_172607-jpg.webp
Infact it appears to work a bit too good compared to the gpi and its causing it to overboost a little and closed loop boost control is reigning in the boost by closing the throttle. Very familiar this had the same issue on the Kangoo!!

Boost pressure measured vs map.

20231125_204315-jpg.webp

Not to worry as ive planned in booking it into Efi for a map.
 
Updates.

Weathers turned crap so decided to go back to stock wheels for a couple of months.

Planned on doing it on sat but far too cold
20231202_114300-jpg.webp
20231202_114304-jpg.webp
20231202_114314-jpg.webp
20231202_154719-jpg.webp

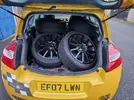
Sunday was better so loaded up the R26 van with original wheels on linglong gallopalong shite tyres and good used michelin ps5 that i was given a while back with 4-5mm of tread.
20231203_132956-jpg.webp
Down to the local garage and my mate swapped the tyres over to the michelins and used the 4poster to fit them, saves messing about at home.
20231203_163713-jpg.webp
Looks alright to be fair. Prefer the comps but they will do for the couple of months of bad weather we have.
20231203_200000-jpg.webp
20231203_200016-jpg.webp
20231203_184509-jpg.webp
20231203_195946-jpg.webp
Thanks for reading!!
 
Updates.

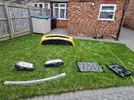
Undertray was missing as per all of the plastics underneath thanks to previous rough owners. Ive reinstated all the rest apart from the undertray. Its not a massive issue but nice to have, to keep the crap out of the engine bay and promotes airflow through the engine bay and out the back of the subframe. Also catches the odd drip of oil and saves it going on my block paving as these f4r always leak from somewhere?!

Megane 2 rs has an engine brace and runs a half sized undertray, Our blue meg 225 still has it fitted. Anyway they are pretty much made of unobtanium 2nd hand now as they have all been ripped off and binned previously.

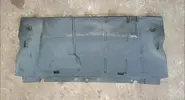
Pic of mk2 rs undertray off google
fb_img_1701956112305-jpg.webp


Compared pics of normal mk2 megane undertray and they are identical apart from about twice the length. 2nd hand oem commanded good money for what they are. Seen a cheap aftermarket one on ebay £30 new. Worth a punt?!

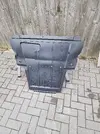
Wait a few weeks and it eventually arrives on the slow boat from wherever. Says manufactured in Turkey on sticker.
20231210_102944-jpg.webp


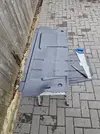
As mentioned above, it wont fit with the rs subframe brace. Marked line out and cut.
20231210_103442-jpg.webp

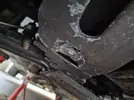
Offered up and the nutserts in the front subframe were knackered with original bolts seized in. Old ones pulled out and larger M8 nutserts fitted.

20231210_110848-jpg.webp

Fitted.
20231210_113030-jpg.webp

Subframe brace in situ.
20231210_113033-jpg.webp


Daft hours work. Should keep the shite off the underside of the engine bay.

Thanks for reading!!
 
Updates.

First of all Happy new year all and all the best for 2024!
20231231_173536-jpg.webp


On the runup to xmas i didnt really use the r26 much, as all over with work and the one day i wanted to use it the mrs took it before i got chance :LOL:

Went away to tenerife for a week and seen its spanish twin in Los Cristianos. Seen this approx ten years ago the first time i went, a few battle scars now but still hanging in there! No doubt worth a small fortune on the island as all cars are expensive compared to uk.

Survivor.
20231217_132533-jpg.webp


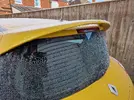
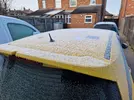
Used it a bit over xmas. Give it a clean as it had not been washed in a month or so and was starting to look a bit unloved. Also removed the R26 sticker from the back.

Clean.
20231226_160209-jpg.webp


Blending in.
20231224_205605-jpg.webp


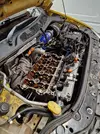
Its had a chirp on the aux belt area from cold recently and what sounded like a noisy lifter if sat a few days (more on that later). Its had a head job and cambelt done not too long ago, but ive seen a few bits that i was not happy with so the decision was took to sort it.

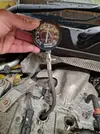
It runs decent and seems to go well enough but before starting i comp tested it and had a look in the bores.

Sanity check. All around this and within 10%
20231231_130329-jpg.webp


Looks like a piston. Nothing to really note on any cylinders.
20231231_131325-jpg.webp


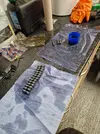
So with this in mind i dug out a spare set of lifters and cleaned/checked them. 3 seemed a bit weak but can make a good set up out of the current ones.

Diesel everywhere. Stinks
20231228_212215-jpg.webp


To be continued..
 
So after sitting about doing nothing for a few days got the R26 in the garage for surgery new years eve.

As i said above this had been in a garage and had the head off and new valves before i got it. It ran ok and it looked to have a recent cambelt on, but i was seeing bits i didn't like when looking. As its going in for a map soon and the ticky lifter i decided to bite the bullet and change lifters etc.

As seen in the last post i comp tested it which was actually just before i pulled it to bits. I found 2x loose spark plugs on cyl 1&2 so that will have been the ticking id imagine. Not uncommon for f4r that.

Id noticed when i first got it that the cam cover had the incorrect sealant and the inlet pulley nut looked slightly rounded which had me wondering if torqued right. Also all 4x locating dowels were missing, incorrect 5pk aux belt (doesnt really hurt just not right).

Gasket maker and no cam cover locating dowels
20231231_195023-jpg.webp


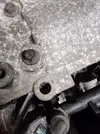
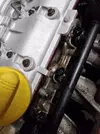
More gasket maker and pulley nut not looking too hot
20231231_191526-jpg.webp


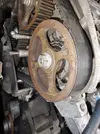
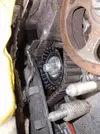
Tensioner in the region but cant see tension mark for whatever reason, wrong nut non flanged.
20231231_191521-jpg.webp


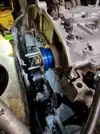
Im no stranger to cambelts on these f4r engines and as usual got the cam slots somewhere near ready to pin the crank and was struggling to get the pin in. In the end i gunned the crank pulley off which was not mega tight, so could see the key slot and location compared to the oil pump case to check its in the correct hole - the timing was miles out on exhaust cam when crank pinned.

Silicone the world
20231231_195611-jpg.webp
20231231_195619-jpg.webp


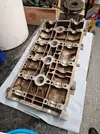
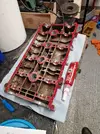
Nice weld on cam cover, assume somebody has fcuked up and broke it when lifting engine.
20231231_195008-jpg.webp


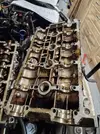
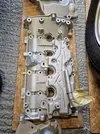
Stripped, head looks ok journals good etc
20231231_203606-jpg.webp


Bit of a shitstorm really must have been having a bad day on this one.
 
I was almost at the point of pulling the head and binning it as was concerned that the lack of locating dowels was going to be a mismatched cam cover and the repaired corner. However journals and cams looked ok so decided to go with it.

Repair - not great but flat and doesnt leak
20240101_172539-jpg.webp


2 hours of picking silicone off
20240101_113903-jpg.webp


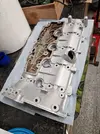
Clean finally, dowels robbed out of spare head and fitted.
20240101_172443-jpg.webp


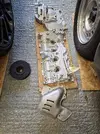
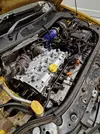
I never planned on blinging this up but whilst cover was off give it a blast of vht aluminium to tidy up as only ten min job as id ultimately regret not doing it. Ive used this on the kangoo and its very durable so should last.

Looks tidier with minimal effort.
20240101_122242-jpg.webp
20240101_122244-jpg.webp
20240101_172158-jpg.webp


Bit of engine assembly lube on journals and correct anaerobic Locktite 518 cam cover sealant.
20240101_174609-jpg.webp


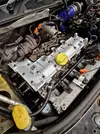
Lifters changed/set made up. Cams back in, cam cover refitted and torqued to spec. Tested cams and moving ok with cover locating dowels fitted so all OK. Tried a new breather cover gasket from autodoc see how that goes.

Bling
20240101_180420-jpg.webp


Breather plate fitted and torqued.
20240101_183912-jpg.webp


Uniform bead of 518.
20240101_184106-jpg.webp


Had to call it a day at that. Sump off next as ive seen a couple of bolts missing and tons of silicone so want a look in.
 
Last weekends update

Started off with installing new cam seals.

Ching spec mandrel doing the business.
20240106_121054-jpg.webp


Dug out the homemade crank puller.

Easy work.
20240106_123242-jpg.webp


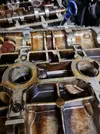
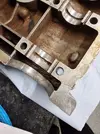
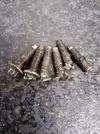
That took a whole half an hr max. Onto sump removal next. Im no stranger to the etorx bolts holding them on and how soft they are. 5 bolts were missing and some loose so all was going well, until found out that previous bodger had rounded off 5 and no amount of burring the heads would get a good bite on the bolts. Typically one of the deep bolts at the flywheel side was causing issues which was a major problem and didnt want to.take gearbox off for access. Nearly give up at this point and pulled engine out but 4 hours laid on my back with cold chisel and long drill bit and its off.

5 bolts that can royally fcuk your day up.
20240106_195158-jpg.webp


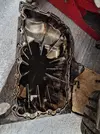
F4r sump fully drained by plug and oil left, never fully drains, better off using vac pump. Silicone all over, old gasket was stuck to the block.
20240106_195146-jpg.webp


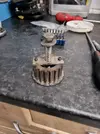
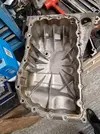
Sump had suffered a little in the process, was not the worst and would have went again. However i have a few in stock so changed it.

Good used meg sump cleaned and ready for use.
20240107_121042-jpg.webp

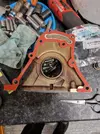
Oil pump closing plate gasket replaced and new crank seal installed. Again a couple of bolts were missing.
20240107_124051-jpg.webp


Reinstalled sump with new gasket which went pretty smoothly. Cracked on and fitted new water pump, tensioners and cambelt using gen renault tools and torqued to spec.

Mot 1801 in use.
20240107_191211-jpg.webp


Looking more complete.
20240107_211557-jpg.webp


Its not far off now, handful of jobs left to do. Ran out of time with the sump issue taking ages so will be back on with it next weekend.

Thanks for reading!!
 
Back
Top