There is more to life with TurboRenault.co.uk
You are using an out of date browser. It may not display this or other websites correctly.
You should upgrade or use an alternative browser.
You should upgrade or use an alternative browser.
5 GT Turbo Another Red Renault 5 GT Turbo On It's Way Back To The Road
- Thread starter Leigh5t
- Start date
Leigh5t
Well-Known Member
Yes mate, it stinks!Gearbox oil sure has a distinctive aroma, just a bit annoying but better now and fixed than on a decent run somewhere in the future

It’s just one of those things. I’ve covered it in some absorbent granules/cat litter type stuff for now. To be honest, it’s less of a pain in the arse than the water leaking in!
I’m just surprised a Renault has held on to that much oil for all these years!
Leigh5t
Well-Known Member
Interesting. Are they interchangeable?Thanks for the tip though. I’ll make sure I fully drain it and replace with whatever is recommendedThats Dexron III, autobox oil/power steering fluid. Use proper gearbox oil not that when you rebuild it.
Actually, maybe the car spat it out!
DaveL485
Staff member
Not really. Will it work, yes, is it ideal, no!Are they interchangeable?
Saying that I wouldnt say use recommended oils anyway - old oil specs and tech. Use modern synthetics, 5w50 for engine for this era and 75w80 synthetic for gearbox. Note this is my personal preference, i'm sure others have other opinions!
Leigh5t
Well-Known Member
Great, thanks for the info.Not really. Will it work, yes, is it ideal, no!
Saying that I wouldnt say use recommended oils anyway - old oil specs and tech. Use modern synthetics, 5w50 for engine for this era and 75w80 synthetic for gearbox. Note this is my personal preference, i'm sure others have other opinions!
Steve Swan
Well-Known Member
Modern, non hypoid, non bevel drive, use any thin Piss. The lighter the oil the longer the synchros last. ATF has enough EP properties to look after the gears. To be fair a good 75 synthetic would be a better technical solution.
There's no shearing forces to contend with so big EP number not reqired.
There's no shearing forces to contend with so big EP number not reqired.
Leigh5t
Well-Known Member
Thanks for this, Steve. When I get round to it, I’ll drop the remaining oil and refill with decent quality synthetic 75, as per yours and Dave’s recommendation. I’m pretty sure I’m going to drop the engine before it goes back on the road to give it a once over. Is there anything I should check with the gearbox too, whilst it’s out? Cheers.Modern, non hypoid, non bevel drive, use any thin Piss. The lighter the oil the longer the synchros last. ATF has enough EP properties to look after the gears. To be fair a good 75 synthetic would be a better technical solution.
There's no shearing forces to contend with so big EP number not reqired.
Steve Swan
Well-Known Member
If it was quiet and free shifting, then it should be fine. Probably worth doing the driveshaft oilseals (if they are easy to replace) and the shifter oilseal if there is any signs of leaks. That will be on the top of the box, so shouldn't leak anyway, one of the things they got right designwise on newer boxes is to put the holes above the oil level ....
Leigh5t
Well-Known Member
Cheers @Steve Swan .Noted.
Brigsy
Media Mogul. Instagram legend.
Selector seal is gearbox strip down to fit in jb/jc. Every one ive seen has leaked too, some drippers, some gushersIf it was quiet and free shifting, then it should be fine. Probably worth doing the driveshaft oilseals (if they are easy to replace) and the shifter oilseal if there is any signs of leaks. That will be on the top of the box, so shouldn't leak anyway, one of the things they got right designwise on newer boxes is to put the holes above the oil level ....
Leigh5t
Well-Known Member
Poeticsome drippers, some gushers
DaveL485
Staff member
Steve Swan
Well-Known Member
In that case, if it ain't Gushing don't fix it.....
clarky_gtt
Well-Known Member
I had a lovely original gearbox, but thought as I was going balls deep on my restoration I might as well have it rebuilt. The worst thing I have ever done. It now leaks and pisses me off. If it ain't broke...paint it and make it look nice 
Leigh5t
Well-Known Member
This should just be general life advice!If it ain't broke...paint it and make it look nice
clarky_gtt
Well-Known Member
Definitely. It didn't leak before! Now it does. And I'm £500 lighter for the troubles
Leigh5t
Well-Known Member
I've not done a proper update for about a month so here goes....
Floor flange prepped and painted
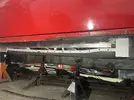
New inner sill made and tacked in place
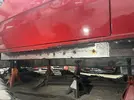
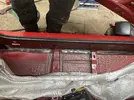

Working my way between welds, trying to keep it from warping.


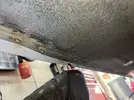
Welds dressed back

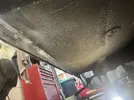
Now to clean up the front jacking point area, which initially looked bad.
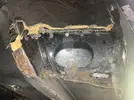
Turned out ok In way better condition than the other side was.
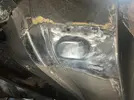
Hydrate 80 for now and I'll come back to that.
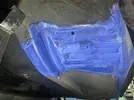
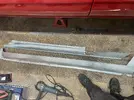
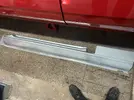
A bit of prep work to the outer sill. To be honest, this sill was poor compared to the other, even though I bought them as a pair. I spent quite some time trying to improve it, and although it's still not great, it's passable....and hidden behind the kit.
Marked out and cut
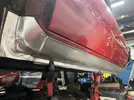
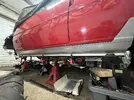
Floor flange prepped and painted

New inner sill made and tacked in place


Working my way between welds, trying to keep it from warping.


Welds dressed back


Now to clean up the front jacking point area, which initially looked bad.

Turned out ok In way better condition than the other side was.

Hydrate 80 for now and I'll come back to that.

A bit of prep work to the outer sill. To be honest, this sill was poor compared to the other, even though I bought them as a pair. I spent quite some time trying to improve it, and although it's still not great, it's passable....and hidden behind the kit.
Marked out and cut


Leigh5t
Well-Known Member
Back to the front jacking point
Primed & seam sealed. I reckon I went a bit heavy with the seam seal.
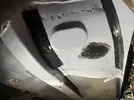
Coat of stone chip
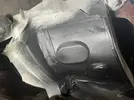
Replaced this section between coats of paint
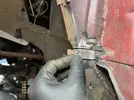
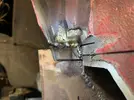
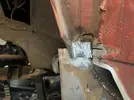
Right, after prepping the inside of it, the jacking point is ready to go on.
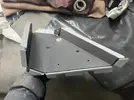
Welding upside down, on your back, with sod all room....is crap.

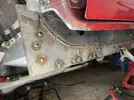
Welds cleaned up

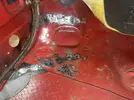
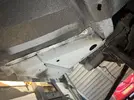
Inner sill cleaned up
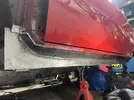
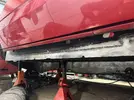
Hydrate everything

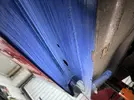
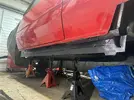
Almost ready for the outer sill.
Primed & seam sealed. I reckon I went a bit heavy with the seam seal.

Coat of stone chip

Replaced this section between coats of paint


Right, after prepping the inside of it, the jacking point is ready to go on.

Welding upside down, on your back, with sod all room....is crap.


Welds cleaned up


Inner sill cleaned up


Hydrate everything


Almost ready for the outer sill.
Duncan Grier
Well-Known Member
Fantastic progress.....many hours of fun fun fun 
Similar threads
- Replies
- 1
- Views
- 68
- Featured
- Replies
- 91
- Views
- 2K
- Replies
- 4
- Views
- 387
