There is more to life with TurboRenault.co.uk

Register a free account today to become a member! Once signed in, you'll be able to participate on this site by adding your own topics and posts, as well as connect with other members through your own private inbox!

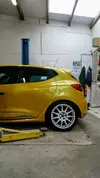
Clio Ricardo's Liquid Yellow 200 EDC

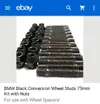
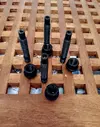
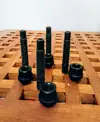
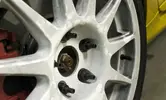
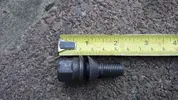
Heading towards the track theme and the swapping between road and trackday wheels I thought I'd order a set of wheel studs. These are future proofed just in case I go 4 pot Brembo which need 16mm spacers to clear the calipers.

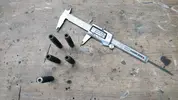
While messing with fitting the Turinis I took a couple of measurements just to be sure I'd order the right length studs.
DSC_3970.webp_20180122_205728.webp
 
Loctite on the threads, torqued up and left for about 3 hours. Manufacturers say to fit the wheel and finger tight the nuts to the wheels but not to torque them up for 24 hours.
 
Messaged my friend with the Clio 182 last night and he's suggested fitting the wheel studs at his place of work this Saturday. He works for a company that restore, build and spanner on classic and Cobra type cars, so we'll have full use of all the workshop facilities.

Also still pondering over the Pro Alloy FMIC January deal..... Trackday... Charge temps... Hmmm.
 
Crumbs. Would hate to see you too serious if a 1/2 cage is a minor mod [emoji41][emoji41]

Will be great I am sure.

Get that IC already.
 
Stud Saturday?

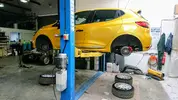
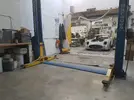
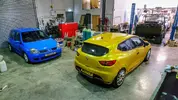
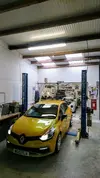
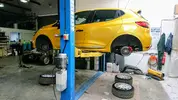
Well, time to pop over to Hertfordshire to meet up at a mates place of work to fit the wheels studs. It's a massive unit with a few projects on the go but thankfully as mentioned a free space in the ramp to hoist the Clio up on
DSC_4012~2.webp
DSC_4012~3.webp
DSC_4014~2.webp

Started with the rears, just to say that the 75mm studs were a guess on my behalf so I wasn't 100% sure until today when we'd physically attempt to fit them..... Hmm.... Ok so they're a tad long on the back, they're pretty much flush with the spoke and to me didn't look right so we aborted and thought we'd better try the fronts.

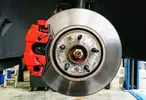
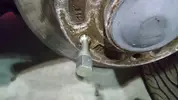
Much better, on the front disc there's a 10mm recess so the stud sank in deeper than the rear setup.... Better, add in 4mm more meat in the front wheel as they're not machined and we're in business. It works and visibly looks better. With that the threads are cleaned out, Loctite on the wheel stud threads then screwed in finger tight. After that they're tightened using the Allen key on a ratchet.
_20180127_132051.webp
_20180127_141055.webp
DSC_4021~2.webp

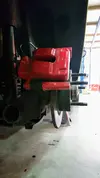
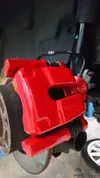
They say as a guide to let the Loctite cure for around 3 hours so with that in mind I clean all the Lux pack calipers, help my mate with his side projects, chat, make coffee, mooch about the unit.
DSC_4023.webp

So in the end a set back as the rears are too long, I'll be making a phone call Monday to swap the studs for smaller ones then fit later on next week.
DSC_4014~2.webp
 
Spoke to MTEC this morning and they're swapping ten of the 75mm wheel studs for 68mm. I should have them the latter part of this week.

Spoiler Update
A date for fitting and collection has finally been made! 10th February, just under 2 weeks and I'll have it in my hands. While I was my mates workplace I spoke to his work colleague who does paint spraying on the side too so I'm going to see if he's interested in painting the spoiler.
 
Stud Saturday Part Deux

The 68mm wheel studs arrived Friday and with a few texts sent another arrangement was made to rendezvous at my mates place of work early doors again.

After a cheeky Mcmuffin nearby we headed to the unit, we didn't have the 4 poster this time as a classic Land Rover was in its place so we decided to jack the back end and place it on axle stands.
DSC_4042~3-01.webp

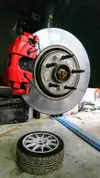
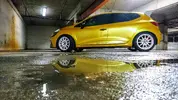
First things first, we need to check that these shorter wheel studs are going to work. Better, but would have been ideal if they were just a little bit shorter... 3mm to be precise. I wanted them to look exactly the same as the front setup so we decided to grind the 10 wheel studs down to give us a length of 65mm.DSC_4050.webp
DSC_4055~2.webp

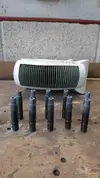
A smidge spray of primer on the cut ends them a blast of black.
DSC_4057.webp

While the studs were drying I turned my attention to cleaning out the threads in the discs ready for the studs. Once the paint had dried in front of the fan heater they were Loctite on the threads then fitted.
DSC_4045.webp
DSC_4058~2.webp

Once again waiting time for the Loctite to go off then fit the wheels and torque the nuts up. I also checked the torque on the front wheels after last week and they were still as tight... So all good.

A quick wash for both cars, and jobs a gooden.
DSC_4074.webp
 
Finally, after paying the deposit in the middle of November I had the official date for having the spoiler fitted. I didn't want it posted to me to the try and fit it myself, I'd heard stories of it not fitting 100% on each Clio so I had it arranged for me to head down to Yeovil in Somerset where the chap moulds and makes the spoilers.

Saturday 10th Feb is an early start to be there for 10:30am, a quick photo at a nearby location as its sunrise and its clear.
DSC_4105~2-01.webp
Arrive at the workshop just after half 10 then reverse the Clio in for the boys to start fitting the spoiler.
20180210_113524.webp
DSC_4109~2.webp_20180210_115806.webp
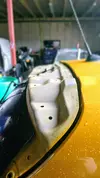
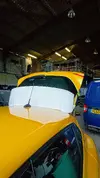
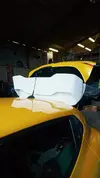
It took a couple of hours, the black under trim has to be removed off the OE spoiler to be fitted on the primered replacement lower spoiler. With a bit of sanding and tweaking the first part was fitted to the tailgate. Then the upper bit slides over the lower and bolts to the tailgate, reassuring to know it's bolted to that and not the other part of the spoiler! Especially when it generates over 100kgs of downforce at speed! Spoiler on and fitted by lunchtime so it's time to head into Yeovil to check in, have a few beers and rest up.

First pic of the spoiler I took after fitting
_20180210_173311.webp

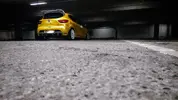
Back home by Sunday afternoon, a quick pikey £3 jetwash then more photos in a location that's becoming a fave of mine.
DSC_4138~2-01.webpDSC_4134~2-01.webpDSC_4137-01.webpDSC_4131~2-01.webp
DSC_4145~2-01.webp
 
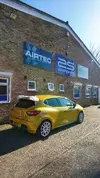
Dropped the Clio off at Airtec, they've been using it to mock up some resonator silicone replacement hoses back in November. They wanted it back a second time to now check on fitments of aftermarket alloy boost hoses to replace the OE hoses that run to the OE intercooler. The original plastic part cracks so they're making alloy replacements.

As I'm local to them and don't use the Clio much I said they were more than welcome to borrow it.

Another early morning photo opportunity
DSC_4170-02.webp
DSC_4174-02.webp
 
Back
Top