There is more to life with TurboRenault.co.uk

Register a free account today to become a member! Once signed in, you'll be able to participate on this site by adding your own topics and posts, as well as connect with other members through your own private inbox!

Alpine Renault 8 GTT

No pics from Sun as it was too damn cold to hang about, I got the O/S front wing fitted plus wheel and tyre and left for warmer shores. Now just got the brake light switch to fit and the rear wheels and it is on the deck again. I then need to get the back panel fitted and it is a whole car again (well nearly) Then I can take it all apart again, so it can be welded and painted
Never a dull moment here........... Plenty cold ones tho.
 
I have been working away at the 8, but life has been getting in the way in the shape of my brother in law's 2013 Transit connect which seems to be developing one issue after another .
Anyway there has been a development

IMG_20211130_103515057.jpg


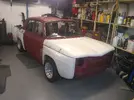
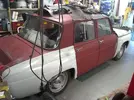
This is sitting on my wets to get an idea of final wheel rim widths. The front is too high, but no big deal and easy to rectify, next job is to get its ass all fitting together (it's a 3 layer sandwich) then it's hopefully off to the bodyshop for welding and painting
More soon.................
 
Still being haunted by the Connect. It's now either developed an EGR fault or a Turbo issue after putting a tiny split in the boost pipework . It is easy to blank of the EGR, so I'll try that and see FFS.
The 8 progresses now it is Royal Mail haunting me by taking ages to deliver anything to me . Anyhow nearly got all it's Ass together and it looks good . Just got the bonnet catch to finish and the fuel tank to mount up.

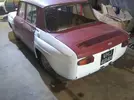
I see you baby, Shakin that Ass.IMG_20211203_151735260.webp

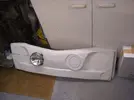
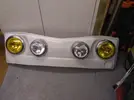
I have also started on the front panel

IMG_20211203_215344561.webp

More soon...........
 
Monday came and Paul came up to inspect progress and discuss further work. I think we know what's happening next. I have to finish off the bonnet catch and fit the fuel tank (temp ) and finish off the anti-roll bar, then its off to the bodyshop for a few weeks after which it will be time to get it going and shake it down. While it is away on it's hols, I have the Gearbox and axles out of a replica works A110 to overhaul, should be interesting as it was built as a one off. I'll post that up on the Dauph /workshop thread
cheers
 
This week I 'ave mostly been Fighting with a Transit Connect. When I'm not doing that I am trying to sort through the hundred or so minor details that need addressing before the bodyshop, however I seem to be getting through them. One of the messier tasks was the front panel which is on the home straight now.

IMG_20211211_165548621.webp

More soon.........
 
I have genetically modified Rally Design's Sierra Anti-roll bar kit to R8 Dimensions. This was done at my old Employer's Welding contractors premises. I picked a bad time to go as they were in the middle of a High pressure Gas job (welding inspectors and other bods in attendance) I had hoped to do a small piece on How to measure up and bend items like this, but ended up leaving it with the Workshop manager Who did it for me in my abscence, Bending thick section keeping the desired centres gets a bit involved, so if I've time later I'll do a couple of drawings for anyone daft enough to want to have a go.

IMG_20211214_142515325.webp

Modified bar with the original used to determine the centre width

IMG_20211214_142530243.webp

Lovely tidy heat and bend. I would not have had such a small heat affected zone. Big up to John the Gaffer at Crown. He is an Artisan in his field.

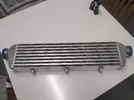
In other news the Quest for the bits we need after the bodyshop has started, so today the intercooler showed up

IMG_20211214_155114191.webp

Hope it bloody fits!!!
 
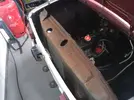
Went out to the car this evening to get a blade length on the Anti-roll bar, which is ready to be finished off. I decided to try the intercooler by fitting the rad panel in and away we go.

IMG_20211214_204641273.webp

A couple of swift incisions were made at what looked like the best place and the rad. panel was flattened off

IMG_20211214_205221034.webp

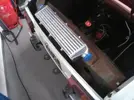
The intercooler was sat on it .

IMG_20211214_205232524.webp

I think we might just get away with this............
 
Not sure if I have read in the thread, is it going front rad in this? and are you then going to add a scoop to the rear to reverse the flow of air to its normal travel to help with intercooling?
 
Not sure if I have read in the thread, is it going front rad in this? and are you then going to add a scoop to the rear to reverse the flow of air to its normal travel to help with intercooling?
It is actually keeping its original cooling system, albeit with a nice ally rad. The plan is to blank off the side spaces between the rad panel and the back panel (a la 8G) So the airflow is, Down through the louvres, through the intercooler, down again to the oil cooler and radiator, Then the propeller (big 6 blade job) blows the air over the engine and turbo. The R8 fan moves as much air at tickover as an electric one can fullstop . At higher rpm it will pull any loose clothing and stick it to the Rad.You can usually here the fan above the engine (even on hot motors) The back rad will work up to 160-170 hp no problem. No percolation issues either as it has an aircooled manifold. The downsides are it restricts engine access and uses shaft horsepower to drive the fan.
 
I'm not sure if people are appreciating the years of hard earned experience going in to making this look easy... I certainly am :)
It is always nice to work on your own car but when the opportunity presents itself to have someone with the depth of experience and expertise building your specific car build it then it would be foolish to pass up that chance ... I am enjoying every update and Steve is coping with my occasional weird request well .. mainly by telling me he isn't doing it or to go stand in a corner 😂
 
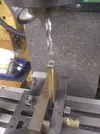
Finished the anti-roll bar blades today, I think, simple cut down and rethread job

IMG_20211215_115208816.jpg

IMG_20211215_122013923.jpg

One of my better Heath Robinson set ups on the mill.

Also 2 seats have arrived which look like they will have to go in rally style Driver up forward / Navigator down back, as this is a narrow old car
More soon.......................................................
 
I have a big space in the garage which means that someone else has a problem for the next few weeks
Actually that's not true it should be fairly straightforward
Looking forward to seeing it painted myself. Still think we should have done the spoof Tour de Corse livery

IMG_20220112_125736418.webp

The Goods inward part of Glenalmond Refinishing

IMG_20220112_125748176.webp

Looks proper daft on those wheels as well as being nearly a foot narrower............
 
So Today Glenalmond Refinishing signed on a new Lackie..............Me
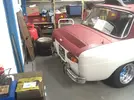
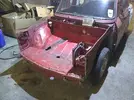
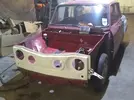
Started removing the front end panels and the front panel, after that Flatting the paintwork in the boot area and prepping ready for repairs

R8TT 13Th Jan (1).webp

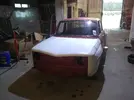
We then started trimming the GRP front to try the fit, which is actually quite good, it will need self tappered into place and the wings and bonnet refitted to make sure it all looks right

R8TT 13Th Jan (2).webp

More soon..........
 
Back
Top