There is more to life with TurboRenault.co.uk

Register a free account today to become a member! Once signed in, you'll be able to participate on this site by adding your own topics and posts, as well as connect with other members through your own private inbox!

Renault 11 Turbo Phase 2 Restoration

Looks Great Steve, my wife wants to do it to her ph1 172 but I don't think she realises how much work is involved.

I do if for a living and never have the time to do my own to the std I work to! I Usually end up rushing things for myself.

My current work build ( one of them!)

Great work on the Midget @Mark_L 👍

Yes i believe you have to be wired a special way to go to all this effort on a car, it doesn’t make it drive or perform any better, just look better. 🤷‍♂️

It’d be great to see a minty phase 1 172 as they’re getting rare now. That was originally my plan with my Clio, but I couldn’t find the Odesssy Blue Phase 1 I would want to re-build to start with.. 😞 so opted for the Phase 2 182 Cup.... again in Blue 😂
 
Thanks for all the feedback on options to rebuild my turbo Gentlemen! 👍 👍

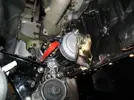
Not really much to show here for a weekend of fiddling on the car.. New starter motor solenoid wrapped in heat shield, and painted:
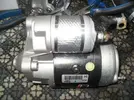
SAM_0066.jpg
Starter motor then re-fitted to car, together with all associated bracketry (that usually infuriates you if you are trying to rebuild the car) :grin.gif:
SAM_0082.jpg
New tie rods fitted to re-painted steering rack:
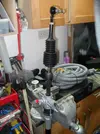
SAM_0068.jpg
And then steering rack, re-fitted to car:
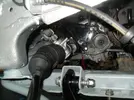
SAM_0069.jpg
I've had a change of heart regarding fitting Hydraulic power steering to this car now.............because I cant really be arsed with all that dirty old fluid rattling round, and I think its always going to give me issues on the drivability of the car because of the engine's ability to drive a PAS pump on an idling carb. I'm now thinking of an electric column system that I can proportionally adjust with a potentiometer will be easier..?

Finished off the wiring loom:
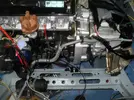
SAM_0078.jpg
And also sourced a new Solid V type alternator belt in the right length, to work with the set up ive got, and bring the alternator a little closer to the engine bay. You can see in this picture that i've also managed to source some Omega clips, to keep all the pipes and wires nicely aligned
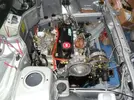
SAM_0083.jpg
I then re-fitted the windscreen wiper motor assembly:
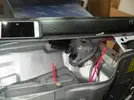
SAM_0092.webp
One more final gratuotous engine bay shot:
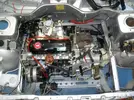
SAM_0089.jpg

As always guys and girls, thanks for reading and your supportive comments, they all really motivate! :)
 
Re . Turbo
Spoke to my neighbor ( he used to work at TT ) he said that they do a rebuild on the standard turbo with a few tweaks to make it spoul up faster and also build The balancing machines that all the other rebuild boys use.
I bumped into and old college last week that I worked with when I was on the spanners and reminded me about the rebuild on my 11 back in the day got it back from paint on Thursday. And got it all back together by Sunday for a Hot date . So I didn’t have to pick her up in the works Renault Extra van with the smell odour le Ep 80 .
 
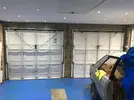
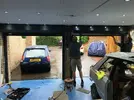
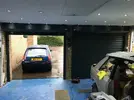
No progress on the car this weekend as we had a day out in London on Satuday 🍺🍺🍺, and then today I was kicked out of the garage as this happened:
36pw8m.gif
Chuffed to bits with the final result
2A3A5A48-69C8-4BDB-80DC-43E3CB524B82.jpeg
F029F6DB-144C-46E1-BA3F-8C88EF41911A.jpeg
174E1BC9-7D48-4255-8CA6-EF9CEADCAF12.jpeg
Even though the old Raider had to sit outside for the day in the p1ssing rain.. ☔
05C747B5-B4A5-4274-A7F7-58B6EDD3675C.jpeg
It was worth it for a few gratuitous beading shots when she came back into the Garage
4BA45C10-25A9-4BB7-8F1D-8A9718542F23.jpegCB3D1728-9B8E-455E-B41F-F1C5CB5A23CD.jpeg

Thanks for reading :)
 
🤪 Warning! Very High Content of OE Lovliness 🤪

So in preparation for tonights activities, I've been busy rubbing down, priming and painting all of the suspension components.

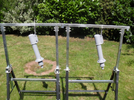
Shock Absorbers first. These units are were the last set of KONI Adjustable Items that Prima Racing were selling a number of years ago, so I grabbed them when they came up. As they were still in good condition (albeit a little rusted and rotton) I gave them some loving. First to rub them down:
SAM_0093.jpg
Then treat the rust with my usual RUSTBUSTER:
SAM_0094.jpg
Then Prime:
SAM_0100.jpg
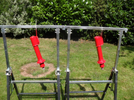
And finally paint:
SAM_0101.jpg
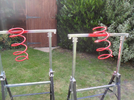
Before doing the all the same process to the springs as-well:
SAM_0103.jpg
I sent away the spring base supports to be shotblasted and powdercoated, as they looked in a right state, needless to say, they came back looking great:
SAM_0106.jpg
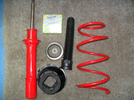
Next it was a case of re-assembling the shocks before. . . . . . . . . . . . . . . . . . . . . . . . . . . . . . . .
GIFMaker.org_4Z6zfq.gif
😍 😘 🥰 CHUFFED to bits with the final results!!

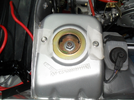
I've only installed everything finger tight for the moment to allow me to remove it all and re-fit the drive shafts when I get them ready. I've even used tape to stop the shock fixing screws from marking the paintwork on the suspension turrets!! 😋
SAM_0131.jpg
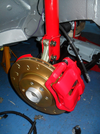
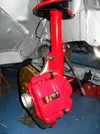
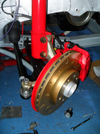
After I finished, I took a few pictures of the finished assembly:
SAM_0127.jpg
SAM_0128.jpg
SAM_0130.jpg

Thanks for reading :)
 
Back
Top