There is more to life with TurboRenault.co.uk
You are using an out of date browser. It may not display this or other websites correctly.
You should upgrade or use an alternative browser.
You should upgrade or use an alternative browser.
Renault 11 Turbo Phase 2 Restoration
- Thread starter Big Steve - Raider
- Start date
Chris Smith
Well-Known Member
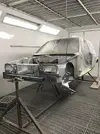
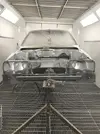
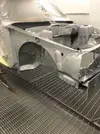
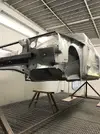
I reckon the truth is Steve has long since finished this project and only slowly updating pics....
Looking good Steve, you must be very excited.
Looking good Steve, you must be very excited.
Duncan Grier
Well-Known Member
Looking very......well immaculate!
Going to be too nice to take out on the mean streets
Going to be too nice to take out on the mean streets
:yes:Excellent! You must be pleased!
clarky_gtt
Well-Known Member
a little jealous here
I need to book some time off and try and steal a booth at work for a week sometime this year
I need to book some time off and try and steal a booth at work for a week sometime this year
Wanted to give you all a taste of the royal FAFF I've been going thru with my re-wiring of the engine bay looms on the 11. As I've already eluded to, the work is a little slow, but there is some satisfaction in doing it yourself, and also knowing that you've done the work, and it's right!!
So what exactly have I been doing? As usual, I will let the pictures do the talking.. Here is two identical looms from the engine bay (One from the Red 11 I broke, and one from my car.)
First I would compare the looms to see which one looked the best candidate to restore:
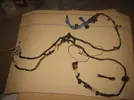
The decision was based on the quality of the connectors, and how complete the looms were. Here you see I was examining the connectors to see which is best..
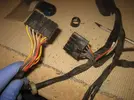
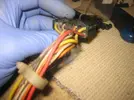
Once the final candidate was chosen, I unwrapped the loom from all the lovley OE Renault Crispy tape/covering:

and would then take a picture of each end of the connector for reference:
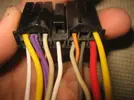
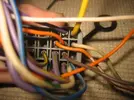
Many of the wires & terminals were showing their age and deteriorating condition well. Here you can clearly see the 30+ year old copper had corroded pretty badly:
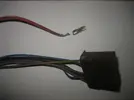
I would then remove EVERY terminal from the connector, Using some special tools I've made/purchased to make the job easier (More on that later TR Fans, I'll make a mini guide when I get round to it!) and also have managed to source pretty much every type of OE Connector Renault used, from various sources:
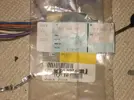
This picture shows the very same loom, with EVERY wire replaced and new Terminals. The difference in flexibility between the Before and After is amazing..!
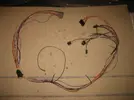
As for re-covering the loom, I was watching one of the Car programmes on Discovery Turbo a few weeks back (Think it was Bitchin Rides/Kindigit Designs) and one of the guys was creating a new wiring loom for one of their cars. In the programme he went into a little bit of detail how they do not use the hard wire coating like Renault and many other OE companies use, they use a more flexible slit protective braiding. Once I watched that I had a good Google and stumbled on a selection of SILVER covering which seemed to be just the job, and I liked the fact that the Silver would match the colour of the car! One PayPal transaction later and TODAY I got a big box through the post from Uncle Sam! In it was a 25ft of each size I ordered, and here is a picture of the 3 smallest sizes (Which I'm using the most of by far):
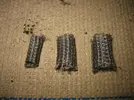
Now It's just a case of me wrapping the loom up in this new sheathing. but there were a couple of rubber Grommets, that were playing hardball... a little drop of Fairy Liquid and some grunting and it soon came through:
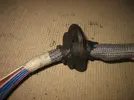
Which leaves the SEMI finished article you can see here:
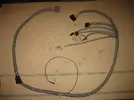
I say SEMI finished, because I've also ordered some SILVER PVC Tape to wrap the ends of the sheathing to ensure they do not fray in the future
I really thank you for reading this after 37 Pages and 737 Posts in this MAMMOTH thread, but I really feel as though I have the wind behind me now and things are moving along well!! FINGERS Crossed that continues!! :dm:
So what exactly have I been doing? As usual, I will let the pictures do the talking.. Here is two identical looms from the engine bay (One from the Red 11 I broke, and one from my car.)
First I would compare the looms to see which one looked the best candidate to restore:

The decision was based on the quality of the connectors, and how complete the looms were. Here you see I was examining the connectors to see which is best..


Once the final candidate was chosen, I unwrapped the loom from all the lovley OE Renault Crispy tape/covering:

and would then take a picture of each end of the connector for reference:


Many of the wires & terminals were showing their age and deteriorating condition well. Here you can clearly see the 30+ year old copper had corroded pretty badly:

I would then remove EVERY terminal from the connector, Using some special tools I've made/purchased to make the job easier (More on that later TR Fans, I'll make a mini guide when I get round to it!) and also have managed to source pretty much every type of OE Connector Renault used, from various sources:

This picture shows the very same loom, with EVERY wire replaced and new Terminals. The difference in flexibility between the Before and After is amazing..!

As for re-covering the loom, I was watching one of the Car programmes on Discovery Turbo a few weeks back (Think it was Bitchin Rides/Kindigit Designs) and one of the guys was creating a new wiring loom for one of their cars. In the programme he went into a little bit of detail how they do not use the hard wire coating like Renault and many other OE companies use, they use a more flexible slit protective braiding. Once I watched that I had a good Google and stumbled on a selection of SILVER covering which seemed to be just the job, and I liked the fact that the Silver would match the colour of the car! One PayPal transaction later and TODAY I got a big box through the post from Uncle Sam! In it was a 25ft of each size I ordered, and here is a picture of the 3 smallest sizes (Which I'm using the most of by far):

Now It's just a case of me wrapping the loom up in this new sheathing. but there were a couple of rubber Grommets, that were playing hardball... a little drop of Fairy Liquid and some grunting and it soon came through:

Which leaves the SEMI finished article you can see here:

I say SEMI finished, because I've also ordered some SILVER PVC Tape to wrap the ends of the sheathing to ensure they do not fray in the future

I really thank you for reading this after 37 Pages and 737 Posts in this MAMMOTH thread, but I really feel as though I have the wind behind me now and things are moving along well!! FINGERS Crossed that continues!! :dm:
Duncan Grier
Well-Known Member
Love it! Hate wiring but it is a very nice feeling when done right and you know you have gained another 20 years grace of dodgy french woring issues 
gtmatt
Well-Known Member
amazing @Big Steve - Raider , love the effort soon be on the road 
Made a start on the engine "dress rebuild" today. I say "dress rebuild" because unlike my Raider, I'm not planning on splitting this engine as it was running sooo sweetly when I took it out the car, I want to try & keep it together as it seems to be a winner already.
The engine has sat at the back of my garage on a stand for 1379 days (3 years, 9 months, 10 days) since I took it out the car!! (HOLY Sh*t where did that time go...?!) so I figured it was about time I gave it some lovin:

I jetwashed it when I took it out of the car, so it is fairly clean still. You can see that the sump is looking a little worse for wear, so phase 1 for me was to remove the sump so I can asess whats needed to get that back to standard. The giblets of the engine were looking a bit mucky, but I'm resiting the urge to get it all cleaned up:
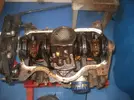
The inside of the sump however, was full of all sorts of old gunk:
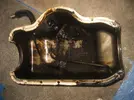
So I broke out the old Parts Washer, and got busy with the Paraffin:
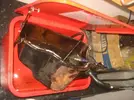
Next step was to take off the manifolds from the head to have a little looksie at the state of them:
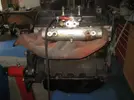
Oh Hello Mr... Looks like the old girl has been ported sometime in her life!! So it looks like the comments I got on Retro Rides some time ago (LINK) had some truth in them..! :bf:
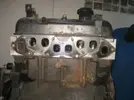
When I look a little bit closer, I can see that the Inlets have indeed been ported to match the gasket, and the valves look like they have been a little fettled too? (I think the Guides have been ground back??)
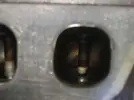
Again I'm fighting the urge to break the engine apart to clean all that carbon off the valves (I'd welcome any suggestions on If I should be doing anything whilst the engine is like this??)
So my plan now is to get some engine Enamel and get the block all painted up and looking spangly, before I bolt all the new parts back on?
Open to suggestions on the block colour?? We all know the OE colour is Black, but was wondering should I do it Silver to match the car??
Thanks for reading!! :ag:
The engine has sat at the back of my garage on a stand for 1379 days (3 years, 9 months, 10 days) since I took it out the car!! (HOLY Sh*t where did that time go...?!) so I figured it was about time I gave it some lovin:

I jetwashed it when I took it out of the car, so it is fairly clean still. You can see that the sump is looking a little worse for wear, so phase 1 for me was to remove the sump so I can asess whats needed to get that back to standard. The giblets of the engine were looking a bit mucky, but I'm resiting the urge to get it all cleaned up:

The inside of the sump however, was full of all sorts of old gunk:

So I broke out the old Parts Washer, and got busy with the Paraffin:

Next step was to take off the manifolds from the head to have a little looksie at the state of them:

Oh Hello Mr... Looks like the old girl has been ported sometime in her life!! So it looks like the comments I got on Retro Rides some time ago (LINK) had some truth in them..! :bf:

When I look a little bit closer, I can see that the Inlets have indeed been ported to match the gasket, and the valves look like they have been a little fettled too? (I think the Guides have been ground back??)

Again I'm fighting the urge to break the engine apart to clean all that carbon off the valves (I'd welcome any suggestions on If I should be doing anything whilst the engine is like this??)
So my plan now is to get some engine Enamel and get the block all painted up and looking spangly, before I bolt all the new parts back on?
Open to suggestions on the block colour?? We all know the OE colour is Black, but was wondering should I do it Silver to match the car??
Thanks for reading!! :ag:
DaveL485
Staff member
Another vote for black.Paint it black Steve. Silver will look gash in a few months once the oil weeps start.
Duncan Grier
Well-Known Member
Black far more oem looking and forgiving 
Similar threads
- Featured
- Replies
- 84
- Views
- 2K
- Replies
- 4
- Views
- 362
- Replies
- 6
- Views
- 269
- Replies
- 2
- Views
- 264

