There is more to life with TurboRenault.co.uk

Register a free account today to become a member! Once signed in, you'll be able to participate on this site by adding your own topics and posts, as well as connect with other members through your own private inbox!

Renault 11 Turbo Phase 2 Restoration

Really pleased this is progressing, is it 'gris argent ' IIRC, I still have some basecoat on the shelf from my old 11T, used it on the wheels of my '55 750, it's a really good shade that can be bright popping in sunlight but 'steelly' in shade.
It's an absolute must for me to see this car when it's finished.
Keep up the excellent work, think I've still got the original cassette holder/stereo surround somewhere from E23 TTH, you're welcome to it, if it it's any use.
 
Been a few weeks since I updated this guys, but work has continued to progress in the background and some funny stories also... this being one.

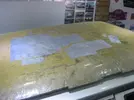
So many months ago I made a start to repair the roof lining, as it was torn when I removed it from the car:
IMG_4843.webp
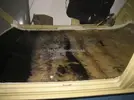
Unfortunately the repair didn't seem to work as well as I'd hoped and the rooflining looked like a dogs breakfast after I'd finished..
IMG_4856.webp

Although I don't need one yet, it was at the back of my mind of things I will need to fix when I start the rebuild, and I was wondering how I was going to get round this problem. :read.gif:

Those of you who know me well, will know I travel all throughout Europe for my work (Sales) which gives me a chance to see what's for sale in all other countires... thankfully in Turkey... there continued to be lots of things for sale for the old R9/R11 models, as it's still a common sight on the roads out there.

After a bit of Googling, I found an advert for a brand new R9 roof lining in Turkey, so I asked my local guy there to help me track one down. Thankfully he managed to get hold of one, but the next problem was getting it back to the UK. I couldn't find anyone to ship it, and it was too large/expensive for Postage... So looked like my last option was to try & fly it home with me during my next trip there. I did some homework and found that "theoretically" it was within the sizing to allow it to fly....

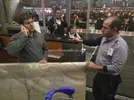
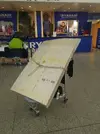
Following another fun week in Istanbul travelling with my team there, I turned up at the airport with one of the guys with the roof lining all packaged up and ready to travel:
IMG_20171102_1942441.webp
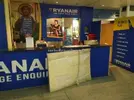
First we had to get it X-Rayed to get INTO the terminal... which took some time, and then finally we got to the check in desk. As you can imagine the check in team were thinking I was having a laugh and told me no, so I was so plesed to have one of our Turkish team there to "discuss" with them in the local language...:punish.gif:
IMG_20171102_2023596.webp
Eventually, they accepted the parcel and I caught my flight home. Few hours later I arrvied back at Stansted and then waited to see if the parcel caught me up... IT DID!! :grin.gif:
IMG_20171102_2328561.webp
IMG_20171102_2329302.webp
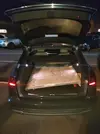
So squeezed it into the back of the car:
IMG_20171102_2337492.webp
Drove Home:IMG_20171103_1750051.webp
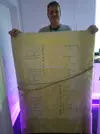
And then the final unwrap..... IT'S FINE!! :friends.gif:
IMG_20171103_1757062.webp

God the lengths we go to restore these old sh1tbag Renault's eh... :ag:
 
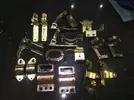
I also took a load of parts to a plating company in Sandy (Bedfordshire) to see what they could do for me... Many of them were in REALLY bad condition... so I was chuffed when I got them back looking not too bad at all!!:
IMG_5730.webp
IMG_5740.webp
IMG_5739.webp
Got a few bits I want to get re-done, as the coating is not thick enough for me, but 90% of what was done I'm pleased with!

If anyone knows of any other platers to recommend, please let me know?

Thanks for Reading :)
 
Steve only you could get a bloody whole roof lining from Turkey to the UK in one piece and through airport politics.....epic stuff

Zinc looks better than I thought knowing you were not 100% happy another 10 sessions and sure they will be up to Big Steve status :bt:
 
Progress continues, even though it's pretty slow because it's flippin cold outside.. but with a pair of winning gloves, and a heater the march goes on! :cg:

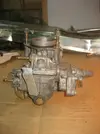
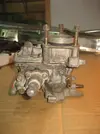
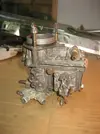
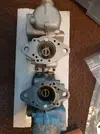
I dug out my carb today and packaged it up for our very own @sparkie to rebuild & refurbish for me. Will be posting it to him this week. Will share some pictures after he has worked his magic, but at the moment it looks like this:
IMG_5748.webp
IMG_5749.webp
IMG_5747.webp
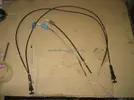
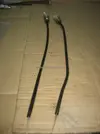
Next thing I wanted to do was try & refurbish some of the carb' control cables that were looking a little tired
IMG_5775.webp
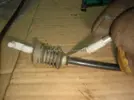
As you can see, one of the Accelerator cables, had already lost it's sheathing, so I bought myself some gloss black heatshrink from eBay and thought I would see if that would work? First I just gave the cable housing a little tickle with a scotchbrite pad to remove some of the surface rust & muck:
IMG_5777.webp
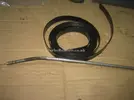
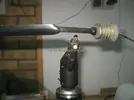
Next I cut a piece of the heatshrink to length, and then started shrinking with my gas bottle:
IMG_5779.webp
Chuffed with how it came out!!
IMG_5780.webp
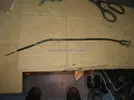
The next one still had a bit of raggy sheathing around it, so I cut it off, and re-shrunk another piece on:
IMG_5782.webp
Now I have two winners!!
IMG_5783.webp
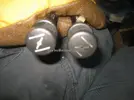
Last thing I wanted to do was choose the best choke cable I had, in the end the decision was easy, based on the printed graphic on the top of the knob:
IMG_5787.webp

Thanks for reading :)
 
@sparkie has made a start on the rebuild on my carb and noticed a few things:

Carb.webp

  • Main jet = 120
  • Air Corrector = 100
  • 1st stage enricher = 70
  • and 2nd stage bush . 100 sized air corrector.
  • The Venturi is stamped with 25mm, but it's been bored out to approx 27mm (I asked if it's got a "Group A" kit, but he said it's not got the special brass secondary venturi, so has just got the bored out venturi with jets to match)
Thanks for reading! :)
 
Back
Top