There is more to life with TurboRenault.co.uk
You are using an out of date browser. It may not display this or other websites correctly.
You should upgrade or use an alternative browser.
You should upgrade or use an alternative browser.
5 GT Turbo R5 GT Turbo - Complete strip down and re-build #1
- Thread starter Chris74#
- Start date
-
- Tags
- gt turbo r5 gt turbo turbo
DaveL485
Staff member
I *might* be going to that Sunday now.Steve, will you PM me your number mate? I will catch up with you at Santa Pod this weekend.
I *might* be going to that Sunday now.
Bringing the Vee for an outing, or coming in the Ovlov?
DaveL485
Staff member
Vee or 220, depends if I can stomach taxing the Vee for all of March, at the end of March!Bringing the Vee for an outing, or coming in the Ovlov?
Vee or 220, depends if I can stomach taxing the Vee for all of March, at the end of March!
220 it is then…
IronmanWarrior
New Member
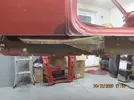
I have an odd question for you going back to when you welded the sills. You had that bit of metal hangin down the inside of the sill which seems to have originally been spot welded to the sill. Did you plug weld it back or not weld it at all and leave it hanging in there? I attached an image of the bit im on about......

Chris74#
Well-Known Member
Hi, This piece hanging down is part of the original 2 piece cill, I cut the rust out of it, welded in some new metal and plug welded it back to the new inner cill to stop it rattling around. I didn't think there was any need to weld it to the new cill, as the replacement was a one piece cill. If I do this again, I will definitely cut the replacement cill in two and weld a butt strap in there to join the two pieces back together, that will look more authentic that the one piece! Live & learn I suppose!! Are you wrestling with the same thing?I have an odd question for you going back to when you welded the sills. You had that bit of metal hangin down the inside of the sill which seems to have originally been spot welded to the sill. Did you plug weld it back or not weld it at all and leave it hanging in there? I attached an image of the bit im on about......
View attachment 200592
IronmanWarrior
New Member
I am very much deep into a long resto and I do not have that piece hanging down which is why threw me a bit when I came across yours. The cills on this have been replaced in the past and wondering if they were simply cut off. I’m not bothered about it being original tbh just solid, and there is a lot of work to make this solid again!Hi, This piece hanging down is part of the original 2 piece cill, I cut the rust out of it, welded in some new metal and plug welded it back to the new inner cill to stop it rattling around. I didn't think there was any need to weld it to the new cill, as the replacement was a one piece cill. If I do this again, I will definitely cut the replacement cill in two and weld a butt strap in there to join the two pieces back together, that will look more authentic that the one piece! Live & learn I suppose!! Are you wrestling with the same thing?
Appreciate the reply. Had a good look at this thread and you documented it really well. Top work you have put in.
Chris74#
Well-Known Member
Sounds interesting, have you got a post running on your resto? It would be good to see some pics!I am very much deep into a long resto and I do not have that piece hanging down which is why threw me a bit when I came across yours. The cills on this have been replaced in the past and wondering if they were simply cut off. I’m not bothered about it being original tbh just solid, and there is a lot of work to make this solid again!
Appreciate the reply. Had a good look at this thread and you documented it really well. Top work you have put in.
It does sound like they cut the remnants of the 2 piece cill off, but I don’t think it’s required once the cill is replaced. I’ve got loads of pics so if you need anything, let me know!
Oh yeah, make sure you have a good dig around the rear beam mounting points, mine looked solid until I had a poke about with a podger!! as you can see in the post somewhere!!
IronmanWarrior
New Member
I haven't really put the effort in to take too many images etc. in order to be able to make a thread about it. It is far worse than your shell was though! Interesting seeing the one in the next post as well and can potentially see the rigidity point of view.Sounds interesting, have you got a post running on your resto? It would be good to see some pics!
It does sound like they cut the remnants of the 2 piece cill off, but I don’t think it’s required once the cill is replaced. I’ve got loads of pics so if you need anything, let me know!
Oh yeah, make sure you have a good dig around the rear beam mounting points, mine looked solid until I had a poke about with a podger!! as you can see in the post somewhere!!
Right now I am still working around the window and bulk head. Repaired the original scuttle with new metal but also got hold of another because I wasn't confident about the overall shape being spot on. It just a very long task and I am lucky if I get 1 day a week on it at the moment.
IronmanWarrior
New Member
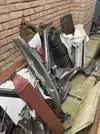
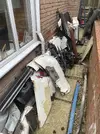
Your not kidding! I did spy a fuel tank. Does that fuel tank leak out of the bung like all the rest of them?Let me know if there are bits of metal that you are still looking for, I have quite a few odd bits of chopped up 5 just laying around! View attachment 200662View attachment 200663View attachment 200664
DaveL485
Staff member
Pick the bung out, clean both surfaces, tiger seal it in.Your not kidding! I did spy a fuel tank. Does that fuel tank leak out of the bung like all the rest of them?
Chris74#
Well-Known Member
Had an odd kind of week after the mammoth adventure at the weekend! I also had the outlaws over from France, so got the Father in law on the gearbox re-build.
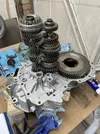
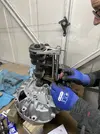
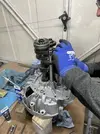
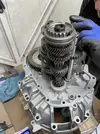
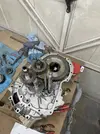
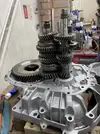
I decided to use the shafts off the spare gearbox to hold the ball bearing and springs in and fitted some of the plugs and the reverse light switch, along with the 5th gear tensioner! turns out this was premature as I had to remove them all to get the cases together!
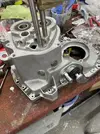
New bearings in and breather pipe fitted!

New gaiter fitted!
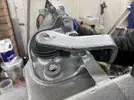
Got sealant on the cases and struggled like mad to get them together!! Had a right game with the box!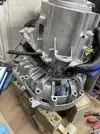
But got there in the end and got the remaining gears on!
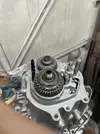
and fork!
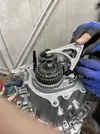
Then spent a couple of hours trying to get the gears! Decided to put it all together and then check it!
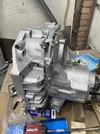

New nylon clutch fork pivot!
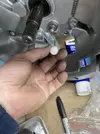
Then fitted the TDC sensor and one of the mounts that I had powder coated previously!
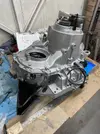
Fitted the drain plug
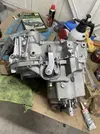
Then the end cap with the new O-ring.
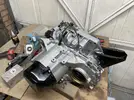
New clutch fork gaiter
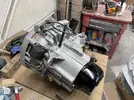
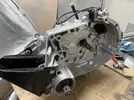
and new diff shaft dust seal!
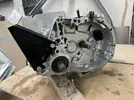
Well I think it looks splendid! Just hope it works OK now
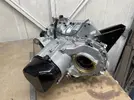
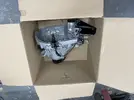
Put it in a box and out the way!
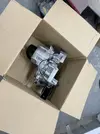
Thanks for reading guys!


I decided to use the shafts off the spare gearbox to hold the ball bearing and springs in and fitted some of the plugs and the reverse light switch, along with the 5th gear tensioner! turns out this was premature as I had to remove them all to get the cases together!

New bearings in and breather pipe fitted!

New gaiter fitted!

Got sealant on the cases and struggled like mad to get them together!! Had a right game with the box!

But got there in the end and got the remaining gears on!

and fork!

Then spent a couple of hours trying to get the gears! Decided to put it all together and then check it!


New nylon clutch fork pivot!

Then fitted the TDC sensor and one of the mounts that I had powder coated previously!

Fitted the drain plug

Then the end cap with the new O-ring.

New clutch fork gaiter


and new diff shaft dust seal!

Well I think it looks splendid! Just hope it works OK now

Put it in a box and out the way!


Thanks for reading guys!
Chris74#
Well-Known Member
All this, I had a go at the high build primer on the shell!
I mixed up two pots ready and got the gun out!
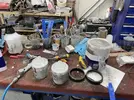
I gave the shell a good going over with panel wipe, and found a couple of spots that required a dab of Dolphin glaze!
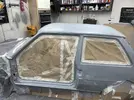
Got that in and sanded and then on with the paint!
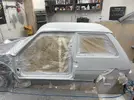
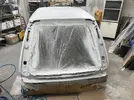
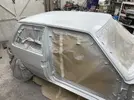
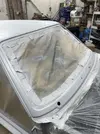
Had an absolute nightmare with the first pot of paint, once it was done I realised I had got the wrong gun, and the tip size is too small, so I switched guns for the second pot of paint!
This was a disaster, the paint was dribbling out and then eventually just stopped! I thought it was because I had left the second pot too long, so I went out there the following night and mixed another pot, but the same thing again. I called the paint supplier the next morning and asked if I should be using thinners as I was having difficulty getting the paint through the gun! They said that it is personal preference and some people like to lay it on thick! I ordered some 2k fast thinners and left it at that so that I could get on with the gearbox!
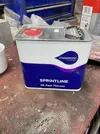
I went out there today and mixed up the paint with 20% thinners, this worked a treat!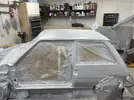
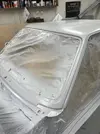
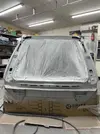
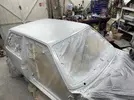
I managed to get two coats on it and then my compressor shit itself!
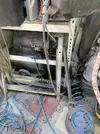
It seems that the pump casing has split! Fatal!!

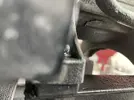
Project is now on stop until I can get a replacement compressor! Shite!
Spent the rest of the day in a really bad mood, cleaning up the garage!
Thanks for reading guys!!!
I mixed up two pots ready and got the gun out!

I gave the shell a good going over with panel wipe, and found a couple of spots that required a dab of Dolphin glaze!

Got that in and sanded and then on with the paint!


Had an absolute nightmare with the first pot of paint, once it was done I realised I had got the wrong gun, and the tip size is too small, so I switched guns for the second pot of paint!
This was a disaster, the paint was dribbling out and then eventually just stopped! I thought it was because I had left the second pot too long, so I went out there the following night and mixed another pot, but the same thing again. I called the paint supplier the next morning and asked if I should be using thinners as I was having difficulty getting the paint through the gun! They said that it is personal preference and some people like to lay it on thick! I ordered some 2k fast thinners and left it at that so that I could get on with the gearbox!

I went out there today and mixed up the paint with 20% thinners, this worked a treat!


I managed to get two coats on it and then my compressor shit itself!

It seems that the pump casing has split! Fatal!!


Project is now on stop until I can get a replacement compressor! Shite!
Spent the rest of the day in a really bad mood, cleaning up the garage!
Thanks for reading guys!!!
Fabulous work on the gearbox @Chris74# !! I’ve often thought I’d like to know how to rebuild one, did you have any knowledge, or just crack on??
Bad news on the Compressor tho.. poor thing checked out when you started using it in anger!!
Cars really coming on strong now mate!! All credit to you for doing so much of the work yourself!!!
Bad news on the Compressor tho.. poor thing checked out when you started using it in anger!!
Cars really coming on strong now mate!! All credit to you for doing so much of the work yourself!!!
Chris74#
Well-Known Member
Morning Steve, you’re up bright and breezy!

I haven’t got any previous car experience at all, I’m in construction. Lots of help from these and of course you tube!!
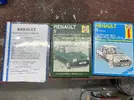
There is a lot more detail in the blue Haynes as opposed to the other one. The Father-in-law used to be a mechanic so he had some idea, but it took lots of reading and looking at photos of the strip down to work it out! I must admit, the bodywork is pushing my patience to the limit, I just can't seem to get through it, and then the compressor issue on top!!

I'll call SGS tomorrow as I have only had the compressor for 18 months, and it hasn't had much use up until the last few weeks, there is supposed to be a 2yr warranty, but i'm pretty sure they will have some kind of get out clause somewhere! I suppose I could always use the tank off it as an auxiliary tank for the new compressor! got look at the positives!

I haven’t got any previous car experience at all, I’m in construction. Lots of help from these and of course you tube!!

There is a lot more detail in the blue Haynes as opposed to the other one. The Father-in-law used to be a mechanic so he had some idea, but it took lots of reading and looking at photos of the strip down to work it out! I must admit, the bodywork is pushing my patience to the limit, I just can't seem to get through it, and then the compressor issue on top!!

I'll call SGS tomorrow as I have only had the compressor for 18 months, and it hasn't had much use up until the last few weeks, there is supposed to be a 2yr warranty, but i'm pretty sure they will have some kind of get out clause somewhere! I suppose I could always use the tank off it as an auxiliary tank for the new compressor! got look at the positives!
Duncan Grier
Well-Known Member
Sure the box will work as well as it looks, thanks for sharing so many pics of it as I am sad and find it very therapeutic  @Big Steve - Raider has finsihed the 11 noe so no more vintage therapy from his lol
Sure some choice words were deleivered in the garage to said compressor
Maybe yesterday was just not the day, could always be something worse and sure you will back on it in no time @Chris74#
Sure some choice words were deleivered in the garage to said compressor
Maybe yesterday was just not the day, could always be something worse and sure you will back on it in no time @Chris74#
Similar threads
- Replies
- 4
- Views
- 360
- Featured
- Replies
- 82
- Views
- 2K
- Question
- Replies
- 8
- Views
- 679
- Replies
- 6
- Views
- 268

