The T.I.B.
is rarely serious
Renault 19 16v Chamade
1991, Tungsten Grey
9 August 2007
I had been looking at the car on an eBay advert for a few days. What attracted me to it was the colour and the fact that it looked smart. I wasn't particularly looking for a phase 1 nor a Chamade, but when I saw this in Tungsten I couldn't resist.
Some images from eBay:
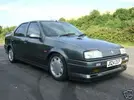
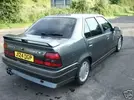
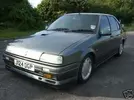
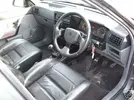
After a few calls and photographs the seller accepted my offer of £700
[BREAK=Aug : Collection]
11 August 2007
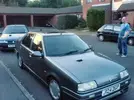
I drove down to pick up the car near Portsmouth in my blue hatch (I had plans to break this up as soon as I had the new vehicle.) After a long day I ended up in Petersfield with two cars which I had to get back! No matter, as Bidderman very kindly garaged the hatch overnight as I drove the Chammy back home.
The Chammy, the Hatch and you can just make out Bidderman's black hatch project in the background!
[BREAK=Aug : The Car]
12 August 2007
The first drive was positive, it handled really well, a lot more direct than the hatch. The ABS took a little getting used to as it has a different feel to normal braking when you just touch the brakes (note: the Bendix ABS may well be coming out soon.)
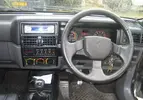
The car idles fine, pulls extremely well and I easily get 10mpg more than the hatch! Everything works, I couldn't find a fault other than the digi dash just starting to bleed. The leather is fantastic and the car was spotless when I got it. Just needs new rubber on the pedals. It's got the Renault floor mats as an added bonus!
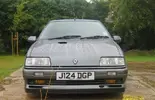
The rear arches had been welded just over a year back so they look smart. However I'm not 100% happy with the job as I can see it is starting to bubble again under the paint so I'll have this redone over the winter.
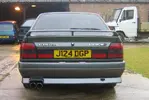
The engine is completely standard, there's a cone filter on it now but I have the original airbox for the car to put on. The exhaust is a noisy twin tailpipe affair which will be replaced by one from Bidderman. There's also a decat but it flew through its last MOT (no advisories.)
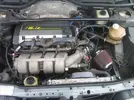
What I didn't know til I picked up the car is that the guy I bought it off had done lots of things to it already: replaced the whiney fuel pump, sorted out the sunroom jamming issue, replaced the clutch, changed the discs & pads.
The car has a full service history, all Renault main dealer, and has receipts for everything that's ever been done to it, including the original receipt for the car - £15,043.74 back in December 1991!
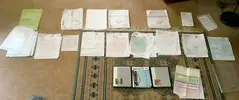
[BREAK=Aug : Interior]
18 August 2007
Interior
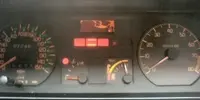
One of the few faults with the car was the blotchy trip computer display:
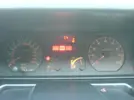
Luckily I had a spare good one from the Hatch so in it went:
I replaced the pedal rubbers where they needed it (note Renault mats):
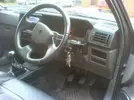
The stereo will be changed for another Sony (and compatible with the stalk controls ) but a grey one to match the car. Apart from that, I think my work on the inside is done.
[BREAK=Aug : Clean Car]
24 August 2007
Clean Car
This was the first chance I had to have a proper look in the dry. So I jacked it up, all looks fine underneath. Removed the arch liners to clear out the built up dirt, that's saved about 10kg. Then time for a good wash so I could see the bodywork properly
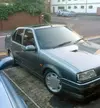
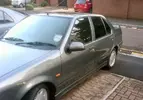
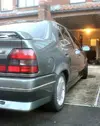
These wheels are a bit of a mission to clean, not as bad as multi-spokes though I'm sure
27 August 2007
Tidying Up
Cleaned up round the bonnet vent where it had been badly sealed. Now looking smart again.
Counted tiny stone chips, less than a dozen. Mainly on the bonnet, a large one on the grille but it's only plastic. Waiting for touch-up paint to arrive.
Stripped down rear wiper assy where it was beginning to rust. Kurust and respray but it's missing a washer jet and wiper arm nut bung thing.
Passenger side window switch ceased to work on the hottest day of the year, Neal is sending a spare!
[BREAK=Sep : Pre-Show]
01 September 2007
Pre-Show
Renault World Series is next weekend so I have a small amount of time to get the car in good order.
No time to get the alloys refurbed so they can wait til Spring 2008.
First on the list, the oil was changed (Comma Eurolite) and a new filter fitted (Renault OEM). The last oil was pretty black although it has been changed regularly throughout the car's history. The engine is not using oil or coolant which is pleasing since it's on its original head gasket (72k over 16 years.)
Friday evening dash to Halfords and I have engine degreaser and Meguiars car wax so plenty of fun in store for the weekend
Saturday saw some progress. Armed with carb cleaner and a hosepipe I set about the engine bay.
Air pipework removed:
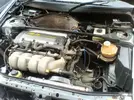
You can see all the paintwork is now clean and the grime has been removed.
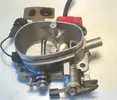
I removed the throttle body for a good clean.
Before:
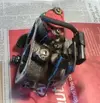
After:
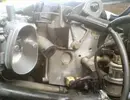
ISCV had a good blast through with carb cleaner too. Side of the head now:
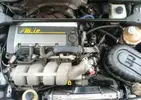
For a finishing touch, the original airbox went on with a new filter:

03 September
Yesterday was a bit of a milestone, I had the first symptoms of water in the spark plug wells - and from that moment I felt like a true phase 1 owner. I can't understand how people could have been so patient in 1991 when they washed their brand new car a bit hard and it stopped driving properly.
Today, new number plates front and rear. The rear one was fine but the front had a couple of stone chips. I'll keep them, shows the car's not been in an accident.
On a side note, this car is really nice. Everything's original, not tampered with, and works spot on. Everything in the bay is in the right place and has the right clips still, a good sign i'm sure
[BREAK=Sep : World Series]
World Series
7 September 2007
I took the car up to Renault World Series at Donington Park. You can read about the weekend here:
http://www.retro-renault.com/forums/general-chat/3828-rws-2007-discussion.html#post36909
To sum up, apart from being a great weekend, I had a bit of an 'incident' where on the Saturday morning a bunch of us were standing round admiring my car when I noticed smoke coming out the side of the bonnet! Between three of us we got the bonnet open, battery disconnected and poured water on the source of the problem - the ABS pump :twisted:
Here's a picture of the motor a couple of weeks later. You can't see much damage but at the time the flames were licking the underside of the bonnet!
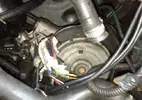
There was no saving the ABS - apart from the fact that the ABS loom had become one hot melted mass, the pump motor itself had been fried and did not spin. I got about a lap and a half around the Donington track before I lost what brake pressure I previously had
Chammy on track!
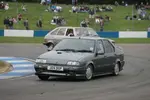
The solution is the wholesale replacement of the braking system from pedal to brake lines with my preferred choice, the standard non-ABS system. This has two advantages: Firstly there are less components to go wrong, also I much prefer the feeling I'm used to with direct braking.
On the way back from Donington (long stopping distances, handbrake on 4 clicks, shove it into 2nd and two feet on the brake pedal) I picked up the entire kit I needed for the non-ABS brakes (BIG thanks Ash you legend!).
The parts as I got them (Brake pedal, master cylinder, vacuum tube, fluid tubes, reservior):
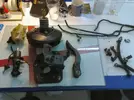
These have had the special clean treatment and I may have painted the pipes in chav yellow
[BREAK=Sep : Engine strip down]
Engine strip down
21 September 2007
To replace the braking system I must remove the engine from my car. This isn't a bad thing mind, I enjoy doing it and it gives me a chance to a) replace some parts e.g. cambelt while the engine is out of the car, and b) clean and tidy up the bay
My garage was tidied in preparation, you couldn't see the floor before for old r19 parts. Most have now been scrapped or passed on to a good home. Here's a picture of my hard work (note large biscuit tin, also my trademark ToolStool(TM) to save me having my tools strewn across the engine bay)
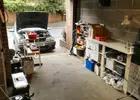
I haven't had much of a chance in the last two weeks to do much work other than compile a list of parts I need to get hold of (cambelt, grounding kit, paints, cleaners, etc etc). Neal has kindly offered me loan of his engine crane so that makes the whole operation possible!
Parts to go on (cams, brake stuff, heatshields, more stuff not in picture):
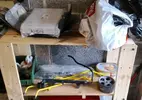
Completed today:
Airbox out.
Coolant system off and flushed (well orange ), rad out.
Header tank out and cleaned (I'm trying cillit bang to start although I have other more serious plans up my sleeve)
Loom disconnected all round
Progress pic:
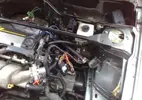
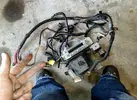
The next stage was to start disconnecting the ABS system. This was a case of following wires and disconnecting them with great care and understanding (thanks Mr Snips!) For now I have left the hydraulics intact; this will be easier to remove once the engine is out.
Bendix ABS: This was just some of the wiring I found lurking in the scuttle. It's big, but it's not clever. Don't do it kids.
[BREAK=Oct : Work Resumes]
Work Resumes
14 October 2007
Well I've had a few weeks 'holiday' from the car, partly to see if I could borrow a crane locally, and partly cos I was fed up with it and it got broken into one Saturday night.
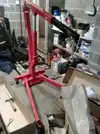
Anyhow, few bits and bobs this weekend. Treated myself to this, it's 1 ton wayne, the engine crane! :lol:
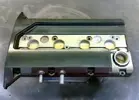
I did a spray-out test of some aerosol Tungsten on a spare rocker cover which will be going on soon. It's a bit dark so when I touch up the bay I'll throw on some thinner coats which will lighten the metallic paint.
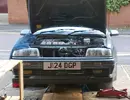
Almost ready to lift the engine out, then it got dark and I got hungry, so the final lift will be tomorrow, I can't wait now!
[BREAK=Oct : Out With The Old]
Out With The Old
15 October 2007
I managed to get the afternoon off work so I could crack on
So it was a case of a few final disconnections, PAS pump, speedo, rear mount bracket, then it was TIME!
Here's a video of the engine being lifted. It's sped up to 4x speed in true benny hill comedy style.
YouTube - Renault r19 F7P Engine Removal
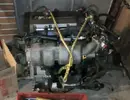
Here's its final resting position, ready for a quick clean and new belts and other parts - nothing too major this time
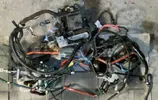
At last, the bay was clear and I could get my hands on the braking system. This came out in about an hour, more a case of undo something, give it a tug, undo some more, keep pulling...
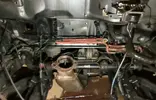
...and here's what fell out
Slightly uncomfortable quarter of an hour down in the footwell removing the pedals but I've been lucky and never had to do clutch or anything before now
It gets dark very early these days
16 October 2007
Another few hours this afternoon saw most of the bay completely stripped, wings and bumper off and only the electrics remaining.
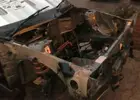
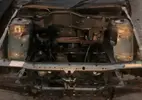
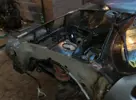
Next on the list is a realy thorough clean of everywhere I can get to, then I'll see about rubbing down any tiny rust patches and respraying...
It's a shame about the weather, it looks like from now on it will be wet and cold, not really ideal conditions for cleaning and painting!
18 October 2007
Work continues... hahaha!
Now the wishbones, hubs and suspension struts are off. Had to hacksaw one of the track rod ends off, but they are both being replaced as a matter of course. New wishbones and lower ball joints will go on, the struts will stay as they are good, with aftermarket springs and sound top mounts.
The hubs will get the wire wheel treatment then a good coat of something. Still got to remove the remnants of the ABS sensors! I may as well have the anti-roll bar off and do the bushes while it's there too, they aren't exactly new. The only thing remaining in the bay now is the PAS which I ran out of time to remove but should lift out.
Looking at things it suddenly hit me that the subframe was completely clear (bar the PAS still) and that was a scary moment.. what started in my mind as a simple job ('oh i'll whip the Bendix ABS out over the winter some time') has turned into a full front end strip down. I enjoy it.. not only a good chance to see what goes what but also a good reason to give everything a good freshen up and replace all wear items so fingers crossed I should never need to go near the front end again... you heard it here first!
No pics as it was dark before I even started tonight. Clocks go back after next week
[BREAK=Oct : Painting]
Painting
24 October 2007
Day off work today so it was over to Renault to pick up a few components, steering rack bush and gaiters and some other stuff. Cold but fine so I decided some painting was on the cards!
I pulled about 100 plastic clips out of the engine bay, hope I remember where they all went!
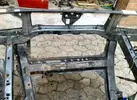
All the visible parts were rubbed back and cleaned and prepped for painting
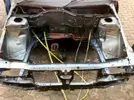
After trying to work on the subframe and the back of the bay I decided it was in fact easier to remove the subframe so 4 bolts and it was free, which makes things easier in terms of painting the subby and the bay seperately.
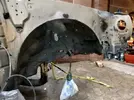
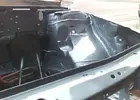
I got the grinder on a few rust patches which then had the Kurust treatment, it's good stuff! This picture shows the state of play before I started painting, you can see all the patches where rust spots had appeared.
By the time I started painting it was almost dark so no pictures tonight. But I gave the inner arches a good thick coating of waxoyl then began priming the wings and the engine bay. Only half done because I ran out of primer but I'm expecting another shipment tomorrow. Hope it looks OK in the light tomorrow!
26 October 2007
Early finish at work on a Friday and the weather was perfect for spraying - dry with barely a breeze. I finished off with the primer coat and gave everything a light de-nib and wipe down.
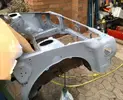
I decided since time was of the essence in the grand scheme of things that one coat of primer would have to do so it was on with the colour. I used over three cans of paint per coat, that's a litre and a half of each - aerosol mind.
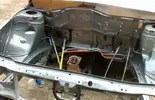
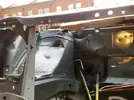
In the end I was really happy with the result. 24 hours should give things time to dry fully before lacquer.
[BREAK=Nov : Reassembly]
Reassembly
29 October 2007
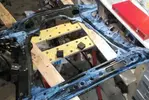
Well now everything is off the car, it's time to put it back on again in a slightly different order. Seemed only natural to start with the subframe, hopefully I can free up some garage space once I get rid of this.
Grinding, grinding, and this much kurust!
4 November 2007
Well the neighbours have all been complaining about living next to a garage, although in slightly different language to that. Proper curtain twitchers round here, really nothing better to do than complain whenever anyone leaves their bin by the road an hour longer than necessary or actually does something with their life like fixing a car. So my priorities shifted away from the braking system and more towards getting the car back on its wheels.
Subframe had its final coat of Hammerite and I chucked it back under the car. Good to get the big things out of the way really. Power steering system was ready to go so was bolted back in place with new a rubber mount and new gaiters, also a bit of a clean up.
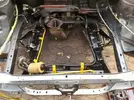
A lot of you will be complaining about the choice of yellow paint, well I've got a tin of it needs using up
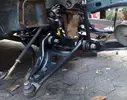
Brand new wishbones, balljoints and track rod ends
Here you can see how the waxoil came out on the inner arches, I used quite a large tin between the two sides
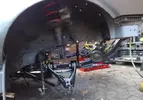
Threw the wings, bonnet and bumper back on for now so it doesn't look too neglected. Nice to get the car back on its wheels too, very nice indeed.
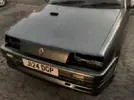
[BREAK=Nov : New Brake System]
New Brake System
9 November 2007
This picture shows the new vacuum servo and master cylinder. Servo upside down for trial fitting only. Front rigid lines will reach perfectly, the rears will need either a bit of re-routing or extending in order to attach to the master cylinder. The correct solution would be to replace these with fresh and better routed but we'll see if I can make these work well enough.
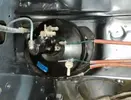
The vacuum servo and master cylinder are now installed, and hooked up to the brake lines, so now I just need to reattach the pedal and brake fluid reservoir, bleed the system, and that should be job done. Thanks to Neal for flaring assistance.
Grabbed some more pictures, although it was nearly dark at 4.30. If this was the summer I'd have finished the whole car in about a fortnight...
The new pipes are the rear lines. Stil to be painted and clipped back properly.
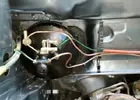
Got the reservoir and feed / return pipes installed, bit of a puzzle given just the bare bulkhead to try and figure out where they go, but like anything, once you know it's simple
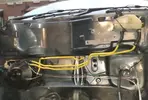
Servo heatshield on, also I've started to replace all the clips around the bay. Having the vacuum servo upside down makes more sense to me but hey, gotta keep it original and route the vacuum pipe right round it. Headlights are on and a few random brackets... more pics tomorrow!
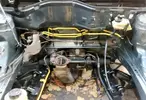
Replacement reservoir bracket, thanks MicKPM
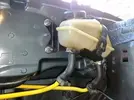
Freshly cleaned and greased lock mech
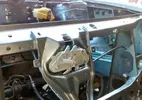
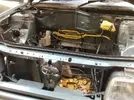
One more picture for luck
[BREAK=Nov : Cams & Tappets]
Cams & Tappets
10 November 2007
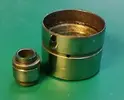
I have a pair of Williams cams to install courtesy of Snowman. He also provided the tappets to match. These, although they have been immersed in oil, were all gunged up and had no spring in them so before they go into the head I must sort them out.
With reference to Chris H's excellent tech article, I pulled apart and refurbed all 16.
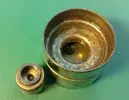
Bang the hydraulic tappet out the bucket part
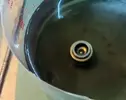
Drain the bucket
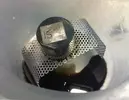
They were cleaned by activating them in a pot of degreaser until they were free to spring nicely, most of them needed the ball valve prodding before they'd move at all. The buckets were cleaned until spotless, they contained a lot of gunge behind the rim.
A good saturday evening's work, I'll probably stick em into the head later tonight too.
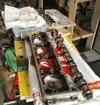
Original cams out, these will have a new home in a different engine
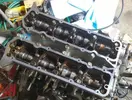
New cams all torqued up. Note the early still 8mm bolts with the 10mm hex heads, better than the annoying later torx ones (Good spot Neal ) Also note the spanking cleanup job on the gasket sealing faces!
[BREAK=Nov : Engine]
Engine
11 November 2007
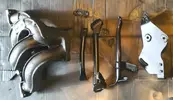
Just a few parts to renew on the engine. Nothing major. All the brackets came off for clean & paint, same with the manifolds and injector rail. Gave the block a wipe with an oily rag, no more. I need this car back on the road!
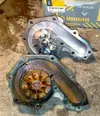
Brand new water pump. Now I've seen a few water pumps, but no two the same. This genuine one even came in a Renault box but has the lamest paddle ever, just folded steel vanes. It also spins quite freely. The one I removed was not original with the car as it had a paper gasket. This paddle was slightly better, a cast ally effort. The last genuine one I had off the bay had a monster of a wheel and was still to turn. Oh well, a paddle's a paddle. Here's the two, old and new
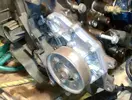
And on the block
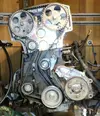
New cam belt kit, thought I'd try SKF this time, fair price and a quality brand name. Nice clean camshaft sprockets you see Engine seems to turn over fine. Here's the gubbins
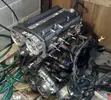
Still to do before the engine goes back: manifolds inlet and exhaust, fuel rail, alternator bracketry, thermostat housing.
28 November 2007
A quick update, not much progress the last couple of weeks as I've had other things on. The prospect of having to tax the car again this weekend I think has spurred me on to start driving it again.
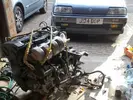
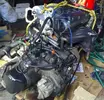
The engine dropped in really sweetly, not too many problems. I did however scratch one of the chassis rails though! Never mind it won't show.
Crane vs. Car
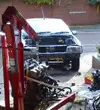
Just slid in really!
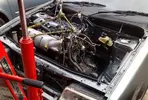
[BREAK ec : Back Together]
Back Together
3 December 2007
Some more progress, the rain held off all day.
ARB back on, driveshafts in, gearstick reattached, wheels back firmly on
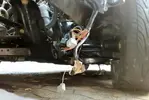
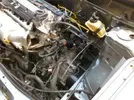
Aux belt back on. PAS pump was annoying. One of the pipes to the PAS fluid radiator had got twisted round the pump, typical.
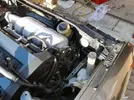
Still need to revert back to the newer style fuel rail for various reasons.
17 December 2007
Over the weekend I did one or two little things, got the proper fuel rail on again for a start!
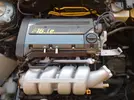
Sorry for the lack of pictures, I was often working in the dark or semi-dark. I connected everything up and after a bit of tinkering with the electronic ignition she fired up! Very tappet-y, this was to be expected.
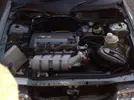
Good progress was made and thanks to ash and benny for calling in tonight to lend a hand with the clutch cable and pedal! I had the car started and the brakes and steering felt good so it was time to take it for a spin.
First stop garage for air and fuel - £101.9/litre, thats gone up about 10p since I started work :lol:
The car feels amazing, nothing loose and it feels really strong! The tappey noise soon went with some high revving action. The car brakes well which is a huge relief to say the least - mission accomplished I think I can say!

A few tweaks still to do:
- adjustcambelt
- maybe bleed brakes some more
- tidy up headlamp loom
- reattach front grille strip
- heat shields and more clips inside the bay
[BREAK ec : Aftermath]
Aftermath
Christmas 2007
Took the car out of town and ended up stopping at the first services to adjust the timing belt! 5 minute job and all was well, slackened the alt belt too for good measure.
Good run, I was expecting to feel no difference at all with the different cams but the car feels great, it just wants to drive and feels very strong
MPG test over 15 mins of motorway, still happy with this really:
65mph == 44mpg
88mph == 38mpg
Also good news, despite ripping out the speedo cable, i just stuffed the wire back into the end plastic part and it's working perfectly for now. Good news for the road speed sensor.
One more thing, since I had the engine out and back in again it's started leaking from the crankshaft (pretty sure) at the pulleys end, the last engine i had out did this too, explain that one.
Maybe being sat idle for 3 months, maybe being sat on the sump has cracked the seal round the crankcase end plate, maybe just bad luck. I'll be attempting a fix with the engine in place, wish me luck.
[BREAK=Jan : Version 2.0]
Version 2.0
New Year 2008!
The Chamade was running. It covered 700 miles in 5 days with no trouble in particular other than the following:
1. Minor oil leak as mentioned
2. Puff of smoke on start up
3. Distinct oiliness around the back end
4. Tapping... or is that clattering..?
I came to the conclusion that I would I have to have the head off and take a look.
Consequently the question arises... do I stick the same bottom end back on or do I seek an alternative? This was my thought process:
1. The bottom end's possibly suffering from oil burning / piston slap
2. I may need a new bottom end
3. I just happened to discover a Megane Coupe write-off in a scrapyard over Christmas, I was looking for a Peugeot MAP sensor, honest!
4. Megane 2.0 litre engine would give me more torque, more power and maximum kudos at the expense of running a non-original engine (although i'd already stuck Williams cams into the head by this point)
5. I negotiated a fantastic price for the Megane engine and gearbox
To sum up:
Note: I would recommend anyone to read the project reports of members such as Neal, Wicked Neo, MicKPM and others who have successfully run the 2.0 litre engine - it is their advice that enables me to know exactly what I can and can't do here!
Bottom End
I'll be using the 2 litre bottom end from the Megane. This has different bores, pistons and crankshaft to the R19. It's still an F-type engine so all the ancillaries etc from the 19 will fit.
Cylinder Head
Since this engine was fitted with DIS electronic sparking and engine management (and the 19 is set up to run a distributor) I'll be attaching the 19 head onto the megane bottom. The Megane (F7R) cylinders are bored to 0.7mm diameter larger than those in the 19 (F7P) but this slight mismatch is of no importance. I'll be using the fractionally larger (F7R) head gasket, although they tend to be larger than the bore diameter anyway.
Gearbox
The Megane coupes were fitted with the JC5 gearbox, as were the Williams engines I believe. Although the gear ratios are similar to the original R19 (JB3) box, the JC5 is reputed to be more durable. As an added bonus (or not) the JC5s were fitted with a longer clutch release lever which gives a far softer feel to the clutch... a bit girly but I may well keep this feature!
Electronic Management
I'd originally bargained on being able to slot in the Megane ECU to run the engine but it turns out that this is hard coded into the door locks, fusebox etc out of the Megane car it came out of so will not function in any other situation. I also quite fancied keeping the Megane flywheel as it has a more industry-standard 60/2 trigger pattern which is compatible with many aftermarket management systems but in the event I'll be keeping the R19 flywheel.
This leaves me looking for something to run the larger engine spec.. for the meantime I'll be trying a custom chip in the 19's ECU with a view to obtaining a Williams ECU in the future, which of course combines early 1990s simplicity with the 2.0 litre spec (and will suit the Williams cams I'm running too).
Some quick snaps as I begin work... this is what I bought:
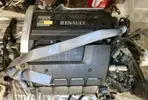
Some dirt, OK, but after stripping everything off the block seems pretty sound
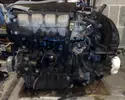
The gearbox seems good, the block has not a trace of rust in the coolant - not bad for an 11 year old engine!
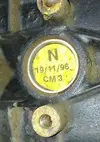
Block label, the magic letters F7R (These blocks have a large cast-in F7R logo on the back too)

Gearbox label
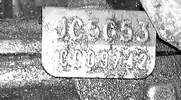
Of course my engine has a birthday!
Whipped off the head, thanks Neal for lending some weight to the operation!
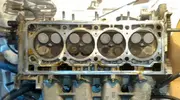
The head, I won't be using this of course. All looks fine, spark plugs were in good condition
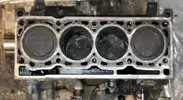
The pistons look fine, never had cambelt failure. Bores look great with the honing marks still clearly visible and no scores or steps. So far so good and this gives me confidence to continue
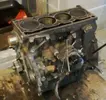
The block, after this I took it outside and jet washed it to remove the worst of the grime and show up a cracked sump - the breakers I strongly suspect.
[BREAK=Jan : 2.0 Engine Build]
2.0 Engine Build
05 January 2007
RUNNING COSTS OF 2.0L CONVERSION
£100.00 F7R Engine, JC5 Gearbox (scrapyard)
£62.00 Head gasket kit, head bolts, bottom end kit (ebay)
£26.00 Starter motor Renault 5 (ebay)
£36.00 Head skimmed and washed
? clutch, may as well
? fluids
£47 head skim and parts dipping
? Rear crankshaft seal
[BREAK=Feb : No News]
February 2008
No news
[BREAK=Mar : Engine Swap (1)]
24 March 2008
It's Easter weekend. It's snowing heavily. I book the week off work and begin the long awaited engine swap...
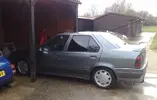
Stage 1: Car full of engine!
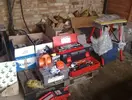
Stage 2: My travelling tool kit unpacked, now we're ready for action
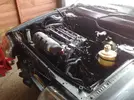
Stage 3: Old engine on its way out
Stage 4: That's that then
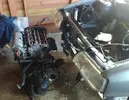
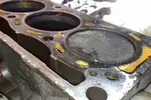
Original engine, I am pretty sure it's never had the head gasket replaced, however it was in good condition with no visible wear to the gasket at all. Not bad for 16 years and 80k miles really.
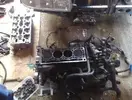
Waterways look a bit orangey, they weren't so bad in daylight
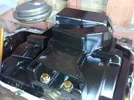
This will make way for the F7R... I took the sump off the new engine to have a good look and things all seem good inside
[BREAK=Mar : Engine Swap (2)]
25 March 2008
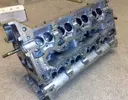
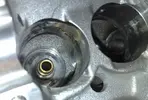
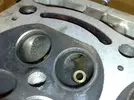
Removed all the valves etc and took the head in for a skim, despite the HG never having blown it was still warped at either end by about 3 thou so worth having done.
Good chance to clean the head, cam carriers and inlet manifold and a proper look at things.
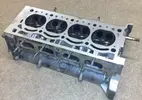
[BREAK=Mar : Engine Swap (3)]
26 March 2008
Continued with the build up of the F7R. This afternoon I did the pulleys end.
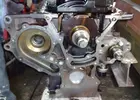
End covers cleaned and degreased
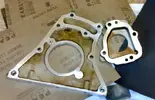
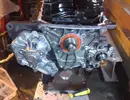
All assembled, the water pump was new in the autumn. Interesting fact, the original crankshaft seal in the F7R block was 8mm thick, the one in the F7P was 10mm. All the factors stock the 10mm one so that went in.
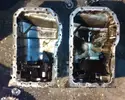
I was hoping to use the F7P oil sump on the F7R because the megane sump arrived cracked, thanks car breakers :roll:
Left: Megane, Right: R19
Megane:
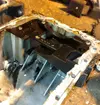
R19:
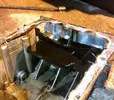
So you can see there are differences. Other than a subtle difference in the oil pump pickup the main problem is that no proper fixings are provided in the 19 sump for the plastic baffle plate found in the megane. The existing R19 plate will foul the big ends. The correct solution is to source an actual F7R sump but for now i'll be running the F7P version.
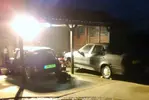
All set for night working, clocks don't go forward until this weekend
[BREAK=Mar : Engine Swap (4)]
27 March 2008
Had a slow-ish day today. Finished off the oil seals on the block, swapped over the sensors on the block (will keep the F7R oil level sensor I think), and installed the new clutch (new pivot bush and release bearing of course) and JC5 gearbox with the R19 release lever. Also strapped a new R5 GTT starter to the back of the thing, I have yet to see if I have mounted it in the right position.
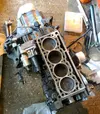
Cleaned up the top face of the block, the piston crowns just wiped clean, this photo was from earlier in the afternoon
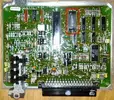
This evening's job was to chip the ECU to hopefully map it for the 2.0l engine. Of course I used the world famous Wicked Neo instructional guide (thanks!), plus I have an electric solder pump, a highly rated tool indeed when it comes to shifting solder from 28 pin legs.
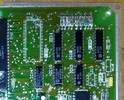
ECU straight out the box, a relatively early one I think (relevant chip indicated)
Chip off the old block
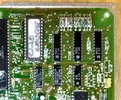
New chip installed
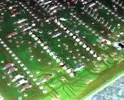
Only a japanese robot could have done it better
[BREAK=Mar : Engine Swap (5)]
28 March 2008
RIGHT, from here on in the rules change.
1) I haven't updated for months so I'm dealing with a backlog of camerafone pictures
2) These pictures are going to be unedited, raw and huge so please bear with me for the time being
3) The storyline will leave something to be desired. Again, bear with me!
Back to this rainy Friday in March:
Picture the scene. Easter has come and gone. It's early this year but that does not excuse the foul weather that has landed upon the UK of late. Even in my hay barn shelter I am finding work tough, with the light poor and the temperature unforgiving.
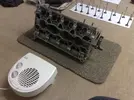
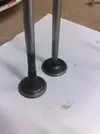
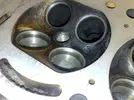
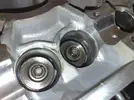
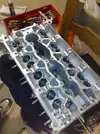
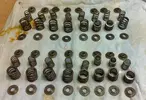
The head was cleaned professionally. Then I took it upon my knee and showed it what was what, in the form of grinding 16 valve heads into it. Believe me you have no idea what dreadful television I had to endure during the grinding of these valves. Please, never again. And I never thought I'd have enough of Carol.
Here's the result, along with the official Fen Way of drying a cylinder head:
The valves:
And their seats:
I love this photo!
The Head, complete
And what belongs in it
Bow down and worship the Green Sealant. This won't even clog your head or tappets.
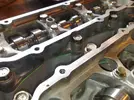
I realise I will have complaints about either:
a) pictures too large for the content
b) pictures to rubbish detail for their size.
Yes - I know, and this is due entirely to laziness. Laziness on my part not to post images as they happen, and also laziness right now in not converting them all individually into bite sized, internet friendly chunks. Well I'm sorry, this inexcusable laziness will hopefully be overcome in the near future when I stop wasting my time doing the times crossword and watching girls, and get around to firing up the PC. If you want you can email me and give me hassle. In fact, if you are actually reading this (and I doubt it) then email me and I'll send you a prize of my own devising. Now there's an offer you can refuse.
Back to April eh, we're making progress!
[BREAK=Apr : Coming Together]
April 2008
Well, it all seemed to go together.
THe ECU soldering I did proved unreliable so I've picked up a few new 2.0 ECUs to try.
The car drives well, pulls very stongly but is pinking under high load + revs. An ECU issue I am hoping.
These pictures appear to be from April so have them:
I gradually reattached items such as the side repeaters, speedo cable etc...
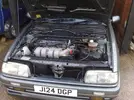
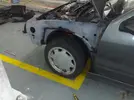

1991, Tungsten Grey
*************************************
Project Overview
It's all good...
*************************************
*************************************
Cheers! List
Bbracer16valver (entire non-ABS kit the day 'it' happened)
Benny - magical clutch cable powers
Neal - Brake line skillz
Mick, Snowman, eBay - for parts
Camberley Auto Factors - best of the factors!
Everyone in the club for top advice - ta!
*************************************
9 August 2007
I had been looking at the car on an eBay advert for a few days. What attracted me to it was the colour and the fact that it looked smart. I wasn't particularly looking for a phase 1 nor a Chamade, but when I saw this in Tungsten I couldn't resist.
Some images from eBay:


After a few calls and photographs the seller accepted my offer of £700
[BREAK=Aug : Collection]
11 August 2007
I drove down to pick up the car near Portsmouth in my blue hatch (I had plans to break this up as soon as I had the new vehicle.) After a long day I ended up in Petersfield with two cars which I had to get back! No matter, as Bidderman very kindly garaged the hatch overnight as I drove the Chammy back home.
The Chammy, the Hatch and you can just make out Bidderman's black hatch project in the background!

[BREAK=Aug : The Car]
12 August 2007
The first drive was positive, it handled really well, a lot more direct than the hatch. The ABS took a little getting used to as it has a different feel to normal braking when you just touch the brakes (note: the Bendix ABS may well be coming out soon.)

The car idles fine, pulls extremely well and I easily get 10mpg more than the hatch! Everything works, I couldn't find a fault other than the digi dash just starting to bleed. The leather is fantastic and the car was spotless when I got it. Just needs new rubber on the pedals. It's got the Renault floor mats as an added bonus!

The rear arches had been welded just over a year back so they look smart. However I'm not 100% happy with the job as I can see it is starting to bubble again under the paint so I'll have this redone over the winter.

The engine is completely standard, there's a cone filter on it now but I have the original airbox for the car to put on. The exhaust is a noisy twin tailpipe affair which will be replaced by one from Bidderman. There's also a decat but it flew through its last MOT (no advisories.)

What I didn't know til I picked up the car is that the guy I bought it off had done lots of things to it already: replaced the whiney fuel pump, sorted out the sunroom jamming issue, replaced the clutch, changed the discs & pads.
The car has a full service history, all Renault main dealer, and has receipts for everything that's ever been done to it, including the original receipt for the car - £15,043.74 back in December 1991!

[BREAK=Aug : Interior]
18 August 2007
Interior
One of the few faults with the car was the blotchy trip computer display:

Luckily I had a spare good one from the Hatch so in it went:

I replaced the pedal rubbers where they needed it (note Renault mats):

The stereo will be changed for another Sony (and compatible with the stalk controls
[BREAK=Aug : Clean Car]
24 August 2007
Clean Car
This was the first chance I had to have a proper look in the dry. So I jacked it up, all looks fine underneath. Removed the arch liners to clear out the built up dirt, that's saved about 10kg. Then time for a good wash so I could see the bodywork properly


These wheels are a bit of a mission to clean, not as bad as multi-spokes though I'm sure
27 August 2007
Tidying Up
Cleaned up round the bonnet vent where it had been badly sealed. Now looking smart again.
Counted tiny stone chips, less than a dozen. Mainly on the bonnet, a large one on the grille but it's only plastic. Waiting for touch-up paint to arrive.
Stripped down rear wiper assy where it was beginning to rust. Kurust and respray but it's missing a washer jet and wiper arm nut bung thing.
Passenger side window switch ceased to work on the hottest day of the year, Neal is sending a spare!
[BREAK=Sep : Pre-Show]
01 September 2007
Pre-Show
Renault World Series is next weekend so I have a small amount of time to get the car in good order.
No time to get the alloys refurbed so they can wait til Spring 2008.
First on the list, the oil was changed (Comma Eurolite) and a new filter fitted (Renault OEM). The last oil was pretty black although it has been changed regularly throughout the car's history. The engine is not using oil or coolant which is pleasing since it's on its original head gasket (72k over 16 years.)
Friday evening dash to Halfords and I have engine degreaser and Meguiars car wax so plenty of fun in store for the weekend
Saturday saw some progress. Armed with carb cleaner and a hosepipe I set about the engine bay.
Air pipework removed:

You can see all the paintwork is now clean and the grime has been removed.
I removed the throttle body for a good clean.
Before:

After:

ISCV had a good blast through with carb cleaner too. Side of the head now:

For a finishing touch, the original airbox went on with a new filter:


03 September
Yesterday was a bit of a milestone, I had the first symptoms of water in the spark plug wells - and from that moment I felt like a true phase 1 owner. I can't understand how people could have been so patient in 1991 when they washed their brand new car a bit hard and it stopped driving properly.
Today, new number plates front and rear. The rear one was fine but the front had a couple of stone chips. I'll keep them, shows the car's not been in an accident.
On a side note, this car is really nice. Everything's original, not tampered with, and works spot on. Everything in the bay is in the right place and has the right clips still, a good sign i'm sure
[BREAK=Sep : World Series]
World Series
7 September 2007
I took the car up to Renault World Series at Donington Park. You can read about the weekend here:
http://www.retro-renault.com/forums/general-chat/3828-rws-2007-discussion.html#post36909
To sum up, apart from being a great weekend, I had a bit of an 'incident' where on the Saturday morning a bunch of us were standing round admiring my car when I noticed smoke coming out the side of the bonnet! Between three of us we got the bonnet open, battery disconnected and poured water on the source of the problem - the ABS pump :twisted:
Here's a picture of the motor a couple of weeks later. You can't see much damage but at the time the flames were licking the underside of the bonnet!

There was no saving the ABS - apart from the fact that the ABS loom had become one hot melted mass, the pump motor itself had been fried and did not spin. I got about a lap and a half around the Donington track before I lost what brake pressure I previously had
Chammy on track!

The solution is the wholesale replacement of the braking system from pedal to brake lines with my preferred choice, the standard non-ABS system. This has two advantages: Firstly there are less components to go wrong, also I much prefer the feeling I'm used to with direct braking.
On the way back from Donington (long stopping distances, handbrake on 4 clicks, shove it into 2nd and two feet on the brake pedal) I picked up the entire kit I needed for the non-ABS brakes (BIG thanks Ash you legend!).
The parts as I got them (Brake pedal, master cylinder, vacuum tube, fluid tubes, reservior):

These have had the special clean treatment and I may have painted the pipes in chav yellow
[BREAK=Sep : Engine strip down]
Engine strip down
21 September 2007
To replace the braking system I must remove the engine from my car. This isn't a bad thing mind, I enjoy doing it and it gives me a chance to a) replace some parts e.g. cambelt while the engine is out of the car, and b) clean and tidy up the bay
My garage was tidied in preparation, you couldn't see the floor before for old r19 parts. Most have now been scrapped or passed on to a good home. Here's a picture of my hard work (note large biscuit tin, also my trademark ToolStool(TM) to save me having my tools strewn across the engine bay)

I haven't had much of a chance in the last two weeks to do much work other than compile a list of parts I need to get hold of (cambelt, grounding kit, paints, cleaners, etc etc). Neal has kindly offered me loan of his engine crane so that makes the whole operation possible!
Parts to go on (cams, brake stuff, heatshields, more stuff not in picture):

Completed today:
Airbox out.
Coolant system off and flushed (well orange
Header tank out and cleaned (I'm trying cillit bang to start although I have other more serious plans up my sleeve)
Loom disconnected all round
Progress pic:

The next stage was to start disconnecting the ABS system. This was a case of following wires and disconnecting them with great care and understanding (thanks Mr Snips!) For now I have left the hydraulics intact; this will be easier to remove once the engine is out.
Bendix ABS: This was just some of the wiring I found lurking in the scuttle. It's big, but it's not clever. Don't do it kids.

[BREAK=Oct : Work Resumes]
Work Resumes
14 October 2007
Well I've had a few weeks 'holiday' from the car, partly to see if I could borrow a crane locally, and partly cos I was fed up with it and it got broken into one Saturday night.
Anyhow, few bits and bobs this weekend. Treated myself to this, it's 1 ton wayne, the engine crane! :lol:

I did a spray-out test of some aerosol Tungsten on a spare rocker cover which will be going on soon. It's a bit dark so when I touch up the bay I'll throw on some thinner coats which will lighten the metallic paint.

Almost ready to lift the engine out, then it got dark and I got hungry, so the final lift will be tomorrow, I can't wait now!

[BREAK=Oct : Out With The Old]
Out With The Old
15 October 2007
I managed to get the afternoon off work so I could crack on
So it was a case of a few final disconnections, PAS pump, speedo, rear mount bracket, then it was TIME!
Here's a video of the engine being lifted. It's sped up to 4x speed in true benny hill comedy style.
YouTube - Renault r19 F7P Engine Removal
Here's its final resting position, ready for a quick clean and new belts and other parts - nothing too major this time

At last, the bay was clear and I could get my hands on the braking system. This came out in about an hour, more a case of undo something, give it a tug, undo some more, keep pulling...

...and here's what fell out

Slightly uncomfortable quarter of an hour down in the footwell removing the pedals but I've been lucky and never had to do clutch or anything before now
It gets dark very early these days

16 October 2007
Another few hours this afternoon saw most of the bay completely stripped, wings and bumper off and only the electrics remaining.


Next on the list is a realy thorough clean of everywhere I can get to, then I'll see about rubbing down any tiny rust patches and respraying...
It's a shame about the weather, it looks like from now on it will be wet and cold, not really ideal conditions for cleaning and painting!
18 October 2007
Work continues... hahaha!
Now the wishbones, hubs and suspension struts are off. Had to hacksaw one of the track rod ends off, but they are both being replaced as a matter of course. New wishbones and lower ball joints will go on, the struts will stay as they are good, with aftermarket springs and sound top mounts.
The hubs will get the wire wheel treatment then a good coat of something. Still got to remove the remnants of the ABS sensors! I may as well have the anti-roll bar off and do the bushes while it's there too, they aren't exactly new. The only thing remaining in the bay now is the PAS which I ran out of time to remove but should lift out.
Looking at things it suddenly hit me that the subframe was completely clear (bar the PAS still) and that was a scary moment.. what started in my mind as a simple job ('oh i'll whip the Bendix ABS out over the winter some time') has turned into a full front end strip down. I enjoy it.. not only a good chance to see what goes what but also a good reason to give everything a good freshen up and replace all wear items so fingers crossed I should never need to go near the front end again... you heard it here first!
No pics as it was dark before I even started tonight. Clocks go back after next week
[BREAK=Oct : Painting]
Painting
24 October 2007
Day off work today so it was over to Renault to pick up a few components, steering rack bush and gaiters and some other stuff. Cold but fine so I decided some painting was on the cards!
I pulled about 100 plastic clips out of the engine bay, hope I remember where they all went!

All the visible parts were rubbed back and cleaned and prepped for painting

After trying to work on the subframe and the back of the bay I decided it was in fact easier to remove the subframe so 4 bolts and it was free, which makes things easier in terms of painting the subby and the bay seperately.
I got the grinder on a few rust patches which then had the Kurust treatment, it's good stuff! This picture shows the state of play before I started painting, you can see all the patches where rust spots had appeared.

By the time I started painting it was almost dark so no pictures tonight. But I gave the inner arches a good thick coating of waxoyl then began priming the wings and the engine bay. Only half done because I ran out of primer but I'm expecting another shipment tomorrow. Hope it looks OK in the light tomorrow!
26 October 2007
Early finish at work on a Friday and the weather was perfect for spraying - dry with barely a breeze. I finished off with the primer coat and gave everything a light de-nib and wipe down.

I decided since time was of the essence in the grand scheme of things that one coat of primer would have to do so it was on with the colour. I used over three cans of paint per coat, that's a litre and a half of each - aerosol mind.
In the end I was really happy with the result. 24 hours should give things time to dry fully before lacquer.


[BREAK=Nov : Reassembly]
Reassembly
29 October 2007
Well now everything is off the car, it's time to put it back on again in a slightly different order. Seemed only natural to start with the subframe, hopefully I can free up some garage space once I get rid of this.
Grinding, grinding, and this much kurust!

4 November 2007
Well the neighbours have all been complaining about living next to a garage, although in slightly different language to that. Proper curtain twitchers round here, really nothing better to do than complain whenever anyone leaves their bin by the road an hour longer than necessary or actually does something with their life like fixing a car. So my priorities shifted away from the braking system and more towards getting the car back on its wheels.
Subframe had its final coat of Hammerite and I chucked it back under the car. Good to get the big things out of the way really. Power steering system was ready to go so was bolted back in place with new a rubber mount and new gaiters, also a bit of a clean up.

A lot of you will be complaining about the choice of yellow paint, well I've got a tin of it needs using up
Brand new wishbones, balljoints and track rod ends

Here you can see how the waxoil came out on the inner arches, I used quite a large tin between the two sides

Threw the wings, bonnet and bumper back on for now so it doesn't look too neglected. Nice to get the car back on its wheels too, very nice indeed.

[BREAK=Nov : New Brake System]
New Brake System
9 November 2007
This picture shows the new vacuum servo and master cylinder. Servo upside down for trial fitting only. Front rigid lines will reach perfectly, the rears will need either a bit of re-routing or extending in order to attach to the master cylinder. The correct solution would be to replace these with fresh and better routed but we'll see if I can make these work well enough.

The vacuum servo and master cylinder are now installed, and hooked up to the brake lines, so now I just need to reattach the pedal and brake fluid reservoir, bleed the system, and that should be job done. Thanks to Neal for flaring assistance.
Grabbed some more pictures, although it was nearly dark at 4.30. If this was the summer I'd have finished the whole car in about a fortnight...
The new pipes are the rear lines. Stil to be painted and clipped back properly.

Got the reservoir and feed / return pipes installed, bit of a puzzle given just the bare bulkhead to try and figure out where they go, but like anything, once you know it's simple

Servo heatshield on, also I've started to replace all the clips around the bay. Having the vacuum servo upside down makes more sense to me but hey, gotta keep it original and route the vacuum pipe right round it. Headlights are on and a few random brackets... more pics tomorrow!

Replacement reservoir bracket, thanks MicKPM

Freshly cleaned and greased lock mech

One more picture for luck

[BREAK=Nov : Cams & Tappets]
Cams & Tappets
10 November 2007
I have a pair of Williams cams to install courtesy of Snowman. He also provided the tappets to match. These, although they have been immersed in oil, were all gunged up and had no spring in them so before they go into the head I must sort them out.
With reference to Chris H's excellent tech article, I pulled apart and refurbed all 16.
Bang the hydraulic tappet out the bucket part

Drain the bucket

They were cleaned by activating them in a pot of degreaser until they were free to spring nicely, most of them needed the ball valve prodding before they'd move at all. The buckets were cleaned until spotless, they contained a lot of gunge behind the rim.
A good saturday evening's work, I'll probably stick em into the head later tonight too.


Original cams out, these will have a new home in a different engine

New cams all torqued up. Note the early still 8mm bolts with the 10mm hex heads, better than the annoying later torx ones (Good spot Neal

[BREAK=Nov : Engine]
Engine
11 November 2007
Just a few parts to renew on the engine. Nothing major. All the brackets came off for clean & paint, same with the manifolds and injector rail. Gave the block a wipe with an oily rag, no more. I need this car back on the road!

Brand new water pump. Now I've seen a few water pumps, but no two the same. This genuine one even came in a Renault box but has the lamest paddle ever, just folded steel vanes. It also spins quite freely. The one I removed was not original with the car as it had a paper gasket. This paddle was slightly better, a cast ally effort. The last genuine one I had off the bay had a monster of a wheel and was still to turn. Oh well, a paddle's a paddle. Here's the two, old and new

And on the block

New cam belt kit, thought I'd try SKF this time, fair price and a quality brand name. Nice clean camshaft sprockets you see

Still to do before the engine goes back: manifolds inlet and exhaust, fuel rail, alternator bracketry, thermostat housing.

28 November 2007
A quick update, not much progress the last couple of weeks as I've had other things on. The prospect of having to tax the car again this weekend I think has spurred me on to start driving it again.


The engine dropped in really sweetly, not too many problems. I did however scratch one of the chassis rails though! Never mind it won't show.
Crane vs. Car

Just slid in really!

[BREAK
Back Together
3 December 2007
Some more progress, the rain held off all day.
ARB back on, driveshafts in, gearstick reattached, wheels back firmly on


Aux belt back on. PAS pump was annoying. One of the pipes to the PAS fluid radiator had got twisted round the pump, typical.

Still need to revert back to the newer style fuel rail for various reasons.
17 December 2007
Over the weekend I did one or two little things, got the proper fuel rail on again for a start!

Sorry for the lack of pictures, I was often working in the dark or semi-dark. I connected everything up and after a bit of tinkering with the electronic ignition she fired up! Very tappet-y, this was to be expected.

Good progress was made and thanks to ash and benny for calling in tonight to lend a hand with the clutch cable and pedal! I had the car started and the brakes and steering felt good so it was time to take it for a spin.
First stop garage for air and fuel - £101.9/litre, thats gone up about 10p since I started work :lol:
The car feels amazing, nothing loose and it feels really strong! The tappey noise soon went with some high revving action. The car brakes well which is a huge relief to say the least - mission accomplished I think I can say!

A few tweaks still to do:
- adjustcambelt
- maybe bleed brakes some more
- tidy up headlamp loom
- reattach front grille strip
- heat shields and more clips inside the bay
[BREAK
Aftermath
Christmas 2007
Took the car out of town and ended up stopping at the first services to adjust the timing belt! 5 minute job and all was well, slackened the alt belt too for good measure.
Good run, I was expecting to feel no difference at all with the different cams but the car feels great, it just wants to drive and feels very strong
MPG test over 15 mins of motorway, still happy with this really:
65mph == 44mpg
88mph == 38mpg
Also good news, despite ripping out the speedo cable, i just stuffed the wire back into the end plastic part and it's working perfectly for now. Good news for the road speed sensor.
One more thing, since I had the engine out and back in again it's started leaking from the crankshaft (pretty sure) at the pulleys end, the last engine i had out did this too, explain that one.
Maybe being sat idle for 3 months, maybe being sat on the sump has cracked the seal round the crankcase end plate, maybe just bad luck. I'll be attempting a fix with the engine in place, wish me luck.
[BREAK=Jan : Version 2.0]
Version 2.0
New Year 2008!
The Chamade was running. It covered 700 miles in 5 days with no trouble in particular other than the following:
1. Minor oil leak as mentioned
2. Puff of smoke on start up
3. Distinct oiliness around the back end
4. Tapping... or is that clattering..?
I came to the conclusion that I would I have to have the head off and take a look.
Consequently the question arises... do I stick the same bottom end back on or do I seek an alternative? This was my thought process:
1. The bottom end's possibly suffering from oil burning / piston slap
2. I may need a new bottom end
3. I just happened to discover a Megane Coupe write-off in a scrapyard over Christmas, I was looking for a Peugeot MAP sensor, honest!
4. Megane 2.0 litre engine would give me more torque, more power and maximum kudos at the expense of running a non-original engine (although i'd already stuck Williams cams into the head by this point)
5. I negotiated a fantastic price for the Megane engine and gearbox
To sum up:
Note: I would recommend anyone to read the project reports of members such as Neal, Wicked Neo, MicKPM and others who have successfully run the 2.0 litre engine - it is their advice that enables me to know exactly what I can and can't do here!
Bottom End
I'll be using the 2 litre bottom end from the Megane. This has different bores, pistons and crankshaft to the R19. It's still an F-type engine so all the ancillaries etc from the 19 will fit.
Cylinder Head
Since this engine was fitted with DIS electronic sparking and engine management (and the 19 is set up to run a distributor) I'll be attaching the 19 head onto the megane bottom. The Megane (F7R) cylinders are bored to 0.7mm diameter larger than those in the 19 (F7P) but this slight mismatch is of no importance. I'll be using the fractionally larger (F7R) head gasket, although they tend to be larger than the bore diameter anyway.
Gearbox
The Megane coupes were fitted with the JC5 gearbox, as were the Williams engines I believe. Although the gear ratios are similar to the original R19 (JB3) box, the JC5 is reputed to be more durable. As an added bonus (or not) the JC5s were fitted with a longer clutch release lever which gives a far softer feel to the clutch... a bit girly but I may well keep this feature!
Electronic Management
I'd originally bargained on being able to slot in the Megane ECU to run the engine but it turns out that this is hard coded into the door locks, fusebox etc out of the Megane car it came out of so will not function in any other situation. I also quite fancied keeping the Megane flywheel as it has a more industry-standard 60/2 trigger pattern which is compatible with many aftermarket management systems but in the event I'll be keeping the R19 flywheel.
This leaves me looking for something to run the larger engine spec.. for the meantime I'll be trying a custom chip in the 19's ECU with a view to obtaining a Williams ECU in the future, which of course combines early 1990s simplicity with the 2.0 litre spec (and will suit the Williams cams I'm running too).
Some quick snaps as I begin work... this is what I bought:

Some dirt, OK, but after stripping everything off the block seems pretty sound

The gearbox seems good, the block has not a trace of rust in the coolant - not bad for an 11 year old engine!
Block label, the magic letters F7R (These blocks have a large cast-in F7R logo on the back too)

Gearbox label

Of course my engine has a birthday!

Whipped off the head, thanks Neal for lending some weight to the operation!
The head, I won't be using this of course. All looks fine, spark plugs were in good condition

The pistons look fine, never had cambelt failure. Bores look great with the honing marks still clearly visible and no scores or steps. So far so good and this gives me confidence to continue

The block, after this I took it outside and jet washed it to remove the worst of the grime and show up a cracked sump - the breakers I strongly suspect.

[BREAK=Jan : 2.0 Engine Build]
2.0 Engine Build
05 January 2007
RUNNING COSTS OF 2.0L CONVERSION
£100.00 F7R Engine, JC5 Gearbox (scrapyard)
£62.00 Head gasket kit, head bolts, bottom end kit (ebay)
£26.00 Starter motor Renault 5 (ebay)
£36.00 Head skimmed and washed
? clutch, may as well
? fluids
£47 head skim and parts dipping
? Rear crankshaft seal
[BREAK=Feb : No News]
February 2008
No news
[BREAK=Mar : Engine Swap (1)]
24 March 2008
It's Easter weekend. It's snowing heavily. I book the week off work and begin the long awaited engine swap...
Stage 1: Car full of engine!

Stage 2: My travelling tool kit unpacked, now we're ready for action

Stage 3: Old engine on its way out

Stage 4: That's that then

Original engine, I am pretty sure it's never had the head gasket replaced, however it was in good condition with no visible wear to the gasket at all. Not bad for 16 years and 80k miles really.

Waterways look a bit orangey, they weren't so bad in daylight

This will make way for the F7R... I took the sump off the new engine to have a good look and things all seem good inside

[BREAK=Mar : Engine Swap (2)]
25 March 2008
Removed all the valves etc and took the head in for a skim, despite the HG never having blown it was still warped at either end by about 3 thou so worth having done.
Good chance to clean the head, cam carriers and inlet manifold and a proper look at things.


[BREAK=Mar : Engine Swap (3)]
26 March 2008
Continued with the build up of the F7R. This afternoon I did the pulleys end.

End covers cleaned and degreased

All assembled, the water pump was new in the autumn. Interesting fact, the original crankshaft seal in the F7R block was 8mm thick, the one in the F7P was 10mm. All the factors stock the 10mm one so that went in.

I was hoping to use the F7P oil sump on the F7R because the megane sump arrived cracked, thanks car breakers :roll:
Left: Megane, Right: R19

Megane:

R19:

So you can see there are differences. Other than a subtle difference in the oil pump pickup the main problem is that no proper fixings are provided in the 19 sump for the plastic baffle plate found in the megane. The existing R19 plate will foul the big ends. The correct solution is to source an actual F7R sump but for now i'll be running the F7P version.
All set for night working, clocks don't go forward until this weekend

[BREAK=Mar : Engine Swap (4)]
27 March 2008
Had a slow-ish day today. Finished off the oil seals on the block, swapped over the sensors on the block (will keep the F7R oil level sensor I think), and installed the new clutch (new pivot bush and release bearing of course) and JC5 gearbox with the R19 release lever. Also strapped a new R5 GTT starter to the back of the thing, I have yet to see if I have mounted it in the right position.
Cleaned up the top face of the block, the piston crowns just wiped clean, this photo was from earlier in the afternoon

This evening's job was to chip the ECU to hopefully map it for the 2.0l engine. Of course I used the world famous Wicked Neo instructional guide (thanks!), plus I have an electric solder pump, a highly rated tool indeed when it comes to shifting solder from 28 pin legs.
ECU straight out the box, a relatively early one I think (relevant chip indicated)

Chip off the old block

New chip installed

Only a japanese robot could have done it better

[BREAK=Mar : Engine Swap (5)]
28 March 2008
RIGHT, from here on in the rules change.
1) I haven't updated for months so I'm dealing with a backlog of camerafone pictures
2) These pictures are going to be unedited, raw and huge so please bear with me for the time being
3) The storyline will leave something to be desired. Again, bear with me!
Back to this rainy Friday in March:
Picture the scene. Easter has come and gone. It's early this year but that does not excuse the foul weather that has landed upon the UK of late. Even in my hay barn shelter I am finding work tough, with the light poor and the temperature unforgiving.

The head was cleaned professionally. Then I took it upon my knee and showed it what was what, in the form of grinding 16 valve heads into it. Believe me you have no idea what dreadful television I had to endure during the grinding of these valves. Please, never again. And I never thought I'd have enough of Carol.
Here's the result, along with the official Fen Way of drying a cylinder head:

The valves:

And their seats:

I love this photo!

The Head, complete

And what belongs in it

Bow down and worship the Green Sealant. This won't even clog your head or tappets.

I realise I will have complaints about either:
a) pictures too large for the content
b) pictures to rubbish detail for their size.
Yes - I know, and this is due entirely to laziness. Laziness on my part not to post images as they happen, and also laziness right now in not converting them all individually into bite sized, internet friendly chunks. Well I'm sorry, this inexcusable laziness will hopefully be overcome in the near future when I stop wasting my time doing the times crossword and watching girls, and get around to firing up the PC. If you want you can email me and give me hassle. In fact, if you are actually reading this (and I doubt it) then email me and I'll send you a prize of my own devising. Now there's an offer you can refuse.
Back to April eh, we're making progress!
[BREAK=Apr : Coming Together]
April 2008
Well, it all seemed to go together.
THe ECU soldering I did proved unreliable so I've picked up a few new 2.0 ECUs to try.
The car drives well, pulls very stongly but is pinking under high load + revs. An ECU issue I am hoping.
These pictures appear to be from April so have them:
I gradually reattached items such as the side repeaters, speedo cable etc...


Last edited by a moderator:

