craigus1977
Active Member
Right then, one cold spring morning at 6 0am I venture up to Stoke to pickup the ol gal. From philip1 (member of retro renault). Stopping off at Birmingham to collect a recovery truck that I hired for £90 (Car Transporter Hire Self Drive OR With a Driver).

Here she is at the services one me way home.

Anyway, I get back and decide to give it a quick wash and hoover out. Not too bad really. A few spots of rust here and there and the front window seals were shot, the laquer was starting to peel along the roof, but other wise okay.


I had already bought some parts from renault, i.e full set of window seals £43 left & right & £21 for the lower (left & right), rain catcher £64, spark plug cover £30. Just bought 2 original boge front shocks off ebay £25 each. And a set of goodridge brake lines, £40. Oh, and a new battery. Should have been £94 but I managed to get a Halfords trade card so it was £52! Result
Fitted the new battery and it started first time. Idle revs were spot on, no misfiring. Pulls well in every gear. And sounded spot on!
Most things electrical worked, although the sunroof only opens halfway. Probably rusted up, will find out in due course.
Cost so far in parts £435.94
[BREAK art pile]
Just a quick update.
Still waiting for my garage to become avalible, should be next weekend hopefully :roll:
More parts are still arriving!

Front and rear shocks, full upper and lower window sills, new expansion tank, new rain catcher, spark plug cover, goodridge brake lines...

New brake regulating valve turned up today, £44 from ebay

Nice new window sticker
Cost so far £461.67
[BREAK=Work Starts]
Got the front up in the air to get a good look underneath...
Not good, subframe is totally rotten


As you can see, it looks pretty grim under there. Not what I was hoping for. Nevermind onwards and upwards. Bonnet came off, no probs. Front bumper next... managed to get the top one and a half bolts out as one sheared. Bolts near the inner arches, rust had eaten away most of the heads so no chance there. Underneath, similar story, one sheared and one rusted. Will get the power tools from work tommorrow

Off comes the bumper after sooo much swearing! Every bolt so far is either siezed or shears off. My best friend is now a blowtorch :twisted:
When it comes to rebuild I'm guessing Renault will get a phone call from me to order every new bolt, screw and nut. Gonna cost a fortune!
[BREAK=Engine Removal]
First big job to do was to take the engine out. This ended to be abit of an epic battle! What with more bolts shearing and jubilee clips well and truly seized, this put up a fight! Anyway after 3 weekends, the power plant is out.


In the middle of the engine removal I've been sandblasting various brackets and repainting them. Next will be to remove and chuck the subframe as its past its best before date!
Big thanks to 'wicked neo' for the new brake servo and master cylinder
New parts pile is getting bigger by the day
[BREAK=New subframe and other parts]
While I've been waiting for a generator and air compressor to be delivered for the garage, I have been concentrating on buying more parts and making good my originals that I have.

Nice gleaming subframe with new cage nuts and new rear engine mount.

New full gasket set and head bolts. Repainted inlet manifold with new stainless bolts. Exhaust manifold was sand blasted and repainted with VHT paint.

New ignition module with a blasted and repainted power steering pump.

New heatshields

Various brackets, also had the sand blast and paint treatment.
The first plan was to strip the car down to the bare shell to give it a full respray, but since removing the engine I'm running out of room to store parts. So plan B is to respray the engine bay, refit the nice clean new engine with new brackets and bolts. Then strip the rest of the car down, i.e. interior and exterior and then give it a full body inside and out respray.
Before that though, I need to strip the underside. Sorting any rust, holes etc. Give it some underseal and refit new lines, brackets, exhaust...

Took the arch liners out to reveal inches of mud! Must have been used as a rally car at some point :roll:
Still need to take off the old subframe, proving to be a right bitch as one bolt at the back corner bolt is spinning with a nut and can't get a spanner onto it. Wings need to come off aswell as the brake servo, brake lines and petrol lines.
Cost so far £720
[BREAK=Sorting engine bay rust]
Subframe off!
Have spent most of the week with the old angle grinder and knotted wire brush attachment to remove most of the loose rust, then treated with kurust and sprayed over with acid 8.


The plan or 'wish list' was to get the shell acid dipped, but I really couldn't afford to get this done. The local restoration guys quoted me a typical quote of £10000+ for strip down, acid dip, repair any metal work destroyed by rust, repaint and build up. I didn't think that was to bad if I had that kind of cash lying round!
Also I'm sort of enjoying doing the work myself
[BREAK=Stripping engine for paint]

Block has been wire brushed and degreased


All looks good inside

Cylinder head cleaned and painted, with trail fit of inlet manifold and other brackets. This engine won't be stripped and rebuilt as it runs fine, I'll make it look nicey nice and refit it. In the meantime I'll get hold of another engine to tune up for fast track action
p.s. thanks to wicked neo for the engine lift eye bracket

Repainted the block today. Loving all these fresh new parts coming together
Cost so far £895.84
[BREAK=Head Skimming]
Okay, not much has been happening at the moment. Due to a new baby and house move. Back to work on the 19 starts again..
Picked up the head today after getting a reskim at Engineering and machining cost was £40 for the skim, but I got them to give it a good look over, new seals etc. Cost £84 altogether.
Also fitted new core plugs into the block.

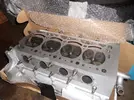
Also bought a new alternator, don't know why as the one I have was in perfect working order! Just wanted a nice new shiny one, and it was only £35.


Thanks to neal for the oil filter
[BREAK=Fuel Injectors, with service report]
Injectors before
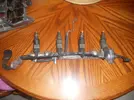
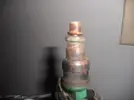
And after being serviced


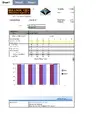
Results of before and after
Cost so far £1014.84
[BREAK=Sand blasting the engine bay]
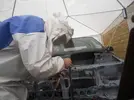
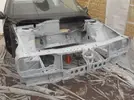
Finally decided to sandblast the bay. I got hold of one of them portable sealey blasters off ebay. Cost me £40 brand new, so wasn't too bad. Took me about 2 hours to blast it back to bare metal. Then sprayed it with etch primer to protect it from rust.
Couple of pics of me in action and after I had sprayed it.
[BREAK=Sills]
Took off the side skirts. Really wish that I hadn't!
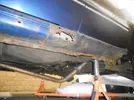
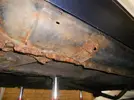
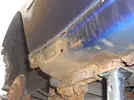
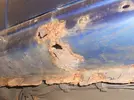
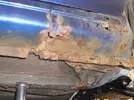
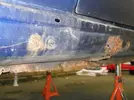
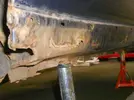
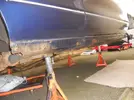
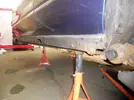
I was hoping, or wishing that these wouldn't be this bad as I'm not looking forward to welding new sills. Bought a new set anyways, cost me about £50 for the pair.
[BREAK=Out comes the interior]
Took the front and rear seats out today along with the rear door cards to see how bad the rust is. By the way the 4 nuts that hold the seat runners from underneath were a pig to undo as these were so rusted and seized. I ended up buying a set of nut extractors, best buy yet!
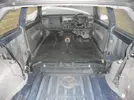
Over 20 year old carpet there, not in bad nick
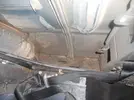
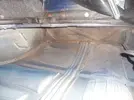
View of what appears not to be too bad (phew)
[BREAK=Rear beam removal]
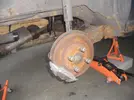
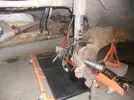
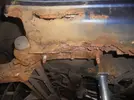
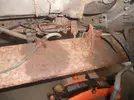
Proving to be a sod to get off.
[BREAK ainting engine bay]
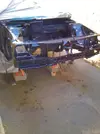
Okay so I have one nice sunny day of 2012 to get this done. So I crack open my spraygun and have a bash.
The bay has been in zinc primer for as long as a can remember and theres no sign of rust coming through so thats good!
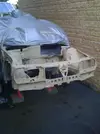
After a few coats of filler primer and a rub down.
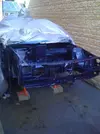
First coat of base coat, and lots of flatting back. Did about 3 coats of colour in total.
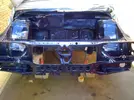
The finished pic which doesn't really do it justice. After 2 coats of 2k laquer. Sweet!!
Gonna wait about a week to give the laquer time to go ard, then refit all the gubbins. I can't wait!
[BREAK=Refitting Brake Servo and Pipework]
Okay, so I begin by fitting the servo and master cylinder. Couldn't find a pucker 19 one so I took neals advise and modded a kangoo one. Fits like a dream!
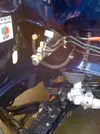
The 3 larger brake pipes I just stripped back and repainted, still gotta make the 4 brake lines from scratch. Ordered some new stickers for the bay to keep it original.
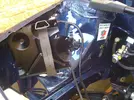
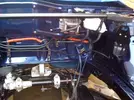
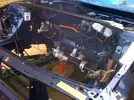
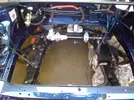
Subframe is on with the power steering rack, new wishbones with new rack ends and gaiters. Bolted the bulkhead part on with the brake fluid res and the map sensor, just as a looksie. Will probably come off when I fit the engine.
Forgot to mention that all the nuts and bolts are being replaced with new stainless steel so no more rusted bolts!! Oh and new jubilee clips
[BREAK=Stripping the underside]
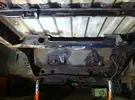
Okay, so I decide on stripping underneath. This has got to be the worst job in this project!
I've been using a knotted wire brush attachment on an angle grinder to get all the old underseal off, uncovering what seems to be a small rust bubble turns out to be a nasty big hole!
Nevermind, no point in moaning about it. These will either be patched up with new steel or IF I can get hold of new sections, these will get used.
At the minute I'm just stripping back, seeing what the damage is, then kurust any surface rust and spray on some zinc primer.
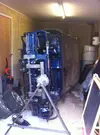
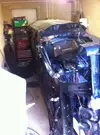
I have now recently bought a rollover jig to make life easier stripping the underseal and welding the sills.
[BREAK=Cutting and welding inner and outer sills]
With the car now on its side I've begun cutting the outer sills off to get to the inner sills. As the outer sills are going to be replaced with new anyway.
Me in action
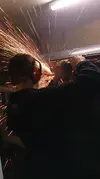
Outer sill has been chopped away, leaving the inner sill now exposed. I've cut out the lower part of the inner sill as this was totally rotten.
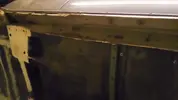
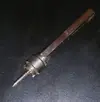
I came across this neat little tool for drilling spot welds. Only cost about a fiver. Money well spent I reckon.
Next job will be to weld in some nice new steel plate to rebuild the inner sill...
Just thought I'd tot up the cost so far aswell. This is including car parts, consumables, and equipment, such as the jig, welder, engine crane etc.
New sills now welded on!
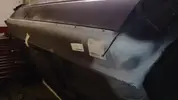
Cost so far £1325.82
[BREAK=Repainting the underside]
I got too excited the other day and decided to repaint the underside with stonechip, I just couldn't bear looking at a patchwork of repairs any longer!
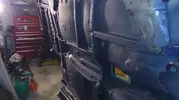
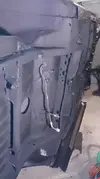
So much better!
I used gravitex in a Shultz gun, good stuff. I repainted the petrol tank aswell. Next will be to trail fit the new parts underneath, make some new brake lines and route the fuel lines through.
[BREAK=Fitting new brake lines]
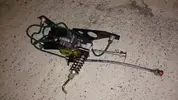
Right then, a fair bit has happened since the last update. All brake lines front and rear have been replaced. Also the ones on the regulator. Can't wait to bleed them, see if my flaring tool was any good!
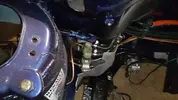
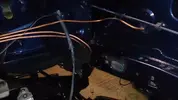
New brake regulator was treated to some new lines and painted
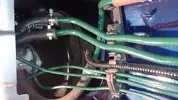
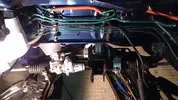
Fitted to the car
[BREAK=Making a new fuel filter bracket]
The bracket I had was pretty unrecognisable due to corrosion, so I made one from carbon. Didn't take too long and the tooling was pretty simple.
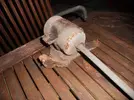
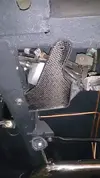
I cleaned up the hoses, fitted new jubilee clips and a new filter. Nice.
[BREAK=Front struts]
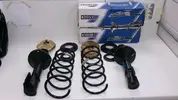
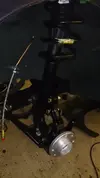
I've had the front struts since the beginning along with the rears. Just been waiting for a pair of springs to turn up on eBay. A set of genuine Renault ones for £10 turned up so I snapped them up. Bought a pair of top bearings too as the original ones were shot.
[BREAK=Cleaned up the gearbox]
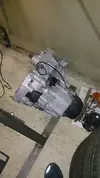
Not much to say about this but thought I should put up a pic as it turned out better than I thought.
Finished achieved by using the glass bead blaster at work.
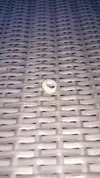
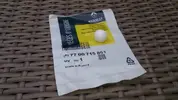
New bush needed!
[BREAK=New Starter]
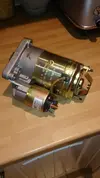
Finally found an original Renault starter motor on the bay, cost only £30! Well chuffed with that.
Car is coming along nicely now.
Now that the welding and undersealing is finished, which has been the biggest job so far, it won't be long till it can be put back onto 4 wheels
[BREAK=New wheel bearings & discs]
Postie bought 4 new wheel bearings with front and rear discs last week.
The rear bearings were pressed in the discs easily, although the fronts were a different story!
Using the press at work, I was getting quite scared as the gauge climbed to 2 tonnes, then 3 tonnes. Eventually an almighty bang went at just over 5 tonnes and the bearing dropped out. Needless to say I had to change my underwear!!
Other side was the same, but now I have a full set of new smooth bearings, and new pants

[BREAK=Engine back in]
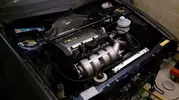
Time has come for the engine to go back in. Which I'm quite glad about as it's just getting in the way. Suprisingley it slipped straight in, which is a first
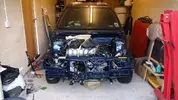
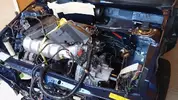
I put a bit of masking tape on the paintwork where I thought it might touch while going in. Stops it from scratching or chipping.
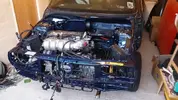
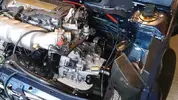
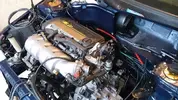
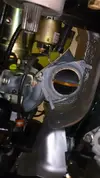
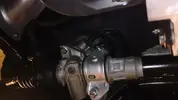
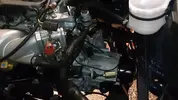
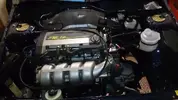
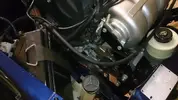
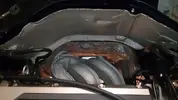
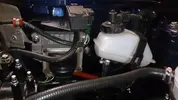
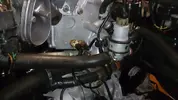
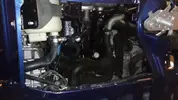
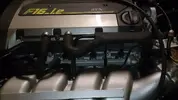
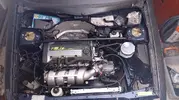
So now I have the task of routing the cables and hoses where they should go. It's quite straight forward but there's a couple where I have no idea where they go! And I have no pictures of these bits, typical.
Picked up some more parts from renault too. New clutch cable and accelerator cable. Need some new HT leads and spark plugs, any recommendations?
Stay tuned for more updates. I think it's going to be finished this year! Next big job will be to get it sprayed then it's pretty much finished
More pictures of connecting things up...
[BREAK=More parts arrived]
Had to order some little bits and bobs from renault. Altogether about £65.
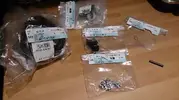
Needed a inner driveshaft gaiter with the fixing plate as the new driveshaft never had it!
[BREAK riveshafts]
Decided that I was going to connect the driveshafts as they have been sitting in the garage since day one!
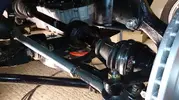
This is the drivers side, pretty straight forward. Roll pin was a bugger as always but went in.
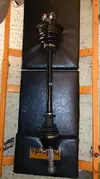
As I mentioned before, the fixing plate on the passenger side was missing, so a new one was ordered from renault. Not just a plate but a whole inner gaiter kit, cost £36!
[BREAK= Brake calipers]
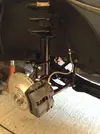
Nice new 4 brake calipers came with EBC black stuff pads, fitted them straight away with goodridge hoses
[BREAK=Fluids]
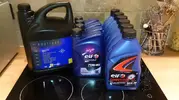
Ordered some engine and gearbox oil, along with some coolant. Whole lot came to £77.
Gearbox takes 3.4 litres, engine takes 5.5 litres.
[BREAK=Revisiting driveshafts]
Not much been happening over the last few months as my new job takes me out of the country quite alot.
Before I went last month I filled the car will oil and gearbox oil, came back and there was a nice puddle underneath. Had a quick look around and found it was leaking from the driveshaft! Word of advise, cheap driveshaft and renault gaiters don't mix! So I bought an original renault driveshaft from the dealer. Job done.
[BREAK=Final jobs to do]
While I have a bit of time at home, I've put a list together what needs to be done to finish.
Air hose to be sourced and fitted
Fabricate and weld front jacking points
Bleed brakes
Buy battery
Bolt the panels and skirts back on
Full respray
Fit lights (front and rear)
Fit badges
Fit window seals
First fire up
Check bolts for torque
MOT
Doesn't sound much, but trying to find time will be the trick.

Here she is at the services one me way home.

Anyway, I get back and decide to give it a quick wash and hoover out. Not too bad really. A few spots of rust here and there and the front window seals were shot, the laquer was starting to peel along the roof, but other wise okay.


I had already bought some parts from renault, i.e full set of window seals £43 left & right & £21 for the lower (left & right), rain catcher £64, spark plug cover £30. Just bought 2 original boge front shocks off ebay £25 each. And a set of goodridge brake lines, £40. Oh, and a new battery. Should have been £94 but I managed to get a Halfords trade card so it was £52! Result
Fitted the new battery and it started first time. Idle revs were spot on, no misfiring. Pulls well in every gear. And sounded spot on!
Most things electrical worked, although the sunroof only opens halfway. Probably rusted up, will find out in due course.
Cost so far in parts £435.94
[BREAK
Just a quick update.
Still waiting for my garage to become avalible, should be next weekend hopefully :roll:
More parts are still arriving!

Front and rear shocks, full upper and lower window sills, new expansion tank, new rain catcher, spark plug cover, goodridge brake lines...

New brake regulating valve turned up today, £44 from ebay

Nice new window sticker
Cost so far £461.67
[BREAK=Work Starts]
Got the front up in the air to get a good look underneath...
Not good, subframe is totally rotten


As you can see, it looks pretty grim under there. Not what I was hoping for. Nevermind onwards and upwards. Bonnet came off, no probs. Front bumper next... managed to get the top one and a half bolts out as one sheared. Bolts near the inner arches, rust had eaten away most of the heads so no chance there. Underneath, similar story, one sheared and one rusted. Will get the power tools from work tommorrow

Off comes the bumper after sooo much swearing! Every bolt so far is either siezed or shears off. My best friend is now a blowtorch :twisted:
When it comes to rebuild I'm guessing Renault will get a phone call from me to order every new bolt, screw and nut. Gonna cost a fortune!
[BREAK=Engine Removal]
First big job to do was to take the engine out. This ended to be abit of an epic battle! What with more bolts shearing and jubilee clips well and truly seized, this put up a fight! Anyway after 3 weekends, the power plant is out.


In the middle of the engine removal I've been sandblasting various brackets and repainting them. Next will be to remove and chuck the subframe as its past its best before date!
Big thanks to 'wicked neo' for the new brake servo and master cylinder
New parts pile is getting bigger by the day
[BREAK=New subframe and other parts]
While I've been waiting for a generator and air compressor to be delivered for the garage, I have been concentrating on buying more parts and making good my originals that I have.

Nice gleaming subframe with new cage nuts and new rear engine mount.

New full gasket set and head bolts. Repainted inlet manifold with new stainless bolts. Exhaust manifold was sand blasted and repainted with VHT paint.

New ignition module with a blasted and repainted power steering pump.

New heatshields

Various brackets, also had the sand blast and paint treatment.
The first plan was to strip the car down to the bare shell to give it a full respray, but since removing the engine I'm running out of room to store parts. So plan B is to respray the engine bay, refit the nice clean new engine with new brackets and bolts. Then strip the rest of the car down, i.e. interior and exterior and then give it a full body inside and out respray.
Before that though, I need to strip the underside. Sorting any rust, holes etc. Give it some underseal and refit new lines, brackets, exhaust...

Took the arch liners out to reveal inches of mud! Must have been used as a rally car at some point :roll:
Still need to take off the old subframe, proving to be a right bitch as one bolt at the back corner bolt is spinning with a nut and can't get a spanner onto it. Wings need to come off aswell as the brake servo, brake lines and petrol lines.
Cost so far £720
[BREAK=Sorting engine bay rust]
Subframe off!
Have spent most of the week with the old angle grinder and knotted wire brush attachment to remove most of the loose rust, then treated with kurust and sprayed over with acid 8.


The plan or 'wish list' was to get the shell acid dipped, but I really couldn't afford to get this done. The local restoration guys quoted me a typical quote of £10000+ for strip down, acid dip, repair any metal work destroyed by rust, repaint and build up. I didn't think that was to bad if I had that kind of cash lying round!
Also I'm sort of enjoying doing the work myself
[BREAK=Stripping engine for paint]

Block has been wire brushed and degreased


All looks good inside

Cylinder head cleaned and painted, with trail fit of inlet manifold and other brackets. This engine won't be stripped and rebuilt as it runs fine, I'll make it look nicey nice and refit it. In the meantime I'll get hold of another engine to tune up for fast track action
p.s. thanks to wicked neo for the engine lift eye bracket

Repainted the block today. Loving all these fresh new parts coming together
Cost so far £895.84
[BREAK=Head Skimming]
Okay, not much has been happening at the moment. Due to a new baby and house move. Back to work on the 19 starts again..
Picked up the head today after getting a reskim at Engineering and machining cost was £40 for the skim, but I got them to give it a good look over, new seals etc. Cost £84 altogether.
Also fitted new core plugs into the block.


Also bought a new alternator, don't know why as the one I have was in perfect working order! Just wanted a nice new shiny one, and it was only £35.


Thanks to neal for the oil filter
[BREAK=Fuel Injectors, with service report]
Injectors before


And after being serviced


Results of before and after
Cost so far £1014.84
[BREAK=Sand blasting the engine bay]
Finally decided to sandblast the bay. I got hold of one of them portable sealey blasters off ebay. Cost me £40 brand new, so wasn't too bad. Took me about 2 hours to blast it back to bare metal. Then sprayed it with etch primer to protect it from rust.
Couple of pics of me in action and after I had sprayed it.


[BREAK=Sills]
Took off the side skirts. Really wish that I hadn't!


I was hoping, or wishing that these wouldn't be this bad as I'm not looking forward to welding new sills. Bought a new set anyways, cost me about £50 for the pair.
[BREAK=Out comes the interior]
Took the front and rear seats out today along with the rear door cards to see how bad the rust is. By the way the 4 nuts that hold the seat runners from underneath were a pig to undo as these were so rusted and seized. I ended up buying a set of nut extractors, best buy yet!

Over 20 year old carpet there, not in bad nick


View of what appears not to be too bad (phew)
[BREAK=Rear beam removal]


Proving to be a sod to get off.
[BREAK
Okay so I have one nice sunny day of 2012 to get this done. So I crack open my spraygun and have a bash.
The bay has been in zinc primer for as long as a can remember and theres no sign of rust coming through so thats good!

After a few coats of filler primer and a rub down.

First coat of base coat, and lots of flatting back. Did about 3 coats of colour in total.


The finished pic which doesn't really do it justice. After 2 coats of 2k laquer. Sweet!!
Gonna wait about a week to give the laquer time to go ard, then refit all the gubbins. I can't wait!
[BREAK=Refitting Brake Servo and Pipework]
Okay, so I begin by fitting the servo and master cylinder. Couldn't find a pucker 19 one so I took neals advise and modded a kangoo one. Fits like a dream!

The 3 larger brake pipes I just stripped back and repainted, still gotta make the 4 brake lines from scratch. Ordered some new stickers for the bay to keep it original.
Subframe is on with the power steering rack, new wishbones with new rack ends and gaiters. Bolted the bulkhead part on with the brake fluid res and the map sensor, just as a looksie. Will probably come off when I fit the engine.
Forgot to mention that all the nuts and bolts are being replaced with new stainless steel so no more rusted bolts!! Oh and new jubilee clips


[BREAK=Stripping the underside]

Okay, so I decide on stripping underneath. This has got to be the worst job in this project!
I've been using a knotted wire brush attachment on an angle grinder to get all the old underseal off, uncovering what seems to be a small rust bubble turns out to be a nasty big hole!
Nevermind, no point in moaning about it. These will either be patched up with new steel or IF I can get hold of new sections, these will get used.
At the minute I'm just stripping back, seeing what the damage is, then kurust any surface rust and spray on some zinc primer.
I have now recently bought a rollover jig to make life easier stripping the underseal and welding the sills.


[BREAK=Cutting and welding inner and outer sills]
With the car now on its side I've begun cutting the outer sills off to get to the inner sills. As the outer sills are going to be replaced with new anyway.
Me in action

Outer sill has been chopped away, leaving the inner sill now exposed. I've cut out the lower part of the inner sill as this was totally rotten.


I came across this neat little tool for drilling spot welds. Only cost about a fiver. Money well spent I reckon.
Next job will be to weld in some nice new steel plate to rebuild the inner sill...
Just thought I'd tot up the cost so far aswell. This is including car parts, consumables, and equipment, such as the jig, welder, engine crane etc.
New sills now welded on!

Cost so far £1325.82
[BREAK=Repainting the underside]
I got too excited the other day and decided to repaint the underside with stonechip, I just couldn't bear looking at a patchwork of repairs any longer!


So much better!
I used gravitex in a Shultz gun, good stuff. I repainted the petrol tank aswell. Next will be to trail fit the new parts underneath, make some new brake lines and route the fuel lines through.
[BREAK=Fitting new brake lines]
Right then, a fair bit has happened since the last update. All brake lines front and rear have been replaced. Also the ones on the regulator. Can't wait to bleed them, see if my flaring tool was any good!


New brake regulator was treated to some new lines and painted

Fitted to the car


[BREAK=Making a new fuel filter bracket]
The bracket I had was pretty unrecognisable due to corrosion, so I made one from carbon. Didn't take too long and the tooling was pretty simple.


I cleaned up the hoses, fitted new jubilee clips and a new filter. Nice.
[BREAK=Front struts]
I've had the front struts since the beginning along with the rears. Just been waiting for a pair of springs to turn up on eBay. A set of genuine Renault ones for £10 turned up so I snapped them up. Bought a pair of top bearings too as the original ones were shot.


[BREAK=Cleaned up the gearbox]
Not much to say about this but thought I should put up a pic as it turned out better than I thought.
Finished achieved by using the glass bead blaster at work.

New bush needed!


[BREAK=New Starter]
Finally found an original Renault starter motor on the bay, cost only £30! Well chuffed with that.

Car is coming along nicely now.
Now that the welding and undersealing is finished, which has been the biggest job so far, it won't be long till it can be put back onto 4 wheels
[BREAK=New wheel bearings & discs]
Postie bought 4 new wheel bearings with front and rear discs last week.
The rear bearings were pressed in the discs easily, although the fronts were a different story!
Using the press at work, I was getting quite scared as the gauge climbed to 2 tonnes, then 3 tonnes. Eventually an almighty bang went at just over 5 tonnes and the bearing dropped out. Needless to say I had to change my underwear!!
Other side was the same, but now I have a full set of new smooth bearings, and new pants

[BREAK=Engine back in]
Time has come for the engine to go back in. Which I'm quite glad about as it's just getting in the way. Suprisingley it slipped straight in, which is a first


I put a bit of masking tape on the paintwork where I thought it might touch while going in. Stops it from scratching or chipping.


So now I have the task of routing the cables and hoses where they should go. It's quite straight forward but there's a couple where I have no idea where they go! And I have no pictures of these bits, typical.
Picked up some more parts from renault too. New clutch cable and accelerator cable. Need some new HT leads and spark plugs, any recommendations?
Stay tuned for more updates. I think it's going to be finished this year! Next big job will be to get it sprayed then it's pretty much finished
More pictures of connecting things up...


[BREAK=More parts arrived]
Had to order some little bits and bobs from renault. Altogether about £65.

Needed a inner driveshaft gaiter with the fixing plate as the new driveshaft never had it!
[BREAK
Decided that I was going to connect the driveshafts as they have been sitting in the garage since day one!

This is the drivers side, pretty straight forward. Roll pin was a bugger as always but went in.
As I mentioned before, the fixing plate on the passenger side was missing, so a new one was ordered from renault. Not just a plate but a whole inner gaiter kit, cost £36!

[BREAK= Brake calipers]
Nice new 4 brake calipers came with EBC black stuff pads, fitted them straight away with goodridge hoses

[BREAK=Fluids]
Ordered some engine and gearbox oil, along with some coolant. Whole lot came to £77.
Gearbox takes 3.4 litres, engine takes 5.5 litres.

[BREAK=Revisiting driveshafts]
Not much been happening over the last few months as my new job takes me out of the country quite alot.
Before I went last month I filled the car will oil and gearbox oil, came back and there was a nice puddle underneath. Had a quick look around and found it was leaking from the driveshaft! Word of advise, cheap driveshaft and renault gaiters don't mix! So I bought an original renault driveshaft from the dealer. Job done.
[BREAK=Final jobs to do]
While I have a bit of time at home, I've put a list together what needs to be done to finish.
Air hose to be sourced and fitted
Fabricate and weld front jacking points
Bleed brakes
Buy battery
Bolt the panels and skirts back on
Full respray
Fit lights (front and rear)
Fit badges
Fit window seals
First fire up
Check bolts for torque
MOT
Doesn't sound much, but trying to find time will be the trick.
Last edited by a moderator:

