Oil Change - DIY
NOTE: It is important to realise that during parts of this procedure the engine will have no oil in it, and you will need to move the car. DO NOT be tempted deliberately or accidentally to start the engine with no oil in - this could be extremely damaging and will make you cry!
Summary Of Steps
- []Author: K1ANO []Date: 3/4/2007
- Associated Forum Post URLs:
v6Clio.net - Login
v6Clio.net - Login
- []A suitable working safe surface i.e. concrete driveway, garage etc. []Ramp - take note the Clio V6 is a very low car and will require a ramp of a low angle i.e. 30 degrees (confirm angle, picture) []10 mm socket and ratchet for the engine cover bolts (confirm size) []24mm drain plug socket []Drain plug washer []5.5 litres of engine oil of a suitable grade for your requirements Opie Oils []1 oil filter - OEM recommended []Cloths and rags for cleaning and wiping oil residue
- Shampoo to wash your hair after it gets oil in it!
NOTE: It is important to realise that during parts of this procedure the engine will have no oil in it, and you will need to move the car. DO NOT be tempted deliberately or accidentally to start the engine with no oil in - this could be extremely damaging and will make you cry!
Summary Of Steps
- []Place a low angle ramp in a suitable location behind your Vee sufficient to allow it to be reversed onto the ramps and still allow access all round. CAUTION: It is advisable to use purpose-built ramps and secure the car in the air with axle stands once it is raised off the ground. Here is a picture of a ramp I constructed to raise the car off the ground...
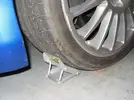
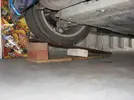 []Carefully reverse the Vee onto the ramp, taking care to observe and avoid any contact with the bodywork or running off the ramp. Also, be careful not to slip the clutch too much. Once positioned suitably on the ramp, chock the wheels to prevent the Vee from rolling forward. Here is a picture of some chocks in place...
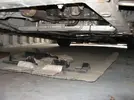
  []Remove the lower rear engine cover using the 10mm socket and ratchet to undo the bolts and ensure you put the bolts somewhere safe. Also, note the orientation of the engine cover, in that the front of it sits (or should do) under the tunnel cover. Engine cover removed...
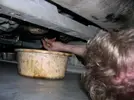
  []Remove the sump plug and drain as much of the oil as possible into a suitable container. NB: It is your responsibility to dispose of the used oil in an appropriate and environmentally sympathetic manner; it is also illegal to pour it down the drain! The car needs to be on level ground to purge all oil in the sump, so at this stage there may still be oil in the sump even when dripping stops. Once oil dripping has stopped, put the drain plug back in but do not tighten it. This will stop any further oil dribbling out for the next couple of steps. Removing the sump plug...
 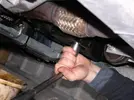 Draining the oil into a container...
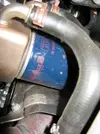
  []Remove the old oil filter; you may need to work a bit harder here due to lack of space and tightness of the filter. It is acceptable to puncture the filter carefully with a screwdriver and rotate it loose—being careful with any oil spillage which may occur (someone else can confirm if this is acceptable practice). There are other methods and tools you can use (maybe add more details later). Locating the oil filter...
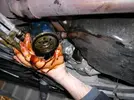
  And removing it with limited space...
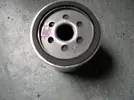
  []Fit a new oil filter after lubricating the rubber seal with engine oil and priming, as much as is possible, the filter. Make sure you check the filter for any dirt or particles which may have fallen into it—never allow any dust or grit to fall into the filter. When priming the filter, bear in mind here that the filter sits horizontally, so oil will flow from the filter once it has been primed. It may help, therefore, to do a practice run of fitting the filter before you prime it. This will give you an idea of how to orientate the filter best to fit it as quickly as possible when it has oil in it. You may also decide not to prime it—that is your choice and may be fine (someone can confirm this). Once the new filter is fitted, you may also, at this stage, want to do a clean-up of any oil spillage on the floor and or pipework, engine etc. Primed filter (the seal is not yet lubricated)...
  []So, once the oil is drained, the sump plug refitted, and the new filter installed... Carefully remove the wheel chocks and roll the Vee down the ramp onto a level surface. []DO NOT START THE ENGINE to get the Vee down the ramp. []Remove the sump plug and drain the remaining oil into a container; bear in mind that you will have to stretch a bit to get the drain plug out and also any container you use will need to be pretty shallow, i.e. a baking tray. Once the oil is fully drained, put the sump plug back in and tighten it if possible (it can be tightened properly later). []Open the tailgate, remove the upper engine covers and oil filler cap. Fill with fresh new oil and ensure you check levels as you do so using the dipstick. Do not overfill with oil. You can check levels using the electronic level sensor, but the dipstick is best at this stage. Correct levels will not be established until oil has circulated around the engine and oil filter, so there is no need to be too scientific here. It helps if you can get someone to do this bit as it is more difficult than the other steps...
 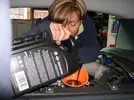 []Next, we are ready to start the engine to raise oil pressure. So carry out a quick mental check of actions, i.e. sump plug in, oil filter on, oil in the engine, Vee is in neutral. Then start the engine DO NOT REV THE ENGINE; the oil light should go out after a second or two. You may decide to be more cautious and disconnect the ignition lead to build up oil pressure using starter motor cranking only, but in my experience, this is very rare (feel free to comment). In either case, switch off the engine once oil pressure has been achieved. If the oil light does not go out after a few seconds, switch off the engine and seek help. It is NOT my fault, or at least I accept no responsibility. []The car can now be left for a few minutes to let oil drain back to the sump, after which point a final level check and top-up can be done before refitting the dipstick and upper engine covers. []Now for the final leg. The Vee can now be reversed back up the ramp, taking all the previous precautions including chocking the front wheels. The sump plug can be torqued up (confirm torque). The oil filter can be checked for leaks. Any oil residue can be cleaned up also. []Retrieve the lower engine cover and bolts and refit the engine cover, being mindful of sliding the front edge of the engine cover under the rear edge of the tunnel cover. Refit the bolts and torque as required (confirm torque). All back together...
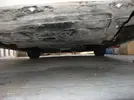
- The Vee can now be driven off the ramps, once the chocks have been removed and the ramps can be stowed away, as can all tools after cleaning. The used engine oil can be disposed of and the Vee can be driven happily for a few thousand miles before you need to repeat this procedure!
Last edited:

