There is more to life with TurboRenault.co.uk
You are using an out of date browser. It may not display this or other websites correctly.
You should upgrade or use an alternative browser.
You should upgrade or use an alternative browser.
Brigsy
Media Mogul. Instagram legend.
Brigsy
Media Mogul. Instagram legend.
Part 8 - Treasure hunting
From the snagging list it was evident that quite a few parts would be required for the kangoo to get it back to rude health. Luckily they fall into the category of not wanted/cheap/free etc so started looking for suitable vehicles breaking.
The options generally are local stuff breaking - gumtree - ebay & breakers yards. Nothing really decent on gumtree usual adverts of van breaking no pics will be over the weighbridge in the next ten mins etc. Ebay always has everything for sale however it comes at a price - a quick reckon up for a handful of parts was going to be decent money. So that only left us with the option of breakers yards to get all the bits and cheap.
I considered going round the local scrapyards however this can be quite fruitless sometimes and time consuming depending what they have in. So started looking at the U-Pull it website as the yard in York had a few last visit a couple of months ago. I was shocked to see they had none in - Edinburgh yard had 4 kangoos in and a clio dci same colour as mine which might have a decent drivers door ?? Got to be plenty of parts in that lot.
A road trip was planned - its 180 miles away so not a massive trip as done it before 18 month ago. With the need for parts and wanting to get the wheels turning on the project last Saturday was picked for the trip.
The next issue was a suitable vehicle for the trip..a van would be perfect for the job (lol both non road worthy ) megane 20s mpg fuck that - gt turbo garage queen too small - clio dci bit small. So borrow a car for the job ( 5 vehicles between us and i have to borrow a fecking vehicle lol) the old mans 307 hdi is picked as decent on fuel and can pack it to the rafters
 list of parts needed from quick reckon up

Set off steady driving bit later than anticipated - arrive at 3pm. A few pics some great views en route millions of speed cameras but apart from that pretty uneventful


Get the tools out and find a few knackered vans but get most of the parts required and a few extras. Ran out of time as wanted more but handed a quick £50 over and load up the hdi, not a bad haul and enough to get the project moving. No joy with the drivers door for the clio as it had a massive dent in the edge! Back home by evening so not a bad day.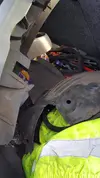
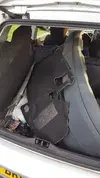
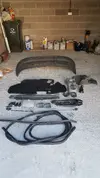
From the snagging list it was evident that quite a few parts would be required for the kangoo to get it back to rude health. Luckily they fall into the category of not wanted/cheap/free etc so started looking for suitable vehicles breaking.
The options generally are local stuff breaking - gumtree - ebay & breakers yards. Nothing really decent on gumtree usual adverts of van breaking no pics will be over the weighbridge in the next ten mins etc. Ebay always has everything for sale however it comes at a price - a quick reckon up for a handful of parts was going to be decent money. So that only left us with the option of breakers yards to get all the bits and cheap.
I considered going round the local scrapyards however this can be quite fruitless sometimes and time consuming depending what they have in. So started looking at the U-Pull it website as the yard in York had a few last visit a couple of months ago. I was shocked to see they had none in - Edinburgh yard had 4 kangoos in and a clio dci same colour as mine which might have a decent drivers door ?? Got to be plenty of parts in that lot.
A road trip was planned - its 180 miles away so not a massive trip as done it before 18 month ago. With the need for parts and wanting to get the wheels turning on the project last Saturday was picked for the trip.
The next issue was a suitable vehicle for the trip..a van would be perfect for the job (lol both non road worthy

Set off steady driving bit later than anticipated - arrive at 3pm. A few pics some great views en route millions of speed cameras but apart from that pretty uneventful


Get the tools out and find a few knackered vans but get most of the parts required and a few extras. Ran out of time as wanted more but handed a quick £50 over and load up the hdi, not a bad haul and enough to get the project moving. No joy with the drivers door for the clio as it had a massive dent in the edge! Back home by evening so not a bad day.


Brigsy
Media Mogul. Instagram legend.
Part 9 - Quick wins
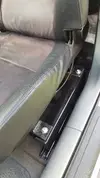
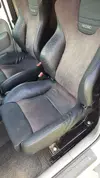
So the start to the massive repair list on Sunday. So take some shitey yet solid mounts on the recaros - clean up and rattle can gloss black - refix furthur back for legroom and fit black plastic ebay endcaps. 100% improvement im sure you will agree
Before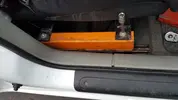
After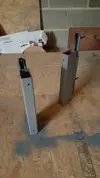
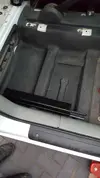
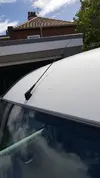
New aerial, old one was snapped which was highly annoying
Bonnet matt & stay. God knows why no bonnet stay was fitted - pain in the arse without. Bonnet matt not essential but good nick and why not.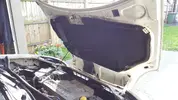
New bumper. Old one was rough as feck scuffed poor fitting. Looks to have had a inerface with something wall or whatever lol most plastics missing underneath.
Original shitter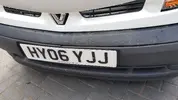
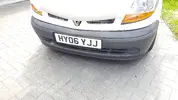
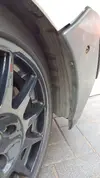
Fitted new arch liner on drivers side and bumper front undertray, fitted the proper bumper locating clips as one was missing/snapped.
Shes tight against the tyre with cup track control arms ! Does not catch though. Old one failed due to flapping all over no screws
New bumper fitted. A decent improvement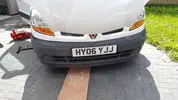
So the start to the massive repair list on Sunday. So take some shitey yet solid mounts on the recaros - clean up and rattle can gloss black - refix furthur back for legroom and fit black plastic ebay endcaps. 100% improvement im sure you will agree
Before

After


New aerial, old one was snapped which was highly annoying

Bonnet matt & stay. God knows why no bonnet stay was fitted - pain in the arse without. Bonnet matt not essential but good nick and why not.

New bumper. Old one was rough as feck scuffed poor fitting. Looks to have had a inerface with something wall or whatever lol most plastics missing underneath.
Original shitter


Fitted new arch liner on drivers side and bumper front undertray, fitted the proper bumper locating clips as one was missing/snapped.
Shes tight against the tyre with cup track control arms ! Does not catch though. Old one failed due to flapping all over no screws

New bumper fitted. A decent improvement

Last edited:
Brigsy
Media Mogul. Instagram legend.
Great work, are bringing this to blyton this year?
Sadly not this year mate, Dephaser & timing belt needs doing badly before any track action, wont be long until its out though !
Brigsy
Media Mogul. Instagram legend.
Part 10 - Bodgit & Scarper
So when i bought this i knew it was going to be a rolling project. I anticipated a few rough bits as Chris had been very honest when describing the van. First thing i noticed when i got in it for test drive were the seatbelt buckles. The buckles looked suspiciously flimsy and fixed down to the cab floor with an m8 bolt and penny washer and very awkward to use. Not looking too sturdy in the event of a crash !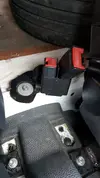
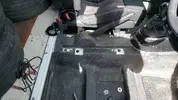
With this in mind i wanted it sorting pronto. Looking round at U-Pull it for replacements was pretty fruitless - all modern cars have pre tensioner setup and fixed to seat subframes which would require major fabrication. I looked at rear seatbelt clips and they looked very similar to what was currently fitted ! There was a distinct lack of oldskool vehicles in the yard - i knew i had to go oldskool to find a floor mounted buckle. With this in mind i had a brainwave and remembered i had a box of seatbelts off my old white gtt in the loft at the folks ! went digging on the Sunday morning and found the old floor mounted front buckles which looked perfect for the job. A quick pic of the box on the facebook R5gtturbo owners group netted a sale on the complete rear seatbelt kit bringing some money back to the project covering the scrapyard haul so result!
Box of tricks check the fade from long term storage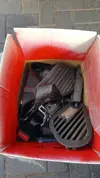
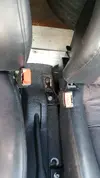
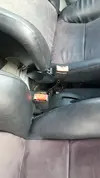
Next step was to re mount the drivers side Recaro. The seating position was too close to pedals for me originally - with bulkhead gone and a bit of jiggery pokery i managed to get it 1.5" further back which is perfect. Drilled a hole for the seatbelt buckles in the floor then dug out some harness spreader plates which were fitted on the underside - no chance of them ripping out in a crash. My sparkie friend Alex was round doing some more work to the wiring in the garage so got him to tighten the bolt whilst i held the spreader plate in place. He said "i need the shit original buckle out of the way" and undone the M8 bolt by hand and chucked it on the floor ! Finger tight tuning ? good riddance to that
Next issue was the drivers side engine mount. On the journey home i had noticed a knocking on and off the throttle - assumed it was a knackered mount possibly dogbone. On inspection i noticed the top engine mount that bolts to the cam cover had a bolt missing - one end was damaged so only one bolt holding it in ! I bought a new one off ebay £12 delivered (clio parts prices are great) initial pics before fixing. Luckily i had a fairly steady drive home - i dont think it would have took much abuse to bust the remaining thread.
Check the gap at the rear
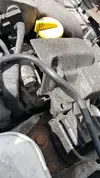
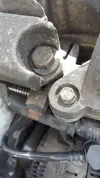
Jacked engine level and the only bolt that was doing anything had 10mm thread exposed & loose
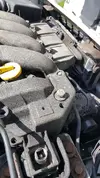
Mount fell to bits on removal
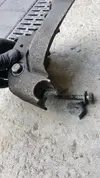
To add to insult the bolt hole that was missing had half of the threads stripped - Chased it out with a tap and fitted a longer bolt as a temp measure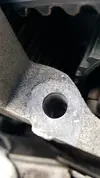
Note tippex on dephaser/cover - wonder if the timing is correct lol belt does not look too clever
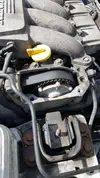
Fixed - temporary will fit a new cambelt cover when i do the belts very soon - Cheap as chips for a new cover £12 off ebay. To be fair all bolts torqued down fine would prob be OK but whilst its off ill change it. Note the lack of gap and level engine.
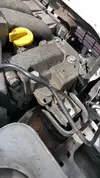
This aint a moan though as very happy with the van and bought it knowing work was needed - have bought stuff with engine conversions before and there are different standards to how some people work - some stuff is decent some not - im very fussy so going to give it a full bolt check on the front to make sure im happy before driving it flat to the boards. Onwards and upwards!
So when i bought this i knew it was going to be a rolling project. I anticipated a few rough bits as Chris had been very honest when describing the van. First thing i noticed when i got in it for test drive were the seatbelt buckles. The buckles looked suspiciously flimsy and fixed down to the cab floor with an m8 bolt and penny washer and very awkward to use. Not looking too sturdy in the event of a crash !


With this in mind i wanted it sorting pronto. Looking round at U-Pull it for replacements was pretty fruitless - all modern cars have pre tensioner setup and fixed to seat subframes which would require major fabrication. I looked at rear seatbelt clips and they looked very similar to what was currently fitted ! There was a distinct lack of oldskool vehicles in the yard - i knew i had to go oldskool to find a floor mounted buckle. With this in mind i had a brainwave and remembered i had a box of seatbelts off my old white gtt in the loft at the folks ! went digging on the Sunday morning and found the old floor mounted front buckles which looked perfect for the job. A quick pic of the box on the facebook R5gtturbo owners group netted a sale on the complete rear seatbelt kit bringing some money back to the project covering the scrapyard haul so result!
Box of tricks check the fade from long term storage

Next step was to re mount the drivers side Recaro. The seating position was too close to pedals for me originally - with bulkhead gone and a bit of jiggery pokery i managed to get it 1.5" further back which is perfect. Drilled a hole for the seatbelt buckles in the floor then dug out some harness spreader plates which were fitted on the underside - no chance of them ripping out in a crash. My sparkie friend Alex was round doing some more work to the wiring in the garage so got him to tighten the bolt whilst i held the spreader plate in place. He said "i need the shit original buckle out of the way" and undone the M8 bolt by hand and chucked it on the floor ! Finger tight tuning ? good riddance to that


Next issue was the drivers side engine mount. On the journey home i had noticed a knocking on and off the throttle - assumed it was a knackered mount possibly dogbone. On inspection i noticed the top engine mount that bolts to the cam cover had a bolt missing - one end was damaged so only one bolt holding it in ! I bought a new one off ebay £12 delivered (clio parts prices are great) initial pics before fixing. Luckily i had a fairly steady drive home - i dont think it would have took much abuse to bust the remaining thread.
Check the gap at the rear


Jacked engine level and the only bolt that was doing anything had 10mm thread exposed & loose

Mount fell to bits on removal

To add to insult the bolt hole that was missing had half of the threads stripped - Chased it out with a tap and fitted a longer bolt as a temp measure

Note tippex on dephaser/cover - wonder if the timing is correct lol belt does not look too clever

Fixed - temporary will fit a new cambelt cover when i do the belts very soon - Cheap as chips for a new cover £12 off ebay. To be fair all bolts torqued down fine would prob be OK but whilst its off ill change it. Note the lack of gap and level engine.

This aint a moan though as very happy with the van and bought it knowing work was needed - have bought stuff with engine conversions before and there are different standards to how some people work - some stuff is decent some not - im very fussy so going to give it a full bolt check on the front to make sure im happy before driving it flat to the boards. Onwards and upwards!
Last edited:
Brigsy
Media Mogul. Instagram legend.
Part 11 - Bigger fish to fry
So all day my mate Alex is saying "when are you going to lower it Briggs" all day he wants to see the torsion bar down. Easy Job i say - done loads - hour max etc. Feeling pleased with the rapid repairs/fitting new parts going well, mid afternoon i take a couple of measurements and reckon up that the torsion bar needs to come down 35mm at the rear for better stance.
So up she goes on stands in the garage
This is where it went wrong. 06 reg so 11 years old - torsion bar looks like its been in the sea ! Check this out after a clean up and dose of plus gas. Note the lack of centrebore on the rear drums very unusual - not been tampered with so assume oem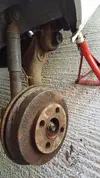 Had to chase the torsion bar threads to be able to fit a bolt due to rust - t handle for tap breaks so have to use adjustable wrench. Wind bolt in to use a socket as a puller - bolt pulls out the bar as shite bolt when tensioned.
Dig out an old 12.9 high tensile gt turbo head bolt and wind a load of thread on with a dye (m10 dye snaps doing this - its a sign lol) wind bolt in and the nut strips its thread when winding the tension on. At this point i think 'fuck this got more urgent stuff to do' and need some heavy artillery - slide hammer - good high tensile bolts - hot spanner maybe even drop beam and use the sledge hammer on it. Needs a drivers side metal brake pipe on beam as scabby anyway so dropping beam might be best option. I refit wheels and plan on giving the bars a couple of weeks of plus gas treament. We will revisit this soon
Finish off by fitting new centre console and hazard light switch - old console had clio switches bodged in and was rattle can black looked shit. The kangoo switches will wire up with minimal fuss - will do that with a load of other stuff next weekend. clipped ashtray in and its starting to look complete, far better than before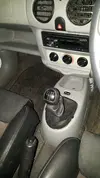
So all day my mate Alex is saying "when are you going to lower it Briggs" all day he wants to see the torsion bar down. Easy Job i say - done loads - hour max etc. Feeling pleased with the rapid repairs/fitting new parts going well, mid afternoon i take a couple of measurements and reckon up that the torsion bar needs to come down 35mm at the rear for better stance.
So up she goes on stands in the garage

This is where it went wrong. 06 reg so 11 years old - torsion bar looks like its been in the sea ! Check this out after a clean up and dose of plus gas. Note the lack of centrebore on the rear drums very unusual - not been tampered with so assume oem
 Had to chase the torsion bar threads to be able to fit a bolt due to rust - t handle for tap breaks so have to use adjustable wrench. Wind bolt in to use a socket as a puller - bolt pulls out the bar as shite bolt when tensioned.
Dig out an old 12.9 high tensile gt turbo head bolt and wind a load of thread on with a dye (m10 dye snaps doing this - its a sign lol) wind bolt in and the nut strips its thread when winding the tension on. At this point i think 'fuck this got more urgent stuff to do' and need some heavy artillery - slide hammer - good high tensile bolts - hot spanner maybe even drop beam and use the sledge hammer on it. Needs a drivers side metal brake pipe on beam as scabby anyway so dropping beam might be best option. I refit wheels and plan on giving the bars a couple of weeks of plus gas treament. We will revisit this soon
Finish off by fitting new centre console and hazard light switch - old console had clio switches bodged in and was rattle can black looked shit. The kangoo switches will wire up with minimal fuss - will do that with a load of other stuff next weekend. clipped ashtray in and its starting to look complete, far better than before

Brigsy
Media Mogul. Instagram legend.
Part 12 - Rose in the thorns
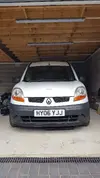
So the Sundays work is drawing to a close - good 6 hours or so of graft. Just messing about tidying gear up etc still early evening & sun is out. I look at the kangoo in the garage and wonder how well the new front bumper will come up with some trim gel. I dig out the old Autoglym bumper gel as all that's in stock - quick clean moss and crap off bumper. Quick application of gel and rub off with an old microfibre cloth to get rid of the residue/give a more matt finish. To be fair i never wanted this to look mint - decent but used bodywork would be more than acceptable enough for a track hoon in my eyes. But still minimal effort and its coming up lovely. There's a rose amongst them thorns for sure You certainly wouldn't think its done over 150k on diesel lump after reading mot history & god knows what on the 172 lump maybe 20k - mileage 170k estimated..
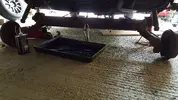
Note the drip tray as the Jc5 gearbox is a leaker! out of the selector seal same as every jc5 in the world -apparently Look at the foglight blanks and consider oem fogs for subtle upgrade - then the thought of brake ducts pops into my head
  a job for another day.
Thanks for reading ! more to come soon
So the Sundays work is drawing to a close - good 6 hours or so of graft. Just messing about tidying gear up etc still early evening & sun is out. I look at the kangoo in the garage and wonder how well the new front bumper will come up with some trim gel. I dig out the old Autoglym bumper gel as all that's in stock - quick clean moss and crap off bumper. Quick application of gel and rub off with an old microfibre cloth to get rid of the residue/give a more matt finish. To be fair i never wanted this to look mint - decent but used bodywork would be more than acceptable enough for a track hoon in my eyes. But still minimal effort and its coming up lovely. There's a rose amongst them thorns for sure

Note the drip tray as the Jc5 gearbox is a leaker! out of the selector seal same as every jc5 in the world -apparently
Thanks for reading ! more to come soon
Chris Smith
Well-Known Member
Looking good Brigsy....
Very good, sorry to see some of the issues... Tbh I only had a quick look under the bonnet
Very good, sorry to see some of the issues... Tbh I only had a quick look under the bonnet
Brigsy
Media Mogul. Instagram legend.
Looking good Brigsy....
Very good, sorry to see some of the issues... Tbh I only had a quick look under the bonnet
All easy fixes mate, getting there now
Brigsy
Media Mogul. Instagram legend.
Part 13 - Big Guns
So running out of jobs to do at the moment & waiting for money to come in to order the belts & dephaser. So lets get the rear lowered !
Armed with a load of expensive 12.9 high tensile bolts & nuts from Hawk Fasteners - plus gassed feck out of the torsion bar ends all week should fly out i hear you say ?? Done 20+ torsion bar lowering without many issues should be done in an hr or so ?!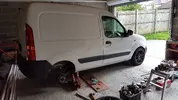
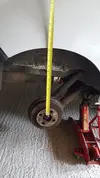
 Measurements first
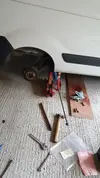
 Pikey slide hammer on
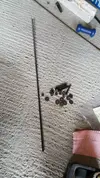
Start with slide hammer - goes bangbangbangbangbangbangbang boom and pulls the threads out of the torsion bar as they were semi fucked. Out comes the hammer and suitable mandrel bray fuck out of the bar in over to try and push it through. Does not even move a mm ! Go round the passenger side - try socket as a puller - Tighten bolt so tight it bends spanner rounds off nut and faceplant the wheelarch. Im pissed off at this point so try hammer trick does not budge a mm !
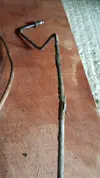
Beam off time - i was hoping this was not going to be necessary as the back is ply lined ! so out with the ply base to get to the bolts. Still this is killing 2 birds with one stone as a brake pipe is rotten as fuck on drivers side rear -must have had a blind man mot'ing it last time pic does not even show the full extent of rust
Brake pipes disconnected, handbrake cables off, compensator disconnected, shockers off - leaves 4 bolts to drop the beam. Had to recruit @Sheryl_O to hold the bolts inside whilst i try to gun them off from underneath. Sealey gun is not man enough to do the job !! had to resort to creaking one bolt round qtr of a turn as cant get grinder in due to fuel tank! Brute force was needed resulting in powerbar pinging off and smacking me in the head - que golf ball sized lump !
Beam is on the floor so i belt the torsion bars and still wont move !! fcking thing ! Only one option - fire
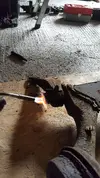
Does not do much - more fire
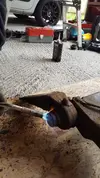
This results in the already soft well used 170k beam bushes going into meltdown on the passenger side of the beam, only one thing for it set bushes on fire and belt the beam ends off, does not take much with combo of crowbar and hammer
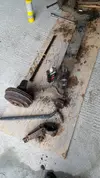
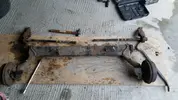
Que more hammering and Shez on the map gas, more hammering, more hammering - swearing at it - repeat
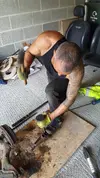
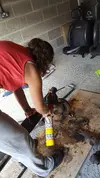
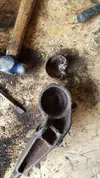
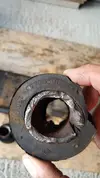
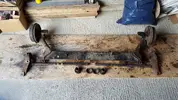 Done that much hammering it has knackered my forearm due to old injury poss tendon damage ? can barely hold a cup of tea lol at least its stripped. Battered and bruised its in bits, the old PMT saying "Always outnumbered never outgunned" comes to mind
 Bushes on order tenner a side - Going to give the beam a quick lick of the half a can of Por15 black thats kicking about in the garage - should fly together with my 20ton press once the bushes arrive. Queue a few days on axle stands
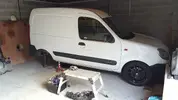
All this for 40mm of lowering - Should have just put half a ton of sand in the back

So running out of jobs to do at the moment & waiting for money to come in to order the belts & dephaser. So lets get the rear lowered !
Armed with a load of expensive 12.9 high tensile bolts & nuts from Hawk Fasteners - plus gassed feck out of the torsion bar ends all week should fly out i hear you say ?? Done 20+ torsion bar lowering without many issues should be done in an hr or so ?!

 Measurements first
 Pikey slide hammer on
Start with slide hammer - goes bangbangbangbangbangbangbang boom and pulls the threads out of the torsion bar as they were semi fucked. Out comes the hammer and suitable mandrel bray fuck out of the bar in over to try and push it through. Does not even move a mm ! Go round the passenger side - try socket as a puller - Tighten bolt so tight it bends spanner rounds off nut and faceplant the wheelarch. Im pissed off at this point so try hammer trick does not budge a mm !
Beam off time - i was hoping this was not going to be necessary as the back is ply lined ! so out with the ply base to get to the bolts. Still this is killing 2 birds with one stone as a brake pipe is rotten as fuck on drivers side rear -must have had a blind man mot'ing it last time

Brake pipes disconnected, handbrake cables off, compensator disconnected, shockers off - leaves 4 bolts to drop the beam. Had to recruit @Sheryl_O to hold the bolts inside whilst i try to gun them off from underneath. Sealey gun is not man enough to do the job !! had to resort to creaking one bolt round qtr of a turn as cant get grinder in due to fuel tank! Brute force was needed resulting in powerbar pinging off and smacking me in the head - que golf ball sized lump !

Beam is on the floor so i belt the torsion bars and still wont move !! fcking thing ! Only one option - fire

Does not do much - more fire

This results in the already soft well used 170k beam bushes going into meltdown on the passenger side of the beam, only one thing for it set bushes on fire and belt the beam ends off, does not take much with combo of crowbar and hammer


Que more hammering and Shez on the map gas, more hammering, more hammering - swearing at it - repeat


 Done that much hammering it has knackered my forearm due to old injury poss tendon damage ? can barely hold a cup of tea lol at least its stripped. Battered and bruised its in bits, the old PMT saying "Always outnumbered never outgunned" comes to mind
All this for 40mm of lowering - Should have just put half a ton of sand in the back
Last edited:
Chris Smith
Well-Known Member
Is it worth sourcing a Clio 1*2 rear beam etc so you can have rear discs?
Brigsy
Media Mogul. Instagram legend.
Is it worth sourcing a Clio 1*2 rear beam etc so you can have rear discs?
Might do that in the future - quite easy to mod the original beam in situ
always outnumbered never out gunned 
good work jon, great update too. Always suprises me how the newer stuff seems more worn out or seized and rusty. The 57 dauphine i had gave me no a single issue with undoing anything, get on the modern clio's and bits are seized and sheering off everywhere! Are you going for uprated shocks at all?
good work jon, great update too. Always suprises me how the newer stuff seems more worn out or seized and rusty. The 57 dauphine i had gave me no a single issue with undoing anything, get on the modern clio's and bits are seized and sheering off everywhere! Are you going for uprated shocks at all?
Similar threads
- Replies
- 133
- Views
- 2K

