Induction Kits & BMC Installation
Author: K1ANO
Date: 29/4/2007
Associated Forum Post URL's:
Forum Post - Induction Kits & BMC Installation
Tools Required
Torx socket/screwdriver (size x ?)
Torx socket/screwdriver (size y ?)
Flat headed screwdriver
Parts Required
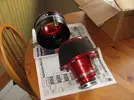
The aftermarket filter and associated fitting kit (well actually with this PiperCross filter there is no specific fitting kit).
Considerations
Much of this procedure can be applied to an OEM air filter change.
There are a large number of retaining bolts to remove so remember to keep all of these safe and make a note as to which sized bolts fit where.
Ensure you have all of the necessary fitting parts required, especially ducting, as the pipe diameters are very large i.e. 75 mm (confirm) and 100 mm, and these are not readily available should you realize you need some.
Engine Cover and Trim Panel Removal
Remove both engine covers from the engine compartment. This will reveal the engine in its normal state.
From the rear of the car, remove the two torx bolts (one on each side) holding the outer trim panels in place.
From inside the car with the seats slid fully forward and tilted fully forward, detach the fishnet luggage tray net and unscrew the two retaining cleats from the door pillars.
Next, remove the small trim panel at the front of the engine bay by undoing the 6 torx bolts holding it in place.
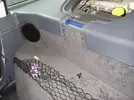
From the rear of the car, remove both outer trim panels and stow safely.
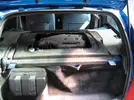
Carefully remove the foam panels from each side of the car, being careful not to tear them as they are fragile. It may also be necessary to lift the rear pillar trim moulding slightly to allow clearance to remove the foam panels. Again, stow the foam panels carefully.
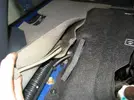
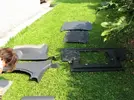
From the rear and inside the car, remove all torx retaining bolts holding the large engine cover in place. There are quite a few of these bolts, but they are all obvious. Stow the engine cover along with the other panels.
OEM Air Filter Box Removal
At this stage, the engine is pretty well exposed, so you should be able to see the OEM filter box clearly.
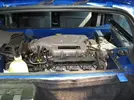
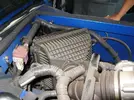
There are two large jubilee clips holding the air ducting to the filter box. There is also a bracket underneath the filter box into which the filter box locates – using 3 rubber bushings. I found it easier to split the filter box, and this is what I will explain below as part of the removal.
Undo the large jubilee clip at the plenum end of the filter box and gently ease the flexible rubber hose off the end.
Undo the 4 torx bolts holding the end of the filter box onto the main body of the filter box – this will be clearer when you can see the filter box in place.
Gently remove the end of the filter box with gentle persuasion. This should reveal the OEM air filter in place – it is large.
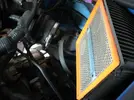
Gently remove the air filter and carefully stow the filter box end piece and the air filter.
Next, unclip the wiring loom clips (as many as required) and gently move the loom out of the way to reveal the large jubilee clip at the other end of the filter box body. This is basically located at the end of a large 100 mm pipe that comes from the passenger side air scoop. Depending on how the jubilee clip is rotated, this task could be fiddly.
Once the jubilee clip is free, slide it down the hose (so as not to lose it) and gently slide off the hose from the filter box.
The filter box can then be lifted from the rubber bushings in which it sits. You can use your hands to feel how the lower filter box bracket and bushings are located to give you an idea of what you are dealing with. I found that you can simply pull the filter box straight up with a little force, and it pops out of the bushings quite well.
You should now be in a position where the OEM air filter box is removed and both induction hoses are in place ready to accept the new filter kit.
Fitting The Aftermarket Filter
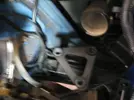
Most aftermarket filters should simply fit in place of the OEM air filter box and utilize the same brackets and generally the OEM induction pipes. This article assumes that the OEM induction pipes and brackets will be used as the PiperCross filter fitted was a simple replacement.
Assemble the aftermarket filter and carry out a test fitting, i.e., offer the filter into the engine bay and look for any obvious fitting problems. The type of problems you may encounter or look out for are bracket locations, induction hose lengths, clearance, etc.
Ensure the means of mounting the filter onto the OEM bracket is clearly understood and the relevant parts are fitted to the filter. It may be the case that the filter does not require mounting brackets and may simply 'hang' from the induction pipes. It is up to you to determine how the mounting of the filter will be done exactly. With the PiperCross filter, the fitting bolt is simply held onto the filter by a massive jubilee clip and can be freely spun around so that it locates into one of the OEM filter bracket rubber bushings.
Once you are happy that the filter will fit correctly and the mounting of it is understood, carefully connect the large 100 mm induction hose, remembering to retrieve the jubilee clip and orientate it such that it can easily be tightened up. Fitting the hose can be fiddly, and you may need a helper. Once it has been slid over the filter snorkel, tighten up the jubilee clip. I found that fitting the large hose was the simplest, as this is by far the fiddliest, but you may find it easier to fit the smaller hose first – up to you!
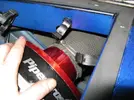
Next, securely fit the smaller induction hose to the filter and tighten the jubilee clip. At this stage, ensure the filter is fitted correctly by checking both induction pipes and ensuring there is no undue stress on the pipework or other components in the engine bay.
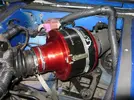
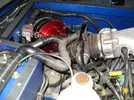
Finally, and as appropriate, make sure the filter is mounted securely.
Engine Cover and Trim Panel Re-fitting
For the time being, I will simply say re-fitting is a reversal of the removal process. This is actually quite true. Things to look out for include:
Re-fitting the foam panels carefully to ensure they are not damaged.
Ensuring you correctly identify the torx bolts and their proper locations.
Ensuring the panels are lined up correctly and that all bolts are fitted partially before tightening so that you don't have to undo them all to realign for one or two bolts which may not fit!
Author: K1ANO
Date: 29/4/2007
Associated Forum Post URL's:
Forum Post - Induction Kits & BMC Installation
Tools Required
Torx socket/screwdriver (size x ?)
Torx socket/screwdriver (size y ?)
Flat headed screwdriver
Parts Required
The aftermarket filter and associated fitting kit (well actually with this PiperCross filter there is no specific fitting kit).

Considerations
Much of this procedure can be applied to an OEM air filter change.
There are a large number of retaining bolts to remove so remember to keep all of these safe and make a note as to which sized bolts fit where.
Ensure you have all of the necessary fitting parts required, especially ducting, as the pipe diameters are very large i.e. 75 mm (confirm) and 100 mm, and these are not readily available should you realize you need some.
Engine Cover and Trim Panel Removal
Remove both engine covers from the engine compartment. This will reveal the engine in its normal state.
From the rear of the car, remove the two torx bolts (one on each side) holding the outer trim panels in place.
From inside the car with the seats slid fully forward and tilted fully forward, detach the fishnet luggage tray net and unscrew the two retaining cleats from the door pillars.
Next, remove the small trim panel at the front of the engine bay by undoing the 6 torx bolts holding it in place.

From the rear of the car, remove both outer trim panels and stow safely.

Carefully remove the foam panels from each side of the car, being careful not to tear them as they are fragile. It may also be necessary to lift the rear pillar trim moulding slightly to allow clearance to remove the foam panels. Again, stow the foam panels carefully.

From the rear and inside the car, remove all torx retaining bolts holding the large engine cover in place. There are quite a few of these bolts, but they are all obvious. Stow the engine cover along with the other panels.

OEM Air Filter Box Removal
At this stage, the engine is pretty well exposed, so you should be able to see the OEM filter box clearly.


There are two large jubilee clips holding the air ducting to the filter box. There is also a bracket underneath the filter box into which the filter box locates – using 3 rubber bushings. I found it easier to split the filter box, and this is what I will explain below as part of the removal.
Undo the large jubilee clip at the plenum end of the filter box and gently ease the flexible rubber hose off the end.
Undo the 4 torx bolts holding the end of the filter box onto the main body of the filter box – this will be clearer when you can see the filter box in place.
Gently remove the end of the filter box with gentle persuasion. This should reveal the OEM air filter in place – it is large.

Gently remove the air filter and carefully stow the filter box end piece and the air filter.
Next, unclip the wiring loom clips (as many as required) and gently move the loom out of the way to reveal the large jubilee clip at the other end of the filter box body. This is basically located at the end of a large 100 mm pipe that comes from the passenger side air scoop. Depending on how the jubilee clip is rotated, this task could be fiddly.
Once the jubilee clip is free, slide it down the hose (so as not to lose it) and gently slide off the hose from the filter box.
The filter box can then be lifted from the rubber bushings in which it sits. You can use your hands to feel how the lower filter box bracket and bushings are located to give you an idea of what you are dealing with. I found that you can simply pull the filter box straight up with a little force, and it pops out of the bushings quite well.
You should now be in a position where the OEM air filter box is removed and both induction hoses are in place ready to accept the new filter kit.

Fitting The Aftermarket Filter
Most aftermarket filters should simply fit in place of the OEM air filter box and utilize the same brackets and generally the OEM induction pipes. This article assumes that the OEM induction pipes and brackets will be used as the PiperCross filter fitted was a simple replacement.
Assemble the aftermarket filter and carry out a test fitting, i.e., offer the filter into the engine bay and look for any obvious fitting problems. The type of problems you may encounter or look out for are bracket locations, induction hose lengths, clearance, etc.
Ensure the means of mounting the filter onto the OEM bracket is clearly understood and the relevant parts are fitted to the filter. It may be the case that the filter does not require mounting brackets and may simply 'hang' from the induction pipes. It is up to you to determine how the mounting of the filter will be done exactly. With the PiperCross filter, the fitting bolt is simply held onto the filter by a massive jubilee clip and can be freely spun around so that it locates into one of the OEM filter bracket rubber bushings.
Once you are happy that the filter will fit correctly and the mounting of it is understood, carefully connect the large 100 mm induction hose, remembering to retrieve the jubilee clip and orientate it such that it can easily be tightened up. Fitting the hose can be fiddly, and you may need a helper. Once it has been slid over the filter snorkel, tighten up the jubilee clip. I found that fitting the large hose was the simplest, as this is by far the fiddliest, but you may find it easier to fit the smaller hose first – up to you!

Next, securely fit the smaller induction hose to the filter and tighten the jubilee clip. At this stage, ensure the filter is fitted correctly by checking both induction pipes and ensuring there is no undue stress on the pipework or other components in the engine bay.

Finally, and as appropriate, make sure the filter is mounted securely.

Engine Cover and Trim Panel Re-fitting
For the time being, I will simply say re-fitting is a reversal of the removal process. This is actually quite true. Things to look out for include:
Re-fitting the foam panels carefully to ensure they are not damaged.
Ensuring you correctly identify the torx bolts and their proper locations.
Ensuring the panels are lined up correctly and that all bolts are fitted partially before tightening so that you don't have to undo them all to realign for one or two bolts which may not fit!
Last edited:

