Chris H
master of boobies
4th October 2010
project Snaily is an excellent machine, reliable, smooth and I suppose brisk. However its just not brisk enough.
So I have been looking for a replacement. the ideal is a Hayabusa then fitting a turbo to it. However insurance would be a major issue and I don't want to have something that will sit for a year or more not going anything until I can insure it.
I thought about a more modern smaller bike, a 600 or something, after all my bike is nearly 30 years old and advances have been made in all departments.
So I looked at other bikes, of course I saw older bikes and since I like older things I was attracted to a Yamaha FJ1100, easily modified, retro chic, air cooled and 120 bhp.
Then I thought money, getting the bike, sorting it then modifying it, no point.
So looked at more modern 'superbikes'. Really fancied a Kawasaki ZX10, but money was to much for what it was.
Then looked back at the Honda stable. I thought VF1000F, rare but I have 750 VF's and don't rate them.
So looked at other things, saw the CBR, I didn't like the looks of the front or rear but the bike can be modified, parts cheap and readily available. So watched a few on ebay, none screamed buy me though. There was a Rothmans one not to far, turns out the same guy I bought the CBX off of! He wanted £650 to much for my taste with a leaking tank.
Gumtree last night, Kevin called said look at this and we called the guy and headed down. the advert was for a CBR 1000 F, red and black, mot'd July 2011, taxed 31st December 2010, new tyres, chain and blah blah, £450.
So go down have a look, looks good (in the dark anyway), engine rattles (they all do) but its a bit worse than usual. He has a load of bikes there and is the typical old bike, long hair etc.
Confirm all the other stuff and settle on 400 which is a bargain no matter how you look at it.
Ride it home, not very impressive, feels way down on power, need loads of throttle to maintain 70, get to 80, not really in the mood to go faster in the pitch black on twisty roads on an unfamiliar bike.
The temp gauge stayed fine, although in traffic the tank got roasting. Lights, horn and brakes etc work fine. the front brakes are much better than the CBX's.
Take it out with me today, starts up happily enough, runs a bit lumpy and the idle is high, get there turn it off, 6 hours later back out, starts up fine head home, Take motorway again 80 ish is all it gets to. It has to be revved to the moon to make progress.
Come home take some pics then do a bit of work on it.
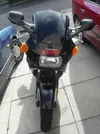
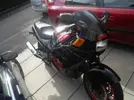
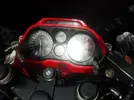
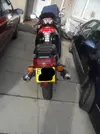
the additional stickers have to go, so I started there, removed a large faded EBC sticker from the lower fairing then removed the Battlax Tyre stickers, I will also remove the tank protector pads as they are terrible. I got some pics of the stickers
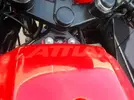
can just make out the Battlax (damaged) sticker on the tank
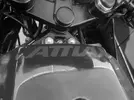
If its grey scaled you can see it clear as day
One of the stickers on the side, the fairings a bit damaged
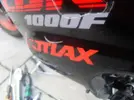
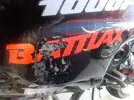
Stickers are now off, for some reason the pictures never turned out so will get some pictures of it sticker-less tomorrow hopefully.
Anyway onto the work. Apparently the guy had paid £100 to have the carbs synchronised the other week I think someone did a bad job myself, so time to look.
The CBR has a lovely hinged tank with a strut to it can lift up and allow access, not enough IMO so I pulled it off revealing this
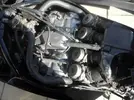
you can make out the rubber caps over the balance ports on the top of the carbs. I hook up the gauges, none match or are even really close.
Number 1 is curious as there's no reading...
rev the engine number 1 comes up but at idle nothing there, it doesn't seem like its only running on 3 but it would explain a lot.
I then adjust the other 3 cylinders to match and the revs go up to about 4 krpm. Back the idle speed adjuster off, still there, force the linkage by hand and it drops down to idle. smooth but now you can hear its not firing properly but its not a definite misfire its a strange one.
So pull the plug out of number 1. Sooted up heavily with some fuel on it. So blowtorch it clean, this is an after pic the before picture never worked
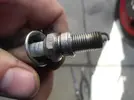
Compression test, 0 PSI, number 4 (easiest to pull out) 140 PSI within 1 crank. Yep that's not good.
I left it at that and took out my 750 to feel a smooth bike again.
Not sure what to do, I could throw lots of money at this. I could sort it so its running on 4 then sell, or spend money on it and maybe turbo this and hold onto it.
I haven't decided, I will when I find out what's wrong, I'm sort of hoping someone has messed up a valve adjustment. But if they have the valve seat may be damaged now or the valve, so head off anyway.
I am trying to borrow a bore scope so I can have a look without pulling it all apart.
The carbs are coming off for a clean up whatever happens so this will allow access to the intake valves.
Bike £400
[BREAK=Inspection begins]
8th October 2010
Well today I had some free time, well I was meant to be doing other stuff but I couldn't be bothered so I done some work on the CBR instead.
So I started by removing the fairing, this is mostly cable tied on so cut those off.
Then to make life easy I drained the coolant. I was surprised to see it actually contained coolant and not rusty water. yeah its pretty poor looking but its better than rusty water!
Coolant draining into a bottle
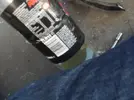
Water pump, just remove the 10mm drain screw, the funnel (and bottle) is there to prevent a mess.
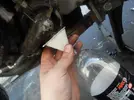
This allowed me to remove a coolant hose over the cam cover so I could remove it easily. Remove a breather pipe and 8 10mm bolts and the rocker cover comes off.
However one bolt snapped!
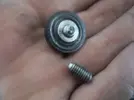
So that needs replaced.
I then set about checking the engines timing just to be sure, it was spot on.
Cover removed for access to crank bolt
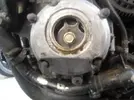
The cam pulley is where its meant to be
I then checked the valve clearances, one exhaust valve was tight, loosened it no change to compression. Which are as follows;
Compression test results
Cylinder 1 0 PSI
Cylinder 2 155 PSI
Cylinder 3 150 PSI
Cylinder 4 155 PSI
The other three cylinders seem in fine fettle anyway!
so I will indeed have to pull the head off to rectify this issue. Oh well.
Whilst I had the engine running its a bit clattery (they all are) I decided to adjust the balance shaft. This can on these bikes make a massive difference to rattling. the balance shaft runs on an eccentric spindle, which adjusts the gears backlash.
Tricky to see but there's a 12mm bolt that locks the adjuster as it were, a 10mm pinch bolt that locks the spindle and the spindle has a flat in it for a screwdriver to turn it.
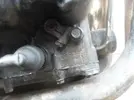
A picture from further back to show where it is
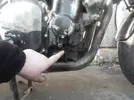
The manual states adjust it with the engine off, I done it whilst it was running. This way I could hear the difference it made, to tight it would start to whine, loose and it would clatter more.
With it adjusted it was slightly quieter but I think it needs the usual cam tensioner and most likely the starter/alternator chain and tensioner changed.
[BREAK=Stripdown]
12th April 2011
Well decided to get my finger out. I need space and more to the point need cash so I can buy a gearbox for the chamade. So time to get on with this.
As I proceeded to work it became more and more apparent that some form of retarded donkey has had the head off before.
So all the fairing and tank off.
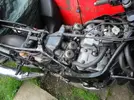
Airbox and carbs off
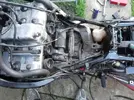
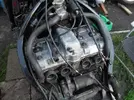
Front cowl off so I can remove the header pipes and the radiator. the small radiator you can see here is the oil cooler.
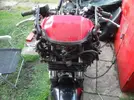
Headers off, notice anything odd about the right stud hole on the first cylinder? yes broken stud, repaired with chemical metal, and some bodged drilling!
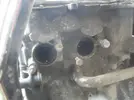
a pic with the head off
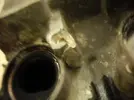
Coil, stat housing etc all gone along with the exhausts
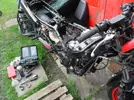
Headers off
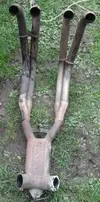
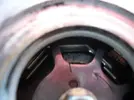
Turned it over a few times with the cam cover off just to check everything moved ok, it appeared to, some of the exhaust side stuff are hard to see though due to the frame, this is the timing hole in the side
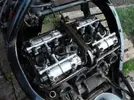
Cam cover off
So next job is the head removal, to do this you need to take off the cam wheel so the chain comes off, then undo the cam caps and remove the caps. Then crack the head nuts.
Now as mentioned earlier some idiots been here, so some nuts and bolts were loose however the best bit. Some retard used a copper washer under one of the outer head nuts, so this of course locked the head to the stud, so I had to chisel the washer off, thankfully copper is very soft and it came off, here it is
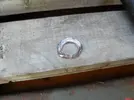
head off
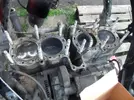
gasket removed, hondas and their open deck blocks, I don't like them
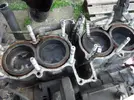
So head off and have a look at the low cylinder, notice anything funny?
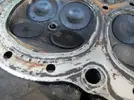
yes that is indeed 1 exhaust valve not sitting flush. It also moved when I touched it, I figured a broken valve spring or dodgy collet.
Back on the block, the joy of an open deck is you can see how clogged the galleries are, they are always filled with debris it may be metal corrosion flakes or casting sand there’s always something.
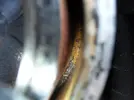
Stuck in a scraper and this came out attached, just to show the debris
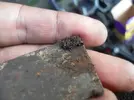
This of course will all be flushed out, I'm very fussy on cylinder cooling even on things I'm not keeping.
Back to the head. A closer look at the dodgy valve showed this, impossible to see with the head on the engine in the frame
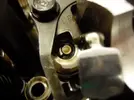
Loose collet and note the bent follower guide plate.
Follower and spring plate removed, the guide plate is a mess
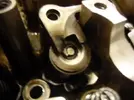
plate off
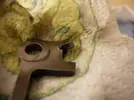
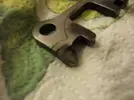
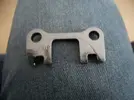
So need a new plate, I looked about, couldn't find any, the 600 uses a different one. Went to Honda was told mid June for delivery but got the part numbers. Tried David Silver and he had them in stock so ordered a new guide plate.
Next pop out the valve, wasn't hard, just a rap with a socket and extension popped them off. Valve is undamaged believe it or not. I cleaned it up later
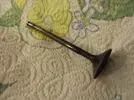
Undamaged
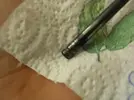
Collets, the damaged one has the ridge inside worn away totally. So ordered 2 new ones from DSS along with the guide plate
So The next task while I wait is clean things up and also lap the valve back in. However one of the locating dowels was stuck in the head.
Now normally you can sometimes wiggle them out with fingers, other times grip with mole grips or something which destroys them.
However sometimes they are into a blind hole, this means you can pop them out with hydraulic force.
Usually you use grease but that makes a mess so I opted for liquid soap.
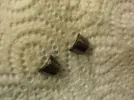
The dowel
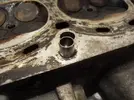
Soap it up
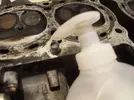
Then get a 1/4 inch extension that’s a snuggish fit inside the dowel then a swift tap with a hammer and the dowel pops out
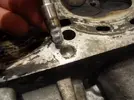
With that out I could start the initial clean up of the head, this is the first stage of scraping gasket debris off
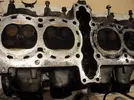
of course this will be done more thoroughly but I wanted the valve back in so nothing got into the guide etc.
I then lapped the valve and with the valve in place (no springs or anything) I filled the chamber up with water to test the seal, it sealed perfectly
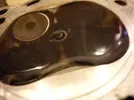
So it doesn't leak and now I can clean up the head properly.
I have ordered the plate and collects and hopefully they will be here before the weekend.
I have to clean the barrels out to remove the grot and I will also strip and clean the carbs, already seen some issues with them.
Then build it back up get it running sweet and maybe see about a wee temp cover to see what its like then sell it.
[BREAK=Head bits fitted]
18th April 2011
Well I hurt my back last week, so everything has taken a knock. Which is annoying as the weather has been fantastic up here.
The parts needed arrived on Friday but only today did I manage to lift the head out of the white chammy to work on it. It was pretty sore, ended up asking the mrs to help me carry it as it was really hurting my back.
New plate and collets
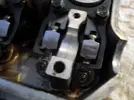
Fitted up the valve, new collets on the left valve, all sorted
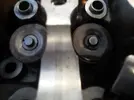
New straight plate, identical to the old one except its not got UP stamped on it. This plate is the older plate not the new part number form which I gather just has up on it.
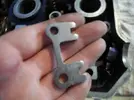
All buttoned up
So next job was the broken stud. this is a proper disaster.
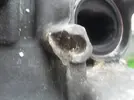
So started to clean it up, whoever done this must have been an idiot or vision impaired. Perhaps Mr Magoo did it. They drilled off the broke stud through the head, this came clean the more I cleaned suspicious areas
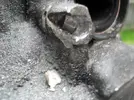
Boring out the stud as best i can

It was cleaned up then a stud put in. Then chemical metal filled the voids.
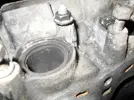
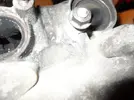
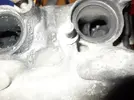
Secure enough the head can be picked up by the stud alone. So just need to clean out the ports of the swarf then clean up the head face, adjust the tappets, clean out the engine blocks water galleries and then just slap it all together.
Oh yeah got to clean up the carbs and also sort out a worn linkage on them.
Previous Total £400
Heel Plates £17.98
head gasket + cover bolt £15.69
Air Scoops £5.99
Follower Plate and Collets £16.62
New total £456.28
[BREAK=Carbs]
6th May 2011
I neglected to update this as it happened so we will catch up now.
the carbs were obviously removed and I stripped them to clean, rebuild and set them properly.
As usual there was clear evidence of idiots being there first, damaged screw heads and so on.
But we shall cover those issues as we progress.
The carbs, this shows the idle adjustment, basically the knob is turned to open the butterflies to alter the idle speed.
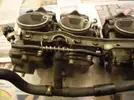
Other side
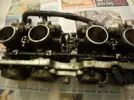
Throttle plates, powah!!! :lol:
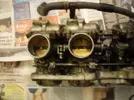
Cab float bowl, all were reasonable clean
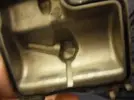
As were the carbs, still pulled everything and cleaned them up
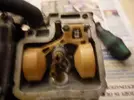
One of the carbs float bowl drain screws was covered in chemical metal. i scraped it off, then managed to unscrew the screw
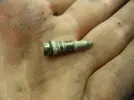
other side
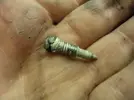
Why they done this I have no idea, the taper is what seals the fuel drain, the o-ring just stops fuel passing by the screw head when draining. Cleaned it up and its fuel tight.
These are throttle linkage springs, they were all different, they were all matched up like so as this is how they are meant to be
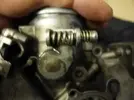
Next it was on to the pilot screws, the pilot screws adjust the idle and low speed mixture. generally they should be 2 - 3 turns out from fully seated. 1 was tight in, 1 was 1 turn out, another 1.5 turns out and the last was seized in and damaged!
This picture shows one of the pilot screws removed and polished up along with the choke plunger, again polished up.
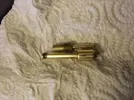
This was the seized one
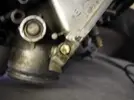
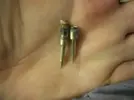
I managed to hacksaw a deeper groove and along with the blowtorch I managed to get the pilot screw removed. The threads were also damaged. I then had the problem of now being down a pilot screw. I have carbs off the spare VF750F, pulled a pilot screw and it was the same tip profile etc but the head was shorter, so it was used, here they are side by side
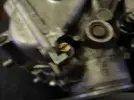
it now looks like this
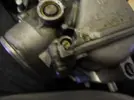
And here is how it should sit
All were set to 2 turns out and the carb synch was bench set.
All that remained was to build the bike back up and try them out.
[BREAK=Build Up]
6th May 2011
So now it was time to put it all together again.
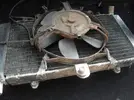
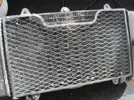
The radiator I painstakingly cleaned both internally and externally. Also made sure the fan worked, it was actually jammed on its housing so I sorted that out.
Back of the radiator
Front of the radiator (before thorough cleaning)
Onto the actual build up.
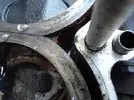
Removed the hose at the front of the jugs and then using water to flush the gallery and a pick to dislodge build up I got the coolant gallery clear of debris
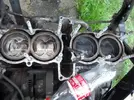
Then on to cleaning the pistons
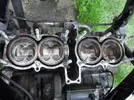
Cleaned the deck face then fitted the new headgasket and also the front cam chain guide
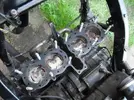
Then the head went on, this was torqued in a few stages as I like to make sure everything is perfect with head gaskets.
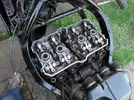
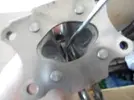
The cam chain tensioner. This annoying little thing need to be primed with oil then held back against spring and hydraulic pressure and a pin used to hold it in. I looked for something suitable, then decided to use a hanger from the babies room
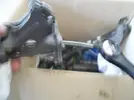
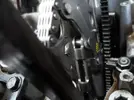
Then you need to put it in place then fit another chain guide to it and secure it with the R clips, one of the r clips was missing, someone used a paper clip or something before hand, I used a split pin wrapped round for a secure hold
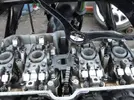
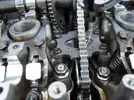
The issue I now had was the hanger was in the way of the chain, I broke it off after this picture
I then fitted up the exhaust, this was done properly so no loose pipes etc mounted solid as it should be
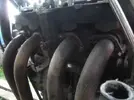
Then I never took any more pictures until it was done. Nearly finished
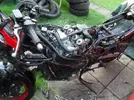
radiator etc bolted up
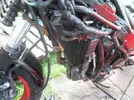
Then it was a case of adding fuel then trying to start it. the battery is knackered so used the chamades battery to jump it. After priming the carbs with fuel it was time to see if it would go. Choke on and it fired first turn of the key. the mrs lost that bet, she reckoned it would take 3 tries.
it idled solidly at 2krpm wiith the choke on and then revved cleanly with the throttle, then the float bowls ran dry of fuel.
So with the babies suitably scared it was time to put the body work and exhaust tailpipes back on.
In this picture you can see the jump leads and battery in the back ground, I started it down there then rode it up the garden :lol:
note it now has the heel plates as well
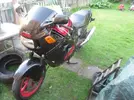
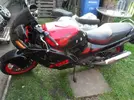
Jobs left to do, try and sort out the fairing for around the screen, get a bubble screen, find the rear damper knob, change oil and filter and balance the carbs to perfection.
It idles nicely, runs smoothly etc. Just a wee service and tweaking of the carb balance will have it perfect.
I am having insurance issues with it so I haven't taken it back out on the road yet to open her up.
[BREAK=On the road]
9th September 2011
4 months since the last update, its been on the road since the start of September.
MOT no issues of course. I spent the days before the MOT stripping down the brakes and they work great, 100% for the front on the roller before it locked and about 80% before the rear locked on the roller. I was well impressed.
I also managed to get some trim on ebay, sadly its black instead of the red but its a lot better than having the fusebox exposed. I am still however missing the nearside inner screen trim piece, most of these bikes have all of it missing now, so its hard to track down.
Whats it like to ride? Well the small screen means you get pummelled by all the wind, it hits me on my chest and throat, so wanting a touring screen or I will make a spoiler thingy for it to get the wind over my head.
Is it fast? Nope, I had hoped it would be a rocket but its not. I need something faster still. Must faster, something at least 1300 cc with a turbo that is made by Suzi...
No pictures but I have a couple of wee vids. You can see the new trim in them around the dash display
http://www.youtube.com/watch?v=J281A-Q7d4U
http://www.youtube.com/watch?v=6mQQsPVxFlY
Previous Total £456.28
Trim parts £10
MOT £20
Road Tax £75
New Total £561.28
[BREAK=Big Update]
June 2012
This is all stuff thats happened since the last update.
I hardly use it.
Yes its pretty and now it has all the plastics round the screen etc but I prefer the cbx. The CBX can corner a lot better, this bike just scrapes bits (like the hero blobs on the pegs etc).
I think the CDi may be failing as it doesn't seem to advance properly so its making it really slow. Of course not checked it as I'm just annoyed by the thing.
I want to get it working better, I just can't be bothered really. I have plans like dropping the front sprocket a tooth (currently a 17 like the VF's will drop it to a 16 tooth and it should really help the acceleration). The bike has new tyres, chain etc and brakes but it just sits there. Its annoyed me greatly. But I expected too much of it I think.
I pulled the carbs off and cleaned em out, they were still clean. The carbs come off so easily on this bike.
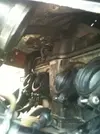
No change, the throttle linkage has some wear but nothing to really worry about.
Got a rear caliper picture here, I did take this apart and remove the dodgy outer seals and fitted new but I may have already covered that, I can't recall. Anyway its sorted now releases cleanly etc. I did recently lube up the slides etc on it.
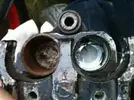
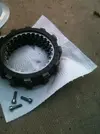
The clutch, again like the CBX it slipped, this one slipped worse when it was running well that is. It would slip at full power from about 8krpm and up.
So I bought uprated EBC clutch springs, these were 10% stiffer than stock, they must have been as it slipped about 10 % less. I imagine it needs new plates really.
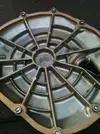
So fairing off, this is annoying as it has to be cable tied as its missing brackets etc. And undo the clutch cover.
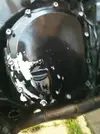
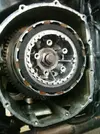
Clutch off
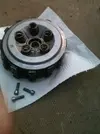
centre removed from steels and fibres
I had to make up a new gasket the original tore on removal
Back together
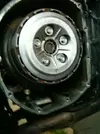
back off for whatever reason
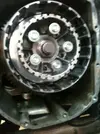
Anyway back together better but still slipping at high revs and load.
On a long ride my exhaust made a noise, I looked down and it was hanging off on the passenger side, then it fell off. I found some wire on a fence and fitted ti back on, the bolt had gone, broken I imagine is it was a new bolt with a nylock on it.
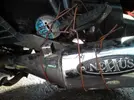
So the finish is pretty scratched on it now.
I had a cleaning urge on the bike so I done that, the wheels came up really well, it looks great now. I decided I wanted to clean the front sprocket area and also see what the front sprocket is like. The chain is new and the rear sprocket is in great condition (still flipped it though), the front sprocket is the fastest wearing one as its smaller and thus spins faster.
So I pulled the sprocket cover off, the rusty water mark is from a dodgy hose clip when I got it ages ago, I still flush the thing through but its still orange after about 50 flush throughs. Anyway you can see the gunge that comes about from lubing the chain and general debris.
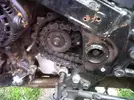
You can see the sprocket is hooking. Its also a 17 tooth item. I flipped it over for the moment but I will be getting a 16 tooth sprocket to make the bike go a bit better
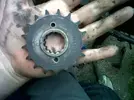
This is the end result after cleaning the gunge out, much nicer
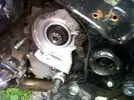
So I still have stuff to do, it wasn't the dream I had hoped which is annoying. Its been mot'd and taxed the full time and its been out maybe 15 times. I take the CBX out about 15 times a month.
Hopefully I will get it going a lot faster and I will like it. I bought the bikes for speed and nothing else. This bike was briefly the fastest production bike on the planet, I want it to act like it.
[BREAK=MOT, upgrades and SORN]
August 2012
So the bike's MOT falls on the 31st August every year and the tax is up on the 31st of August every year.
So due to lack of use because its not as fast as I want, the handling whilst rock solid (especially at speed) doesn't allow a lot of lean due to the bulbous bodywork and the fact the bike is kept out the back and chained up means its a 20 minute affair to get it out the front. The CBX is out the front can be unchained and ridden away in a few seconds. So as of today it is SORNed.
I have plans for it though over the winter hopefully. Plans where I may actually see that 160 odd mph it promised.
The MOT. This wasn't an issue I knew it would pass easily as the bike is mechanically sound. But there was two things I wanted to sort out before the MOT.
Number one was changing the tyre valves. Someone had put car ones on it. These are long and make pumping the tyres up awkward. I just kept putting it off. I had an assistant in the form of my cousin Jamie, so once I broke the bead he held it away so I could change the valve. So both front and rear tyre valves were changed to the common TR412 valves. Much better for filling with air and I don't have to worry about the long car valve tearing off at 140 mph.
This picture shows the difference in the length between the old and new fitted valve
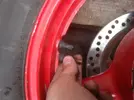
The other issue was the charging system. Any bikers will know that charging systems on bikes are an issue. Some don't charge others charge too much and boil the battery dry. This bike is in the latter category.
Now this wasn't an issue until I took it a few long journeys recently and when at a stop I could smell the battery and sure enough it needed topped up. It was boiling itself dry.
Now I had always meant to add a relay to the charging system like I had done to the CBX but just never got around to it. Well I have now. Now stupidly I never got a picture of it charging at 17 volts at higher revs, but this is what the issue was.
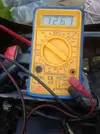
Battery voltage with the ignition off
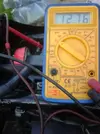
Ignition on headlights off though
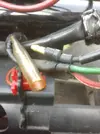
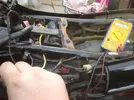
Rectifier switched live feed sensing wire
Voltage check on that wire
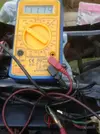
Nearly a volt missing. This is bike off no head/running lights on only the ignition lights. In this state the rectifier thinks the battery voltage is a volt lower than it really is, better charge it says mr rectifier - wrongly of course. When the headlight etc was on the voltage drop was even worse of course. Bike wiring is terrible, its not like cars where things have their own feeds and multiple earths. Bikes have 1 feed and 1 earth for the loom. Everything from ignition to lighting is shared by very small wires with crimps, switches and connections along the way.
BTW the official tolerance in the auto industry for a join etc is 0.5V put 10 joins in 5v drop at the end is ok technically!
So what to do, well connecting the sensing wire tot he battery will remove the voltage drop but it will also drain the battery as it will be live all the time. So we need a switched feed with little drop, enter the relay.
The relay is wired so the original switched live 11 (ish) volt feed switches the relay on. The other half of the relay connects the battery directly to the sensing wire. This allows it to see the true battery voltage.
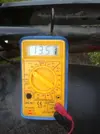
So with that done, battery voltage
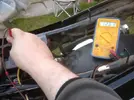
And on the output terminal to the sensing wire the same reading
This is what we want.
Start the bike up, idling no lights on
idling with lights on
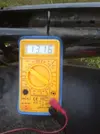
Awesome. It also doesn't go above 14.3 volts when revved either. So no more boiling the battery dry.
This is the relay loose. I done it so in case of a relay failure it can easily be resorted back to stock. I further tidied up the wiring and isolated the crimps as well.
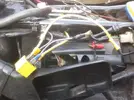
After this was done it was off to the MOT station. It passed, it was given praise on its excellent brakes, There was no warping on the front and the rear only had a little deviation (was only flicking 1 digit back and forth, this is very rare). So MOT'd for another year. It had only done just over 1k miles since the last mot.
I took it out for a bit and took a couple of pictures. I just crave a 200 mph wheelie machine though. I want to be on the back wheel doing 200 mph + with more to go. I need the speed.
Anyway the bike pictures from the run
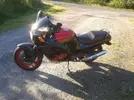
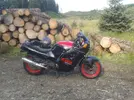
It is quite tidy really, only up close do the faults become really noticeable. Still I often get comments on it.
I never get anything but looks of horror about the CBX though :lol:
[BREAK=Sold]
May 2015
Wow nearly 3 years since the last update.
I sold this a few weeks back.
Sold to a friend so I can still have a go now and then.
I liked the idea of the bike but it just wasn't right for me. It was to cramped to be comfortable for me.
My friend asked me about it and I sold it to him. Made a small loss but I got an ornament out of the way and I used the money to buy stuff for the CBX and my unit.
So win win really.
I hadn't ridden it on the road in 2 years except to and from the mot station.
project Snaily is an excellent machine, reliable, smooth and I suppose brisk. However its just not brisk enough.
So I have been looking for a replacement. the ideal is a Hayabusa then fitting a turbo to it. However insurance would be a major issue and I don't want to have something that will sit for a year or more not going anything until I can insure it.
I thought about a more modern smaller bike, a 600 or something, after all my bike is nearly 30 years old and advances have been made in all departments.
So I looked at other bikes, of course I saw older bikes and since I like older things I was attracted to a Yamaha FJ1100, easily modified, retro chic, air cooled and 120 bhp.
Then I thought money, getting the bike, sorting it then modifying it, no point.
So looked at more modern 'superbikes'. Really fancied a Kawasaki ZX10, but money was to much for what it was.
Then looked back at the Honda stable. I thought VF1000F, rare but I have 750 VF's and don't rate them.
So looked at other things, saw the CBR, I didn't like the looks of the front or rear but the bike can be modified, parts cheap and readily available. So watched a few on ebay, none screamed buy me though. There was a Rothmans one not to far, turns out the same guy I bought the CBX off of! He wanted £650 to much for my taste with a leaking tank.
Gumtree last night, Kevin called said look at this and we called the guy and headed down. the advert was for a CBR 1000 F, red and black, mot'd July 2011, taxed 31st December 2010, new tyres, chain and blah blah, £450.
So go down have a look, looks good (in the dark anyway), engine rattles (they all do) but its a bit worse than usual. He has a load of bikes there and is the typical old bike, long hair etc.
Confirm all the other stuff and settle on 400 which is a bargain no matter how you look at it.
Ride it home, not very impressive, feels way down on power, need loads of throttle to maintain 70, get to 80, not really in the mood to go faster in the pitch black on twisty roads on an unfamiliar bike.
The temp gauge stayed fine, although in traffic the tank got roasting. Lights, horn and brakes etc work fine. the front brakes are much better than the CBX's.
Take it out with me today, starts up happily enough, runs a bit lumpy and the idle is high, get there turn it off, 6 hours later back out, starts up fine head home, Take motorway again 80 ish is all it gets to. It has to be revved to the moon to make progress.
Come home take some pics then do a bit of work on it.


the additional stickers have to go, so I started there, removed a large faded EBC sticker from the lower fairing then removed the Battlax Tyre stickers, I will also remove the tank protector pads as they are terrible. I got some pics of the stickers
can just make out the Battlax (damaged) sticker on the tank

If its grey scaled you can see it clear as day

One of the stickers on the side, the fairings a bit damaged


Stickers are now off, for some reason the pictures never turned out so will get some pictures of it sticker-less tomorrow hopefully.
Anyway onto the work. Apparently the guy had paid £100 to have the carbs synchronised the other week I think someone did a bad job myself, so time to look.
The CBR has a lovely hinged tank with a strut to it can lift up and allow access, not enough IMO so I pulled it off revealing this

you can make out the rubber caps over the balance ports on the top of the carbs. I hook up the gauges, none match or are even really close.
Number 1 is curious as there's no reading...
rev the engine number 1 comes up but at idle nothing there, it doesn't seem like its only running on 3 but it would explain a lot.
I then adjust the other 3 cylinders to match and the revs go up to about 4 krpm. Back the idle speed adjuster off, still there, force the linkage by hand and it drops down to idle. smooth but now you can hear its not firing properly but its not a definite misfire its a strange one.
So pull the plug out of number 1. Sooted up heavily with some fuel on it. So blowtorch it clean, this is an after pic the before picture never worked

Compression test, 0 PSI, number 4 (easiest to pull out) 140 PSI within 1 crank. Yep that's not good.
I left it at that and took out my 750 to feel a smooth bike again.
Not sure what to do, I could throw lots of money at this. I could sort it so its running on 4 then sell, or spend money on it and maybe turbo this and hold onto it.
I haven't decided, I will when I find out what's wrong, I'm sort of hoping someone has messed up a valve adjustment. But if they have the valve seat may be damaged now or the valve, so head off anyway.
I am trying to borrow a bore scope so I can have a look without pulling it all apart.
The carbs are coming off for a clean up whatever happens so this will allow access to the intake valves.
Bike £400
[BREAK=Inspection begins]
8th October 2010
Well today I had some free time, well I was meant to be doing other stuff but I couldn't be bothered so I done some work on the CBR instead.
So I started by removing the fairing, this is mostly cable tied on so cut those off.
Then to make life easy I drained the coolant. I was surprised to see it actually contained coolant and not rusty water. yeah its pretty poor looking but its better than rusty water!
Coolant draining into a bottle

Water pump, just remove the 10mm drain screw, the funnel (and bottle) is there to prevent a mess.

This allowed me to remove a coolant hose over the cam cover so I could remove it easily. Remove a breather pipe and 8 10mm bolts and the rocker cover comes off.
However one bolt snapped!

So that needs replaced.
I then set about checking the engines timing just to be sure, it was spot on.
Cover removed for access to crank bolt

The cam pulley is where its meant to be

I then checked the valve clearances, one exhaust valve was tight, loosened it no change to compression. Which are as follows;
Compression test results
Cylinder 1 0 PSI
Cylinder 2 155 PSI
Cylinder 3 150 PSI
Cylinder 4 155 PSI
The other three cylinders seem in fine fettle anyway!
so I will indeed have to pull the head off to rectify this issue. Oh well.
Whilst I had the engine running its a bit clattery (they all are) I decided to adjust the balance shaft. This can on these bikes make a massive difference to rattling. the balance shaft runs on an eccentric spindle, which adjusts the gears backlash.
Tricky to see but there's a 12mm bolt that locks the adjuster as it were, a 10mm pinch bolt that locks the spindle and the spindle has a flat in it for a screwdriver to turn it.

A picture from further back to show where it is

The manual states adjust it with the engine off, I done it whilst it was running. This way I could hear the difference it made, to tight it would start to whine, loose and it would clatter more.
With it adjusted it was slightly quieter but I think it needs the usual cam tensioner and most likely the starter/alternator chain and tensioner changed.
[BREAK=Stripdown]
12th April 2011
Well decided to get my finger out. I need space and more to the point need cash so I can buy a gearbox for the chamade. So time to get on with this.
As I proceeded to work it became more and more apparent that some form of retarded donkey has had the head off before.
So all the fairing and tank off.

Airbox and carbs off


Front cowl off so I can remove the header pipes and the radiator. the small radiator you can see here is the oil cooler.

Headers off, notice anything odd about the right stud hole on the first cylinder? yes broken stud, repaired with chemical metal, and some bodged drilling!

a pic with the head off

Coil, stat housing etc all gone along with the exhausts

Headers off

Turned it over a few times with the cam cover off just to check everything moved ok, it appeared to, some of the exhaust side stuff are hard to see though due to the frame, this is the timing hole in the side

Cam cover off

So next job is the head removal, to do this you need to take off the cam wheel so the chain comes off, then undo the cam caps and remove the caps. Then crack the head nuts.
Now as mentioned earlier some idiots been here, so some nuts and bolts were loose however the best bit. Some retard used a copper washer under one of the outer head nuts, so this of course locked the head to the stud, so I had to chisel the washer off, thankfully copper is very soft and it came off, here it is

head off

gasket removed, hondas and their open deck blocks, I don't like them

So head off and have a look at the low cylinder, notice anything funny?

yes that is indeed 1 exhaust valve not sitting flush. It also moved when I touched it, I figured a broken valve spring or dodgy collet.
Back on the block, the joy of an open deck is you can see how clogged the galleries are, they are always filled with debris it may be metal corrosion flakes or casting sand there’s always something.

Stuck in a scraper and this came out attached, just to show the debris

This of course will all be flushed out, I'm very fussy on cylinder cooling even on things I'm not keeping.
Back to the head. A closer look at the dodgy valve showed this, impossible to see with the head on the engine in the frame

Loose collet and note the bent follower guide plate.
Follower and spring plate removed, the guide plate is a mess

plate off


So need a new plate, I looked about, couldn't find any, the 600 uses a different one. Went to Honda was told mid June for delivery but got the part numbers. Tried David Silver and he had them in stock so ordered a new guide plate.
Next pop out the valve, wasn't hard, just a rap with a socket and extension popped them off. Valve is undamaged believe it or not. I cleaned it up later

Undamaged

Collets, the damaged one has the ridge inside worn away totally. So ordered 2 new ones from DSS along with the guide plate

So The next task while I wait is clean things up and also lap the valve back in. However one of the locating dowels was stuck in the head.
Now normally you can sometimes wiggle them out with fingers, other times grip with mole grips or something which destroys them.
However sometimes they are into a blind hole, this means you can pop them out with hydraulic force.
Usually you use grease but that makes a mess so I opted for liquid soap.
The dowel

Soap it up

Then get a 1/4 inch extension that’s a snuggish fit inside the dowel then a swift tap with a hammer and the dowel pops out

With that out I could start the initial clean up of the head, this is the first stage of scraping gasket debris off

of course this will be done more thoroughly but I wanted the valve back in so nothing got into the guide etc.
I then lapped the valve and with the valve in place (no springs or anything) I filled the chamber up with water to test the seal, it sealed perfectly

So it doesn't leak and now I can clean up the head properly.
I have ordered the plate and collects and hopefully they will be here before the weekend.
I have to clean the barrels out to remove the grot and I will also strip and clean the carbs, already seen some issues with them.
Then build it back up get it running sweet and maybe see about a wee temp cover to see what its like then sell it.
[BREAK=Head bits fitted]
18th April 2011
Well I hurt my back last week, so everything has taken a knock. Which is annoying as the weather has been fantastic up here.
The parts needed arrived on Friday but only today did I manage to lift the head out of the white chammy to work on it. It was pretty sore, ended up asking the mrs to help me carry it as it was really hurting my back.
New plate and collets

Fitted up the valve, new collets on the left valve, all sorted

New straight plate, identical to the old one except its not got UP stamped on it. This plate is the older plate not the new part number form which I gather just has up on it.

All buttoned up

So next job was the broken stud. this is a proper disaster.

So started to clean it up, whoever done this must have been an idiot or vision impaired. Perhaps Mr Magoo did it. They drilled off the broke stud through the head, this came clean the more I cleaned suspicious areas

Boring out the stud as best i can

It was cleaned up then a stud put in. Then chemical metal filled the voids.


Secure enough the head can be picked up by the stud alone. So just need to clean out the ports of the swarf then clean up the head face, adjust the tappets, clean out the engine blocks water galleries and then just slap it all together.
Oh yeah got to clean up the carbs and also sort out a worn linkage on them.
Previous Total £400
Heel Plates £17.98
head gasket + cover bolt £15.69
Air Scoops £5.99
Follower Plate and Collets £16.62
New total £456.28
[BREAK=Carbs]
6th May 2011
I neglected to update this as it happened so we will catch up now.
the carbs were obviously removed and I stripped them to clean, rebuild and set them properly.
As usual there was clear evidence of idiots being there first, damaged screw heads and so on.
But we shall cover those issues as we progress.
The carbs, this shows the idle adjustment, basically the knob is turned to open the butterflies to alter the idle speed.

Other side

Throttle plates, powah!!! :lol:

Cab float bowl, all were reasonable clean

As were the carbs, still pulled everything and cleaned them up

One of the carbs float bowl drain screws was covered in chemical metal. i scraped it off, then managed to unscrew the screw

other side

Why they done this I have no idea, the taper is what seals the fuel drain, the o-ring just stops fuel passing by the screw head when draining. Cleaned it up and its fuel tight.
These are throttle linkage springs, they were all different, they were all matched up like so as this is how they are meant to be

Next it was on to the pilot screws, the pilot screws adjust the idle and low speed mixture. generally they should be 2 - 3 turns out from fully seated. 1 was tight in, 1 was 1 turn out, another 1.5 turns out and the last was seized in and damaged!
This picture shows one of the pilot screws removed and polished up along with the choke plunger, again polished up.

This was the seized one

I managed to hacksaw a deeper groove and along with the blowtorch I managed to get the pilot screw removed. The threads were also damaged. I then had the problem of now being down a pilot screw. I have carbs off the spare VF750F, pulled a pilot screw and it was the same tip profile etc but the head was shorter, so it was used, here they are side by side

it now looks like this

And here is how it should sit

All were set to 2 turns out and the carb synch was bench set.
All that remained was to build the bike back up and try them out.
[BREAK=Build Up]
6th May 2011
So now it was time to put it all together again.
The radiator I painstakingly cleaned both internally and externally. Also made sure the fan worked, it was actually jammed on its housing so I sorted that out.
Back of the radiator

Front of the radiator (before thorough cleaning)

Onto the actual build up.
Removed the hose at the front of the jugs and then using water to flush the gallery and a pick to dislodge build up I got the coolant gallery clear of debris

Then on to cleaning the pistons


Cleaned the deck face then fitted the new headgasket and also the front cam chain guide

Then the head went on, this was torqued in a few stages as I like to make sure everything is perfect with head gaskets.

The cam chain tensioner. This annoying little thing need to be primed with oil then held back against spring and hydraulic pressure and a pin used to hold it in. I looked for something suitable, then decided to use a hanger from the babies room


Then you need to put it in place then fit another chain guide to it and secure it with the R clips, one of the r clips was missing, someone used a paper clip or something before hand, I used a split pin wrapped round for a secure hold

The issue I now had was the hanger was in the way of the chain, I broke it off after this picture


I then fitted up the exhaust, this was done properly so no loose pipes etc mounted solid as it should be

Then I never took any more pictures until it was done. Nearly finished

radiator etc bolted up

Then it was a case of adding fuel then trying to start it. the battery is knackered so used the chamades battery to jump it. After priming the carbs with fuel it was time to see if it would go. Choke on and it fired first turn of the key. the mrs lost that bet, she reckoned it would take 3 tries.
it idled solidly at 2krpm wiith the choke on and then revved cleanly with the throttle, then the float bowls ran dry of fuel.
So with the babies suitably scared it was time to put the body work and exhaust tailpipes back on.
In this picture you can see the jump leads and battery in the back ground, I started it down there then rode it up the garden :lol:
note it now has the heel plates as well


Jobs left to do, try and sort out the fairing for around the screen, get a bubble screen, find the rear damper knob, change oil and filter and balance the carbs to perfection.
It idles nicely, runs smoothly etc. Just a wee service and tweaking of the carb balance will have it perfect.
I am having insurance issues with it so I haven't taken it back out on the road yet to open her up.
[BREAK=On the road]
9th September 2011
4 months since the last update, its been on the road since the start of September.
MOT no issues of course. I spent the days before the MOT stripping down the brakes and they work great, 100% for the front on the roller before it locked and about 80% before the rear locked on the roller. I was well impressed.
I also managed to get some trim on ebay, sadly its black instead of the red but its a lot better than having the fusebox exposed. I am still however missing the nearside inner screen trim piece, most of these bikes have all of it missing now, so its hard to track down.
Whats it like to ride? Well the small screen means you get pummelled by all the wind, it hits me on my chest and throat, so wanting a touring screen or I will make a spoiler thingy for it to get the wind over my head.
Is it fast? Nope, I had hoped it would be a rocket but its not. I need something faster still. Must faster, something at least 1300 cc with a turbo that is made by Suzi...
No pictures but I have a couple of wee vids. You can see the new trim in them around the dash display
http://www.youtube.com/watch?v=J281A-Q7d4U
http://www.youtube.com/watch?v=6mQQsPVxFlY
Previous Total £456.28
Trim parts £10
MOT £20
Road Tax £75
New Total £561.28
[BREAK=Big Update]
June 2012
This is all stuff thats happened since the last update.
I hardly use it.
Yes its pretty and now it has all the plastics round the screen etc but I prefer the cbx. The CBX can corner a lot better, this bike just scrapes bits (like the hero blobs on the pegs etc).
I think the CDi may be failing as it doesn't seem to advance properly so its making it really slow. Of course not checked it as I'm just annoyed by the thing.
I want to get it working better, I just can't be bothered really. I have plans like dropping the front sprocket a tooth (currently a 17 like the VF's will drop it to a 16 tooth and it should really help the acceleration). The bike has new tyres, chain etc and brakes but it just sits there. Its annoyed me greatly. But I expected too much of it I think.
I pulled the carbs off and cleaned em out, they were still clean. The carbs come off so easily on this bike.

No change, the throttle linkage has some wear but nothing to really worry about.
Got a rear caliper picture here, I did take this apart and remove the dodgy outer seals and fitted new but I may have already covered that, I can't recall. Anyway its sorted now releases cleanly etc. I did recently lube up the slides etc on it.

The clutch, again like the CBX it slipped, this one slipped worse when it was running well that is. It would slip at full power from about 8krpm and up.
So I bought uprated EBC clutch springs, these were 10% stiffer than stock, they must have been as it slipped about 10 % less. I imagine it needs new plates really.
So fairing off, this is annoying as it has to be cable tied as its missing brackets etc. And undo the clutch cover.

Clutch off

centre removed from steels and fibres

I had to make up a new gasket the original tore on removal

Back together

back off for whatever reason


Anyway back together better but still slipping at high revs and load.
On a long ride my exhaust made a noise, I looked down and it was hanging off on the passenger side, then it fell off. I found some wire on a fence and fitted ti back on, the bolt had gone, broken I imagine is it was a new bolt with a nylock on it.

So the finish is pretty scratched on it now.
I had a cleaning urge on the bike so I done that, the wheels came up really well, it looks great now. I decided I wanted to clean the front sprocket area and also see what the front sprocket is like. The chain is new and the rear sprocket is in great condition (still flipped it though), the front sprocket is the fastest wearing one as its smaller and thus spins faster.
So I pulled the sprocket cover off, the rusty water mark is from a dodgy hose clip when I got it ages ago, I still flush the thing through but its still orange after about 50 flush throughs. Anyway you can see the gunge that comes about from lubing the chain and general debris.

You can see the sprocket is hooking. Its also a 17 tooth item. I flipped it over for the moment but I will be getting a 16 tooth sprocket to make the bike go a bit better

This is the end result after cleaning the gunge out, much nicer

So I still have stuff to do, it wasn't the dream I had hoped which is annoying. Its been mot'd and taxed the full time and its been out maybe 15 times. I take the CBX out about 15 times a month.
Hopefully I will get it going a lot faster and I will like it. I bought the bikes for speed and nothing else. This bike was briefly the fastest production bike on the planet, I want it to act like it.
[BREAK=MOT, upgrades and SORN]
August 2012
So the bike's MOT falls on the 31st August every year and the tax is up on the 31st of August every year.
So due to lack of use because its not as fast as I want, the handling whilst rock solid (especially at speed) doesn't allow a lot of lean due to the bulbous bodywork and the fact the bike is kept out the back and chained up means its a 20 minute affair to get it out the front. The CBX is out the front can be unchained and ridden away in a few seconds. So as of today it is SORNed.
I have plans for it though over the winter hopefully. Plans where I may actually see that 160 odd mph it promised.
The MOT. This wasn't an issue I knew it would pass easily as the bike is mechanically sound. But there was two things I wanted to sort out before the MOT.
Number one was changing the tyre valves. Someone had put car ones on it. These are long and make pumping the tyres up awkward. I just kept putting it off. I had an assistant in the form of my cousin Jamie, so once I broke the bead he held it away so I could change the valve. So both front and rear tyre valves were changed to the common TR412 valves. Much better for filling with air and I don't have to worry about the long car valve tearing off at 140 mph.
This picture shows the difference in the length between the old and new fitted valve

The other issue was the charging system. Any bikers will know that charging systems on bikes are an issue. Some don't charge others charge too much and boil the battery dry. This bike is in the latter category.
Now this wasn't an issue until I took it a few long journeys recently and when at a stop I could smell the battery and sure enough it needed topped up. It was boiling itself dry.
Now I had always meant to add a relay to the charging system like I had done to the CBX but just never got around to it. Well I have now. Now stupidly I never got a picture of it charging at 17 volts at higher revs, but this is what the issue was.
Battery voltage with the ignition off

Ignition on headlights off though

Rectifier switched live feed sensing wire

Voltage check on that wire

Nearly a volt missing. This is bike off no head/running lights on only the ignition lights. In this state the rectifier thinks the battery voltage is a volt lower than it really is, better charge it says mr rectifier - wrongly of course. When the headlight etc was on the voltage drop was even worse of course. Bike wiring is terrible, its not like cars where things have their own feeds and multiple earths. Bikes have 1 feed and 1 earth for the loom. Everything from ignition to lighting is shared by very small wires with crimps, switches and connections along the way.
BTW the official tolerance in the auto industry for a join etc is 0.5V put 10 joins in 5v drop at the end is ok technically!
So what to do, well connecting the sensing wire tot he battery will remove the voltage drop but it will also drain the battery as it will be live all the time. So we need a switched feed with little drop, enter the relay.
The relay is wired so the original switched live 11 (ish) volt feed switches the relay on. The other half of the relay connects the battery directly to the sensing wire. This allows it to see the true battery voltage.
So with that done, battery voltage

And on the output terminal to the sensing wire the same reading

This is what we want.
Start the bike up, idling no lights on

idling with lights on

Awesome. It also doesn't go above 14.3 volts when revved either. So no more boiling the battery dry.
This is the relay loose. I done it so in case of a relay failure it can easily be resorted back to stock. I further tidied up the wiring and isolated the crimps as well.

After this was done it was off to the MOT station. It passed, it was given praise on its excellent brakes, There was no warping on the front and the rear only had a little deviation (was only flicking 1 digit back and forth, this is very rare). So MOT'd for another year. It had only done just over 1k miles since the last mot.
I took it out for a bit and took a couple of pictures. I just crave a 200 mph wheelie machine though. I want to be on the back wheel doing 200 mph + with more to go. I need the speed.
Anyway the bike pictures from the run


It is quite tidy really, only up close do the faults become really noticeable. Still I often get comments on it.
I never get anything but looks of horror about the CBX though :lol:
[BREAK=Sold]
May 2015
Wow nearly 3 years since the last update.
I sold this a few weeks back.
Sold to a friend so I can still have a go now and then.
I liked the idea of the bike but it just wasn't right for me. It was to cramped to be comfortable for me.
My friend asked me about it and I sold it to him. Made a small loss but I got an ornament out of the way and I used the money to buy stuff for the CBX and my unit.
So win win really.
I hadn't ridden it on the road in 2 years except to and from the mot station.
Last edited by a moderator:

