There is more to life with TurboRenault.co.uk

Register a free account today to become a member! Once signed in, you'll be able to participate on this site by adding your own topics and posts, as well as connect with other members through your own private inbox!

5 GT Turbo C1J rebuild.

Yes. That's definitely one of those `someone else's time and money scenarios' I started watching this thread as I wanted to see a rebuild from a turbo point of view. All my own C1J's (about 10 with rebuilds) were atmo's, so built from a different point of view. The last engine I built had no Renault bits in it, except the Block, shells, head casting and rocker gear. I use cheap and cheerful head gaskets, so prefer a bit of protrusion, as with time and rpm the liners can hammer out a thou or so over time. All my valve seats are on 0.5mm wide for flow, this would not work in a turbo motor, well it would, just not for long......
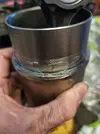
I do wonder if the problem has been caused by localised boiling around the liner seat, due to a cooling system that was old and not totally sealed (therefor allowing boiling in nooks and crannies) @sparkie What end of the block is it??? Just to satisfy a morbid curiosity I have about this.
I will now apologize for the Hi-jack and promise to shut up.....
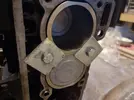
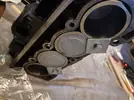
The pitting is the gearbox end liner base - furthest corner away from the waterpump.
 
Thanks for the reply. It would be the hottest part most likely to boiling. I also think it ties in with lower power versions of this engine being less susceptible to this issue.
My own feelings on this is that the cooling system must achieve decent pressurisation, The hoses should be firm to touch when hot and it is a good idea to take a bleed off the gearbox end of the head about 3-4mm in diameter and tie into the top hose (hot feed to the radiator ) to help prevent this.
Anyone else have any theories on this?? Most 70's Renault's would boil, when worked hard if the fill cap on the radiator was not completely sealed, as it allowed any pressure to escape and did not raise the boiling temp of the water. Allowing micro steam pockets to form, in turn making the hotspot worse.
Surely mk1 5 engines would have the corrosion at the opposite end of the block when compared to a mk2 5, due to the locations of the waterpumps?
 
Probably. I have never used a MK1 5 block. They all had the mounting lugs sawn off to fit in a mk1 5, so they don't lend themselves to anything else. Then you need to swap the waterpump to the other end of the head which requires a bit of grinding and some epoxy putty to accomplish.
 
Ive seen a few people add a coolant feed into the gearbox end blank. Personally ive never ran one though, and not had any issues. My ecu clt temp sensor is in the blank, and not seen any astronomical temps.

The rad cap must be sealed properly or you will always have issues. Same on most engines.
 
Still generally dont have any issues overall if the rad is adequately sized. Ive run a minimilistic cooling system for years, with lots of track use on a heavily boosted setup, and did not have any issues in that respect. A cooling pump on a timed relay to run when engine is shut down is a good idea, msot modern stuff run one which i guess is to help with issues like this, coolant boiling in turbo core etc.
 
The point I'm trying to make badly is that you don't know this is happening until you strip the motor and find damage that can't be explained. The idea of post cooling is a first class one. When Racing the main point of the cooldown lap was just that. Foot off gas and everything that blew cold air switched on. Temps down in the low 80's by the time you got to parc ferme. Not so easy to accomplish on a hot day in a traffic jam...
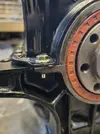
 
I did give my old lump a strip down to see how knackered it was and didnt see any real issues in respect of cooling in cyl 1 area. Id cracked the head between every valve on every cylinder, which is very common in these c1j's and lost almost all of one of the exhaust lobe on one cylinder. Still made 235hp on the dyno it was quite unbelievable.

Out of all the c1js ive pulled apart the ones that have been poorly maintaned, running straight water have always had issues with corrosion internally, or laid ip for years and gone very furry inside.

Im interested to see how my current engine is internally after 6000 miles and 7600rpm and egt's in the high 900s on high boost. On the surface though it appears to be good, oil pressure is still 4bar when hot, and no real blow by issues. Stock pistons, rods and liners have done real well considering how pushed it is. Ill be doing a post inspection when i do some upgrades soon.
 
Been in bed for 3 days feeling rough! Now I'm a bit better and as Chris has caught up, I thought I'd better do some more work.
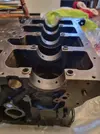
Block cleaned up.
20221230_145657.jpg
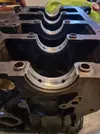
Main bearings in, making sure there is no debris under them. Obviously making sure the side with the oil holes are fitted into the block side. Don't forget to oil them.
20221230_150042.jpg

Don't forget the thrust washers eitherside of main 3, fit with the recesses outwards.
20221230_150315.jpg
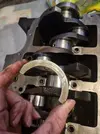
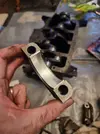
Fit the main bearing caps. Ensure the bearing seats are clean! Fit and oil them,
Make sure they are in the correct numbered order! Do not run down number 2 or 1, as you still have to fit the rear seal and the dipstick lower tube.
20221230_150723.jpg
Sealant on the outside of the rear seal.
20221230_152440.jpg

Grease on the inner lip seal.
20221230_152531.jpg

Insert and tighten the bolts. Ensure its level with the surrounding block and cap.
20221230_152917.jpg

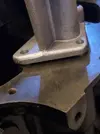
Fit the lower dipstick tube.
20221230_153037.jpg
Remember the washer under the main cap bolt. It's the only one with one!
20221230_153057.webp
 
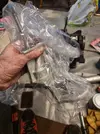
The oil pump saga.
Look at the new oil pump....lovely!20221230_153749.webp
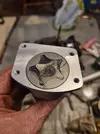
Take it apart and pack it with grease.
20221230_154036.webp
Grease the spline too.
20221230_154310.webp
Then discover that the hole in the new pump, is too small for the dowel in the block to fit into.....again ( I've had this before)
20221230_154449.webp
A bit of 'careful milling' of the aluminium body, and it fitted like a charm.
 
Been in bed for 3 days feeling rough! Now I'm a bit better and as Chris has caught up, I thought I'd better do some more work.
Block cleaned up.
View attachment 209977
Main bearings in, making sure there is no debris under them. Obviously making sure the side with the oil holes are fitted into the block side. Don't forget to oil them.
View attachment 209978

Don't forget the thrust washers eitherside of main 3, fit with the recesses outwards.
View attachment 209979
Fit the main bearing caps. Ensure the bearing seats are clean! Fit and oil them,
Make sure they are in the correct numbered order! Do not run down number 2 or 1, as you still have to fit the rear seal and the dipstick lower tube.
View attachment 209980
Sealant on the outside of the rear seal.
View attachment 209981

Grease on the inner lip seal.
View attachment 209982

Insert and tighten the bolts. Ensure its level with the surrounding block and cap.
View attachment 209983

Fit the lower dipstick tube.
View attachment 209984
Remember the washer under the main cap bolt. It's the only one with one!
View attachment 209985
Hope you’re feeling better Sparkie. Thanks for the detailed info,I really appreciate it! It really helps!!
 
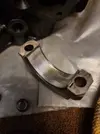
Insert the big end bearings and oil them.
20221230_164044.webp

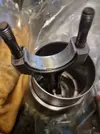
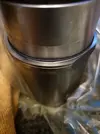
Put the liner seal on.20221230_164050.webp

Fit the bearing to the conrod cap and oil.
20221230_164053.webp

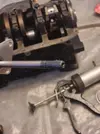
Slather sealant over the liner seal. Don't be shy...20221230_164411.webp

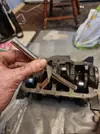
Slip in the liner, ensure that the cut out of the conrod bearing faces the back of the block and make sure the flats on the side of the liner is straight.
Then fit another liner and use the liner clamps.20221230_165420.webp
Continue.20221230_171746.webp

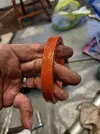
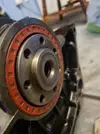
Then remember you had an over enthusiastic powder coater....who painted the lip where the crank seal fits.
20221230_175624.webp

Use a finger file to grind that paint off and fit the seal.
20221230_180358.webp
 
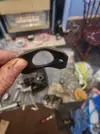
Cam retaining plate removal problems...
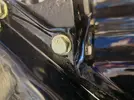
20221230_182209.jpg
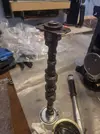
Hammer it flat again and fit it to the uprated cam.20221230_182820.jpg
20221230_183153.jpg

Then fit it, after greasing the lobes and cam journals.
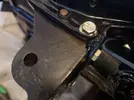
20221230_183309.jpg

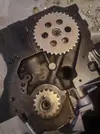
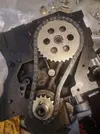
Trial fit the cam and crank gear, to get the correct orientation.20221230_183755.jpg
Fit the chain..20221230_184337.jpg
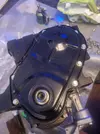
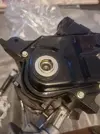
Fit the chain tensioner and the cam gear bolt, then fit the timing cover after applying sealant.20221230_185816.jpg
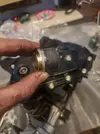
Grease the bottom pulley carrier.
20221230_185844.jpg
20221230_185910.jpg
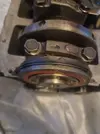
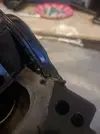
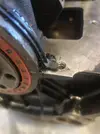
But sealant in the groove of the timing cover and in main cap 1, then fit the horseshoe seals.20221230_191301.jpg
Make sure there is sealant under the 'ears'
20221230_191317.jpg
20221230_191311.jpg

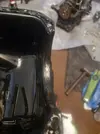
Apply sealant to the sump, including where the horseshoe seal fits. Smooth the sealant in those horseshoe seal areas with your finger.20221230_191824.jpg

Fit the sump and loosely tighten the bolts. Only tighten once all the bolts are fitted.20221230_192613.jpg
Then add further sealant around where the horseshoe seals are exposed. This is vitally important - smear it flush with your finger - you are pushing the sealant into any voids.
20221230_192730.jpg
20221230_192848.jpg
20221230_192857.jpg

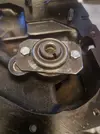
Knock the rear cam plate in. Use sealant!
20221230_193449.jpg
Then let all the sealant set for 24hrs.
 
Cam retaining plate removal problems...
View attachment 209999
Hammer it flat again and fit it to the uprated cam.View attachment 210000
View attachment 210001

Then fit it, after greasing the lobes and cam journals.
View attachment 210002

Trial fit the cam and crank gear, to get the correct orientation.View attachment 210003
Fit the chain..View attachment 210004
Fit the chain tensioner and the cam gear bolt, then fit the timing cover after applying sealant.View attachment 210005
Grease the bottom pulley carrier.
View attachment 210006
View attachment 210007
But sealant in the groove of the timing cover and in main cap 1, then fit the horseshoe seals.View attachment 210008
Make sure there is sealant under the 'ears'
View attachment 210009
View attachment 210010

Apply sealant to the sump, including where the horseshoe seal fits. Smooth the sealant in those horseshoe seal areas with your finger.View attachment 210011

Fit the sump and loosely tighten the bolts. Only tighten once all the bolts are fitted.View attachment 210012
Then add further sealant around where the horseshoe seals are exposed. This is vitally important - smear it flush with your finger - you are pushing the sealant into any voids.
View attachment 210013
View attachment 210014
View attachment 210015

Knock the rear cam plate in. Use sealant!
View attachment 210016
Then let all the sealant set for 24hrs.
What brand/ type of sealant do you recommend for this? 👍🏻
 
What brand/ type of sealant do you recommend for this? 👍🏻
I've used all sorts over the years. My current favourite involves me walking into my local carparts place and just buying what they have on the shelf, after asking them for 'RTV'. Literally any brand will do
 
Any sealant seems to leak after a period, ive tried expensive stuff and cheap stuff and usually get a thousand miles before it starts leaking😆Im using victor reinz reinzosil on the modern stuff seems ok. Dirko Ht is rated too but not used it myself.
 
Back
Top