There is more to life with TurboRenault.co.uk

Register a free account today to become a member! Once signed in, you'll be able to participate on this site by adding your own topics and posts, as well as connect with other members through your own private inbox!

5 GT Turbo C1J rebuild.

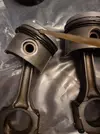
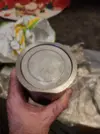
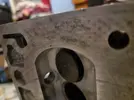
That block looks the dogs wanger! What is the last photo of?
Where the liner drops into the block, the liner seal sits on that angled rim and seals the liner base in the block, it stops the water from the coolant jacket draining down into the sump. Common for corrosion there on ally blocked 21's too. The liner seals are supposed to go in dry, its just a rubber O-Ring, but I smear Reinzosil around the liner base and O-Ring before fitting now. It's a high temp oil and water proof, flexible sealant and it helps fill in all those little corrosion points. You only need a little and it squishes nicely into place. You have to remember to clamp the liners down in place though as it needs to dry with the liners in the right position, otherwise your liner/deck protrusion will be wrong. I've used it on maybe 20 engines over the last 15 years and never had an issue, other than its a lot harder to get the liner back out lol
 
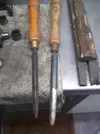
I use old carbon steel bearing scrapers for cleaning the liner bases. I'll try to get a pic. it's like a narrow curved file with no teeth, perfect for scraping cast iron, the 45 chamfer where the O ring sits is about 50% complete. To my tired old eyes in the pic the corrosion looks like it's sticking up not down. Is it a Cavity??
 
I use old carbon steel bearing scrapers for cleaning the liner bases. I'll try to get a pic. it's like a narrow curved file with no teeth, perfect for scraping cast iron, the 45 chamfer where the O ring sits is about 50% complete. To my tired old eyes in the pic the corrosion looks like it's sticking up not down. Is it a Cavity??
Could be a new Internet meme, "is it a cavity or a protrusion"... its definitely a cavity.
 
I think @DaveL485 's sealer suggestion is a good one. You could try an epoxy putty, but making sure you didn't end up with a high spot would be difficult and if it were even just slightly low, you are back to where you are now!!!
I use a trace of silicone on liners, but I'm a philistine. I have a sacrificed head gasket, which was a new one, that's been used on my builds I fit the liners, check the protrusions, if ok, remove, touch of sealer, refit, sacrificial head gasket on, head on and Torque down. Leave for 24 hr and remove, recheck liner protrusions.
This is because I am using oversize liners and prefer to set the protrusion high, about 6 thou. I guess you are using production parts and production settings, which means this extra step is a bit of a pain timewise.
This issue and other related problems will only get worse as time marches on and engines that have lain about gently corroding, get older and older
Like I always say
Happy Motoring (while you still can)
It needs to be more elastic than epoxy, I think anything hard would crack or degrade with the constant heat cycling and thermal expansion & contraction especially between different materials. The block @sparkie has pictured I would happily use my method on though. I wonder if it was really bad, you could have it ground out, welded and machined? Certainly could on an ally block. Back in the day you'd just bin it for another block but with spares drying up, it'd be interesting to see how efficient it would be to rebuild the bit of damaged liner seat.

PS I like liner protrusion at ~0.1mm :)

PPS Reinzosil is the best elastic sealant for sumps and cooling unions that i've ever used, by a country mile.
 
it'd be interesting to see how efficient it would be to rebuild the bit of damaged liner seat.
Yes. That's definitely one of those `someone else's time and money scenarios' I started watching this thread as I wanted to see a rebuild from a turbo point of view. All my own C1J's (about 10 with rebuilds) were atmo's, so built from a different point of view. The last engine I built had no Renault bits in it, except the Block, shells, head casting and rocker gear. I use cheap and cheerful head gaskets, so prefer a bit of protrusion, as with time and rpm the liners can hammer out a thou or so over time. All my valve seats are on 0.5mm wide for flow, this would not work in a turbo motor, well it would, just not for long......
I do wonder if the problem has been caused by localised boiling around the liner seat, due to a cooling system that was old and not totally sealed (therefor allowing boiling in nooks and crannies) @sparkie What end of the block is it??? Just to satisfy a morbid curiosity I have about this.
I will now apologize for the Hi-jack and promise to shut up.....
 
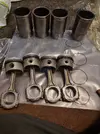
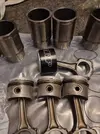
Piston time....
20221221_195756.jpg
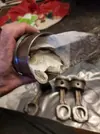
Rings onto pistons...20221221_200457.jpg
Oil the Rings and space the gaps at 120 degree intervals.

20221221_201118.jpg

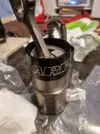
Insert the piston into the ring compressor...
20221221_200937.jpg

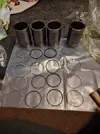
Wipe out the new liner...
20221221_201246.jpg
Oil the liner...
20221221_201300.jpg
Insert the piston into the liner...
20221221_201338.jpg
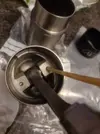
Oil the gudgeon pin...
20221221_201359.jpg

Admire your handiwork...
20221221_202146.jpg
 
Piston time....
View attachment 209597
Rings onto pistons...View attachment 209598
Oil the Rings and space the gaps at 120 degree intervals.

View attachment 209600

Insert the piston into the ring compressor...
View attachment 209599

Wipe out the new liner...
View attachment 209601
Oil the liner...
View attachment 209602
Insert the piston into the liner...
View attachment 209603
Oil the gudgeon pin...
View attachment 209604

Admire your handiwork...
View attachment 209605
Keep it coming mate, this is invaluable 👍🏻👍🏻 Thanks
 
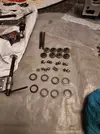
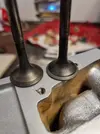
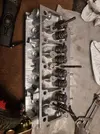
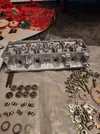
Time to lap the valves in and start assembling the head. Make sure you've got all the parts, including those under spring washers.
20221223_175817.jpg

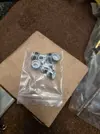
Valve stem seals, as specified by the customer.
20221223_175832.jpg

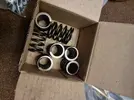
Uprated springs.
20221223_175839.jpg

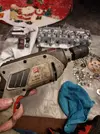
Drilly McDrillface, aka the lapping tool.
20221223_175915.jpg
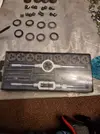
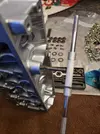
Chasing the threads.
20221223_175932.jpg

20221223_181016.jpg

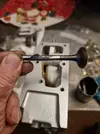
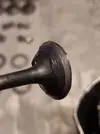
Grease that stem and put grinding compound on the edge of the valve head.
20221223_183457.jpg

In position. Push-pull, push-pull, with your finger on the valve as it spins applying low pressure on the valve seat.
20221223_183610.jpg

Showing gap on the valve with the drill pushing in towards the head.
20221223_183617.jpg

Lapped in on the right.
20221223_183753.jpg

Grease up the valve...
20221223_184023.jpg

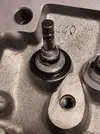
Lower spring washer and valve stem oil seal fitted.
20221223_191154.jpg

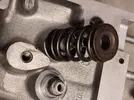
Fit the spring, and retainer, then compress.
20221223_191209.webp
20221223_192346.jpg

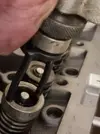
Fit the collets by greasing them , so they stick to the valve stem.
20221223_191311.webp20221223_194852.webp
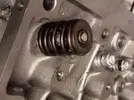
Sorted...

20221223_175826.webp

20221223_183917.webp
 
Time to lap the valves in and start assembling the head. Make sure you've got all the parts, including those under spring washers.
View attachment 209654

Valve stem seals, as specified by the customer.
View attachment 209656

Uprated springs.
View attachment 209657

Drilly McDrillface, aka the lapping tool.
View attachment 209658
Chasing the threads.
View attachment 209659

View attachment 209660

Grease that stem and put grinding compound on the edge of the valve head.
View attachment 209661

In position. Push-pull, push-pull, with your finger on the valve as it spins applying low pressure on the valve seat.
View attachment 209662

Showing gap on the valve with the drill pushing in towards the head.
View attachment 209663

Lapped in on the right.
View attachment 209664

Grease up the valve...
View attachment 209666

Lower spring washer and valve stem oil seal fitted.
View attachment 209667

Fit the spring, and retainer, then compress.
View attachment 209668
View attachment 209669

Fit the collets by greasing them , so they stick to the valve stem.
View attachment 209670View attachment 209671
Sorted...

View attachment 209655

View attachment 209665
Absolutely loving this, stripped mine down today based on this thread! 👍🏻👍🏻👍🏻
 
Great stuff, enjoying the read.

Personally i'm a liners in & seated then pistons in man, rather than pistons in liners first :) Horses for courses!
 
Back
Top