dan_rt
Member
This article describes how I changed the alternator on my MK1 Ph3 Clio 1.4 fitted with an E7J aka the 'Energy' lump.
I was driving to work, when about 2 minutes away the battery light came on.........Joy! Turned the lights, fans and radio off. After work it started up and I began the approx 20 mile drive home. I had no lights, indicators, the airbag light was on. I barely had a fuel pump and ecu lol. Anyhow it got me home.... just!
Got the battery off and into the garage, put a multimeter on it, it read 10v. So stuck it on charge and called it a night.
Before going shopping for a new alternator I got my multi-meter and did a continuity test from the +ve lead running from the back of the alternator to the battery. That was all fine, so off to get an alternator.
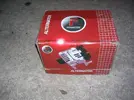
I sourced an alternator from GSF got the guy down to £70 (60amp unit). Partco and Parkers wanted circa £100 and diddn't have any on the shelf. I wanted a new/recon unit now, therefore scrappy was out the question so I bought it.
First things first, jack up the NSF, remove the road wheel, support on an axle stand and remove the inner arch liner.
Unclip the loom from the top mount and disconnect the MAP sensor. This allows the loom to be moved out of the way to gain better access to the alternators tensioner nut.
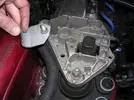
You can see the tensioner nut in the picture below (13mm).
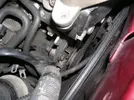
Slacken the nut and remove the bolt. A ratchet spanner comes in handy here to speed things up a little.
Next stop, remove the lower pivot bolt (16mm) access this through the arch.
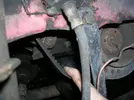
Then remove the belt from the alternator. No need to remove it from the crank pully just out the way will surfice. Then disconnect the +ve lead (8mm) and loom connector to the voltage regulator both from the back of the alternator. The alternator should now be free willy, however getting it out is another story.
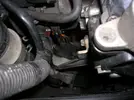
To get the alternator out you have one of 2 options; remove the drivers side drive shaft or unbolt the ball joint from the wishbone and move the hub/strut assembly forward. I chose the latter. If anybody tells you that you can remove the top mount and raise/lower the engine don't listen to them.
Now remove the TRE (16mm nut)
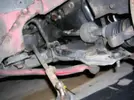
Get a jack under the ball joint to support it and remove the 2 16mm nuts. Gradually lower the jack slightly and move the hub/strut assembly forward towards the front of the car. Be carefull here not to split the CV joint gaitor.
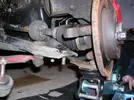
Then withdraw the alternator throught the arch.
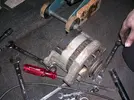
Replacement alternator
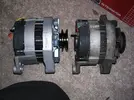
New and old alternator side by side. Check that the mount points, connectors and pulley are the same on both the units.
Now fit the replacement alternator, which is the reverse of removal . When tensioning up the belt, I find it makes it easier to have a piece of wood a couple of foot long by say 1 1/2" x 1/2" to press down on the alternator putting tension on the belt with one hand while tightening up the tensioner bolt with a ratchet spanner with the other.
The battery was taken off charge and fitted back in the bay. I cleaned up all of the terminals with switch cleaner and they came up a treat.
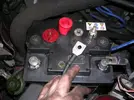
Battery charge indicator gleaming... the brightest it had been in a long while even if it had just come off charge!
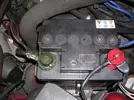
I then fired it up into life and the dash battery light immediately cleared....result! Next test was to see how it perfomed under load. So on with the headlights, foglights (front & rear), headed screen, radio, fans, hazards. Get a multi-meter across the battery terminals have an assistant give it a bit of gas. You should be getting a reading on the meter of between 13.5v and 14.8v for everything to be healthy. I got 14.78v. Job's a good 'un!
I was driving to work, when about 2 minutes away the battery light came on.........Joy! Turned the lights, fans and radio off. After work it started up and I began the approx 20 mile drive home. I had no lights, indicators, the airbag light was on. I barely had a fuel pump and ecu lol. Anyhow it got me home.... just!
Got the battery off and into the garage, put a multimeter on it, it read 10v. So stuck it on charge and called it a night.
Before going shopping for a new alternator I got my multi-meter and did a continuity test from the +ve lead running from the back of the alternator to the battery. That was all fine, so off to get an alternator.
I sourced an alternator from GSF got the guy down to £70 (60amp unit). Partco and Parkers wanted circa £100 and diddn't have any on the shelf. I wanted a new/recon unit now, therefore scrappy was out the question so I bought it.
First things first, jack up the NSF, remove the road wheel, support on an axle stand and remove the inner arch liner.
Unclip the loom from the top mount and disconnect the MAP sensor. This allows the loom to be moved out of the way to gain better access to the alternators tensioner nut.

You can see the tensioner nut in the picture below (13mm).

Slacken the nut and remove the bolt. A ratchet spanner comes in handy here to speed things up a little.
Next stop, remove the lower pivot bolt (16mm) access this through the arch.

Then remove the belt from the alternator. No need to remove it from the crank pully just out the way will surfice. Then disconnect the +ve lead (8mm) and loom connector to the voltage regulator both from the back of the alternator. The alternator should now be free willy, however getting it out is another story.

To get the alternator out you have one of 2 options; remove the drivers side drive shaft or unbolt the ball joint from the wishbone and move the hub/strut assembly forward. I chose the latter. If anybody tells you that you can remove the top mount and raise/lower the engine don't listen to them.
Now remove the TRE (16mm nut)

Get a jack under the ball joint to support it and remove the 2 16mm nuts. Gradually lower the jack slightly and move the hub/strut assembly forward towards the front of the car. Be carefull here not to split the CV joint gaitor.

Then withdraw the alternator throught the arch.

Replacement alternator

New and old alternator side by side. Check that the mount points, connectors and pulley are the same on both the units.

Now fit the replacement alternator, which is the reverse of removal
The battery was taken off charge and fitted back in the bay. I cleaned up all of the terminals with switch cleaner and they came up a treat.

Battery charge indicator gleaming... the brightest it had been in a long while even if it had just come off charge!

I then fired it up into life and the dash battery light immediately cleared....result! Next test was to see how it perfomed under load. So on with the headlights, foglights (front & rear), headed screen, radio, fans, hazards. Get a multi-meter across the battery terminals have an assistant give it a bit of gas. You should be getting a reading on the meter of between 13.5v and 14.8v for everything to be healthy. I got 14.78v. Job's a good 'un!
Last edited by a moderator:

