There is more to life with TurboRenault.co.uk

Register a free account today to become a member! Once signed in, you'll be able to participate on this site by adding your own topics and posts, as well as connect with other members through your own private inbox!

Alpine 1968 Renault R8

  • Thread starter Thread starter Adey
  • Start date Start date
  • Featured
OK here goes. I think bending the mounting anti clockwise to make the crank a little more vertical, then you will have to tweak the carb end of the lever clockwise to stop the ball joint locking on travel. Make sure the cable has the absolute minimum of free play, as it hardly moves and any looseness there is multiplied by nearly 3 at the pedal or carb.
Also there must be no freeplay in the axle mounting/clock spring affair at the crank.
You'll see from my poor sketch above that the pedal travel is fair, but the cable only moves a third of that distance and has to be stepped up at the engine end again, freeplay in the centre spells Disaster.

It is important to have the lower (throttle cable) connection working in the 25 past, to 25 to, part of its arc. All linkages are bound by this. I always liken it to the clock face Max L-R travel is given by being at the 5 to, to 5 past, or 25 past to 25 to. For Max up and down travel then its 10 past to 20 past, or 20 to, to 10 to.
Then you need to look at the direction the linkage pulls in, in the same way. Looking at the pic above you are pulling from Quarter to to 20 to. I think it would be better being in the range 20 to, to 25 to.
If you have deciphered my ramblings you will see that at half travel the linkages should be tangential to each other, pretty much 90 degrees or 12,3,6 and 9 on the Clock face. I always like to visualise stuff.
If this will not work you could go to a cam drum type linkage on the carb spindle. If you imagine a Cam lobe on the end of the spindle with the tip of the lobe at 5 past position with a short cable to the crank. The cable is attached at the 4 position on the clock face and the cable goes over the top of the lobe to the crank arm This means when travelled the throttle is slow to act as it has a longer lever (the cam lobe) but as it rotates the effective throttle lever gets shorter and faster acting. meaning you have good control on the first third of throttle and snap acting on the last third.

Sorry if it doesn't seem to make much sense, if you were local I could just pay a visit and draw on your garage wall. Paul Errington drove himself up the wall with this too.
If it makes you feel better being able to visualise and correct this on the Engines valvetrain (which is bound by the same laws of Physics Captain) is also important to finding the last drop of power, and I'm sure I'm not quite there yet.
Best
S
 
another few hours wasted, still no joy with it, was getting close to burning it....

ordered the following to hopefully make something up that should ditch the lever setup.

Screenshot 2024-11-13 171333.webp
 
I'm saying Nowt. You will need to work in a step up lever. I once tried a Weber comp linkage on side draughts which was an unmitigated disaster until I made a copy of the R8 Gordini linkage (2 bits of sheet metal) which worked perfect..
 
The bits should give me a few parts to play with. The linkage/lever I've made really doesn't seem to have increased its throw at all. I will hopefully get it in the air this weekend so I can check out the pedal end too.
 
So in a bid to get this up and running and wrapped up in a better, more oem way than the hack that I've made so far, I've ordered myself a Renault 8S weber carb. This should work with the original oem lever setup and it can be re jetted if I need. That should be with me next week and will likely need me to re work the manifold again but should only take a little bit of re drilling...... my old throttle cable was stiff and id chopped up the end with faffing trying to get the length correct, so I ordered one from arnaudventouxpieces at the start of the week. Here today (y)

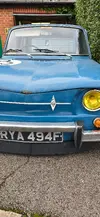
Ordered a new front badge and fixings too, mines split in two pieces so will be a nice fresh addition to the rust bucket.

I need to order up some tube and make a decision on the back box. I think I should get the biggest I can in there, it'll be very short and straight through anyway but if I can make it sporty but quiet ill be happy.

20241115_161225(0)[1].webp
 
New cable in, ball ache on the drive tbh. Defo need a lottery win so I can have a workshop with a ramp..

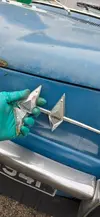
Also fitted the new front badge, happy with that bit of it 😀

Slipped with a drill too and chewed up the side of my finger, smarts a little but I'll live 👍🏼

20241116_113420.webp20241116_113424.webp20241116_114547.webp
 
So in a bid to get this up and running and wrapped up in a better, more oem way than the hack that I've made so far, I've ordered myself a Renault 8S weber carb. This should work with the original oem lever setup and it can be re jetted if I need. That should be with me next week and will likely need me to re work the manifold again but should only take a little bit of re drilling...... my old throttle cable was stiff and id chopped up the end with faffing trying to get the length correct, so I ordered one from arnaudventouxpieces at the start of the week. Here today (y)

Ordered a new front badge and fixings too, mines split in two pieces so will be a nice fresh addition to the rust bucket.

I need to order up some tube and make a decision on the back box. I think I should get the biggest I can in there, it'll be very short and straight through anyway but if I can make it sporty but quiet ill be happy.

View attachment 220871
Hi Adey,
Nice new throttle cable by the way, I know that the tip I am going to impart is a bit late now, but I use an Imp Sport inner Bowden cable on my R8G Comp Car, threaded through the insitu std R8 outer sheathing from the pedal end, the reason for this is that its quick to replace on Competition events i.e. if the original factory cable breaks in the heat of battle, a solderless nipple is at the carbs end, also my spare wire coils up neatly and lives in the glove box.
Regarding the linkage nylon ball ends, these again can occasionally fail or pop off in the heat of battle, so I would suggest that you consider going to all metal ones which have a small wire retaining clip below the ball to prevent them parting company, when flooring it.
I like your exhaust manifold design by the way, I use on the R8G a cheap [Merlin Castle Combe] cylindrical silencer 50mm diam straight through pipe which neatly lives between the bumper over riders and below the 2 number plate lamps, this passes the 98db noise testing at hillclimbs etc-just!
The maker is Simons sizes are 100mm overall diam x 420mm long, they will last for a few years until the Fibre Glass stuffing blows away.
A modified Halfords exhaust flexible rubber strap hangs the 90deg inserted tail pipe end from an upper bumper iron.
Cheers
Dave
 
Hi Dave, cheers for the tips (y)

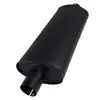
I have already got hold of the metal link ends, got a few in when trying to faf about with the carb already, will probably make use of them as a upgrade once the carb is here. Ive actually ordered a jetex oval back box, 50mm 420 long. Hopefully it lasts a few years between changes. It was a toss up between that and a simons. Not sorted a tail pipe yet, would love a Devil style one :D. will look at mounting once its here. On the Dauphine I hung it from the engine cradle so it moved with everything.

s-l1600.webp
 
All good. You have 2 choices Hang the Zaurst from the cradle, so it all moves together and do the Joints up tight, or have a slip joint between the manifold bolted to the engine and the rest hanging from the bumper. I've always used the latter. with a good slip joint and 2 Sherpa springs holding it all together. Makes removing the exhaust for maint a 20 sec job.
Seriously make it as long as possible, worth having it right across the rear of the car to gain valuable extra length, you could work in a 90 and 180 bend to add near a metre.
Some of the Alconi stuff took the pipe forward over the bellhousing and down under the plugs side of the motor and across the back . It improves the mid range scavenge of the motor which ultimately improves efficiency, performance and MPG at cruising speeds.
OR
Turbo it .
 
Oh dear, that's a bummer, I saw welder out on garage floor and thought...." He's not gonna ....is he...? "😃
in situ..... Its currently curing.

I'm seemingly going backwards more than forwards with it at the moment. I wouldn't mind going front tank setup but it was a future plan, didn't want to have my hand forced.

I nearly blew the whole thing up when ripping the panel out, flicked the new throttle cable across the starter motor and got some sparks... very lucky tbh
 
Our tank has pinholes in it, but fuel has long since evaporated/turned to gum, few little telltale brown streaks on it.....when I get my arse in gear I'll drop arse end off and see if I can repair it.
 
All good. You have 2 choices Hang the Zaurst from the cradle, so it all moves together and do the Joints up tight, or have a slip joint between the manifold bolted to the engine and the rest hanging from the bumper. I've always used the latter. with a good slip joint and 2 Sherpa springs holding it all together. Makes removing the exhaust for maint a 20 sec job.
Seriously make it as long as possible, worth having it right across the rear of the car to gain valuable extra length, you could work in a 90 and 180 bend to add near a metre.
Some of the Alconi stuff took the pipe forward over the bellhousing and down under the plugs side of the motor and across the back . It improves the mid range scavenge of the motor which ultimately improves efficiency, performance and MPG at cruising speeds.
OR
Turbo it .
High Steve,
I did exactly that exhaust route [but handed] with the Renault 1647cc unit in the Hillman Imp "Rimp" as at the time I had lots of pipework/ bends lying about, and a gas welder, the pipe went over the 336 R16 box bellhousing and under the Weber twin choke carb A works Imp silencer [Aston Martin] was across the back.

When I much later fitted to the R8, Salv's experimental one off 1840cc unit in lieu of the then installed Sacco 1550, I mounted the long silencer high up behind the number plate area/ below the boot lock with suitable swept bends from the 1600s Alpine 4 branch manifold. As it happens I changed over the bellhousings insitu to the R17G item, as I already had the access plug fitted to the then 365 internals big Wheeler box. That engine was a beast, the torque was impressive, I think Salv told me that after the road testing was completed , it ended up in an Irish Tarmac Alpine A110. However I digress.
Cheers
Dave
 
Update with some pics (Videos to follow in a week or 2 hopefully, make sure you watch :D ) bit too wet to check my fuel tank repair but not wet enough to stop me tinkering.

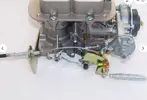
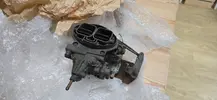
Renault R8S Weber carb turned up, came with the bracket, spring and arms for the throttle actuation so that's great (y) OEM so should all work fine on this.

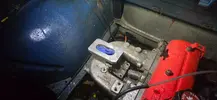
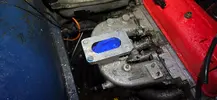
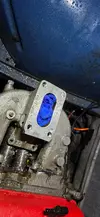
Remember when I plugged and re drilled the inlet manifold to suit the r5 weber carb I had?? shouldn't have done that.... I've had to undo that work and spent 2 hours this evening repairing my handywork and getting the manifold ready for redrilling (again). The holes taken out to 10.2mm, tapped to m12 and then I made m12 plugs out of some 12mm aluminium bar. Arms are aching a little bit now. gave them a tight fit thread and used some Loctite to keep them in situ, followed with a quick hit with a flap wheel to take the tops off and then hit with the drill and flap wheel.

All being well (and dry) tomorrow should see the manifold redrilled and tapped and the manifold in place, and hopefully a test of the fuel tank 🤞

20241118_170328.webp20241118_165706.webp20241118_163826(0).webp20241118_162116.webp20241118_151846.webp
 
marked up, drilled and tapped some holes to m8, then made a pair of studs and we have a carb in place. Throttle cable is a touch short so I have ordered some internally threaded bar to extend the m6 end of the throttle cable (id of made that too if I had something to make it from)

20241119_170502.webp

All being well, by the end of the week I should have the exhaust parts here to tack something together. I'm still yet to check the fuel tank though....
 
Another quick afternoon/evening update. Throttle cable extended and fitted, yet to test but being oem I'm expecting/hopeful it will work. I've also popped the fuel that I took out back in. No leaks that I can see so dropped the car back down with a jug underneath so I can check again tomorrow 🤞🏻

20241120_170051.webp20241120_170046.webp
 
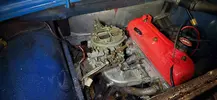
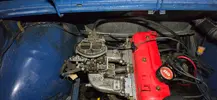
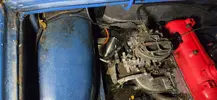
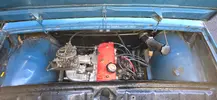
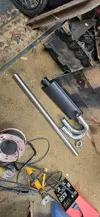
And I think we are onto a winner 😁 no leaks from the tank so rear panel back on. Throttle cable linked up and checked, aaaaannnnnnnnd we have full actuation of both throttle plates 💪🏻 I've fitted up the water hoses and put a little bit of antifreeze in. Sucked through some petrol and we have a quick rough idle. Parts for the exhaust are also here so this weekends job should be getting that roughed out. I should then be able to run the car up without offending everyone.

20241121_161958.webp20241121_162242.webp
 
Back
Top