There is more to life with TurboRenault.co.uk
You are using an out of date browser. It may not display this or other websites correctly.
You should upgrade or use an alternative browser.
You should upgrade or use an alternative browser.
Alpine 1968 Renault R8
- Thread starter Adey
- Start date
- Featured
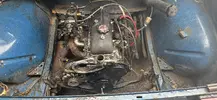
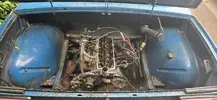
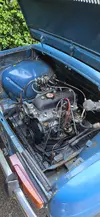
Not exactly tight for space in there is it?
Nope, makes it fucking awesome to work on
Steve Swan
Well-Known Member
6 pipes,10 bolts and about 6 wires. Ain't exactly a challenge
Steve Swan
Well-Known Member
I'll take that back it's only 3 wires. Oil P. Water T and points.
Steve Swan
Well-Known Member
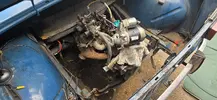
On the studs that stick out of the block and get in the way of mating the engine and box. I always put a touch of weld on the nut in the bellhousing pocket, so that unscrewing the nut draws the stud out of the block. It makes life so much easier. You can change an engine with only a trolley jack. Though in my advancing years, I use an engine crane.
Brigsy
Media Mogul. Instagram legend.
I double nut and remove the studs on c1j/gtt engine to get it out leaving gearbox in situ. Makes life loads easier.On the studs that stick out of the block and get in the way of mating the engine and box. I always put a touch of weld on the nut in the bellhousing pocket, so that unscrewing the nut draws the stud out of the block. It makes life so much easier. You can change an engine with only a trolley jack. Though in my advancing years, I use an engine crane.
Right, I think we are onto a winner.
Started the day by fitting up the engine cradle, this then bolts to the engine mounts and holds a everything steady. Next up was to get the starter motor in place so I could use it to spin the engine over and check for oil pressure and oil making its way to the rockers. This wasn't an issue and all went fine. Like for like engine means everything just goes back in as is.
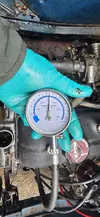
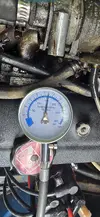
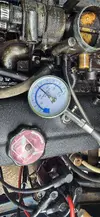
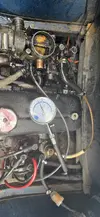
Whilst at it I thought it'd be good to do a comp check... this is where things got a little odd. Compression was right down on 4 and 2.. (about 3 bar on each) I rotated everything over and found the inlet valve on 4 to be tight on the rocker. Adjusted it back to spec and comp jumped up a little. The other 2 were ok though still looking ropey (all low and the highest at about 6.5 bar) I'm not going to lie at this point I was very concerned, had I just picked up a duff engine.
In my head lack of comp could only really be a few things, more holes in the piston..... blown gasket, valves not seating or stuck piston rings. As it was already down I thought I may as well just crack on with what I had anyway. A bit of a run should highlight the issue. Slapped some ATF down the bores to help with the piston rings if it was them. Checked the dizzy drive gear to see it was out a tooth, so moved that around to spec. Fitted up my coil and the rest of the wiring. Sucked fuel through from tank to the carb top and poured some down the carb itself. Got to cranking it over and within a few turns she fired into life, and for an old hag that hasn't been ran for a while it sounded fantastic. Sprayed oil everywhere as I had the rocker off but still smooth, better than the old engine at least lol. I was shocked at how well it was running considering the previous results!
With no water pump hooked up I didn't run it for long, less than a minute at a guess. Out of curiosity I checked the comps again once. 10.5 to 11bar on all of them! 2 bar higher than my old engine. Ill take that
So next up is to drain the oil and fit the filter setup along with some fresh oil. I'm waiting on a water pump gasket, the old pump was knackered so I'm going to fit the "new" one from the old engine. Once that is done I will be able to refit the rad panel and get the system bled and working again. There's a few panels I need to refit but I want to clean them up a little first.
Once up and running I will make sure I set the timing properly (just in case it was det that contributed to the death of the last engine) maybe even a run on the dyno to make sure all is good. I'm hopeful that the better condition engine will have a few more ponies than the old engine had.
Cheers for reading


Steve Swan
Well-Known Member
These are all very low comp. motors. The first 1289 (12ts) bottom end I used in Liz's 8 was with a r10 1300 head to make it look period. We had to take an eighth of an inch off the head to get some decent compression.... If you've got a mate with head skimming facilities you could do that, but be warned. It still won't pull a Sailor off your Sister.
fingers crossed. ahh no, what engine was it and whats the issue?Hope that engine is better than the one i got stuck in to me by the same person ,still sits in my shed with its so called 50,000miles on
1108 renault 8 engine ,was told it was fantastic and to put it straight in well it did start and run but lasted 5 minutes , loads of crankshaft end float and would not start hot or if you turned it off , decided to take the head off were i found one broken valve spring but no other signs of problems also had a water leak between the head and block .typical it was under the manifold so could never rely trace itfingers crossed. ahh no, what engine was it and whats the issue?
Wheelers Workshop
Active Member
Adey,@Steve Swan late bellhousing, fork, spring and bearing also getting picked up at the weekend. Ill keep these aside for the future upgradesthe 1108cc I've got can be slapped in and ran around until I find/build something a touch bigger
You will also need the later"1300" design input shaft from Brian, as the oil seal location is further along the shaft from the "1108 early shaft,
Chhers
Dave
Adey,
You will also need the later"1300" design input shaft from Brian, as the oil seal location is further along the shaft from the "1108 early shaft,
Chhers
Dave
Cheers @Wheelers Workshop, @Steve Swan has me sorted on that front I believe
Wheelers Workshop
Active Member
Hi Adey,
Thats great Steve always comes up trumps with gearbox bits, regarding taking your 1108cc Sierra engine out and as you have removed most of the engine bay tins, have you considered removing the rear panel ? there are only 6 speed screws left to remove and the bumper irons/wire connections and you have total access so a trolly jack can be utilised with the motor balanced on it . This is how I remove my engines from my R8G, I have a electric winch in the workshop so I take the weight of the motor and push the car forward so it clears. this also make the installation much easier . I however favour keeping the 4 studs being in the block as it guides the motor into the bellhousing at installation.
This also gives an indication of pitch and yaw of the block, so it guides onto the spigot shaft easily.
The later bigger main bearing C1J R5GTT block I currently use has only 3 fixed studs and a loose trough bolt below the starter, but aligning the motor still works as above.
Regarding your early design 1108 box its probably easier to pressure wash off the gunged axle connection nuts/studs etc in advance of future removal, a suitable M10 treaded pilot hole and Plug will be needed to access the roll pin holding the shaft insitu when you swap over to the guided set up from the 1300 box. I note that Steve will provide co ordinates for the drilling
While you are in there its probably worth changing the 2 side rubber pads which if these are original, they will most likely be knackered .
Finally , your later upgraded bellhousing fork ,release bearing and spring are likely to be using a release bearing with needles in it in lieu of the carbon bearing and triangle clutch set up you have now, so a compatible 180d 1108 clutch cover with fingers [no triangle ] will be needed, and its release bearing. Those triangle pads fail when one of the radial straps breaks. This failure put Tony Gomis and me out of the Coronation Rally at Pembrey decades ago .
Cheers
Dave
Steve Swan
Well-Known Member
The Input shaft will be my contribution to the project. the 160 clutch can stay on the old 1108, as you will need a 180 for a useable set up. It was a shame about the 5ts bottom end, it would have worked well, but would need re-blocking into a 12 block to fit in the car, a 1400 block will be easier to source. That said you can try to source a 5g motor and re-block it into GT turbo block.
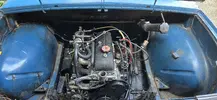
Not too much done today. Gave the tin work a quick hit with some cheap bed liner. Fitted rivnuts to the chassis and re fitted the bottom and rear panels. Hopefully tomorrow I'll get chance to finish the wiring and drop the oil out. Gasket looks to be arriving Friday so all being good I'll have it up and running this weekend where I can properly check how it behaves.


Similar threads
- Question
Other ( non boosted Renault )
R8 5 speed gearbox (again)
- Replies
- 9
- Views
- 149
- Featured
- Replies
- 82
- Views
- 2K
- Replies
- 21
- Views
- 1K
