Chris H
master of boobies
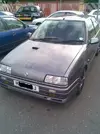
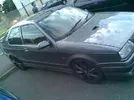
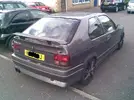
Skinny on the forums was advertising his car for breaking, rather than see another one getting broken I decided to step in and save it.
So me and Steve101 went up to Skinny's for a look at the car on Wednesday (I think). I decided I'll take it. The car needs a lot of work and when I say a lot I mean a LOT. Its in quite rough condition but it can be saved.
The body as its an H plate is rot free so that's why I was ok about parting with so much money. This is the dearest 19 16V I have ever bought! £250 and had to pay the hi-ab boys £40 quid to get it brought to the house.
Anyway I got some pics on Wednesday and here they are
Steve101 on the left and Skinny on the right
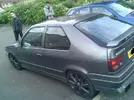
Anyway as i said it needs LOTS of work, I need to make a list and it will be very long. However I have most of the bits here at base camp so its just a case of getting on with it.
[break=Back at base and inspection]
4th July 2008
I went with the recovery boys to pick the car up on the low loader, dropped it off at the house then had to go back to work. When I got home I started on the car.
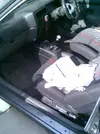
First job was the interior, had to tidy it out. No offence to anyone but ever 19 16V I have ever seen for sale is always full of rubbish and in a right mess, this was no exception.
These pics are before I cleaned it out, not the fact every single seat is ripped, just as well I have a mint interior to go in, life can be good. It will also stop my sister moaning as the interior in in her cellar!
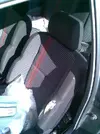
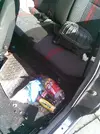
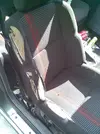
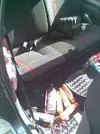
Got the bottles and rubbish away
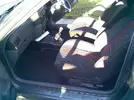
after a thorough hoover
whats this you ask?
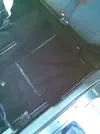
that'll be a screwed carpet!
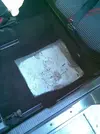
The usual had happened, some reprobate peasant jacked the car in the wrong place and folded up the floor, now instead of doing what you should do which is just stamp on the floor and it goes back into shape, they cut the carpet and hammered at it. It never went back to shape, I stamped on it and it did. However I now need a carpet, which is annoying as I binned one not long ago. theres a slim, very slim chance theres one at my sisters with the seats but its unlikely.
Drivers side
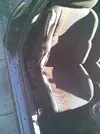
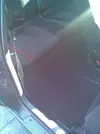
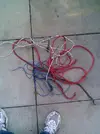
I also removed a lot of stereo wiring, good quality gear
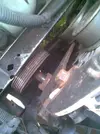
The power steering pump as Skinny said was knackered, its not just a bit knackered its totalled, this is common on VW's, we get them in the work often
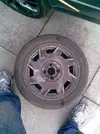
Skinny said the spare wheel was a ph1 alloy, indeed it was, this is however incorrect as it should be a steelie. A few years of dirt on there! Tyre doesn't stay inflated on it, no big deal though.
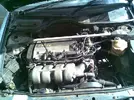
This is the engine bay, well there's a lot of work to be done in here. The blocks cracked, not only that the tappets are dead, there's a lot of blow by and the throttle cable is totally wrong and frankly its just awful. The thing must be a good 30bhp down on standard power even before the block cracked. The crack starts just behind the starter and works its way towards the oil pressure switch, its about 3 inches long.
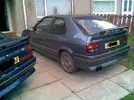
Heres some pictures of the car at base, the 18's went back to Skinny last night so its on its own spare alloy, my Chamades spare steelie and my 2 allesio 17's at the moment. I have a set of megane lyra wheels to go on that skinny gave me, the tyres need replaced really on them though.
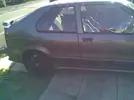
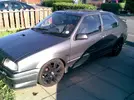
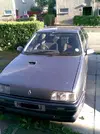
My chamade in comparison is fresh out the factory!
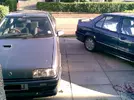
Both wings need replaced on it
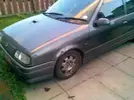
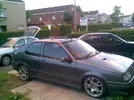
Got a quick pic when I was changing the wheels over.
As you can see there's potential there, there really is. But there's a hell of a lot needing done, I could fanny it up and punt it on really quickly, but with my name on it I won't do it. Like the rest of my stuff it will be done properly. I have been having a few ideas about it though, may keep it as well I have never had a ph1 Tungsten grey H plate before! That's a good enough reason to me :lol:
[break=Known Spec so far]
The cars spec, as is that I have noted so far.
Kent camshaft pulleys, maybe cams will know later when the heads off
Scorpion back box
maybe Scorpion mid section, its stainless anyway
Decat
Adjustable FPR
Grooved and drilled front discs
Front lowering springs (not much, maybe 10mm less than the chamade which is standard. Rear standard height but exhaust still rubs on axle)
Some crappy gearknob
Momo steering wheel
Thats all I can recall at the moment, but tbh most of it will be back to standard.
[break ash bulbs, wheels and some cleaning]
5/6th July 2008
After work on the 5th I set about sorting out the blown bulbs in the dash. The trip comp and the sidelight bulb were away so I needed 3 bulbs.
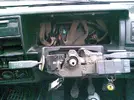
Steering wheel off, easy as its not bolted on, note the damage caused by an aftermarket wheel, its machined through the shroud and started on the stalk holder thingy. You can see theres no trip comp lighting
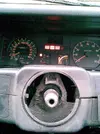
Display out
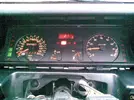
Let there be light, not good oil pressure and idle at the right speed, it looks like 1krpm + but its only because of the angle the display is at.
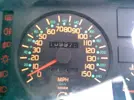
The mileage
Whilst I was there I popped out all the vents and gave them a good scrub and cleaned the ducting as well, that ducts spotless!
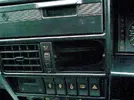
I also cleaned the ashtray which had been used, I hate cars that are smoked in.
6th July, after work I got home and decided to clean the Megane Lyra wheels that came with the came and stick them on, better than the mix and match set thats there.
So I used my trade alloy wheel cleaner on them and got them blinging.
Quick clean on the left and not touched on the right
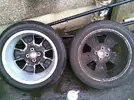
This is the nearside front one, a burst CV gaiter on the car they came from had thrown grease all over the wheel
Them on the car
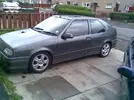
Only put on the nearsides as I can't be bothered doing the offsides. Still at least it matches on both sides now.
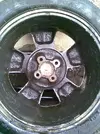
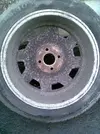
This is the wheel that was in the cars spare wheel cradle
the inside of it
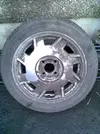
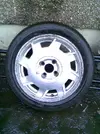
After a clean
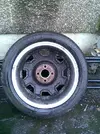
It won't stay inflated as there's a rim leak on it, it really needs re-furbed, I just need another 3 now and a steelie.
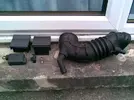
I rummaged through the sheds to get some parts I needed for the car, it seems that I threw out a fair amount of stuff that I need which is a bit crap, anyway stuff I did find.
C/L motor, air box - tb pipe, rear ash trays, clutch pedal stop and a bulb for the map light
Power steering pump and 2 new handbrake cables
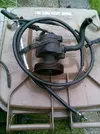
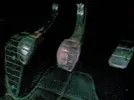
I fitted the clutch stop first, this brought the pedal back down to the right position, I don't know why the before pic never turned out!
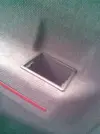
missing ashtray
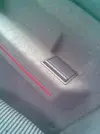
new one fitted
there was no jack in the back but the shed had one so here it is fitted
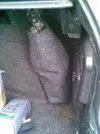
This is the boot contact plate
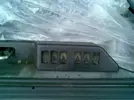
I cleaned it up so its as new, this meant the c/l motor in the boot started working, so no need for the other one. However the usual problem of a snapped triangle on the boot lock means it doesn't actually work.
[break=Offside track rod end]
10 July 2008
Well today I have the day off of work and the rain stopped so I decided to get a wee hour in on the car.
The car came with new track rod ends as the old ones were past it, so i decided to replace the worst one which was the offside one and just work on the offside of the car.
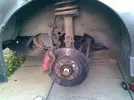
Anyway car up and supported wheel off and this is the TRE
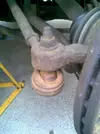
as you can see its no longer serviceable by a long shot! There should be NO gap

Old and new
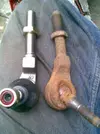
New one fitted
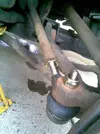
There is still some play, however its not in the track rod. I am unsure if its the rack or just the nearsides play coming through, I will know better when I do the nearside.
I then got a picture of the crack on the block, rather impressive. It only leaks sometimes I have found
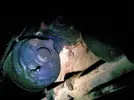
Note the engine has an early tin sump
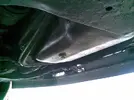
A quick snap of the decat pipe
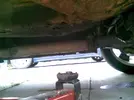
I then pulled the side skirt off along with the arch liner which had been screwed on to keep it out of the way of the 18's obviously.
The usual build up of dirt
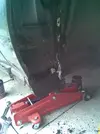
I then noticed a bubble and hit it with a claw hammer to reveal this
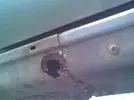
Thankfully its the only hole on it, the rest as expected is quite solid
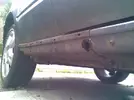
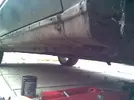
I then hosed it all off and its clean, will have to wash it properly and weld up my hole. I could put the skirt back on and it would pass an mot as they can't see it but I do things right.
I noticed this
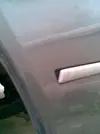
I checked the other side and it was the same. So it would seem someone bought new bumper trim then stuck them on the wrong sides meaning they are upside down!
This scratch had been poorly painted over
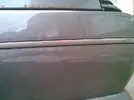
I got out the 2000 grit W&D and worked on it, its a lot better now but not perfect so no pictures of that yet. I have sorted a few areas of paint on the car with the paper.
Also the subframe bush, the bush is ok however the bolts not tight, its moving up and down nearly 10mm! The car must have been awful on the road.
[break=New Knob]
12 July 2008
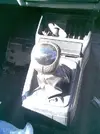
I received a new knob from Mad Pierre, the proper knob has made such a difference, the cars getting there!
never got anything else done today due to other projects!
Anyway crap knob that was in the car
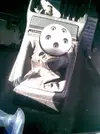
Renault knob as intended, far superior!
[break=Steering column shroud]
29th July 2008
I went and got my column shroud from Neal from the post office.
Stickers, lol. Anyway they were removed
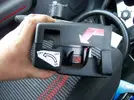
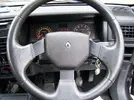
New shroud on and the steering wheel too. Its a clio 16V wheel, I know its crap with no leather on it but better than the old mouldy wheel I have or the crappy thing it came with.
Just waiting on my carpet from Neo then I can fit the decent seats as well.
[break=280mm Brakes]
20 September 2008
Not done anything on this for ages really. I have however put the carpet in I got from Wicked NEO, I need a seat slider as the drivers side outer had to get the grinder on it.
Today I also done a bit of mechanical work, I put on the 280mm brakes, well only the offside as I had a truck to go work on.
i have some pics but none of the 280's on the car I will get some tomorrow.
The 259's through the 16 inch Lyra wheel
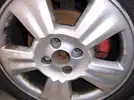
the tiddlers
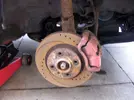
the wee assembly and the beefy one beside it
New pads were fitted, the bigger brakes fill out the wheel nicely, I will need to see what it looks like with a proper ph1 rim on.
I will get pics tomorrow and if the weathers good I will do the passenger side as well.
[break ower steering pump and some adjustments]
28th Spetember 2008
Well Soneji came over today and he wanted to see the car so I showed him it and about it then somehow I got working on it.
Still to do the nearside big brakes but I got something else done.
I done the power steering pump. As earlier pics in the report showed the pump had broken apart, they also showed the ALT belt set up.
Now this was actually a pretty dodgy bodge job, things were put on totally wrong and the wrong alternator was fitted as well.
Anyway the pump off
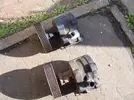
The spindle has sheared as to why it sheared remains at present a mystery.
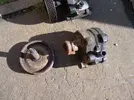
nice
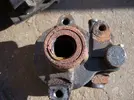
The space where the pump lives
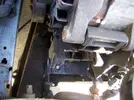
note pump fitted and adjuster fitted which was missing
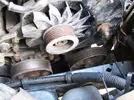
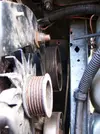
So I had to use another side bracket and the proper 16V alternator and also had to repair the alternator wiring as the big ring terminal was snapped off.
Only issue is I don't have the right belt to put on it. So i have had to leave it as is. I did pour in oil and worked the steering back and forth which got a lot through it. I will get a belt and check that it operates ok.
Why did I put the pump on now instead of when the engines out? Well if its in now and I can check it it means if I need to replace the rack etc I can do it with the engine out rather than building it up then having to the rack later.
I also took the damaged cambelt cover off and gave it to Soneji a I have a better one to use.
This gave me access to the Piper cam pulley. I cracked the bolts off and adjusted the cam from its retarded position to one between 0 and 1 degree advanced, running improved immediately as expected.
Poor pic but heres the pulley's
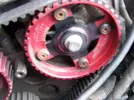
I also adjusted the FSE fuel pressure regulator, which again sorted out the running a bit more, it also eliminated the flat spot when you snap the throttle open, instead of a stumble it revs up instantly as it should.
Anyway I will get a bit more done on it this week I hope.
[break=280mm brakes done]
10th November 2008
Well after having no time today I found some time after I serviced an Almera. That and Steve_101 talked me into it.
I fitted the big brakes to the passenger side, so thats the brake upgrade finish.
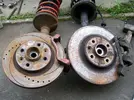
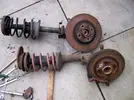
Old strut, small disc with red lowering springs and the new big brake strut and hub
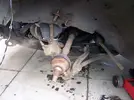
the 19 stripped
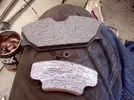
the 259 pad is considerably smaller than that of the 280 one
All fitted up, new pads and new track rod end as well, bled through and ready to rock
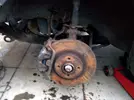
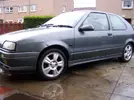
The only issue is the cars too high with the springs on it
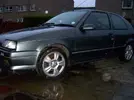
another pic with no flash
[break=Sunroof job started]
19th November 2008
Well today since it was dry I decided to do a bit. I need to get this sunroof out of the house so needed to clear out the interior and take bits off.
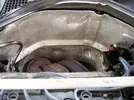
Anyway I had the heatshields I bought sitting inside the car so stuck them on so they were out the way, looks much better with them on as its how its meant to look
I then decided to have a crack at the dented wing, I was going to replace it but theres not many tungy ph1 wings going round so decided to try and pop it out, which worked well, not perfect but a lot lot better
arch liner off and the usual mud build up, which i washed out
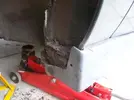
80% of it out, as it went right up to the top of the wing, its a bit rippled but its a lot better
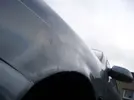
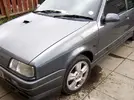
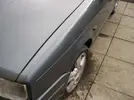
I want the sunroof fitted this week. I'm waiting on arch liners with the brake ducts to arrive as well so when they come they'll be fitted.
[BREAK=New Sunroof fitted]
20th November 2008
Well today I fitted the new sunroof in, the old sunroof is one of the rare but heavier slide only sunroofs. Now its fitted with the better and lighter tilt and slide sunroof.
Anyway some pictures, not many as I had to do it all myself
interior and headlining out
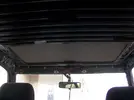
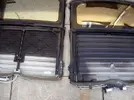
the old slide only broken sunroof on the left and the new tilt and slide on the right. The old one can actually be repaired as it seems just clips and spacers broke free. I'm not fixing it though.
The infamous cardboard sound deadening panel that drops down and jams the sunroof, this is most likely what caused the sunroof to break. Remove it, its not any noisy in my experience.
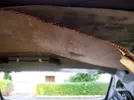
Anyway its all back together now and working perfectly. Also as a side note I got the alarm working, its also the best installed Renault standard alarm I have seen which is why I left it fitted, normally I remove them as they like to start fires and so on.
Only thing that doesn't work with the alarm is the offside indicator, the nearside lights up as its meant to so will sort that.
I'm glad that sunroof is out the house though! :lol:
[BREAK=Small jobs]
27th November 2008
Well I had to take some bulbs out of the car for my sisters coupe so I bought new bulbs and fitted them, although i still need an orange indicator bulb.
I fitted a new rear wiper blade to replace the knackered one that had scratched the screen (before I got it).
I also had to take the struts off it to put onto my sisters coupe. So now the car actually sits nice and lower where it should be but the struts are knackered so need to sort that out.
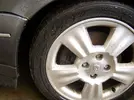
I got a wee pic of the 280 brakes through the wheel
[BREAK=Brake ducts]
9th December 2008
Bidderman sent me some brake ducts and liners for the car as usual these were missing.
Anyway today I stuck 1 on but then had to babysit so never put the other on, but looks like Thursday I will
Anyway before, yes the main liner isn't on the car at the moment, I was cleaning behind it
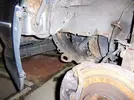
duct and liner
fitted up, need to put the 10mm bolt in on the inner wing to hold it still, note the standard earth braid is missing from wing to gearbox, will sort that out
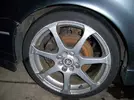
I then stuck on one of the 17 inch 100+ alloys to see what it was like, ignore the Vauxhall centre cap. The 280 brakes don't look to big anymore, imagine a 238 behind there
[BREAK=Work starts again!]
9th June 2009
Wow never knew it was nearly 6 months since I touched this car!
Anyway the handbrake has never worked on it, so best have a look at that I thought.
I started with the offside and noted a new caliper, shame the bleed nipple was broken off though. Anyway the caliper was sticking but working it back and forth and the handbrake mechanism freed it up lovely. I then got the camera for the nearside.
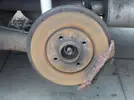
The nearside, the hub nut has been removed to enable the disc to come off
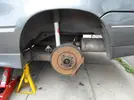
disc is fine under the surface rust coat
Stainless steel backbox
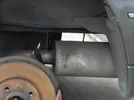
As you can see the stainless system rests on the axle and the brake pipe has been moved to accommodate this. This will be rectified as its very noisy and I want to have the brake pipe secured properly.
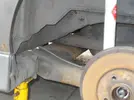
The nearside handbrake wasn't to clever. It was sticking when releasing, this is a problem as the brakes will not adjust right and the handbrake won't work properly.
This picture is handbrake fully on (no pads or disc obviously)
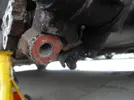
Handbrake off, but this is only halfway back
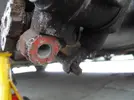
And this is where it should be
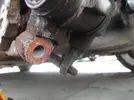
Its the cable that's the issue, I have new ones though so will fit another time. I was pressed for time earlier.
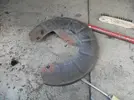
Also something unusual the back plates were plastic, not seen plastic back plates on the 19 before always only metal
I also cracked off the bleed nipple and funnily enough no fluid came out
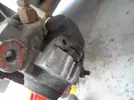
I cleaned up the nipple and copper greased the threads so it shouldn't seize. I then bled the caliper
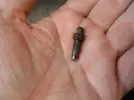
The cable freed off a bit and now the car is actually held by the handbrake, it takes considerable effort to move it now which is great.
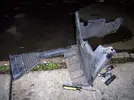
I then decided to jack up the front to have a look at some fluid leaks, the jacking point made bad noises so jacked it on the chassis rail further in and supported it. I knew the jacking point was damaged from someone previously jacking it wrongly (this always happens as idiots in garages don't care for your car). So it had collapsed upwards, I decided to pull it back into shape.
So after pulling, levering and tearing metal off I was left with this
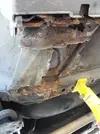
Nice eh. Still seen a lot worse, the floorpan itself is fine
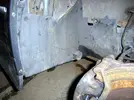
Another shot looking outward from the centre of the car
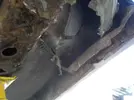
Instead of patching it I am going to find out if a complete panel is available from Renault as that seems a far better option as almost all of the panel that its made up of is now gone.
[BREAK=Works getting done now]
22nd June 2009
Well got a call in the morning from Renault my gear was in so went down to collect.
This is the new rack bush
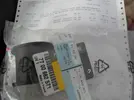
And this is the new jacking point panel
After working on a couple of other cars I decided it was time to get on with this car. So put the front end up on ramps as I was going to wash it underneath there is ps fluid all over the place.
So got under and then started doing some work. First as usual some idiots have worked on it before and not known their arse from their elbow so I have a lot of rectification work to do to get the car up to standard.
This is a pic of someones bad bodge to the ps pipes, I mean how thick are some people Why the hell would anyone do this to that pipe? How stupid do you have to be?
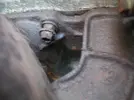
Here's 2 pics of the crack on the block, poor pics as it was awkward
Anyway the engine is now ready to come out, its all disconnected aside from the gear link rod which I meant to do later then forgot but it was wet with coolant so left it until I pull the lump out. I was too dirty to take pics of things with my nice camera.
However loads of issues were revealed, will document some later. I loved how they welded the downpipe to the de-cat but only what they could see. The snapped lower studs that hold the exhaust manifold on, the headbolt wound right into the flange to hold the downpipe to the manifold and so on.
[BREAK=Engine out]
23rd June 2009
Well I had an hour to spare so pulled the engine out, then a few hours later I also washed the bay
The bits missing and bodge list gets longer everytime, just as well I will put everything right then!
Car will be as good as new when I'm done with it.
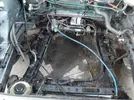
This is the bay after getting a wash down
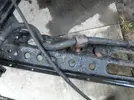
Noticed why the rack was moving so much, in addition to a knackered bush the bolts on the offside are loose so the whole bracket moves!
Note the mess made with the PS pipe by whoever butchered the car before
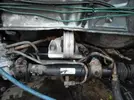
you can see the coupler used which needs to be sorted
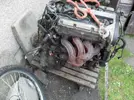
Engine on my wheelie thingy I made
crack on the block
note snapped lower stud, all lower ones are broken!
loom not attached right, butchered timing cover, list goes on and on
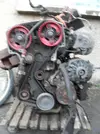
note cut inner bracket for the aux belt set up!
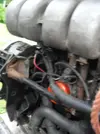
Anyway will start sorting out the shell then worry about the engine.
[BREAK=Steering work]
10th July 2009
Well decided to do the rack. Turned into a bit of a job.
The old bush came off fine in 2 or so pieces
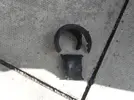
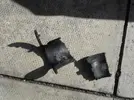
The fact the top rack mounting bolt was missing was an issue though to get it in the subframe has to be dropped. Now the rear offside subframe bolt wasn't tightened as I mention before.
Turns out the bolt was seized inside the bushes sleeve. So I had to hacksaw it out.
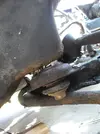
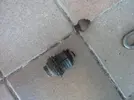
This allowed me to drop the subframe enough to get the top bolt in. So now the racks held tightly as it should be.
But the racks fecked, it started leaking from somewhere new. The leaking union on it was caused because some idiot cross threaded it.
So this whole steering debacle has been caused by some idiot who changed the rack cross threading the union creating a leak running the pump dry destroying it which contaminated the oil system damaging the seals.
So even more money to be spent.
[BREAK=Couple of things]
13th July 2009
The other day I finally got the exhaust manifold off, stuck on 2 dodgy studs, it was a nightmare.
Anyway the pic here shows the crack a lot better
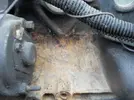
I popped out a core plug and inside the gallery was very clear, the irony is if it was sludged up it probably wouldn't have leaked.
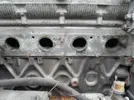
This is the head after the manifold came off, note one of the stuck studs on the right broke beneath the head surface, no biggy, I'll sort that out. This is after a wire brushing btw. I still need to remove the rest of the broken studs
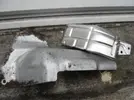
I was in the shed and knew I had the missing heatshields needed for the chassis and engine, I took them out and cleaned them up, they came up well but the one that goes at the master cylinder has corrosion on it, so not sure if I should bother sorting that out before fitting it.
Only issue is its raining hard up here just now so not much can get done
[BREAK=stripping]
15th July 2009
Well got the rest of the studs out of the head on the manifold side aside form the one I need to drill. I had a feel in the exhaust port, feels like the heads been ported. Will know for sure when I pull the head off though.
Then I removed the wiring loom, easy job as it was barely attached. I also removed the starter
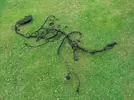
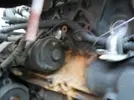
Starter out you can see the span of the crack
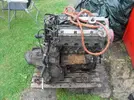
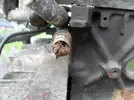
Pulled off the hose from the oil cooler to the T piece, a wee bit clogged...
Front before I removed the stuff
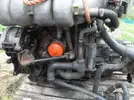
Engine plate, hard to make some parts out
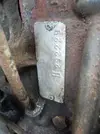
Knocked out the rest of the rear core plugs and I did find sludge
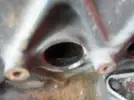
Gearbox plate after a quick clean up
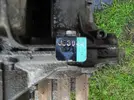
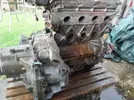
Good shot of the oil cooler behind the filter
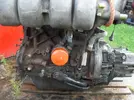
Side shot
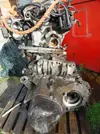
Gonna give it a good wash down before I go any further.
[BREAK=small update]
26th September 2009
Well the cars just sat and been ignored, its used to store some things in mainly!
I was at the scrappy yesterday and got the boot locks remote locking pivot thingy, they always break this one was fine, so the boot lock now works off the central locking again, which is nice. Hers a pic of the broken part
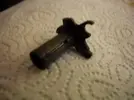
I am hoping to get on with this very soon as I'm sick of looking at it really.
I got a black ph2 and I think I'm just going to swap the engine into it as I have nowhere and no time to build up an engine at the minute. I have a mrs, a baby and another on the way, work and college stuff to do so pressed for time.
[BREAK rogress]
17th April 2010
Wow last update 6 months ago!
Well things are coming along now. Following on from the black ph2 report,
The exhaust manifold as I got it had been drilled badly and bolts and nuts used with no springs. Now this is not right and makes things more awkward. So I swapped the manifold over to another with good studs. This meant having to remove the wiring heatshield I just fitted the day before but ho hum, yes copper grease on the studs, always use it, the exhaust manifolds on these corrode and jam, often the manifold is levered off ripping out the stud and its threads. This way it will come off easily if needs be years down the line
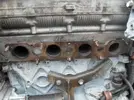
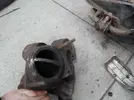
I then pulled the subframe off, not even 15 minutes to do this
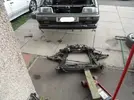
I had the engien and subframe on a wheely trolley, however it was to tall to fit under the bumper, so had to take it off then lift/drag it under.
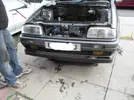
need to watch when lowering so nothing catches
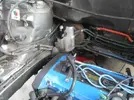
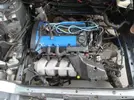
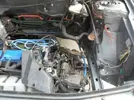
Its not bolted up as it was 7pm which is the time I get my eldest ready for bed. So left it like this. Didn't start work until 6pm.
Anyway the plan is as follows,
engine up, all connected running,
Fit ANOTHER sunroof,
stick on other front hubs (the ones on it have screwed wheel bearings as the megane they were on was towed with no driveshafts fitted)
weld on the passenger jacking panel
4 new tyres for the 17's
MOT
then sold.
Trouble is I have so much work on I find it hard to get time to dedicate to the cars I have. For example the white chammy just needs the brake callipers bled (refusing to buy 3 new callipers because they only have snapped nipples!)
[BREAK=update]
17th July 2010
Not sure why I haven't updated this but the car was driven the day after the last report. Theres very little to be done still.
I have some pictures
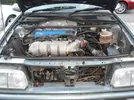
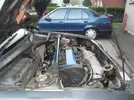
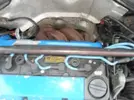
Jobs remaining to be done on this car are as follows.
Nearside lower pinch bolt fitting
Sunroof swap
Sort downpipe to cat slight exhaust blow
Oil and filter change
wheels and tyres
get the jacking panel welded in
Then its mot'd and gone.
Only issue is the weather has been very poor and the car is full of spare parts as I have ran out of storage space!
There is maybe 2 hours of actual work left to do on this car.
[BREAK=Going tomorrow]
12th August 2010
Well the car is sold, got a down payment and its away tomorrow. Who got it is up to them to reveal.
Anyway I can say I have spent way to much on this thing and tbh I'm not bothered to see it go.
The car was MOT'd on Tuesday morning, sailed through but then bizarrely a brake line burst leaving the station! A hole appeared i9n the line where its clipped into the bracket, the line was perfect aside from this.
Anyway to get it mot'd I had to get the jacking point welded into it, I done the prep and Jonah done the welding and he undersealed it all. Poor pictures but during the process wasn't appropriate to take pictures.
I replaced the burst front to rear line, left the other as its fine, I popped it out of all clips and its ok. Done that bleed it out on all corners so new fluid throughout.
Only pic of the new line
Then oil and filter change, had to buy some more oil, and a filter of course
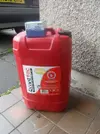
Draining the old stuff
My tipex has vanished so I used some orange nail polish I use to identify things
Of course had to fit a new sealing washer on the sump plug, running out of those too
So its away tomorrow, but of course it had to be inspected before it left.
Elizabeth is QC officer
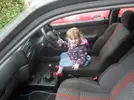
Engine running, yes she started it

Gearstick check

Air vent is ok

Handbrake ok
She closed the door on me!
Road test time, struggling to see out

Thats better

:lol:
The end - hopefully!
[BREAK=Sold!]
13th August 2010
Well its away now.
I will still see it often
Of course for some reason a perfect looking metal pipe decided to spring a pinhole leak! Taped it up and supplied another pipe as a replacement!
The owner I imagine should take over with his report soon.
So me and Steve101 went up to Skinny's for a look at the car on Wednesday (I think). I decided I'll take it. The car needs a lot of work and when I say a lot I mean a LOT. Its in quite rough condition but it can be saved.
The body as its an H plate is rot free so that's why I was ok about parting with so much money. This is the dearest 19 16V I have ever bought! £250 and had to pay the hi-ab boys £40 quid to get it brought to the house.
Anyway I got some pics on Wednesday and here they are


Steve101 on the left and Skinny on the right

Anyway as i said it needs LOTS of work, I need to make a list and it will be very long. However I have most of the bits here at base camp so its just a case of getting on with it.
[break=Back at base and inspection]
4th July 2008
I went with the recovery boys to pick the car up on the low loader, dropped it off at the house then had to go back to work. When I got home I started on the car.
First job was the interior, had to tidy it out. No offence to anyone but ever 19 16V I have ever seen for sale is always full of rubbish and in a right mess, this was no exception.
These pics are before I cleaned it out, not the fact every single seat is ripped, just as well I have a mint interior to go in, life can be good. It will also stop my sister moaning as the interior in in her cellar!


Got the bottles and rubbish away

after a thorough hoover

whats this you ask?

that'll be a screwed carpet!

The usual had happened, some reprobate peasant jacked the car in the wrong place and folded up the floor, now instead of doing what you should do which is just stamp on the floor and it goes back into shape, they cut the carpet and hammered at it. It never went back to shape, I stamped on it and it did. However I now need a carpet, which is annoying as I binned one not long ago. theres a slim, very slim chance theres one at my sisters with the seats but its unlikely.
Drivers side


I also removed a lot of stereo wiring, good quality gear

The power steering pump as Skinny said was knackered, its not just a bit knackered its totalled, this is common on VW's, we get them in the work often

Skinny said the spare wheel was a ph1 alloy, indeed it was, this is however incorrect as it should be a steelie. A few years of dirt on there! Tyre doesn't stay inflated on it, no big deal though.

This is the engine bay, well there's a lot of work to be done in here. The blocks cracked, not only that the tappets are dead, there's a lot of blow by and the throttle cable is totally wrong and frankly its just awful. The thing must be a good 30bhp down on standard power even before the block cracked. The crack starts just behind the starter and works its way towards the oil pressure switch, its about 3 inches long.

Heres some pictures of the car at base, the 18's went back to Skinny last night so its on its own spare alloy, my Chamades spare steelie and my 2 allesio 17's at the moment. I have a set of megane lyra wheels to go on that skinny gave me, the tyres need replaced really on them though.


My chamade in comparison is fresh out the factory!

Both wings need replaced on it


Got a quick pic when I was changing the wheels over.

As you can see there's potential there, there really is. But there's a hell of a lot needing done, I could fanny it up and punt it on really quickly, but with my name on it I won't do it. Like the rest of my stuff it will be done properly. I have been having a few ideas about it though, may keep it as well I have never had a ph1 Tungsten grey H plate before! That's a good enough reason to me :lol:
[break=Known Spec so far]
The cars spec, as is that I have noted so far.
Kent camshaft pulleys, maybe cams will know later when the heads off
Scorpion back box
maybe Scorpion mid section, its stainless anyway
Decat
Adjustable FPR
Grooved and drilled front discs
Front lowering springs (not much, maybe 10mm less than the chamade which is standard. Rear standard height but exhaust still rubs on axle)
Some crappy gearknob
Momo steering wheel
Thats all I can recall at the moment, but tbh most of it will be back to standard.
[break
5/6th July 2008
After work on the 5th I set about sorting out the blown bulbs in the dash. The trip comp and the sidelight bulb were away so I needed 3 bulbs.
Steering wheel off, easy as its not bolted on, note the damage caused by an aftermarket wheel, its machined through the shroud and started on the stalk holder thingy. You can see theres no trip comp lighting

Display out

Let there be light, not good oil pressure and idle at the right speed, it looks like 1krpm + but its only because of the angle the display is at.

The mileage

Whilst I was there I popped out all the vents and gave them a good scrub and cleaned the ducting as well, that ducts spotless!

I also cleaned the ashtray which had been used, I hate cars that are smoked in.
6th July, after work I got home and decided to clean the Megane Lyra wheels that came with the came and stick them on, better than the mix and match set thats there.
So I used my trade alloy wheel cleaner on them and got them blinging.
Quick clean on the left and not touched on the right

This is the nearside front one, a burst CV gaiter on the car they came from had thrown grease all over the wheel

Them on the car

Only put on the nearsides as I can't be bothered doing the offsides. Still at least it matches on both sides now.
This is the wheel that was in the cars spare wheel cradle

the inside of it

After a clean


It won't stay inflated as there's a rim leak on it, it really needs re-furbed, I just need another 3 now and a steelie.
I rummaged through the sheds to get some parts I needed for the car, it seems that I threw out a fair amount of stuff that I need which is a bit crap, anyway stuff I did find.
C/L motor, air box - tb pipe, rear ash trays, clutch pedal stop and a bulb for the map light

Power steering pump and 2 new handbrake cables

I fitted the clutch stop first, this brought the pedal back down to the right position, I don't know why the before pic never turned out!

missing ashtray

new one fitted

there was no jack in the back but the shed had one so here it is fitted

This is the boot contact plate

I cleaned it up so its as new, this meant the c/l motor in the boot started working, so no need for the other one. However the usual problem of a snapped triangle on the boot lock means it doesn't actually work.
[break=Offside track rod end]
10 July 2008
Well today I have the day off of work and the rain stopped so I decided to get a wee hour in on the car.
The car came with new track rod ends as the old ones were past it, so i decided to replace the worst one which was the offside one and just work on the offside of the car.
Anyway car up and supported wheel off and this is the TRE

as you can see its no longer serviceable by a long shot! There should be NO gap

Old and new

New one fitted

There is still some play, however its not in the track rod. I am unsure if its the rack or just the nearsides play coming through, I will know better when I do the nearside.
I then got a picture of the crack on the block, rather impressive. It only leaks sometimes I have found

Note the engine has an early tin sump

A quick snap of the decat pipe

I then pulled the side skirt off along with the arch liner which had been screwed on to keep it out of the way of the 18's obviously.
The usual build up of dirt

I then noticed a bubble and hit it with a claw hammer to reveal this

Thankfully its the only hole on it, the rest as expected is quite solid


I then hosed it all off and its clean, will have to wash it properly and weld up my hole. I could put the skirt back on and it would pass an mot as they can't see it but I do things right.
I noticed this

I checked the other side and it was the same. So it would seem someone bought new bumper trim then stuck them on the wrong sides meaning they are upside down!
This scratch had been poorly painted over

I got out the 2000 grit W&D and worked on it, its a lot better now but not perfect so no pictures of that yet. I have sorted a few areas of paint on the car with the paper.
Also the subframe bush, the bush is ok however the bolts not tight, its moving up and down nearly 10mm! The car must have been awful on the road.
[break=New Knob]
12 July 2008
I received a new knob from Mad Pierre, the proper knob has made such a difference, the cars getting there!
never got anything else done today due to other projects!
Anyway crap knob that was in the car

Renault knob as intended, far superior!

[break=Steering column shroud]
29th July 2008
I went and got my column shroud from Neal from the post office.
Stickers, lol. Anyway they were removed

New shroud on and the steering wheel too. Its a clio 16V wheel, I know its crap with no leather on it but better than the old mouldy wheel I have or the crappy thing it came with.

Just waiting on my carpet from Neo then I can fit the decent seats as well.
[break=280mm Brakes]
20 September 2008
Not done anything on this for ages really. I have however put the carpet in I got from Wicked NEO, I need a seat slider as the drivers side outer had to get the grinder on it.
Today I also done a bit of mechanical work, I put on the 280mm brakes, well only the offside as I had a truck to go work on.
i have some pics but none of the 280's on the car I will get some tomorrow.
The 259's through the 16 inch Lyra wheel

the tiddlers

the wee assembly and the beefy one beside it

New pads were fitted, the bigger brakes fill out the wheel nicely, I will need to see what it looks like with a proper ph1 rim on.
I will get pics tomorrow and if the weathers good I will do the passenger side as well.
[break
28th Spetember 2008
Well Soneji came over today and he wanted to see the car so I showed him it and about it then somehow I got working on it.
Still to do the nearside big brakes but I got something else done.
I done the power steering pump. As earlier pics in the report showed the pump had broken apart, they also showed the ALT belt set up.
Now this was actually a pretty dodgy bodge job, things were put on totally wrong and the wrong alternator was fitted as well.
Anyway the pump off

The spindle has sheared as to why it sheared remains at present a mystery.

nice

The space where the pump lives

note pump fitted and adjuster fitted which was missing


So I had to use another side bracket and the proper 16V alternator and also had to repair the alternator wiring as the big ring terminal was snapped off.
Only issue is I don't have the right belt to put on it. So i have had to leave it as is. I did pour in oil and worked the steering back and forth which got a lot through it. I will get a belt and check that it operates ok.
Why did I put the pump on now instead of when the engines out? Well if its in now and I can check it it means if I need to replace the rack etc I can do it with the engine out rather than building it up then having to the rack later.
I also took the damaged cambelt cover off and gave it to Soneji a I have a better one to use.
This gave me access to the Piper cam pulley. I cracked the bolts off and adjusted the cam from its retarded position to one between 0 and 1 degree advanced, running improved immediately as expected.
Poor pic but heres the pulley's

I also adjusted the FSE fuel pressure regulator, which again sorted out the running a bit more, it also eliminated the flat spot when you snap the throttle open, instead of a stumble it revs up instantly as it should.
Anyway I will get a bit more done on it this week I hope.
[break=280mm brakes done]
10th November 2008
Well after having no time today I found some time after I serviced an Almera. That and Steve_101 talked me into it.
I fitted the big brakes to the passenger side, so thats the brake upgrade finish.
Old strut, small disc with red lowering springs and the new big brake strut and hub

the 19 stripped

the 259 pad is considerably smaller than that of the 280 one

All fitted up, new pads and new track rod end as well, bled through and ready to rock

The only issue is the cars too high with the springs on it

another pic with no flash

[break=Sunroof job started]
19th November 2008
Well today since it was dry I decided to do a bit. I need to get this sunroof out of the house so needed to clear out the interior and take bits off.
Anyway I had the heatshields I bought sitting inside the car so stuck them on so they were out the way, looks much better with them on as its how its meant to look

I then decided to have a crack at the dented wing, I was going to replace it but theres not many tungy ph1 wings going round so decided to try and pop it out, which worked well, not perfect but a lot lot better
arch liner off and the usual mud build up, which i washed out

80% of it out, as it went right up to the top of the wing, its a bit rippled but its a lot better


I want the sunroof fitted this week. I'm waiting on arch liners with the brake ducts to arrive as well so when they come they'll be fitted.
[BREAK=New Sunroof fitted]
20th November 2008
Well today I fitted the new sunroof in, the old sunroof is one of the rare but heavier slide only sunroofs. Now its fitted with the better and lighter tilt and slide sunroof.
Anyway some pictures, not many as I had to do it all myself
interior and headlining out

the old slide only broken sunroof on the left and the new tilt and slide on the right. The old one can actually be repaired as it seems just clips and spacers broke free. I'm not fixing it though.

The infamous cardboard sound deadening panel that drops down and jams the sunroof, this is most likely what caused the sunroof to break. Remove it, its not any noisy in my experience.

Anyway its all back together now and working perfectly. Also as a side note I got the alarm working, its also the best installed Renault standard alarm I have seen which is why I left it fitted, normally I remove them as they like to start fires and so on.
Only thing that doesn't work with the alarm is the offside indicator, the nearside lights up as its meant to so will sort that.
I'm glad that sunroof is out the house though! :lol:
[BREAK=Small jobs]
27th November 2008
Well I had to take some bulbs out of the car for my sisters coupe so I bought new bulbs and fitted them, although i still need an orange indicator bulb.
I fitted a new rear wiper blade to replace the knackered one that had scratched the screen (before I got it).
I also had to take the struts off it to put onto my sisters coupe. So now the car actually sits nice and lower where it should be but the struts are knackered so need to sort that out.
I got a wee pic of the 280 brakes through the wheel

[BREAK=Brake ducts]
9th December 2008
Bidderman sent me some brake ducts and liners for the car as usual these were missing.
Anyway today I stuck 1 on but then had to babysit so never put the other on, but looks like Thursday I will
Anyway before, yes the main liner isn't on the car at the moment, I was cleaning behind it

duct and liner

fitted up, need to put the 10mm bolt in on the inner wing to hold it still, note the standard earth braid is missing from wing to gearbox, will sort that out

I then stuck on one of the 17 inch 100+ alloys to see what it was like, ignore the Vauxhall centre cap. The 280 brakes don't look to big anymore, imagine a 238 behind there

[BREAK=Work starts again!]
9th June 2009
Wow never knew it was nearly 6 months since I touched this car!
Anyway the handbrake has never worked on it, so best have a look at that I thought.
I started with the offside and noted a new caliper, shame the bleed nipple was broken off though. Anyway the caliper was sticking but working it back and forth and the handbrake mechanism freed it up lovely. I then got the camera for the nearside.
The nearside, the hub nut has been removed to enable the disc to come off

disc is fine under the surface rust coat

Stainless steel backbox

As you can see the stainless system rests on the axle and the brake pipe has been moved to accommodate this. This will be rectified as its very noisy and I want to have the brake pipe secured properly.

The nearside handbrake wasn't to clever. It was sticking when releasing, this is a problem as the brakes will not adjust right and the handbrake won't work properly.
This picture is handbrake fully on (no pads or disc obviously)

Handbrake off, but this is only halfway back

And this is where it should be

Its the cable that's the issue, I have new ones though so will fit another time. I was pressed for time earlier.
Also something unusual the back plates were plastic, not seen plastic back plates on the 19 before always only metal

I also cracked off the bleed nipple and funnily enough no fluid came out

I cleaned up the nipple and copper greased the threads so it shouldn't seize. I then bled the caliper

The cable freed off a bit and now the car is actually held by the handbrake, it takes considerable effort to move it now which is great.
I then decided to jack up the front to have a look at some fluid leaks, the jacking point made bad noises so jacked it on the chassis rail further in and supported it. I knew the jacking point was damaged from someone previously jacking it wrongly (this always happens as idiots in garages don't care for your car). So it had collapsed upwards, I decided to pull it back into shape.
So after pulling, levering and tearing metal off I was left with this

Nice eh. Still seen a lot worse, the floorpan itself is fine
Another shot looking outward from the centre of the car

Instead of patching it I am going to find out if a complete panel is available from Renault as that seems a far better option as almost all of the panel that its made up of is now gone.
[BREAK=Works getting done now]
22nd June 2009
Well got a call in the morning from Renault my gear was in so went down to collect.
This is the new rack bush

And this is the new jacking point panel

After working on a couple of other cars I decided it was time to get on with this car. So put the front end up on ramps as I was going to wash it underneath there is ps fluid all over the place.
So got under and then started doing some work. First as usual some idiots have worked on it before and not known their arse from their elbow so I have a lot of rectification work to do to get the car up to standard.
This is a pic of someones bad bodge to the ps pipes, I mean how thick are some people Why the hell would anyone do this to that pipe? How stupid do you have to be?

Here's 2 pics of the crack on the block, poor pics as it was awkward


Anyway the engine is now ready to come out, its all disconnected aside from the gear link rod which I meant to do later then forgot but it was wet with coolant so left it until I pull the lump out. I was too dirty to take pics of things with my nice camera.
However loads of issues were revealed, will document some later. I loved how they welded the downpipe to the de-cat but only what they could see. The snapped lower studs that hold the exhaust manifold on, the headbolt wound right into the flange to hold the downpipe to the manifold and so on.
[BREAK=Engine out]
23rd June 2009
Well I had an hour to spare so pulled the engine out, then a few hours later I also washed the bay
The bits missing and bodge list gets longer everytime, just as well I will put everything right then!
Car will be as good as new when I'm done with it.
This is the bay after getting a wash down

Noticed why the rack was moving so much, in addition to a knackered bush the bolts on the offside are loose so the whole bracket moves!
Note the mess made with the PS pipe by whoever butchered the car before

you can see the coupler used which needs to be sorted

Engine on my wheelie thingy I made

crack on the block

note snapped lower stud, all lower ones are broken!

loom not attached right, butchered timing cover, list goes on and on

note cut inner bracket for the aux belt set up!

Anyway will start sorting out the shell then worry about the engine.
[BREAK=Steering work]
10th July 2009
Well decided to do the rack. Turned into a bit of a job.
The old bush came off fine in 2 or so pieces


The fact the top rack mounting bolt was missing was an issue though to get it in the subframe has to be dropped. Now the rear offside subframe bolt wasn't tightened as I mention before.
Turns out the bolt was seized inside the bushes sleeve. So I had to hacksaw it out.


This allowed me to drop the subframe enough to get the top bolt in. So now the racks held tightly as it should be.
But the racks fecked, it started leaking from somewhere new. The leaking union on it was caused because some idiot cross threaded it.
So this whole steering debacle has been caused by some idiot who changed the rack cross threading the union creating a leak running the pump dry destroying it which contaminated the oil system damaging the seals.
So even more money to be spent.
[BREAK=Couple of things]
13th July 2009
The other day I finally got the exhaust manifold off, stuck on 2 dodgy studs, it was a nightmare.
Anyway the pic here shows the crack a lot better

I popped out a core plug and inside the gallery was very clear, the irony is if it was sludged up it probably wouldn't have leaked.
This is the head after the manifold came off, note one of the stuck studs on the right broke beneath the head surface, no biggy, I'll sort that out. This is after a wire brushing btw. I still need to remove the rest of the broken studs

I was in the shed and knew I had the missing heatshields needed for the chassis and engine, I took them out and cleaned them up, they came up well but the one that goes at the master cylinder has corrosion on it, so not sure if I should bother sorting that out before fitting it.

Only issue is its raining hard up here just now so not much can get done
[BREAK=stripping]
15th July 2009
Well got the rest of the studs out of the head on the manifold side aside form the one I need to drill. I had a feel in the exhaust port, feels like the heads been ported. Will know for sure when I pull the head off though.
Then I removed the wiring loom, easy job as it was barely attached. I also removed the starter

Starter out you can see the span of the crack

Pulled off the hose from the oil cooler to the T piece, a wee bit clogged...

Front before I removed the stuff

Engine plate, hard to make some parts out

Knocked out the rest of the rear core plugs and I did find sludge

Gearbox plate after a quick clean up


Good shot of the oil cooler behind the filter

Side shot

Gonna give it a good wash down before I go any further.
[BREAK=small update]
26th September 2009
Well the cars just sat and been ignored, its used to store some things in mainly!
I was at the scrappy yesterday and got the boot locks remote locking pivot thingy, they always break this one was fine, so the boot lock now works off the central locking again, which is nice. Hers a pic of the broken part

I am hoping to get on with this very soon as I'm sick of looking at it really.
I got a black ph2 and I think I'm just going to swap the engine into it as I have nowhere and no time to build up an engine at the minute. I have a mrs, a baby and another on the way, work and college stuff to do so pressed for time.
[BREAK
17th April 2010
Wow last update 6 months ago!
Well things are coming along now. Following on from the black ph2 report,
The exhaust manifold as I got it had been drilled badly and bolts and nuts used with no springs. Now this is not right and makes things more awkward. So I swapped the manifold over to another with good studs. This meant having to remove the wiring heatshield I just fitted the day before but ho hum, yes copper grease on the studs, always use it, the exhaust manifolds on these corrode and jam, often the manifold is levered off ripping out the stud and its threads. This way it will come off easily if needs be years down the line


I then pulled the subframe off, not even 15 minutes to do this


I had the engien and subframe on a wheely trolley, however it was to tall to fit under the bumper, so had to take it off then lift/drag it under.

need to watch when lowering so nothing catches


Its not bolted up as it was 7pm which is the time I get my eldest ready for bed. So left it like this. Didn't start work until 6pm.
Anyway the plan is as follows,
engine up, all connected running,
Fit ANOTHER sunroof,
stick on other front hubs (the ones on it have screwed wheel bearings as the megane they were on was towed with no driveshafts fitted)
weld on the passenger jacking panel
4 new tyres for the 17's
MOT
then sold.
Trouble is I have so much work on I find it hard to get time to dedicate to the cars I have. For example the white chammy just needs the brake callipers bled (refusing to buy 3 new callipers because they only have snapped nipples!)
[BREAK=update]
17th July 2010
Not sure why I haven't updated this but the car was driven the day after the last report. Theres very little to be done still.
I have some pictures


Jobs remaining to be done on this car are as follows.
Nearside lower pinch bolt fitting
Sunroof swap
Sort downpipe to cat slight exhaust blow
Oil and filter change
wheels and tyres
get the jacking panel welded in
Then its mot'd and gone.
Only issue is the weather has been very poor and the car is full of spare parts as I have ran out of storage space!
There is maybe 2 hours of actual work left to do on this car.
[BREAK=Going tomorrow]
12th August 2010
Well the car is sold, got a down payment and its away tomorrow. Who got it is up to them to reveal.
Anyway I can say I have spent way to much on this thing and tbh I'm not bothered to see it go.
The car was MOT'd on Tuesday morning, sailed through but then bizarrely a brake line burst leaving the station! A hole appeared i9n the line where its clipped into the bracket, the line was perfect aside from this.
Anyway to get it mot'd I had to get the jacking point welded into it, I done the prep and Jonah done the welding and he undersealed it all. Poor pictures but during the process wasn't appropriate to take pictures.


I replaced the burst front to rear line, left the other as its fine, I popped it out of all clips and its ok. Done that bleed it out on all corners so new fluid throughout.
Only pic of the new line

Then oil and filter change, had to buy some more oil, and a filter of course

Draining the old stuff

My tipex has vanished so I used some orange nail polish I use to identify things

Of course had to fit a new sealing washer on the sump plug, running out of those too

So its away tomorrow, but of course it had to be inspected before it left.
Elizabeth is QC officer

Engine running, yes she started it

Gearstick check

Air vent is ok

Handbrake ok

She closed the door on me!

Road test time, struggling to see out

Thats better

:lol:
The end - hopefully!
[BREAK=Sold!]
13th August 2010
Well its away now.
I will still see it often
Of course for some reason a perfect looking metal pipe decided to spring a pinhole leak! Taped it up and supplied another pipe as a replacement!
The owner I imagine should take over with his report soon.
Last edited by a moderator:


