lewis77
Active Member
Project 'Iceberg'
Well this is my first project report. Suppose it makes sense now that I have myself a project .
.
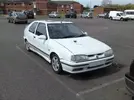
For those that have seen the car before floating around here, this is the 19 16v once belonging to Renig (kind of him to sell it to me). After speaking with a few people and deciding that if I wanted a 16v, I'd have to do it soon, as by the time I can afford the insurance there wouldn't be many left. So when this came up in the forum, in white (my favourite colour), I couldn't resist. So I made some arrangements, and now have 2 19's cars on camp .
.
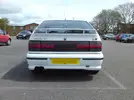
Well some pictures, after I managed to tow it 32 miles back to where I live and work. Care of the local scrappy.
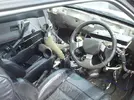
This is the interior, will be sorted fairly sharpish!
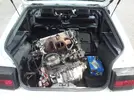
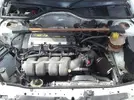
And the spare engine that came with it! It's a 1.8 16v lump from a clio. Will be transplanted in due course!
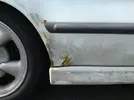
The only bodywork issue I could find, should be simple to fix.
[BREAK=The Fixing Begins]
First job was to jump the beast, see if it would start as I haven't heard it running yet.
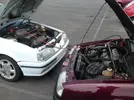
Connected it up to the Red 19 and tried the key, no luck :cry:.
It just turned once then stopped - battery was as dead as a doornail.
So off to Halfords, and with my little trade discount card I got £30 off a new battery - £54.25 - Laughing!
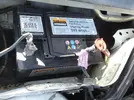
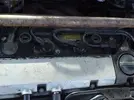
I then checked the HT Leads, and the spark plugs.
I kid you not there was about 2 inches of water in each of the plug holes! So that was removed by ramming a cloth in there until it soaked everything up! Also one of the HT leads was badly corroded so replaced it with one from the spare engine.
Next, time to crank it!
I placed the key in, and when the ignition came on it sounded healthier already! The fuel pump kicked in nicely.
On first crank, it put up some resistance, but went after about 2-3 seconds!
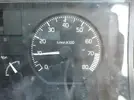
It idles at just below 1000rpm, and nothing came out of the exhaust. It does rev up and down the range quite nicely.
I did go for a quick drive around the car park, but not long as there is absolutely no coolant in the header tank! And it was pissing oil and water everywhere it went!
Next job is to find out what is leaking and to re-new all the fluids.
[BREAK=The Cooling System]
Well had a go at draining the coolant out yesterday. Never drained anything before, so was an interesting experience!
I have found that there is no easy route for the fluid out of the bottom unless you remove the bumper, which I wasn't going to do! I eventually got the hose off the top radiator inlet and then it pissed coolant (or liquid rust) al over the gearbox and drive shafts. At least I caught most of it.
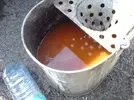
Wonderful colour! And full of oil, just proves the head gasket is giving up the ghost.
While I was there I decided to have a go at the aux water pump, see why it was making funny noises. But I didn't realise you could reach it until I removed the radiator!
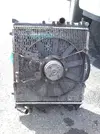
Gave me a chance to clean it thoroughly though. Will purge it once I get hold of mains water. Will also be taking it down to engineering section to get it pressure tested, along with the whole system, just to find out where the leaks are!
I have also removed the header tank, just because I want a nice clean one . So will be cleaning that up as best as I can soon.
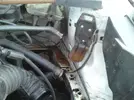
Also I absolutely had to remove the stupid single use metal clips Renault put on, in favour of standard jubilee clips. If anybody wants to know how to remove them, grap the tabs with pliers, twist and pull, Should snap them right off .
.
While poking around I noticed this hidden away underneath the clutch cable:
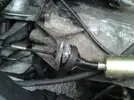
No wonder the biting point was so low! Have removed this, until I realise why it was there in the first place.
Next to finish the cooling and move on to an oil change.
[BREAK=The Cooling System (Cnt'd)]
Well just a small update but today I managed to properly clean out the radiator, after getting my hands on a tap and hose.
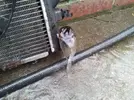
Mind you I have broken the retaining clips that hold the Fan and motor onto the radiator. Well one was missing and the other fell apart from rust, So it doesn't hold on properly now, just as well since there is evidence of the fan catching the radiator anyway.
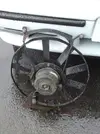
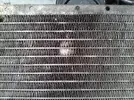
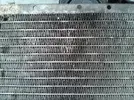
As a last addition, I fixed most of the bent fins, by poking around with a screwdriver. Some are buggered beyond repair, but it looks better now
Before:
After:
Next time to hopefully move onto something else. Cooling is starting to bore me now
[BREAK oors, Dash and Destruction]
Well yesterday I had another go at taking things to pieces, or at least that's how it turned out.
I decided to have a bash at the engine in the boot, see if I could strip it down and have a looksee,
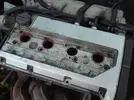
This is with the spark plug cover off, as you can see it it missing a rubber seal, along with a bolt or two here and there. More to the point with I took the rocker cover off all the bolts came off with my fingers, I'm guessing it's been looked at recently :?
Well with the cover off I could see all the cams and valve heads, very exciting, never seen this far down this close before . Like I said, a huge learning curve!
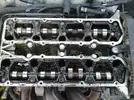
There was an awful lot of rust and water in here, mixed with a terrible amount of oil, something tells me the rocker cover gasket's fubar'd!
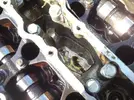
Well I tried to remove most of it, trouble is oil doesn't soak up well into paper towels, which is all I have for now
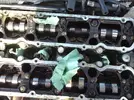
Still got rid of most of it.
I did try and strip it further bit I buggered my torx bit on the bolt for the distributor cap to get the next section of the head off, so it's staying like that in the boot until I'm next down Halfords.
I soon got bored of that so went in search of why my drivers door was unable to stay open :?. I figured it was the check link bar, and upon some wiggling found it loose. So off with the door card!
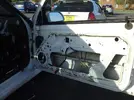
A little different removing one with wires and speakers in . Bit harder than mine. But nevertheless found the catch and couldn't really see the problem.
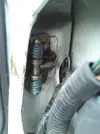
I have turned it round in that picture, to see if it made any difference but all it does now is stop the hinges getting damaged further. I reckon I needed to compare with one that wasn't broken
Off with the passenger door card!
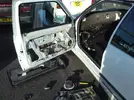
This one isn't broken so have discovered that the drivers one definitely is. It's missing one of the rollers that must have snapped and come out (maybe it's in the bottom of the door? :?)
In the process though I did find that both door cards are snapped in places.
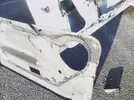
I didn't make it worse I swear! :roll:
So while I'm waiting for parts for those bits I moved on, like usual!
The dash was next on my list of things I most want fixed, except I didn't want to tackle this as it seems like a massive job!
As promised though pictures of the flocking.
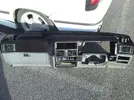
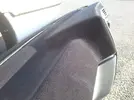
I doesn't seem to bad all done in black.
I found that the dash is indeed a pain to get back on, and judging from the amount of broken clips is a pain to get off as well! I had to remember to move things like the steering column release lever to put it back on, because this meant I had to pull it on and off several times.
I found the easiest way was to clip in the wiring loom then raise it up and push it on.
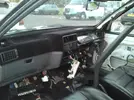
This is it now, it is still not fixed in as I have to put in the heater ducts and all the dash controls. But while it's not fixed in I want to replace certain cables, clips, plugs and grommets.
This is all I have for now, I'll probably be back out later so should have a few more pictures soon enough. I'll have to organise the report soon but I am doing different parts at the moment to keep things interesting!
[BREAK ash Fitting - It's a Car Again!]
Well I thought I'd finish off the dash regardless of fiting a new throttle cable and fixing the clutch pedal (which isn't secured).
I start by saying that which ever way you go about this it has its own set of problems that doesn't make it a walk in the park.
I initially tried putting it up then clipping the wires to it but it doesn't work, it is just impossible to get your hands in behind to clip it in.
So I clipped most of the clips around to loom, apart from the sides to allow some movement.
Then unlike last time I clipped in the heater pipes before I put it on
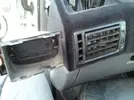
These are a pain to get in, as both sides need to go in before the other. So after some wiggling and annoyance then finally a quick shove, it went
I then fitted the big heater pipe back to the center console unit.
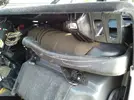
I was fairly confused with the heater pipes, as I have a pipe and center unit from the old dash on my back seats, and had no idea where these went, until I realised they were spare. Spares anyone??
Once both sides were done, I brought all the wires through to their correct places. After I shredded most of my arms on the inside dash clips all over the place.
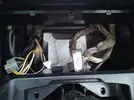
I plugged all the dash switches and the clocks back in along with the heater controls, which are a pain with those bloody stiff cables! But everthing works now
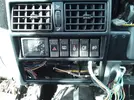
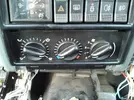
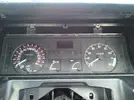
As you can see with the clocks, the top clips are broken on the black plastic cover and I cant fix it back in and I think it's missing a cover that goes across the top, not sure though as I haven't compared the two cars yet. Anybody got spares?
This is the finished dash as it is now
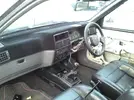
The center console is from a different model (possibly executive as it has holes for heating pipes that I don't have the pipes for in my dash :?) and is black. I may spray the other interior trim panels black since the console looks quite nice, but haven't decided yet . For now though on the lookout for a standard console as it's not original.
A couple of smaller fixes, I removed two wires which were in the door pillar from a previous aftermarket alarm, that was removed, so decided to cut them out.
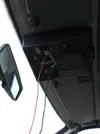
Can somebody tell me if those ultrasonic recievers are standard as they don't connect up to anything :??
While up there though I noticed that it has had problems with leakage from the aerial

 Hmm, hoping this is not still a problem. Or i'll be stuffing it with sealant!
As a little after touch I had to fill up the cooling system again, since with a dash it looks more like a car now .
.
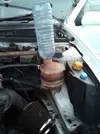
In goes the header tank, (even though I still haven't cleaned it :roll and in goes some water for the time being, it's being drained again soon anyway, to fill it properly. And then off for a little drive around base. Was more of a test drive this time, but not too fast or to high in revs, due to the engine in the boot and the head gasket going. But I already like it, and can't wait to finish it now (I now I'm impatient
  )
)
I imagine there are going to be an awful lot of pages to this report when it's totally finished.
[BREAK=Headlights and New Parts]
Well I have finally uploaded the pictures now, I refuse to update without pictures as it defies the whole point of reporting
Had a whole load of stuff delivered from eBay while I was on holiday, so as soon as I got back to the car I began fitting
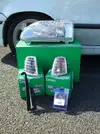
So far to turn up - Front headlight unit, indicator units (all brand new) £17.98, Battery clamp £6.50 and a radio wiring loom £2.99 (for when I eventually sort out the ICE)
Notice how low the car is getting because of the weight of the engine , I later found out this has put a shock out
  .
.
First to go in was the battery clamp and wiring loom as very easy to do. Was quite impressed with the condition of the clamp, no rust etc.
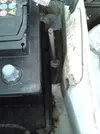
Here was where all my problems started :roll:. Headlights and bumper!
Pain as most of the nuts and screws are rusty as hell, so found it quite difficult to remove it.
First off were the headlight covers
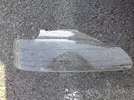
I actually quite like these, suppose to protect the headlights, but still the NS one cracked!
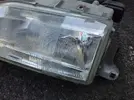
Anyway, I carried on removing the grille, which came off without to much of a fight, although it is missing a considerable amount of the fixing screws
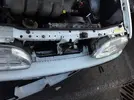
Grille off, bumper next, (kind of happy I've taken the other one off so many times so know where I'm going )
)
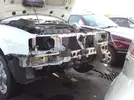
I hate the way these cars look with their faces off, kind of like after a very strange accident :?. And how the inner fixing bolts are behind everything! Especially the OS, behind the ECU the headlight loom, and whatever the funny tank thing is poking out the bottom in that picture, looks like an overflow that empties into the bottom of the bumper liner, what is it :??
Well, while the bumper was off I cleaned it and put all the clips back in for the front splitter, probably why it was hanging off underneath.
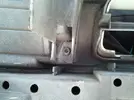
I'm starting to attract a lot of attention from people around the place now, as I'm taking it to pieces in the middle of a car park!
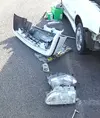
This is one of my 'tidier' days :lol:
Anyhow, with the lights out I decided to fit the new one in, and low and behold, someone made a rookie mistake and didn't check compatibility before buying
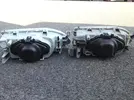
Anybody tell the difference (apart from the adjuster motor)? The new one isn't a 16v version! Bugger! The connectors are different.
So, not so bad it can go on the other car! Until the adjuster motor wouldn't fit into the existing ball joint and when putting the old piece in the new headlight, I pulled the inner unit off the other ball joints (n). If anyone has done this before it's a bitch, since its sealed from the front, and I can't pull it back from the back, so I left it and put the old one back in - Headlight anyone??
Still at least I had new clear indicators!
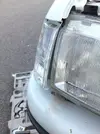
That don't really fit , £20 for nothing! Still, swapped the non-broken one on the red 19 to the white one, since both had opposite ones buggered
  . Until I get some more I'll be having the silly wide ones on the red 19.
Well with the progress with the light halted until I get a new NS headlight unit for a 16v, I moved on to fixing the bumper mounts I knackered a while back when I lowered it onto a bucket
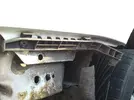
This was the one broken the rivets had stretched, so I cleverly put a strip of one of the seals I found in the boot behind it .
.
Mind you when I checked the other side, I pulled off the rivet :evil:, every problem requires another to be fixed first!
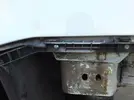
Still a quick bolt through and it's much more secure now, I might change all the rivets!
That's it until tomorrow, when I'll upload some pictures from later in the week where I tackled the arches!
[BREAK=Bodywork and Sills]
Decided it's high time I got off my ass and updated this have all the pictures just haven't written it out for some reason.
This is from last week when I decided to go at all the rust I could find with my claw hammer and some pliers!
First up was the O/S Arch;
Before:
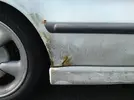
After:
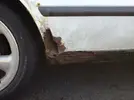
Not looking brilliant, needs to be ground back and have a plate welded in, then filled and sprayed.
The other areas are just the normal expected places
O/S Sill
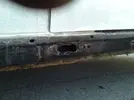
Both sills have been waxoiled all over (along with an area above the spare wheel cage), very temporary bodge job! I hate taking things to pieces only to find it's not been done completely and properly.
N/S Sill
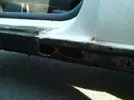
A little worse round this side of the car
N/S Arch
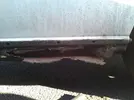
This has kind of disheartened me since I know nothing about bodywork or how to fix it! I'm hoping this arch is repairable, since it has eaten all the way round and underneath, but not into anything apart from the arch metal, here's hoping!
Couple of other things. Removed the headlight ready for a new one
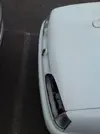
I have decided to sack off everything that is broken or needs replacing so that it's down to the bare bones and I can fix it from there. It's very easy to remove things while your waiting for/sourcing parts!
It's also now on axle stands since it was getting steadily lower and lower with the weight of the engine in the boot!
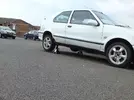
I have found out it's put a shock through on the O/S, as I can lift the wheel up and down with my hands but can't on the N/S. Knew that would happen, I just wasn't quick enough!
Here's my Aux water pump relay as well,
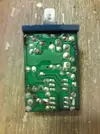
You might be able to make out the corrosion on the board, this is a before shot. I cleaned it up with a brush then a fibreglass pen, and it looked better but most of the pathways had corroded off, especially the top left corner where it was missing completely.
So soldered a new piece in and tested it. 12 2 was the time it ran for before, and after... 12:53! Bugger.
It is all right though, since I found a mint condition one connected to the loom on the engine in the boot!
Well that's it for the bodywork until I get my head around the task, and get some advice on whether it's fixable or not.
A small update next time, minor fixes until I get pics of my deep engine strip in the boot :lol:
[BREAK ulling It To Pieces]
Well some random bit and bobs I decided to remove. Mainly because I had the correct size spanner in my hand at the time
Air filter was first to go, broken and warped replacement to come soon
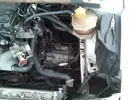
I also have a load of new jubilee clips to go on all the pipes I broke the standard Renault connections on.
A quick look at my clutch cable, was replaced fairly recently, and then clipped back in strangely
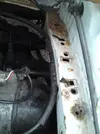
And the cable ties have pulled it off the sill which it sits along under the brake lines
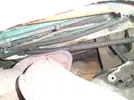
Yes it's in contact with the exhaust manifold! Not good, need to find a proper way of securing it back in.
While I was in the engine bay I removed the radiator fan and bracket, got a new one, but it's back at home, didn't bring it back with me.
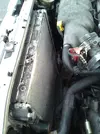
Outside the engine bay now, I got to work on the headlights, £25 from Simon along with the dash piece for above the clocks .
.
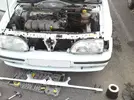
And with them properly back in
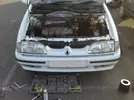
Much better, just need to re-fit the headlight covers
Brakes!
I don't really like brakes since I have never done them before, and they are the most important thing on the car! But off came the wheels since it's now on the stands.
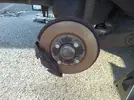
the bolts aren't standard since the jack bar doesn't fit them Had to get a proper wheel brace.
Still haven't decided why I dismantled the N/S brake (no pics sorry). But I might uprate them if I can!
These are the rear tires, not much tread left at all!
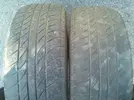
Will change these to the Diesel next month and go get them renewed (plus it'll have alloys for a while then )
)
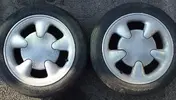
Their still not polished but, are now in my room so I can do so at night while watching films, although they may need a sand and paint before they're anywhere near perfect.
While I was under the car for the brakes I did notice the exhaust clamp on the backbox, 10mm which is what I was currently holding. So off it came, or I tried at least until I sheared the bolts, bugger! :evil:
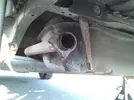
If it aint broke don't fix it! Still now the backbox is off, makes way for a full stainless system when I can find one that'll fit!
Noticed the exhaust brackets while I was there:
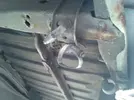
No wonder it didn't move, and sat so high in the bumper! (Oh and the bumper needs re-shaping since it was hacksawed for the exhaust space :roll
Anyone got any exhaust mounts
I did however sticker it up! £2 each from Tom
Front inner:
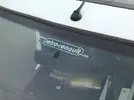
and rear outer:
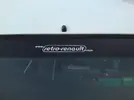
(I've also removed the annoying "Airbags are for homos" and "Rebuilt with genuine stolen parts" stickers left in the back window :roll:
Much better at least I'm advertising now, even if it isn't going anywhere!
The engine in the boot tonight gets pictures taken of it, and a little more of a strip once I've got the correct Torx ratchet pieces (what size are they?)
[BREAK=Rear Engine Strip]
Been a while since I last updated, Not much major happened with the actual car itself, really waiting on parts and panels. Desperately need a head gasket set soon though!
I have however stripped the engine in the boot down, no real reason for this other than to check it's condition and gain some experience with the F7P, Ready for when I do the one in the front. Still undecided whether I'm transplanting this or not.
No step by step pics because I got carried away taking off bolts
Here's all the bits after they were out of the boot though
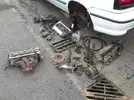
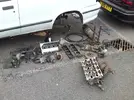
Various bits there, as you can see. The block is all that is left
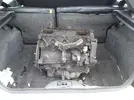
Can't strip this as it's still full of oil! I need one of those pressure containers to pump it out since I cant lift it and drain it that way. This is my problem, having a car that won't move, in a car park with no access to storage or power tools!
Still, I soon got bored as I can't do anything with this and put it all back
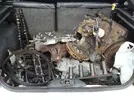
I'm going to skim the head off of that engine and port it out, basically get it refurb'd and as good as I can then I'll swap them over, saves leaving the front engine apart for ages.
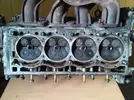
And the valves for anyone who's interested. Still can't get that bleeding exhaust manifold off! need to grind the nuts off if I can.
[BREAK=The Reaper Came]
Well sadly the Reaper came to collect this and send it to 19 heaven .
.
The sills were finally the death of it, like a slow growing disease.
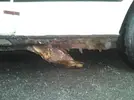
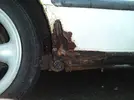
How it looked after totally stripping what I could
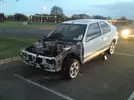
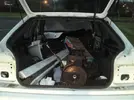
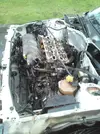
Such a waste of the engine I couldn't remove!
Funnily the scrappy I randomly found on Yell.com was the same guy and the same truck that brought it to me 6 months earlier, to the day!
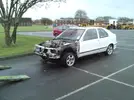
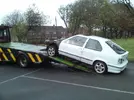
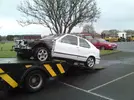
Goodbye to a very useful project for me! :cry:
Still I'd like it to do something useful, if you need something pm me, I might have it if I managed to take it off before it went.
Well this is my first project report. Suppose it makes sense now that I have myself a project

For those that have seen the car before floating around here, this is the 19 16v once belonging to Renig (kind of him to sell it to me). After speaking with a few people and deciding that if I wanted a 16v, I'd have to do it soon, as by the time I can afford the insurance there wouldn't be many left. So when this came up in the forum, in white (my favourite colour), I couldn't resist. So I made some arrangements, and now have 2 19's cars on camp
Well some pictures, after I managed to tow it 32 miles back to where I live and work. Care of the local scrappy.


This is the interior, will be sorted fairly sharpish!

And the spare engine that came with it! It's a 1.8 16v lump from a clio. Will be transplanted in due course!

The only bodywork issue I could find, should be simple to fix.
[BREAK=The Fixing Begins]
First job was to jump the beast, see if it would start as I haven't heard it running yet.

Connected it up to the Red 19 and tried the key, no luck :cry:.
It just turned once then stopped - battery was as dead as a doornail.
So off to Halfords, and with my little trade discount card I got £30 off a new battery - £54.25 - Laughing!

I then checked the HT Leads, and the spark plugs.
I kid you not there was about 2 inches of water in each of the plug holes! So that was removed by ramming a cloth in there until it soaked everything up! Also one of the HT leads was badly corroded so replaced it with one from the spare engine.

Next, time to crank it!
I placed the key in, and when the ignition came on it sounded healthier already! The fuel pump kicked in nicely.
On first crank, it put up some resistance, but went after about 2-3 seconds!

It idles at just below 1000rpm, and nothing came out of the exhaust. It does rev up and down the range quite nicely.
I did go for a quick drive around the car park, but not long as there is absolutely no coolant in the header tank! And it was pissing oil and water everywhere it went!
Next job is to find out what is leaking and to re-new all the fluids.
[BREAK=The Cooling System]
Well had a go at draining the coolant out yesterday. Never drained anything before, so was an interesting experience!
I have found that there is no easy route for the fluid out of the bottom unless you remove the bumper, which I wasn't going to do! I eventually got the hose off the top radiator inlet and then it pissed coolant (or liquid rust) al over the gearbox and drive shafts. At least I caught most of it.

Wonderful colour! And full of oil, just proves the head gasket is giving up the ghost.
While I was there I decided to have a go at the aux water pump, see why it was making funny noises. But I didn't realise you could reach it until I removed the radiator!

Gave me a chance to clean it thoroughly though. Will purge it once I get hold of mains water. Will also be taking it down to engineering section to get it pressure tested, along with the whole system, just to find out where the leaks are!
I have also removed the header tank, just because I want a nice clean one

Also I absolutely had to remove the stupid single use metal clips Renault put on, in favour of standard jubilee clips. If anybody wants to know how to remove them, grap the tabs with pliers, twist and pull, Should snap them right off
While poking around I noticed this hidden away underneath the clutch cable:

No wonder the biting point was so low! Have removed this, until I realise why it was there in the first place.
Next to finish the cooling and move on to an oil change.
[BREAK=The Cooling System (Cnt'd)]
Well just a small update but today I managed to properly clean out the radiator, after getting my hands on a tap and hose.

Mind you I have broken the retaining clips that hold the Fan and motor onto the radiator. Well one was missing and the other fell apart from rust, So it doesn't hold on properly now, just as well since there is evidence of the fan catching the radiator anyway.

As a last addition, I fixed most of the bent fins, by poking around with a screwdriver. Some are buggered beyond repair, but it looks better now
Before:

After:

Next time to hopefully move onto something else. Cooling is starting to bore me now
[BREAK
Well yesterday I had another go at taking things to pieces, or at least that's how it turned out.
I decided to have a bash at the engine in the boot, see if I could strip it down and have a looksee,

This is with the spark plug cover off, as you can see it it missing a rubber seal, along with a bolt or two here and there. More to the point with I took the rocker cover off all the bolts came off with my fingers, I'm guessing it's been looked at recently :?
Well with the cover off I could see all the cams and valve heads, very exciting, never seen this far down this close before

There was an awful lot of rust and water in here, mixed with a terrible amount of oil, something tells me the rocker cover gasket's fubar'd!

Well I tried to remove most of it, trouble is oil doesn't soak up well into paper towels, which is all I have for now

Still got rid of most of it.
I did try and strip it further bit I buggered my torx bit on the bolt for the distributor cap to get the next section of the head off, so it's staying like that in the boot until I'm next down Halfords.
I soon got bored of that so went in search of why my drivers door was unable to stay open :?. I figured it was the check link bar, and upon some wiggling found it loose. So off with the door card!

A little different removing one with wires and speakers in

I have turned it round in that picture, to see if it made any difference but all it does now is stop the hinges getting damaged further. I reckon I needed to compare with one that wasn't broken
Off with the passenger door card!

This one isn't broken so have discovered that the drivers one definitely is. It's missing one of the rollers that must have snapped and come out (maybe it's in the bottom of the door? :?)
In the process though I did find that both door cards are snapped in places.

I didn't make it worse I swear! :roll:
So while I'm waiting for parts for those bits I moved on, like usual!
The dash was next on my list of things I most want fixed, except I didn't want to tackle this as it seems like a massive job!
As promised though pictures of the flocking.


I doesn't seem to bad all done in black.
I found that the dash is indeed a pain to get back on, and judging from the amount of broken clips is a pain to get off as well! I had to remember to move things like the steering column release lever to put it back on, because this meant I had to pull it on and off several times.
I found the easiest way was to clip in the wiring loom then raise it up and push it on.

This is it now, it is still not fixed in as I have to put in the heater ducts and all the dash controls. But while it's not fixed in I want to replace certain cables, clips, plugs and grommets.
This is all I have for now, I'll probably be back out later so should have a few more pictures soon enough. I'll have to organise the report soon but I am doing different parts at the moment to keep things interesting!
[BREAK
Well I thought I'd finish off the dash regardless of fiting a new throttle cable and fixing the clutch pedal (which isn't secured).
I start by saying that which ever way you go about this it has its own set of problems that doesn't make it a walk in the park.
I initially tried putting it up then clipping the wires to it but it doesn't work, it is just impossible to get your hands in behind to clip it in.
So I clipped most of the clips around to loom, apart from the sides to allow some movement.
Then unlike last time I clipped in the heater pipes before I put it on

These are a pain to get in, as both sides need to go in before the other. So after some wiggling and annoyance then finally a quick shove, it went
I then fitted the big heater pipe back to the center console unit.

I was fairly confused with the heater pipes, as I have a pipe and center unit from the old dash on my back seats, and had no idea where these went, until I realised they were spare. Spares anyone??
Once both sides were done, I brought all the wires through to their correct places. After I shredded most of my arms on the inside dash clips all over the place.

I plugged all the dash switches and the clocks back in along with the heater controls, which are a pain with those bloody stiff cables! But everthing works now


As you can see with the clocks, the top clips are broken on the black plastic cover and I cant fix it back in
This is the finished dash as it is now

The center console is from a different model (possibly executive as it has holes for heating pipes that I don't have the pipes for in my dash :?) and is black. I may spray the other interior trim panels black since the console looks quite nice, but haven't decided yet
A couple of smaller fixes, I removed two wires which were in the door pillar from a previous aftermarket alarm, that was removed, so decided to cut them out.

Can somebody tell me if those ultrasonic recievers are standard as they don't connect up to anything :??
While up there though I noticed that it has had problems with leakage from the aerial

As a little after touch I had to fill up the cooling system again, since with a dash it looks more like a car now

In goes the header tank, (even though I still haven't cleaned it :roll
I imagine there are going to be an awful lot of pages to this report when it's totally finished.
[BREAK=Headlights and New Parts]
Well I have finally uploaded the pictures now, I refuse to update without pictures as it defies the whole point of reporting
Had a whole load of stuff delivered from eBay while I was on holiday, so as soon as I got back to the car I began fitting

So far to turn up - Front headlight unit, indicator units (all brand new) £17.98, Battery clamp £6.50 and a radio wiring loom £2.99 (for when I eventually sort out the ICE)
Notice how low the car is getting because of the weight of the engine
First to go in was the battery clamp and wiring loom as very easy to do. Was quite impressed with the condition of the clamp, no rust etc.

Here was where all my problems started :roll:. Headlights and bumper!
Pain as most of the nuts and screws are rusty as hell, so found it quite difficult to remove it.
First off were the headlight covers

I actually quite like these, suppose to protect the headlights, but still the NS one cracked!

Anyway, I carried on removing the grille, which came off without to much of a fight, although it is missing a considerable amount of the fixing screws

Grille off, bumper next, (kind of happy I've taken the other one off so many times so know where I'm going

I hate the way these cars look with their faces off, kind of like after a very strange accident :?. And how the inner fixing bolts are behind everything! Especially the OS, behind the ECU the headlight loom, and whatever the funny tank thing is poking out the bottom in that picture, looks like an overflow that empties into the bottom of the bumper liner, what is it :??
Well, while the bumper was off I cleaned it and put all the clips back in for the front splitter, probably why it was hanging off underneath.

I'm starting to attract a lot of attention from people around the place now, as I'm taking it to pieces in the middle of a car park!

This is one of my 'tidier' days :lol:
Anyhow, with the lights out I decided to fit the new one in, and low and behold, someone made a rookie mistake and didn't check compatibility before buying

Anybody tell the difference (apart from the adjuster motor)? The new one isn't a 16v version!
So, not so bad it can go on the other car! Until the adjuster motor wouldn't fit into the existing ball joint and when putting the old piece in the new headlight, I pulled the inner unit off the other ball joints (n). If anyone has done this before it's a bitch, since its sealed from the front, and I can't pull it back from the back, so I left it and put the old one back in - Headlight anyone??
Still at least I had new clear indicators!

That don't really fit
Well with the progress with the light halted until I get a new NS headlight unit for a 16v, I moved on to fixing the bumper mounts I knackered a while back when I lowered it onto a bucket

This was the one broken the rivets had stretched, so I cleverly put a strip of one of the seals I found in the boot behind it
Mind you when I checked the other side, I pulled off the rivet :evil:, every problem requires another to be fixed first!

Still a quick bolt through and it's much more secure now, I might change all the rivets!
That's it until tomorrow, when I'll upload some pictures from later in the week where I tackled the arches!
[BREAK=Bodywork and Sills]
Decided it's high time I got off my ass and updated this have all the pictures just haven't written it out for some reason.
This is from last week when I decided to go at all the rust I could find with my claw hammer and some pliers!
First up was the O/S Arch;
Before:

After:

Not looking brilliant, needs to be ground back and have a plate welded in, then filled and sprayed.
The other areas are just the normal expected places
O/S Sill

Both sills have been waxoiled all over (along with an area above the spare wheel cage), very temporary bodge job! I hate taking things to pieces only to find it's not been done completely and properly.
N/S Sill

A little worse round this side of the car
N/S Arch

This has kind of disheartened me since I know nothing about bodywork or how to fix it! I'm hoping this arch is repairable, since it has eaten all the way round and underneath, but not into anything apart from the arch metal, here's hoping!
Couple of other things. Removed the headlight ready for a new one

I have decided to sack off everything that is broken or needs replacing so that it's down to the bare bones and I can fix it from there. It's very easy to remove things while your waiting for/sourcing parts!
It's also now on axle stands since it was getting steadily lower and lower with the weight of the engine in the boot!

I have found out it's put a shock through on the O/S, as I can lift the wheel up and down with my hands but can't on the N/S. Knew that would happen, I just wasn't quick enough!
Here's my Aux water pump relay as well,

You might be able to make out the corrosion on the board, this is a before shot. I cleaned it up with a brush then a fibreglass pen, and it looked better but most of the pathways had corroded off, especially the top left corner where it was missing completely.
So soldered a new piece in and tested it. 12
It is all right though, since I found a mint condition one connected to the loom on the engine in the boot!
Well that's it for the bodywork until I get my head around the task, and get some advice on whether it's fixable or not.
A small update next time, minor fixes until I get pics of my deep engine strip in the boot :lol:
[BREAK
Well some random bit and bobs I decided to remove. Mainly because I had the correct size spanner in my hand at the time
Air filter was first to go, broken and warped replacement to come soon

I also have a load of new jubilee clips to go on all the pipes I broke the standard Renault connections on.
A quick look at my clutch cable, was replaced fairly recently, and then clipped back in strangely

And the cable ties have pulled it off the sill which it sits along under the brake lines

Yes it's in contact with the exhaust manifold! Not good, need to find a proper way of securing it back in.
While I was in the engine bay I removed the radiator fan and bracket, got a new one, but it's back at home, didn't bring it back with me.

Outside the engine bay now, I got to work on the headlights, £25 from Simon along with the dash piece for above the clocks

And with them properly back in

Much better, just need to re-fit the headlight covers
Brakes!
I don't really like brakes since I have never done them before, and they are the most important thing on the car! But off came the wheels since it's now on the stands.

the bolts aren't standard since the jack bar doesn't fit them
Still haven't decided why I dismantled the N/S brake (no pics sorry). But I might uprate them if I can!
These are the rear tires, not much tread left at all!

Will change these to the Diesel next month and go get them renewed (plus it'll have alloys for a while then

Their still not polished but, are now in my room so I can do so at night while watching films, although they may need a sand and paint before they're anywhere near perfect.
While I was under the car for the brakes I did notice the exhaust clamp on the backbox, 10mm which is what I was currently holding. So off it came, or I tried at least until I sheared the bolts, bugger! :evil:

If it aint broke don't fix it! Still now the backbox is off, makes way for a full stainless system when I can find one that'll fit!
Noticed the exhaust brackets while I was there:

No wonder it didn't move, and sat so high in the bumper! (Oh and the bumper needs re-shaping since it was hacksawed for the exhaust space :roll
Anyone got any exhaust mounts
I did however sticker it up! £2 each from Tom
Front inner:

and rear outer:

(I've also removed the annoying "Airbags are for homos" and "Rebuilt with genuine stolen parts" stickers left in the back window :roll:
Much better at least I'm advertising now, even if it isn't going anywhere!
The engine in the boot tonight gets pictures taken of it, and a little more of a strip once I've got the correct Torx ratchet pieces (what size are they?)
[BREAK=Rear Engine Strip]
Been a while since I last updated, Not much major happened with the actual car itself, really waiting on parts and panels. Desperately need a head gasket set soon though!
I have however stripped the engine in the boot down, no real reason for this other than to check it's condition and gain some experience with the F7P, Ready for when I do the one in the front. Still undecided whether I'm transplanting this or not.
No step by step pics because I got carried away taking off bolts
Here's all the bits after they were out of the boot though


Various bits there, as you can see. The block is all that is left

Can't strip this as it's still full of oil! I need one of those pressure containers to pump it out since I cant lift it and drain it that way. This is my problem, having a car that won't move, in a car park with no access to storage or power tools!
Still, I soon got bored as I can't do anything with this and put it all back

I'm going to skim the head off of that engine and port it out, basically get it refurb'd and as good as I can then I'll swap them over, saves leaving the front engine apart for ages.

And the valves for anyone who's interested. Still can't get that bleeding exhaust manifold off! need to grind the nuts off if I can.
[BREAK=The Reaper Came]
Well sadly the Reaper came to collect this and send it to 19 heaven
The sills were finally the death of it, like a slow growing disease.


How it looked after totally stripping what I could


Such a waste of the engine I couldn't remove!
Funnily the scrappy I randomly found on Yell.com was the same guy and the same truck that brought it to me 6 months earlier, to the day!


Goodbye to a very useful project for me! :cry:
Still I'd like it to do something useful, if you need something pm me, I might have it if I managed to take it off before it went.
Last edited by a moderator:


