There is more to life with TurboRenault.co.uk

Register a free account today to become a member! Once signed in, you'll be able to participate on this site by adding your own topics and posts, as well as connect with other members through your own private inbox!

  • This section contains the archived boards. They should be read only. If you want a thread resurrecting please message admin and we can move into the live section

Technical Section

Status
Not open for further replies.

This will be the technical bit of the site when I get there
On these pages I will try to cover all the technical details to overcome various problems encountered by myself and others this will include
Big brake conversions
Fitting different engines inc 5 gt turbo (turbo terrific 10) built for less than £250
Gearboxes everything you wanted to know
Suspension and steering how to set up your car and build some simple chassis tools
Cooling systems how to avoid overheating
Wheels most recent workshop activity was making wheels I will show you how
I hope to get some help on this section of the site from the "welsh wizard" Dave wheeler,he has been at this twice as long as me and over the years he has owned many renaults. I hope with his help to expand these pages to cover 4cv and Dauph Gordini
I SUPPOSE I MUST MAKE THIS POINT ALL THE TECH TIPS MENTIONED ON THESE PAGES HAVE BEEN USED BE ME OR PEOPLE I TRUST. I CANNOT STRESS ENOUGH THAT UNLESS YOU UNDERSTAND WHAT YOU HAVE TO DO IN ORDER TO CARRY OUT THESE OPERATIONS SAFELY AND CORRECTLY DO NOT ATTEMPT TO MODIFY YOUR VEHICLE. I AM TRYING TO ENCOURAGE PEOPLE TO HAVE FUN AND LEARN,BUT I CANNOT BE HELD RESPONSIBLE FOR OTHER PEOPLES WORKMANSHIP. ONE PEICE OF ADVICE I WILL GIVE FREELY IS THAT IF YOU ARE UNSURE OF ANYTHING GET A PROFFESIONAL OPINION MOST MOT TESTERS WILL GIVE AN OPINION PLEASE TAKE THEIR ADVICE ON SUITABILITY​
 
BIG BRAKES GROS FREINS


I thought that the best place to start off the technical part of the site would be with a simple project, so here goes.
If your car has got good power output it will not be long before you find the limitations of the brakes.I suppose that for the time the brakes were very good, but in my time I have managed to distort calipers and suffered severe brake fade too many times. Consultation with the worthies (you know who you are) gave me all the details required for Alpine "Gros friens" using Renault 16 calipers (48 mm) and discs with Matra Bageera rears (45mm).I considered this at some length and decided to invent some of my own as the R16/Matra parts were not the easiest to locate and what would the long term parts supply be like? My system is as follows Front calipers are 48mm VW Golf GTI items using Polo GT carriers with Vauxhall Tigra/Vectra vented discs 254mm x 20mm. Rears are the same disc with a citroen BX GTI caliper 50mm (vented type or buy the 5 sided socket and use any BX front caliper but get the carrier from the front of a Pug 205 any vented model will do. Infact these bendix calipers are fitted to most french vehicles over a 10 year span so parts are not a problem) It must be a BX front caliper to get the included handbrake mechanism this gives a very large caliper that will take big brake pads. These are the reasons for this choice of parts it will be easier to list pros and cons so here we go
For Against
Cheap Not original
easy to find rear carrier to make
good spares backup front carrier to make
unlimited choice of brake pads citroen seals to be changed
exotic compound pads cheap
Brake effort doubled on standard
vented front and rear discs good heat shedding
So there you have it in the next part I will detail what has to be done,what has to be made and how it goes together​
 
PROJECT PROTO


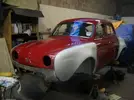
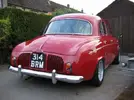
Finally I am making a start on the report of the dauph proto I have been building
I bought this car from Renault owners club member Brian from carlisle. He said it had allegedly been restored but he had not examined the work too closely, he suspected there were unforseen problems which had been covered up so the price of the car was reasonable.
I had known Brian for some time and liked his honesty about the car which was duly purchased and taken home. The next 2 weeks saw it getting a new radiator and the brakes a clean up and the car was mot'd ,not bad after a 38 year lay up. I cut the springs and put on an old set of cosmics and proceeded to drive around somewhat leisurely in it in the summer of 2005
I had the "proto"idea in mind when I was looking for a donor ca,r at first I thought I had bought a car too pretty to cut up, but closer inspection revealed that all was not as good as it looked ,so into the workshop it went in oct 2005 and it is still there
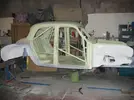
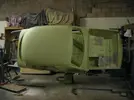
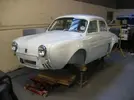
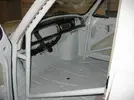
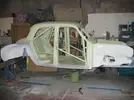
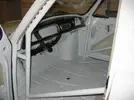
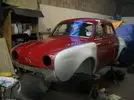
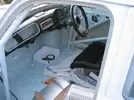
It has been constructed as close as possible to Quereon's layout although his car evolved regularly from the late sixties until 1974 I wil add more text but here are a sequence of pictures showing the work done from purchase to date
AND REMEMBER ALL THAT GLISTERS IS NOT GOLD​

www.8gordiniworkshop.pwp.blueyonder.co.uk_1253649363.webp
modified as per M.Quereon's dimentions

www.8gordiniworkshop.pwp.blueyonder.co.uk_1253649413.webp
And so on

www.8gordiniworkshop.pwp.blueyonder.co.uk_1253650166.webp
same same

www.8gordiniworkshop.pwp.blueyonder.co.uk_1253649449.webp
And so forth

1253648583.jpg

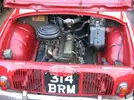
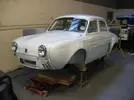
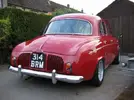
As purchased nice car

www.8gordiniworkshop.pwp.blueyonder.co.uk_1253649625.webp
R8 crossmember gets adjustable rack mountings while off car

www.8gordiniworkshop.pwp.blueyonder.co.uk_1253649750.webp
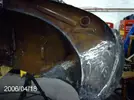
After much cutting and welding ,shotblasting ,now rubbing

www.8gordiniworkshop.pwp.blueyonder.co.uk_1253649787.webp
And more

www.8gordiniworkshop.pwp.blueyonder.co.uk_1253649934.webp
In paint at last

www.8gordiniworkshop.pwp.blueyonder.co.uk_1253650005.webp
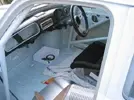
comprehensive interior fitted

www.8gordiniworkshop.pwp.blueyonder.co.uk_1253648794.webp
playtime commences

www.8gordiniworkshop.pwp.blueyonder.co.uk_1253650105.webp
On wheels and on its holidays in 2008 while Liz's 8 in shop

www.8gordiniworkshop.pwp.blueyonder.co.uk_1253650255.webp
comprehensive interior nearly finished

www.8gordiniworkshop.pwp.blueyonder.co.uk_1253648961.webp
And in

www.8gordiniworkshop.pwp.blueyonder.co.uk_1253650321.webp
Stickers and stripes

www.8gordiniworkshop.pwp.blueyonder.co.uk_1253650370.webp
Stripes and stickers

www.8gordiniworkshop.pwp.blueyonder.co.uk_1253650442.webp
Needs motor wiring and plumbing to finish Junior has laid claim to it now

www.8gordiniworkshop.pwp.blueyonder.co.uk_1253648707.webp
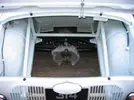
Still looking good

www.8gordiniworkshop.pwp.blueyonder.co.uk_1253648747.webp
va va voom

www.8gordiniworkshop.pwp.blueyonder.co.uk_1253648842.webp
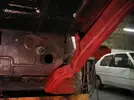
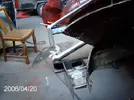
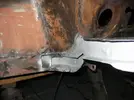
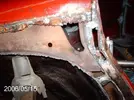
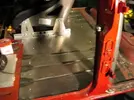
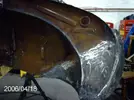
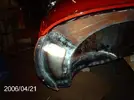
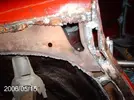
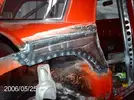
The rot sets in

www.8gordiniworkshop.pwp.blueyonder.co.uk_1253649535.webp
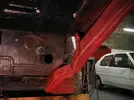
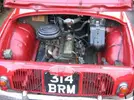
Front was no better

www.8gordiniworkshop.pwp.blueyonder.co.uk_1253648874.webp
and in

www.8gordiniworkshop.pwp.blueyonder.co.uk_1253648991.webp
And in

www.8gordiniworkshop.pwp.blueyonder.co.uk_1253649036.webp
And in

www.8gordiniworkshop.pwp.blueyonder.co.uk_1253649190.webp
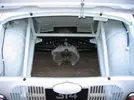
Modified into a pontoon box to carry the scuttle load better a la R8

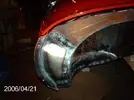
1253649236.jpg

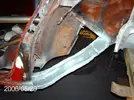
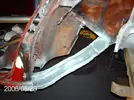
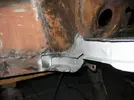
More tinworms here​
 
GEARBOX PROJECT 1 mainshaft


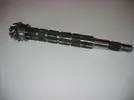
In this section I will try to give a 'blow by blow' account of the current gearbox project for the dauphine. Over the years I have built 4 'Big' boxes 2 4 speed and 2 5 speed none of these gearboxes used any parts from the R8 353 gearbox
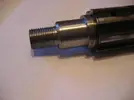
This current box uses Standard early type R8 330 side casings, a late R10 1300 bellhousing, R16 4 speed 336 crownwheel and pinion which has been cut and shut with a R17 Gordini 365 5 speed shaft making the 4 speed into a 5 speed. All the gears, selectors, end case and shift mechanism is from the 365 box
This mixture will give a close ratio gearset, but with a 9x34 final drive 3.77:1 which I hope will be just right for my purposes. this will use my own design concentric hydraulic release mechanism based on the Saab 9000 bearing and an AP racing 184mm clutch
So sit back and enjoy, or shake your head, whatever seems best​

www.8gordiniworkshop.pwp.blueyonder.co.uk_1236548492.webp
9 : Spliced mainshaft complete

www.8gordiniworkshop.pwp.blueyonder.co.uk_1236548399.webp
7 : Mainshaft mods complete

www.8gordiniworkshop.pwp.blueyonder.co.uk_1236548583.webp
11 : Detail of finished stopkey

www.8gordiniworkshop.pwp.blueyonder.co.uk_1236548445.webp
8 : Tailpiece mods complete

www.8gordiniworkshop.pwp.blueyonder.co.uk_1236548545.webp
10 : Machining a spare 2nd speed stopkey

www.8gordiniworkshop.pwp.blueyonder.co.uk_1236548740.webp
14 : Modified key on shaft holding 3rd gear

www.8gordiniworkshop.pwp.blueyonder.co.uk_1236548646.webp
12 : 3rd speed shaft groove opened up 1mm

1236548687.jpg

13 : modded key on modded shaft

www.8gordiniworkshop.pwp.blueyonder.co.uk_1236548925.webp
18 : modified shim washer fitted giving original clearance

1236548809.jpg

16 : Turning down original 336 shim washer to fit inside 4th gear

1236549084.jpg

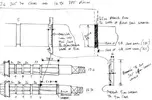
20 : 2nd drawing of shaft details copyright Mr Wheeler

1236548860.jpg

17 : Oilways ground onto shim washer

www.8gordiniworkshop.pwp.blueyonder.co.uk_1236549000.webp
19 : Drawing detail of mods reqd to fit 365 gears onto 336 or 385 shaft

www.8gordiniworkshop.pwp.blueyonder.co.uk_1236548222.webp
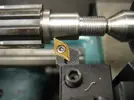
3 : Finish shoulders to size

www.8gordiniworkshop.pwp.blueyonder.co.uk_1236548140.webp
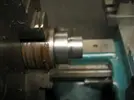
1 : 4spd mainshaft in lathe

www.8gordiniworkshop.pwp.blueyonder.co.uk_1236548179.webp
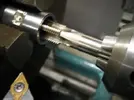
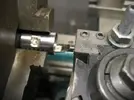
2 : Cutting L/H thread on mainshaft

www.8gordiniworkshop.pwp.blueyonder.co.uk_1236548358.webp
6 : Tapping L/H thread on tail

www.8gordiniworkshop.pwp.blueyonder.co.uk_1236548287.webp
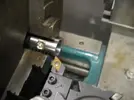
4 : Facing tail to length

www.8gordiniworkshop.pwp.blueyonder.co.uk_1236548325.webp
5 : Finish boring tail to size​
 
GEARBOXES HISTORY


GEARBOXES HISTORY
One of the workshops activities is gearbox modification. Renault 8's are blessed with weak differentials and low gearing, this problem is exacerbated by fitting 13" wheels
There are several solutions but fall into 3 main categories
1 Fit Renault 336 4 speed internals into R8 330 casings final drive is changed from 4.1:1 to 3.77:1 this is probably the easiest conversion
2 Fit Renault 385 5 speed internals into R8 330 casings final drive is changed from 4.1:1 to 3.875:1 a bit more involved but a good all rounder
3 Fit a hybrid of all the above parts plus parts from the R 17 Gordini 365 close ratio gearbox to have the best possible gearbox this gets quite involved but is possible for the "experienced DIY constructor"
Before we begin on the nitty gritty of "HOW" we shall look at an old article wirtten by DAVE WHEELER on the subject of "WHY" this was the article that set me on my way over 10 years ago
I am currently building a hybrid box for the Dauphine which is about the most complex conversion it is possible to do, this will be photographed at every stage and will demonstrate all the techniques required for any of the conversions. This box uses standard 330 casings and late type 330 bellhousing .The mainshaft is a combination of R16 4 speed 336 and R 17 G 365 "cut and shut" the gears are all 365 close ratio and all the end case parts are 365 as I personally think the shift mechanism is superior to all the others of this period,so over to Mr Wheeler for Part 1
RENAULT TRANSAXLES
GROUPINGS
The transaxles produced in the 1960's to 1970's can be commonly grouped by their age/design & their power transmission capabilities. Early 845cc 1090 cars I have ignored as later type boxes can be substituted if so desired & power outputs are very low, so failure is unlikely
GROUP A : The Weakest
Circa 1962-1968/9 type 330, commonly found in 956cc R8, 1108cc R8, R8 Gordini 1108cc, R10. Type 353 in R8 Gordini 1255cc and early A110 Alpines
GROUP B : Stronger than Above
Circa 1969-1971 type 330 found in later 1300cc R 10 & some very late R8
GROUP C : Strongest & dearest
Type 364 found in A110 Alpines which is sometimes mistakenly called the Monte-Carlo box which itself is extremely rare. These boxes were designed to transmit 1600-1800cc power and represent the pinnacle of design for their time
WHAT BREAKS AND WHY?
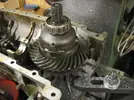
If we consider the box to be two seperate zones within a common casing, Zone one can be the actual gearbox containing gears,synchros,bearings,selectors etc and the second zone being the final drive and differential comprising the crownwheel , pinion and differential spool
It is normally this zone two which causes all the problems, the commonest being the shearing of the sunwheel or the universal joint centre breaking .Group 1 boxes can also loose teeth from the sunwheel on occasions. Occasionally pinion teeth also break.
HOW DO I IDENTIFY THE BOX FITTED TO MY VEHICLE?
This is simply done by examining the main casing in the drain plug area under the car
Group A type boxes have a "flat" spine in this vicinity while Group B boxes have an enlarged fin like spine like an upside down dorsal fin which is often damaged by the reduced ground clearance


www.8gordiniworkshop.pwp.blueyonder.co.uk_1234741669.webp
Sun Wheel Details​


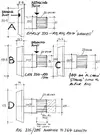
The group A boxes when compared to group B are inferior when examined like for like; for example the gears are narrower, synchro hub tapers are different, detent balls are 8mm compared to 10mm but most importantly the sunwheels are small in diameter and narrow 11.8mm (see drawing A)
The group B boxes have the larger improved size sunwheels 13.3mm, wider gears, better synchro design(R16), 10mm detent balls and the guided ball bellhousing casting to name a few. (see drawing B). Incidentally the 4 and 5 speed 8 Gordini boxes all hail from the group A design and have early sizes ,but the differential has been uprated by adding another pair of planet gears (4) and this therefore reduces the loading on the narrow design teeth by doubling the number engaged. To achieve this requires 2 extra cross pins which themselves require 2 extra roll pins to retain them . These pins can and do come out of their locations and can wreck a transmission

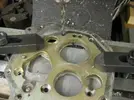
As a footnote to all this Mr Wheeler has found out that very late production 5 speed boxes have a strenghthened crownwheel and pinion we suspect this is as a result of renault revising their gearbox final drives around 1969 as any R 16 manual will show
The group C boxes have the drain plugs in a different location under the diff and are some 25mm approx longer measured from axle to bellhousing gasket face . This is due to its very large crownwheel size. These boxes utilize the large sunwheelas in drawing C and are the strongest production items available. Many other areas of the box are uprated and the true Monte-Carlo box has even stronger gear teeth.
WHAT COMPONENTS ARE INTERCHANGEABLE WITHIN GROUPS ?
Group A bellhousings can be upgraded to group B by directly swapping the items ,but the clutch input shaft also has to be exchanged as the oil seal position is different
The group A differentials can be directly swapped for the later group B type as an insurance to reduce the problems with weak sunwheel teeth. For example an R8 G 330 4-speed with a sheared sunwheel could be repaired by fitting the group B diff carrier complete or conversley a weak type replacement sunwheel could be fitted
The principle bearings are common to all ie; diff side bearings,but beware the internal bore differs in diameter one side to another. Pinion bearings can be replaced with care and have to be located with Loctite or similar industrial adhesive, however these tend to last the lifetime of the box
UNIVERSAL JOINTS
These can be grouped like the transaxles as follows:
Group 1: 1962-1972 from 956 R8 to 1300 R10 inc caravelle Alpine and Gordini models. This joint is standard and represents the most common and weakest and has a large rubber central bump stop located in a hole drilled in the Hardy Spicer centre. This hole seriously weakens the joint and failure is instant , with the cruciform breaking into 4 pieces. Wear rates are quite good due to its large needle bearing surfaces and dust/water free operating enviroment
Group 2: Renault offered a 'competition' UJ to suit the above models which simply did not have the drilled hole formed and hence is solid centered and resists fracture much better (these are now no longer available but Steve Swan can convert your standard ones with solid centres contact the home page for details)
Group 3: As group 2 solid centered but the inboard yokes are resplined to 23 spline x 25mm diameter to suit the bigger sunwheels found in the 364 box these are not available from Renault but we have had A batch made and may look at doing more if there is enough interest
Group 4: As group 3 but has big splines inboard and outboard for use with 'Big' Halfshafts something neither Mr Wheeler or Mr Swan has found neccesary ----------------------Yet!!


When U/J failure takes place, it is usually in association with sunwheel shearing. Due to the compact nature of the swing axle and its carrier, the flailing U/J yokes can jam against the tube. Loss of drive is then apparent, however if the U/J has only broken it is possible to gently move the car under power. ( or even qualify if you don't mind your vision going blurry at 100mph with the vibration) A note of caution must be made here, if you intend towing a car in this condition any distance suspended towing is recommended as the broken joint is now 'running' inside and against the axle tube. Considerable scoring and weakening of the tube can occur.


The standard joints are, in Renaults words, sealed for life and unrepairable. We repair the joints by substituting standard universal joints part no PUJ2211 (24 x 63.4mm) available from any bearing suppliers which are solid centred and uprate the joint to group B spec as well. These joints are designed to be circlip located and not staked as the originals were, so this involves machining grooves in the yokes for the circlips ,but then makes the joints serviceable as centres have to be replaced periodically when racing. I regularly check the backlash on the rear wheels and if it is excessive then I replace the centres. I have become quite good at spotting a U/J that has broken needles.
WHAT COMPONENTS FROM NEWER F.W.D. MODELS CAN
I FIT TO MY GEARBOX TO UPRATE IT ?


The fundamental differences between R12, R16,R18 and fuego 3xx type boxes when compared to the R8/R10 box is the omission of the 6 long M10 studs to each side case which allows the swing axle to be fitted. Ignoring the end casing differences what you have left is very similar to the 330 box contents, but the differential is considerably beefed up and uses large sunwheels(as sketch D ) which are slightly larger in diameter than the strong 364 box type
The main gear trains, gears, synchros, selectors, reverse idler and bearings are all very similar to the late type 330 boxes. it is only when we examine the later 2 liter and above engined cars that the components grow significantly in size. so we find that a large range of FWD models exist which under the current circumstances can provide a source of parts for swapping with RWD boxes. These vehicles can be sub-divided again by the way the crownwheel and pinion are installed in the casings i.e. an R8 crownwheel is located in the L/H side half case of the boxwhen viewed from the bellhousing , so is the R16 TL, TS, TX & R5 Alpine/Gordini, but the R12,R18and fuego are located in the R/H case And if fitted would give 1 forward and 4 reverse gears!
We use the good old R16 as a donor ; TL or TS for a 4 speed and TX for 5 speed. These complete drive trains/ diff etc can be persuaded to fit R8/10 casings withsome minor modifications to the casing to clear the larger crownwheel. The diff carrier is some 11mm wider than the original, which requires a suitable spacer between the casing and swing axle carrier to compensate for this.
The conversions are all slightly different in their details. The 4 speed uses all the gears and forks from the R16 box, but uses the R8/10 rods as the R8 endplate and shift mech are unchanged. The 5 speed conversion uses all the 5 speed parts and only the original sidecasings are used so these can be the early type with the detents opeded up to suit the later size parts. This means cutting a bigger clearance hole under the rear seat squab, but gives you a 5 speed box for your R8 without the need for any R8 5speed parts, you will of course have to make your own linkage, but this is not too complicated to do.
There were a few special tuning parts available for R8 boxes ' Mountain' Ratio kits and the 'mille tour' (1000 rpm drop) ratios these are quite rare and hard to come by so are outwith the reach. of most people, however there is an alternative
The Renault 365 gearbox was a close ratio box fitted to Alpine A310, R 12Gordini and R17 gordini. The best of these was the late mk1 17G box of types 365 33 and 34. These have the closest ratio's of any production Renault box and the synchro arrangement of 3rd and 4th gear is as mechanically strong as a light commercial vehicle. With a little modification these ratios can be fitted onto a R16 TX pinion shaft, which gives you a close ratio 5 speed box for your R8.
It is also possible, as I have just found out, to cut and shut a 4speed and 5 speed shaft to give the 4 speed final drive ratio on a 5 speed box, this is the most complicated of all the conversions and it is this conversion I will try to explain piece by piece on the next few pages.
The sunwheels (type D) are then shortened to R8 length to fit the universal joint. The result is a 364 style transaxle at a fraction of the cost of the genuine article. If you go down the route of the close ratio gears you actually have a very superior transaxle to anything produced by the Regie.
The next link in the transmission train are the universal joints, standard R8/10 ones will require boring out and resplining to suit the large sunwheels, or if you can find some 364 joints as in group C then fit straight on.​
 
GEARBOX PROJECT 2 sidecasings

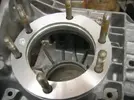
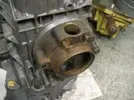
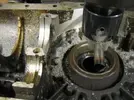
With the mainshaft finished with for now we turn to the sidecasings. This sequence of mods is common to all 'big' box conversions, except if your donor is a very late type in which case all the detents will be 10mm and not need increased​

www.8gordiniworkshop.pwp.blueyonder.co.uk_1243804831.webp
Then the holes are drilled

www.8gordiniworkshop.pwp.blueyonder.co.uk_1243804863.webp
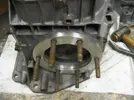
Spacer fitted to sidecasing

www.8gordiniworkshop.pwp.blueyonder.co.uk_1243804912.webp
Small setscrews are used to attach spacer

www.8gordiniworkshop.pwp.blueyonder.co.uk_1243804950.webp
Showing how the spacer works

www.8gordiniworkshop.pwp.blueyonder.co.uk_1235423613.webp
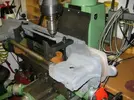
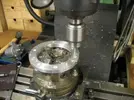
Machining casings for clearance

www.8gordiniworkshop.pwp.blueyonder.co.uk_1235423591.webp
Checking clearance 1.5 - 2mm will be fine

1235423566.jpg

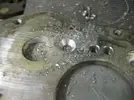
Detent holes opened up from 8mm to 10mm now reamed to final size

www.8gordiniworkshop.pwp.blueyonder.co.uk_1235423553.webp
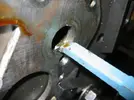
Cutting oilway for topshaft rollerbearing

www.8gordiniworkshop.pwp.blueyonder.co.uk_1235423533.webp
Sandy soda blasts the casings (not abrasive like grit or beads) spot the 'mystery' machine behind him answers on a postcard

www.8gordiniworkshop.pwp.blueyonder.co.uk_1235423509.webp
Ask not what you can do for your dishwasher, but what your dishwasher can do for you (make sure the domestic management is not on the premises though)

www.8gordiniworkshop.pwp.blueyonder.co.uk_1243804542.webp
Rear case machined away to clear 5th gear selector shaft

www.8gordiniworkshop.pwp.blueyonder.co.uk_1243804591.webp
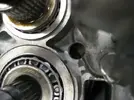
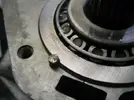
As you can see the bearing retaining pin has been lost

www.8gordiniworkshop.pwp.blueyonder.co.uk_1243804642.webp
Bearing pin rotated 180 degrees

www.8gordiniworkshop.pwp.blueyonder.co.uk_1243804684.webp
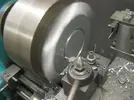
Trepanning alloy plate

www.8gordiniworkshop.pwp.blueyonder.co.uk_1243804723.webp
This gives a big hole for little swarf

www.8gordiniworkshop.pwp.blueyonder.co.uk_1243804760.webp
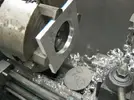
Then the o/d is trepanned

www.8gordiniworkshop.pwp.blueyonder.co.uk_1243804799.webp
Finally the spacer is faced to thickness​
 
GEARBOX PROJECT 3 bearing plate


We now turn our attention to the bearing plate which fits to the end of the sidecasings and locates the double taper roller bearings
On very late 5 speed boxes and NG boxes the topshaft bearing is an angular contact ballrace and not a double taper roller, Renault were obviously trying to save a few francs and give another 0.1 mpg so your bearing plate must be used with the bearing types you choose to use all from the same donor box
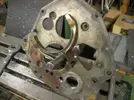
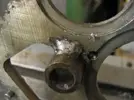
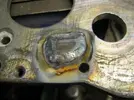
the simplest way is to use the 385 R16 or R5G plate this only needs 2 holes redrilling and 2 holes welded up but the endcase sits quite high needing a fairly large hole to be cut and made good in the rear seat squab area not a big problem on an R8 but would probably not fit an Alpine
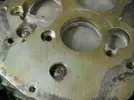
the sequence of pictures shows the work reqd to use the 365 plate this is the same as a 395 and would fit into an 8 or alp with minimal modifications​

www.8gordiniworkshop.pwp.blueyonder.co.uk_1236633533.webp
3 : Fitting support tube to plate

www.8gordiniworkshop.pwp.blueyonder.co.uk_1236633503.webp
2 : Making support tube

www.8gordiniworkshop.pwp.blueyonder.co.uk_1236633675.webp
6 : View of modified plate and selector

www.8gordiniworkshop.pwp.blueyonder.co.uk_1236633585.webp
4 : Welding support into plate

www.8gordiniworkshop.pwp.blueyonder.co.uk_1236633628.webp
5 : Checking fit of 5th gear selector

www.8gordiniworkshop.pwp.blueyonder.co.uk_1236633799.webp
9 : Milling blank flat

www.8gordiniworkshop.pwp.blueyonder.co.uk_1236633724.webp
7 : Cutting blank for welding

www.8gordiniworkshop.pwp.blueyonder.co.uk_1236633764.webp
8 : Blank welded into plate

www.8gordiniworkshop.pwp.blueyonder.co.uk_1236633971.webp
11 : This is all the mods reqd to fit a 385 plate to 330 casings what are you waiting for??

www.8gordiniworkshop.pwp.blueyonder.co.uk_1236633854.webp
10 : using a 385 plate to redrill drain holes and lower mounting

www.8gordiniworkshop.pwp.blueyonder.co.uk_1236634165.webp
14 : special bolt manufacture

www.8gordiniworkshop.pwp.blueyonder.co.uk_1236634037.webp
12 : Countersinking hole under selector mech

www.8gordiniworkshop.pwp.blueyonder.co.uk_1236634107.webp
13 : The difficult part! screwcutting the selector hole in the plate

www.8gordiniworkshop.pwp.blueyonder.co.uk_1236634316.webp
17 : Original 365 bolt (left) and special on right

www.8gordiniworkshop.pwp.blueyonder.co.uk_1236634203.webp
15 : setting up to screwcut

www.8gordiniworkshop.pwp.blueyonder.co.uk_1236634258.webp
16 : 1mm pitch to match internal thread pitch cut in plate

www.8gordiniworkshop.pwp.blueyonder.co.uk_1236634473.webp
19 : top view of mechanism very compact in reality

www.8gordiniworkshop.pwp.blueyonder.co.uk_1236634394.webp
18 : complete R17 selectors on 365 plate on R8 casings

www.8gordiniworkshop.pwp.blueyonder.co.uk_1236633473.webp
1 : Boring plate to take support tube​
 
Status
Not open for further replies.
Back
Top