There is more to life with TurboRenault.co.uk

Register a free account today to become a member! Once signed in, you'll be able to participate on this site by adding your own topics and posts, as well as connect with other members through your own private inbox!

Alpine Renault 8 GTT

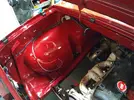
Brief update. I have started picking bits up and fitting them , more to create some space than anything else, there is a kind of plan which is finish from the dashboard forward , sort out the inside of the saloon , then turn it around and set to in the engine bay.
I spent part of the day straightening out the front bumper , this car has had a sore face some time in the past and an indifferent repair. The new front end is all GRP and possesses all the mechanical strength of a piece of chalk, so I made the decision to refit the front bumper and bracketry as it is quite a strong affair and will protect the front in the event of a car park ding situation , personally I think they look better with bumpers than without, it makes the car look longer and better balanced shape wise.
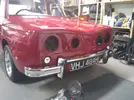
To recap how it arrived looking like it was recovering from a bout of Bell's Palsy
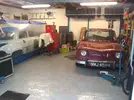
1. R8TT Oct (1).webp

and how it looks tonight the bits are in good shape and would respond well to rechroming as the original plating is of the `any less and they'd have missed' type
R8TT Apr (44).webp

Rear wheel thing appears to be working, but keeping mum until I know it works properly

R8TT Apr (43).webp

50 series tyres on the front not working, but the wheels are ok, you win some lose some
More soon..................
 
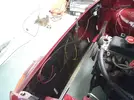
Still fighting with the front end, got a really awkward bit done tho. The main wiring harness comes through the double scuttle panels, it is a really tight corner and I am happier now it is done fingers are bloody sore now.

R8TT Apr (45).jpg

The detail shot. I'm using heat shrink as it is hard wearing and waterproof an old French electrics need all the help they can get!!

R8TT Apr (46).jpg

Onward............
 
Spent an enjoyable afternoon in the sunshine , messing about with odds and ends

R8TT Apr (48).webp

It's oddly therapeutic cleaning up old parts

R8TT Apr (50).webp

As it's getting fitted to plastic it needs it's own earth

R8TT Apr (49).webp

Back together again

R8TT Apr (51).webp

Tonight was back at the car
Wiring from scratch is a menace job , not my favourite thing at all..R8TT Apr (52).webp

wiring during

R8TT Apr (53).webp

Wiring after..........

R8TT Apr (54).webp


Last shot of the finished number plate lamp fitted

R8TT Apr (55).webp

More soon...........
 
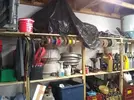
I don't know how organised or not most of you are, my set up is compact and covers most basic requirements for old car refurbishment.
The nut,bolt& washer Dept.. plus other sundriesIMG_20220421_204324853_BURST000_COVER_TOP.jpg


Wire and Heatshrink

IMG_20220421_204341574.jpg

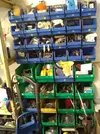
The usual Linbins full of old Renault bits. There used to be twice as many and twice as full

IMG_20220421_204435329.jpg

I am a guy who has some odd good ideas and lots more bad ones
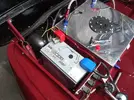
One of the better ones is that on nice shiny cars with lots of GRP it makes some sense to improve the vehicle earthing system
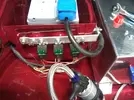
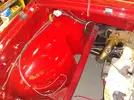
The pic is of the Earth Busbar which attaches the main battery earth to a strip which connects all the earths from the components in the front end

IMG_20220421_204446955.jpg


Today ended STEVE 1 - Wiring/plumbing Nil.

IMG_20220421_204451433.jpg

More soon................
 
Last edited:
No pics today
Steve - Nil Wiring - Nil
Trying to figure out what works and what doesn't, someone who shall remain nameless cut the wiring harness in half which is not helping, but nearly there now. It is hard to force the pace on this, as you can end up burning hours for no result. If this were my own car I would spend a bit more time in idle contemplation, but this is not mine and the clock is ticking.
I am also after a bit of general GT turbo information , if we say the cooling system is 3 parts engine-radiator, engine - heater and the last category , sort of added on drivel . I would like to know the flow through the manifold/carb/turbo, as this jigsaw I am building came in a cardboard box with no picture. I am using the R8 waterpump as it makes the main cooling circuits very much simpler so I need to create a cooling circuit for the added on bits any info on this gratefully received
More soon............
 
Dont worry about the water pipes to inlet manifold or carb base, they do not need to be fitted. Cant help with flow diagram, but you will need a bleedoff on top rad hose/hose to the top of waterpump, or drill the water pump for a bleed point like i have done. Pic of mine for reference. Its basically water pump to rad and back, top of water pump to matrix, matrix to header tank. Header tank opposite side goes back to the front of the water pump. Water pump small ports to turbo and back. Basic, yet works very well.

20200531_210314_IMG_3437.JPG
 
Last edited:
Thanks for that @Brigsy. The last time I did this we took the GTT motor and fitted it connected up what we needed and binned the rest it was 20 years ago and my memory is pretty hazy on it. I've dug out the nice refurbed carb and manifold, as I have to invent a throttle linkage for it. I also need to figure out all what pipe connections I actually need to use. I remember we did not use over half the bits that were present and a lot of pipes ended up blocked off. need to find a schematic of how it is all supposed to work and go from there.
Forgot one pic from Yesterday
It's Fizzog is finished

IMG_20220422_211730891.webp
More soon .............
 
Boost/vac pipework is super easy on carburettor. My preference for actuator pipe is to run it straight from the turbo compressor housing on a barb fitting. All you need after that is fuel pressure regulator reference pipe plumbed into carb top, and aei ignition module plumbed into inlet manifold under throttle so it sees vacuum, can tee in a boost gauge to aei if necessary.

Breather wise, remove one way valve on inlet and bung the hole with a short m8 bolt. Does it have servo assist? If not bin both valves and bung.

The pipe that goes to the sump on drivers side under water pump is an oil return on ph2, breather pipe on ph1 baffled sump. Can do away with that and block off, and simply run rocker cover to catch tank. I fitted an an10 breather into my sump as mine is heavily boosted, but not necessary on a basic setup.

Pic of my old carburettor setup for reference.

20120313_220744_IMG_0051.webp20120313_220755_IMG_0053.webp
 
Yesterday (Sun) Got a few hours in on the rear wiring harness
All pretty straightforward if slightly awkward

R8TT Apr (60).webp


The loom runs on the N/S have split it in 3 - coil/ sensors. Start/charge. and lights

R8TT Apr (61).webp

Finally the same shot with flash to show how much this colour changes in light. Dunno if this is because it's base and clear or not ?????

R8TT Apr (59).webp


More soon.........
 
This afternoon has been spent on Refurbishing a refurbished carb. !! I don't think that vapour blasting a carb really counts as refurbishing. I had to strip the choke out and the throttle plate as neither would work smoothly, better now can feel the abrasive on my fingers.
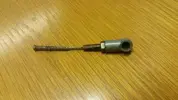
I will get a couple of pics up as I need some bits for the throttle linkage as I have to turn it thro. 90 degrees, so I need the carb connector short cable and balljoint, so I can make a crank up to adapt it to my original device (before the carb was turned around)
 
Can anyone here give me a heads up on a few bits and bobs
Needing manifold and turbo gaskets, any ideas on suppliers??? Also needing the short cable from the carb spindle with the ball socket end.

IMG_20220425_215324821.webp

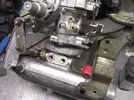
You can see my homemade adaptor to turn the carb 90 degrees, so I need the short cable to get lined up on the same plane as the screwdriver in the pic, which will have to turn at 90 degrees to the R8-R5 adaptor crank. This is a Renault 8 101, as the pedal has a step down ratio of about 2.5:1 meaning you have to step it back up at the carb end or you only get half throttle

All and any wisdom gratefully received................
 
Back
Top