There is more to life with TurboRenault.co.uk

Register a free account today to become a member! Once signed in, you'll be able to participate on this site by adding your own topics and posts, as well as connect with other members through your own private inbox!

9 turbo Phase 1 9 Turbo

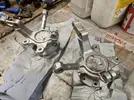
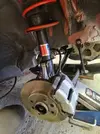
Threw some paint at the hubs

x20220422_190141_RS.webp

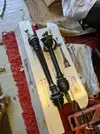
Got the reconditioned shafts out, flaming £300 to restore the original shafts!

x20220423_162213_RS.webp

Lobbed it all at the car with the new discs & pads too, only to discover the pads were rear pads, wrongly listed when bought which was annoying.

x20220423_181622_RS.webp

x20220423_181625_RS.webp

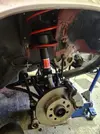
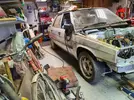
Back on its wheels, not maximum slammage but better.

x20220423_182309_RS.webp

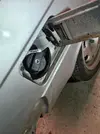
Refitted the fuel filler collar

x20220424_130954_RS.webp

Found the handbrake bracket thing i'd lost previously! Damn thing.

x20220424_131315_RS.webp

Started emptying out the boxes of parts and loosely placing stuff around, then couldnt help but try up my new headlights to start getting the wiring roughly placed, although a lot of it will need to be replaced as its shabby

x20220424_155931_RS.webp

x20220424_161324_RS.webp

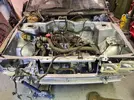
Decided to remove the oil cooler system to simplify, its a sandwich plate and rubber hoses with metal unions that go to the side of the rad. Ive bought a non-oil cooler rad, and an M20 oil filter screw thing (cheers for the tip @Brigsy ), more on that next time.
 
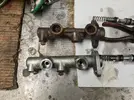
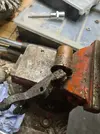
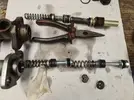
Been having issues getting the brakes anywhere near so gave up with messing with the new (but different) brake master. Even the p/n on the original microfiches lead to this cylinder but its not the same. I took it off and looked to see if I could use the guts in the original cylinder.
x20220507_163632_RS.webp

Nope

x20220507_163627_RS.webp

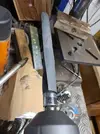
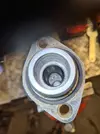
So while I spend months or years trying to source the right cylinder I decided to clean the old one up as best I could and use that for now. It actually came up really well with various abrasives and cleaners, all the rubber looked very good considering. The difficult bit was the inside of the cylinder being so deep, eventually I cobbled together a 10", 1/2" drive extension, with numberplate tape stuck to it and fine grade wet & dry paper stuck to that. I gave that a razz around the inside of the m/c and it came up great!
x20220507_165959_RS.webp

x20220507_170025_RS.webp

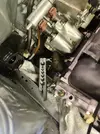
Bunged it back on and realised this is 4 x M10 ports, the other was 2 x M10 and 2 x M12, so I had to cut the flares off and reflare 2 pipes on the car, pain in the arse!
x20220507_173924_RS.webp

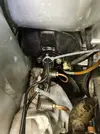
Got it done, and in, did a bunch of pressure bleeding, and I now have a brake pedal :) (the zip ties are to stop the push fit feeder pipes popping out with ~30psi from the pressure bleeder in the system, usually this is just gravity feed)
x20220508_172657_RS.webp

Short update, yes, but it means I have a usable handbrake and footbrake now, thats a significant step forward in major systems.
 
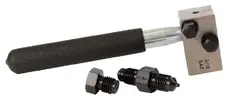
@DaveL485 that flaring tool 😩

If you've got a few flares to make, do yourself a favour and pick up one of these 'powerhand' tools.

View attachment 201606

Thank me later.
I've got a posh flare mate that 'orrible one is only for this type of situations where I am limited on space and I need a really thin width on the flare. I couldnt get the union back far enough for anything bigger.

20220409_173055.jpg
 
Joy
For what it's worth I found an extension in the tool section in B&Q which is about 300 mm long with a hex for the cordless at one end and a 6mm hole with a couple of grubscrewa at the other perfect for small flap wheels etc at the bottom of long holes. Too late I know
 
Reminder to self - fit the f'king reverse switch sensor BEFORE you fill the gearbox oil - fuming!

x20230506_191752_RS.jpg

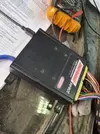
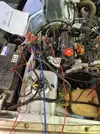
I stuck the 9 in the work area to see if I could get the lump to fire now the red 21 is movable, so I threw the engine oil and gearbox oil in, connected up the fuel pipework and an EFI fuel reg and made sure that was fuel tight with a feed to the pump. Seemed to be OK. Next I dragged out the ECU, engine loom and coils etc and started plugging it all in loosely to see what would happen. I managed to pick up a ready made EFI loom for the C1J so I only had to change the TPS plug, then wire up power and ign and fuel pump, then set up the trigger wheel config, aux out for the fuel pump and a couple of other bits.

x20230507_174541_RS.jpg

x20230507_174535_RS.jpg

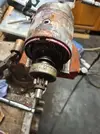
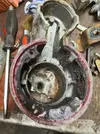
I cranked that bad boy over and it was popping out the inlet, so I switched up the HT lead pairing and cranked it and IT FIRED UP! But ran too high, maybe 4k rpm so I killed it. Once I figured out why it was revving too high (forgot to bung a fitting on the inlet) I cranked it again and it wouldnt bloody start like it did before and within a few short cranks the starter motor died. Knew I should have got a new one! I tried stripping and cleaning but an hour doing that got me maybe 5 secs of cranking before it went super slow again (like a dying battery, but the battery wasnt dying). Had a mardy, turned everything off and ordered a new starter off autodoc!

x20230507_174549_RS.jpg x20230507_174551_RS.jpg

x20230507_174555_RS.jpg

But....it definitely ran. I'm not making it up, honest!
 
New starter here... wrong one! Too many teeth on the ring engagement sprocket. Ordered another one.... sigh.

@sparkie or @Brigsy I sat the dizzy back in place to plug the hole, but I didnt put the drive key in the bottom so it wont spin. This wont affect anything else will it? I dont need the dizzy as its wasted spark now.
 
Oh! Thats BAD.

Its run as well, I hope I havent f'ked it! Christs sake.
I'm going to wasted spark om my C1j turbo build for my R8. (R8 GT Turbo Too) So, how much of the dizzy is needed? Just the gear thingy that turns the pump, or do I need something to keep the gear in place?
 
Back
Top