dan_rt
Member
Had this car for near on 12 month now so thought it was about time I got my finger out and wrote a report on it.
Back end of last year the cambelt wen't on the Mrs's Astra, while it was off the road being repaired she needed a run around......I stumbeled upon this coupe on the bay and we went halves with the intention of us tidying it up once the Astra was back on the road and using it as a weekend toy once complete as I had alway's fancied something with an 'F7' power plant.
Mileage 119k, 10 Stamps in the book with last belt and tensioner change @ 90k
Anyway went to pick it up and brought it back to base.
Few shots:
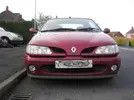
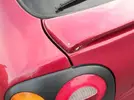
The spoiler is like this at both ends... probably due to previous owners opening the tail gate with the spoiler :twisted:
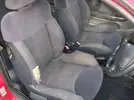
Worn bolster... all the cloth ones seem to be like this
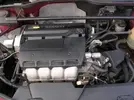
The power plant that is the F7R-710
Small scuff on bumper
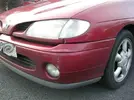
Arch's
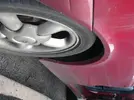
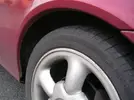
The beach....
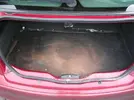
Some muppet had had the CD changer away :twisted:
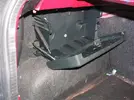
After the initial 'inspection' I noticed there were a few bit's that wanted sorting before being used by the Mrs to commute to work in.
I got hold of somebody on the bay breaking a coupe and got the washer bottle cap and battery clamp posted.
Clamp fitted......better than the rag that was shoved in there :roll:
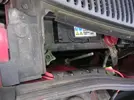
Cap on
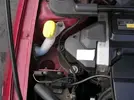
New genuine aux belt on (better than the previous one that was split in secions length ways and various secions of v were missing.
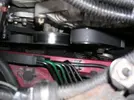
Looking through the service book there was no evidence of anything being carried out for the last 20k so I did an oil, filter and plug change.
The car was then used daily untill the tax ran out in Feb so I pulled it off the road as the Astra was back on the road for her. No 'real' issues in the 5k+ it coverd only the drivers door handle not opening but a dose of WD sorted that!
[BREAK=Some Parts Sourced]
The car was now off the road so the progress can commence.
The drivers side outer window seal was shot, I diddn't fancy paying new prices so off to source a 2nd hand one. Perusing the bay I noticed a Ph2 breaking for spares, being a 51 plate the rubber would be in a lot better condiditon. I noticed the car also had leather.... so asked the question and the deal was done!
Here is the haul and it only cost a ton! About the same price as the window seal from the stealers. When I turned up to collect it I got a lot more than I bargained for!
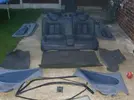
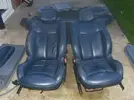
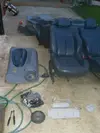
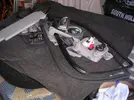
The leather was in 'fair' condition as usual just the drivers seat letting it down. Any how have it the once over with some blue shoe polish, blue leather cleaner and then a couple of goes with the Mer leather cleaner and feed.
Before.....
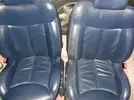
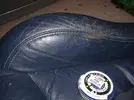
After.....
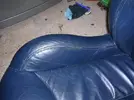
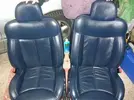
[BREAK=Installing the interior and sorting drivers window seal]
Offending seal....
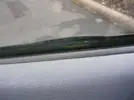
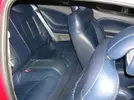
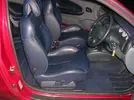
Interior Removal...
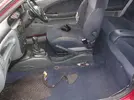
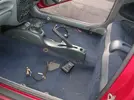
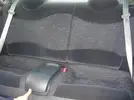
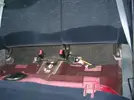
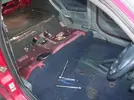
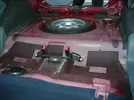
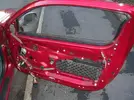
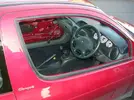
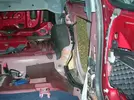
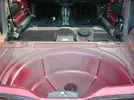
Obviousley the interior got a good chover and going over with uphoulstery cleaner.
I got a new boot carpet with the lot of bits I got from eBay so decided to use that as it less resembled a sea side resort.
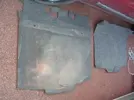
The loom on the bottom of the seats are different as it is ph2 leather and a ph1 car, the ph1 doesn't have air bags in the seats also the connections for the pre tensioners are different so had to splice the old connectors on.
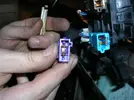
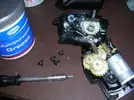
The drivers side rear window wasn't playing ball so stripped it down an not it is
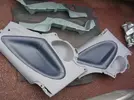
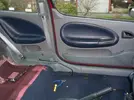
Fitting.....

[BREAK=CD Changer, tail gate struts]
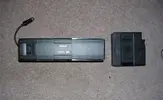
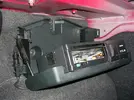
Noticed chunkster on the forums had some coupe parts for sale, the deal was done on a CD changer and fitted it was.
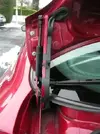
Tail gate was a mare to open and wouldn't stay up spoperly, in the haul of parts I got from eBay were 2 tail gate struts so got them fitted.
I also decided that the gear knob and speaker grills on the parcel shelf were looking a bit tierd so decided to spray them.
Sanded and primed....
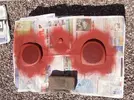
Sprayed and laqured
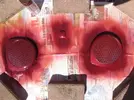
They are now fitted, will get pics up.
[BREAK=More Parts]
There was no question about it, the Coupe was in need of disc's and pads all round.
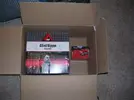
So picked up this lot:
Front disc's and pads (It has a 280mm setup up front)
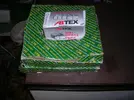
Rear disc's with bearings already in and ABS rings and Mintex pads.
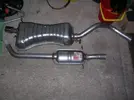
A Tinex Exhaust I picked up from someone on Coupe Club breaking a car due to cambelt failure. It was good as new doesn't look like it had been on very long at all
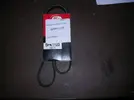
While there I was offerd and accepted a Gates aux belt at a good price
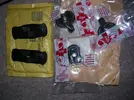
Also got new mounts as the current ones were let's say 'past their best'
[BREAK=Fitting the exhaust & Prepping rear arch's]
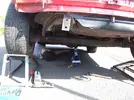
Up it goes...
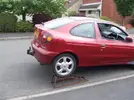
Yes the drivers side rear spat is missing but I am in the process of sourcing one, they seem to be rare as hen's teeth.
The car has a tow bar decided to take it off out the way for now....
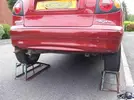
Rear bumper off....
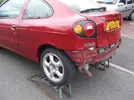
After a clean with jet wash.... rear arch's were done also...
All the 13 years worth of mud etc caught around the fuel filler pipes were also removed.
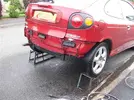
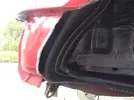
Decided to attack the rear arch's, they were just starting to go but not to far gone to be saved.
Drivers side....
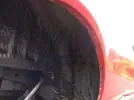
Passenger side...
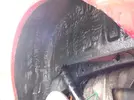
Ground back...
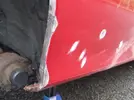
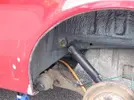
Treated...
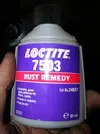
Primed up for now...
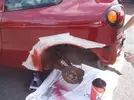
Also applied underseal to the rear arch's
Next job to hit, the exhaust.
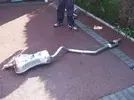
It was siezed solid at the joint so out came the hack saw as it was being dumped any way...
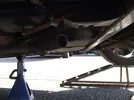
The centre section diddn't take much...
Laid up....
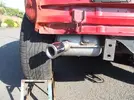
Fitted.....
[BREAK=Time to give the front some attention]
Bumper off....
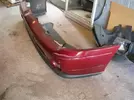
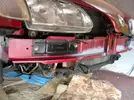
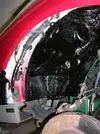
Arch liners removed....
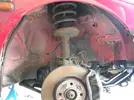
Cleaned all the mud from within.
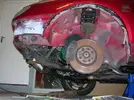
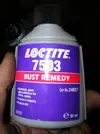
Ground the little but of rust back and applied some of the rust treatment.
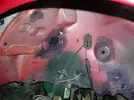
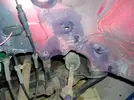
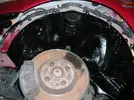
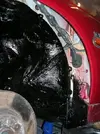
Gave the front arch's a fresh lick of underseal.
[BREAK=Front Suspension]
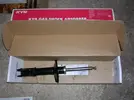
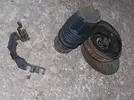
When the struts were removed they were leaking and not looking to clever so a new pair were sourced.
KYB Gas ones.
Any how here is the transformation:
Before.....
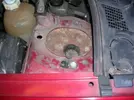
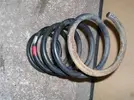
After a lick of paint...
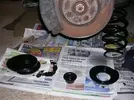
Bearing stripped cleaned and re greased.
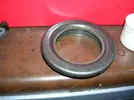
Ready to assemble...
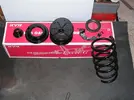
Built up....
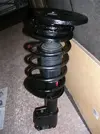
Fitted.....
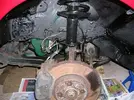
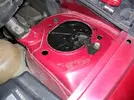
[BREAK=Spoiler Prepping]
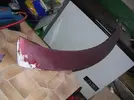
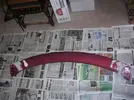
Decided to attack the spoiler.
Removed all the lose paing etc and filled the gaps, here it is after a sand ready to be primed.
[BREAK=We have a leak!]
Went in the garage and noticed that there was a puddle of water on the floor, after further investigation it was coming from the rad.
So stripped it off and went about sourcing a new one.
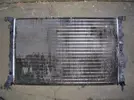
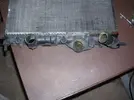
New and old...
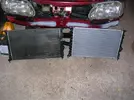
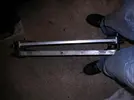
Gave the fan bracket a rub down and lick of paint.
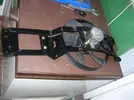
And got it fitted....
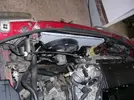
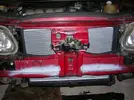
While I was at it I cleaned up the K&N and gave it an oil. You would not believe the amout of crap that came out of it.
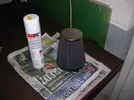
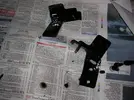
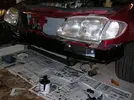
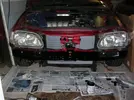
Also gave some bracket's that hold the plastic cover above the rad and the front cross member a freshen up
[BREAK= Bit of bodywork]
Before we got hold of it there had been a slight mishap with the front bumper.
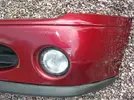
There were also a couple of other bits that would need a slight touch up and polish.
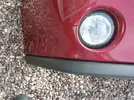
So got the main area sanded and a coat of primer on a localised area of the bumper.
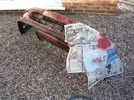
[BREAK=Stoppers and some bodywork]
Right, progress has been slow it has been sat in the garage looking and feeling sorry for itself only started on occasion. This bank holiday we decided to get something done on it.........
Decided to get these fitted, to clear some space in the shed (no doubt for me to fill with more crap).
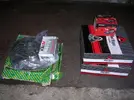
Yes a simple task you may thing....
Decided to start up front, first task remove the two T30 disc retaining screws. Started on the N/S first one came out a piece of cake the other one was a little more stubborn. Gave it a dose of WD then came back to it the screw diddn't want to budge but I could see my T30 bit twisting in it's holder :evil: anyway loaded the ratchet up with enough torque just before it started to deform the bit and gave it a few hard belts with the hammer and it shifted. They were both siezed up the other side but this method got 'em out! Some people need introducing to a marvelous invention called copper grease! After that I thought I was on the homeward straight,, but no! The disc diddn't want to part company with the hub. Gave it numerous belts with a large ball pein hammer but it diddn't want to move, so off to get the 4lb lump hammer it still diddn't want to shift but eventually this happened....
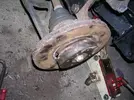
So just chiseled away at the part of the disc still siezed up to the hub and used the crow bar and persuaded it that it was picking a fight with the wrong man.
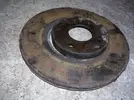
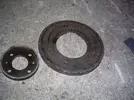
Gave the hub a grease up to prevent a reoccurance.
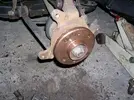
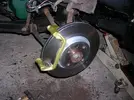
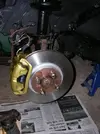
Gave the discs a clean then the flange a lick of silver paint. Painted the calipers and carriers gold, creased up the retaining screws and got them fitted.
Next onto the rears....
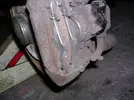
Yes that is WD not brake fluid.
Disc off, pads and carrier off and was faced with this after a quick clean up.
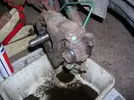
Yes the seal/gaitor on the piston is shot, so will need to source a replacement.
Gave the rears a lick of paint to match the front..
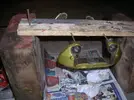
Gave the retaining bar/shim a going over with the wire brush and emery cloth.
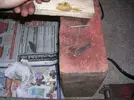
Then offered the new disc up.
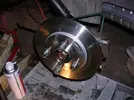
When I removed the studs to take the wheel of I noticed that they were rather stiff, so gave them a once over with the wire brush and a bit of copper grease.
Same the other side, the seal was shot also.
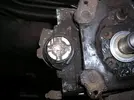
(Yes that is brake cleaner not brake fluid)
All back together....
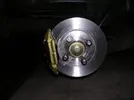
The rear arch's and bumper were also sprayed with colour and laquer and will be ready for a polish when we get round to doing the rest of the car prior to the MOT.
We also managed to get 2 of the 4 alloys sanded back..... will get pics up!
Well something needed to be done about the dust seals on the rear calipers, went down to Renault, they wanted £40 for the gaitors needles to say I declined.
I picked up a full rebuild kit for the grand sum of £24 from the bay. Yes it is from 'Big Red' which I know people have issues with....all I can say is the kit came complete as described.
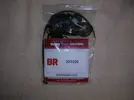
Anyway the calipers are working fine so I will just use the dust seal out of the kit. The N/S/R is fitted.... diddn't get a pic but it is done.
Need to get the other side done and give it a brake fluid change and that is the brakes completed.
9th May 2010....
Got the O/S/R seal fitted.
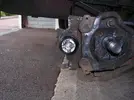
Seen as the all discs and pads had been changed it made sense to do a fluid change.
This shot was meant to show the colour of the fluid in the reservoir but you can't really see.
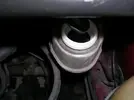
Anyway, this was some of the fluid that came out.....
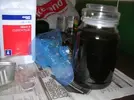
I also gave the reservoir a clean up while I was at it.
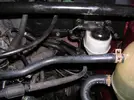
The brakes are now finished.
[BREAK=Wheels & Fuel Filter]
15th May 2010
Replacing the fuel filter had been on the 'To Do' list for a while. I had noticed that the mounting bracket had snapped while undersealing so this would have to be resolved also.
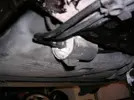
The filter that was fitted was a Renault Puraflux and looks original :roll:
I picked up a couple of fuel filters up off the bay at a good price. Below is the one I fitted.
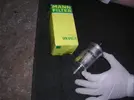
All is in order again.... a bit safer than it was before
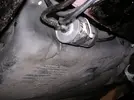
Next task was to crack on with the laborious task sanding of the wheels. Sam had done 2 1/2 ........She found out that the centre of the wheel just held her beer nicely :lol:
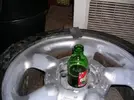
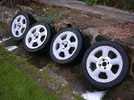
Anyhow we got all the wheels sanded back ready to be primed and have them a wash. However we will need to go and see my man down at the tyre place as 2 have knackerd valves and won't hold any pressure. The reprobate I bought them from had some max power valve caps on which siezed on and he must have 'attempted' to remove them breaking the valve in the process! Anyhow it needs sorting and it makes sense to get it done before spraying them up.
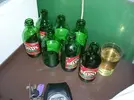
We had a few 'refreshments' to ease the laborious task of getting the wheels sanded. :lol:
In addition to the above we also managed to get the undersealing and waxoyling comleted. At present she is up on axle stands in the garage taking the weight off her legs :lol: Hopefully tomorrrow we shall get the arch liners back in place and bumpers fitted.
[BREAK=MOT Booked]
Got both front and rear bumpers fitted and all 4 arch liners fitted. The spoiler has been fitted and t-cut, looks a good match and finish for rattle cans. Number plates are also fitted.
MOT Booked in for 8am this Saturday (29th May 2010).... fingers crossed
Once she has passed, new plates will be orderd to tidy her up and it willl get a full machine polish, resin polish and wax prior to it being taxed then hopefully be going to FCS
Friday 28th - After getting in from work, gave the car a once over, checked all bulbs put some fresh fuel in and swaped the rear tyres over for the 2 that had been sanded down as the tread on the current 2 rears were debatable as to wether it met MOT requirements or not :lol: The N/S screenwash jets were blocked so unblocked them and called it a night.
Saturday 29th, up early and primed the engine and Sam drove us to the pre booked MOT.....it passed :lol:
After getting home from the MOT we had planned on washing it and machine polishing it but the rain put the dampers on that. So decided to crack on with the wheels. As I mentioned previousley 2 diddn't hold pressure due to the valves being shot. So in went the wheels to the back of Sams cars and we set off to see my 'contact' at a tyre fitting place.....when we turned up it was shut :twisted: :twisted: We then tried a few other places to see if they would do back handers as I refuesed to spend the best part of £20 getting 2 valves replaced and wheels balanced. Eventually I struck gold and the deal was done. :lol: We then got the wheels back to base.
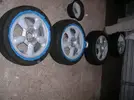
The wheels were wiped down with surgical spirit and masked off.
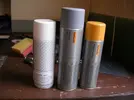
The primers that we will be using....
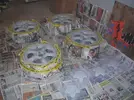
Here is the first coat of 'acid etch'
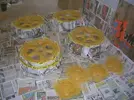
Then a coat of 'filler primer'
Then the final coat of box standard grey primer.....we will eventually be putting colour on honest
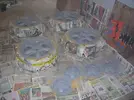
Then for the colour, Sam and I had been depating what colour to go for but we settled on 'Ford Graphite Grey'
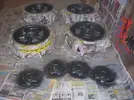
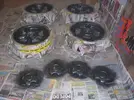
After a few coats and masking off we have wheels....
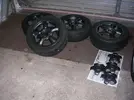
I then let Sam loose with the tyre marker, she seemed to have the nack to it :lol:
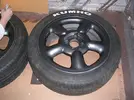
That was the wheels complete.
I then added a bit of the good stuff to the tank.
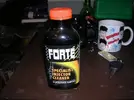
Sunday 30th, the weather looked good today so up we got and cracked on with the task of valeting it and bringing the paintwork up to scratch.
Here is what we did....
1 - Gave the car a wash
2 - Dried it off with the leaf blower
3 - Machine polished it with 3M perfect it and a sponge pad
4 - 1 coat of Auto Glym Super-Resin Polish
5 - 1 coat of Conilite Wax to seal it
6 - Windows cleaned inside and out
7 - Plastics dressed
It was worth the effort. I will get pics up of the finished article, we are just awaiting the number plates to tidy it up.
Monday 31st
Got the tyres dressed
Also decided to give the cooling system a good flush, the rad was new and the water was staying reasonably clear but it coule be better. I thought this stuff could get to work on the heater matrix and block....
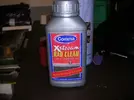
Well I ran that through on fast idle for 30 minutes and it seemed to get to work quite well.
I also gave the system another couple of flushs and it is currently say with water in at the moment.
The plan is that once it is on the road and the water stays fairly clear to add the correct coolant and also re seal the stat housing which are notorious for leaking on these lumps.
[BREAK=Ipod/Aux in]
15th August 2010
Well I haven't updated for a few weeks now mainly because I haven't done anything on it So today I decided to get my finger out and crack on.
First task was to sort the exhaust,, it was banging on the boot floor when driving and even at idle. Reversed her up on the ramps and, adjusted the joint where the centre pipe meets the cat such that there was more overlap on the joint. I then adjusted the rear joint where the back box meets the centre pipe. Took the car out for a quick spin and over a few speed bumps and it seems fine. So that is one thing to cross of my list.
Next thing was to re attach the tow bar. We had removed it when we took the bumper off,, it has had a couple of coats of Hammerite and now is back on.
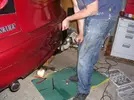
I recently aquired myself an iPod touch, now there was nothing wrong with the standard stero with the CD changer I just wanted to be able to put my iPod through the standard HU. I wanted a solution that looked OEM so that ruled out one of the tape adaptors.
So I bought myself an FM modulator. For those of you that don't know what this does it basically sits between the aeriel and the HU and accepts a stero input via phono leads. I tapped a switched power supply from the back of the cigar lighter.
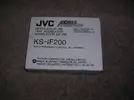
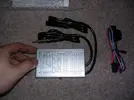
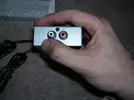
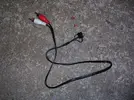
I decided to make myself up a loom....
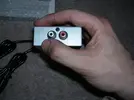
Which I installed here....
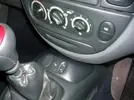
Now all I have to do is tune the HU into a pre defined frequency and plug my iPod in and hey presto.
I then decided to call it a day.
The 'To-do' is as follows:
I will then feel comfty in putting it into daily service again.
[BREAK=Cambelt & Oil Leak]
4th September 2010.
Popped down the factors this morning to pick up some box oil to give that a change.
I decided I would tackle the cambelt/oil leak first that is coming from the N/S of the block. Now these things are never as straight forward as you can imagine.
Crack of the crank pulley bolt no issues. When I came to remove the top engine mount I find that it is shot. It was on my radar to take a look at as it diddn't look in the best condition from just looking at it but this.....
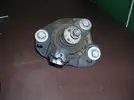
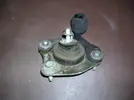
Yes the section of rubber with the bolt in it is totally detached. So I am after a replacement. I have been in touch with buypartsbuy to see if they come good, else an alternative will have to be sourced.
Got the lump supported and took the plugs out to make it easier to turn over. I took the bottom plastic belt housing off and there was a bit of engine oil in there. I got the other plastic cover and the top metal cover off (one of the bolts was missing from the top metal cover so I will have to find a suitable substitue from my array of random bolts I have). Now there was a bolt inside the plastic cambelt housing obviously left in there by the previous reprobate that changed the belt.
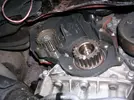
I set #1 piston to TDC and removed the belt.....
Looks like I got there just in time :roll:
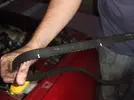
It was a Gates belt though, just a shame they diddn't put everything back together properly when they last changed it.
Now I *seem* to have found the source of the oil leak, which looks to be coming from around the aux shaft. The area inside the plastic belt cover surounding the aux pulley is damp with engine oil,, also outside the belt cover around where the aux shaft goes into the block seems to be wet with engine oil and the surrounding area seems to be sprayed a bit ie around the gaitor on the rack etc. I am guessing it is just a case of removing the aux pulley, removing the back cambelt plastic cover and replacing the oil seal?? Hopefully this will be viable with the engine in situ?
Now the leak coming from this oil seal would explain why the leak only seems to occur acter the car is parked up after a drive...
Anyway, obviously there was no point putting the new cambelt on untill I have sorted this oil leak.
I will get some more pictures of the leak to see if any of you guys can confirm this or have any other ideas.
11th September 2010.
Today we went down to the the local Renault parts desk to be relieved of £13.55 for an aux shaft oil seal.
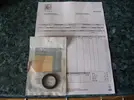
After returning home I decided I really needed to get the aux pulley removed. So as per the advice of Neal (Thanks ) I refitted the old cambelt, had my assistant in the car on the brakes and in 4th tried cracking the bolt with the 15mm spanner but it was slipping on the teeth of the belt. So held the belt to the pulley with a pair of pliers and the bolt cracked off.... result :lol: I was half expecting the pulley to require a bit of persuasion to be removed from the shaft but I just pulled it off with my bare hands.
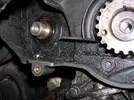
I think it is safe to say we have a leak!
I then removed the rear plastic cambelt cover
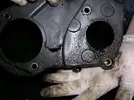
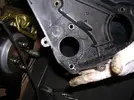
On further inspection of the crankshaft front oil seal, it looked to be weeping very slightly so I have a new one on order from the factors. While I was down there I picked up some RTV Silicone.
12th September 2010
Fabricated a puller to remove the crank pulley and got it removed...
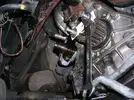
The seal is not too bad in the grand scheme of things, however as everything is stripped down it makes sense to change it.
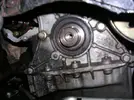
I gave the front casing from around the aux pulley a degrease and clean up
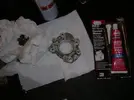
Then got the casing fitted along with the oil seal.
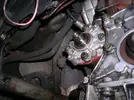
21st September 2010.
Had an hour or so spare this evening so decided to crack on a bit more.
Cleaned and degreased the side of the block that sits behind the lower cambelt case and crank oil seal. I then removed the crank shaft oil seal.
Here we have the aux and crank oil seals side by side.
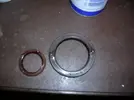
Got the new crankshaft oil sealed lubed up in some fresh engine oil and got it fitted.
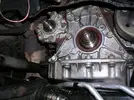
Bad picture it looks like the internal spring that sits against the internal side of the seal is showing the spring... its not its just the flash on the cam playing tricks..... I actuall went back out and removed the cambelt to be 100% sure.
The plastic cambelt covers were cleaned up and all the oil and other reminants were removed.
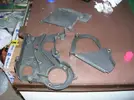
I then went about fitting the inner plastic cambelt cover and crank pulley back on.
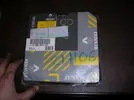
Here is a bargain genuine cambelt I picked up from eBay for the price of £1.04, it would have been even more of a bargain if I diddn't have to pay the £4 p&p but can't complain to much I guess :lol:
I then got the engine timed up and the belt in situ.
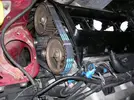
The belt still needs tensioning, however I decided to call it a night.
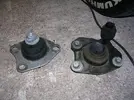
The replacement engine mount arrived today; spot the difference
[BREAK=Getting it back on the road]
Got the cambelt tensioned and and the engine running again.
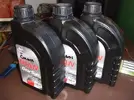
Next step was to change the box oil, no pics of the old oil but what came out diddn't look to bad coupled with the fact that there is a non factory hub nut on the N/S shaft leads me to belive it must have been changed at least once in it's life.
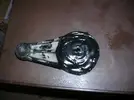
Took the dogbone/rear mount off and Tiger Sealed it. In addition with the new top engine mount and box oil the gear changes are a lot more precice!
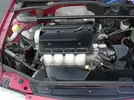
I sprayed the engine/box and are where the aux shaft had been leaking with engine degreaser and worked it with a brush then got the pressure washer out to finish up. I guess I should have really taken a before and after pic, however a vast improvment was made.
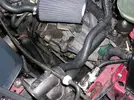
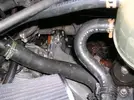
One final task was to finish off the cooling system. The system had Previously been flushed and I had left water in the system, however it had been parked out on the road and the temeratures had been dropping so I had to drop the contents out. While I was at it I decided to re seal the stat housing as it had a very small leak and I had the RTV silicone I used on the casing of the aux shaft anyway. Once sealed up I gave the system another quick flush in both directions then added the correct concentration of anti-freeze and bled the system.
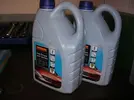
Basically it is now at a stage where I am comfty putting it into daily service; at present it is Sat in the garage plugged into the a maintenance charger untill it is insured.
[BREAK=On The Rollers]
6th November 2010
RenaultOnline.net rolling road day. Put out a respectable 132bhp at the wheels not bad after 14 years and 125k.
[nomedia="http://www.youtube.com/watch?v=t5V8BYZA3wE"]YouTube - Megane F7R rolling road‏[/nomedia]
[BREAK=Stat Housing]
5th December 2010
Finally had to bite the bullet and spend the £38.41 on a new stat housing. I had tried twice to seal the old one up but to no avail. After picking it up from Renault (and having a laugh at a fool in there paying nearly £37 for 5ltr of GM 10w/40 semi synthetic oil) I stopped off at the factors for some screen wash, anti-freeze and box of gloves.
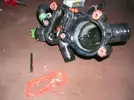
You can see below that the oval apature has pretty much had it, one length of the internal channel has tottaly snapped off and the other is getting there.
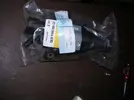
The new replacement
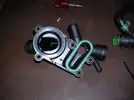
Transfered everything over, the thermostat was changed a couple of months ago so got everything fitted and bled the cooling system yet again. Hopefully this will be the end of the old girls incontinence issues :lol:
Also changed the O/S headlamp bulb as it had blown.
[BREAK=Update...]
Well haven't updated it for a while.
It turned 130k a month or so ago so gave it an oil, filter and plug change. Noticed that one of the plugs wells contained oil so ordered a new cam cover gasket and got that fitted and cleaned up.
Took it for it's MOT and it passed with no advisories
Back end of last year the cambelt wen't on the Mrs's Astra, while it was off the road being repaired she needed a run around......I stumbeled upon this coupe on the bay and we went halves with the intention of us tidying it up once the Astra was back on the road and using it as a weekend toy once complete as I had alway's fancied something with an 'F7' power plant.
Mileage 119k, 10 Stamps in the book with last belt and tensioner change @ 90k
Anyway went to pick it up and brought it back to base.
Few shots:

The spoiler is like this at both ends... probably due to previous owners opening the tail gate with the spoiler :twisted:

Worn bolster... all the cloth ones seem to be like this

The power plant that is the F7R-710

Small scuff on bumper

Arch's


The beach....

Some muppet had had the CD changer away :twisted:

After the initial 'inspection' I noticed there were a few bit's that wanted sorting before being used by the Mrs to commute to work in.
- Battery Clamp was missing
- Aux belt wasn't looking to clever
- Washer bottle cap missing
I got hold of somebody on the bay breaking a coupe and got the washer bottle cap and battery clamp posted.
Clamp fitted......better than the rag that was shoved in there :roll:

Cap on

New genuine aux belt on (better than the previous one that was split in secions length ways and various secions of v were missing.

Looking through the service book there was no evidence of anything being carried out for the last 20k so I did an oil, filter and plug change.
The car was then used daily untill the tax ran out in Feb so I pulled it off the road as the Astra was back on the road for her. No 'real' issues in the 5k+ it coverd only the drivers door handle not opening but a dose of WD sorted that!
[BREAK=Some Parts Sourced]
The car was now off the road so the progress can commence.
The drivers side outer window seal was shot, I diddn't fancy paying new prices so off to source a 2nd hand one. Perusing the bay I noticed a Ph2 breaking for spares, being a 51 plate the rubber would be in a lot better condiditon. I noticed the car also had leather.... so asked the question and the deal was done!
Here is the haul and it only cost a ton! About the same price as the window seal from the stealers. When I turned up to collect it I got a lot more than I bargained for!


The leather was in 'fair' condition as usual just the drivers seat letting it down. Any how have it the once over with some blue shoe polish, blue leather cleaner and then a couple of goes with the Mer leather cleaner and feed.
Before.....


After.....


[BREAK=Installing the interior and sorting drivers window seal]
Offending seal....

Interior Removal...


Obviousley the interior got a good chover and going over with uphoulstery cleaner.
I got a new boot carpet with the lot of bits I got from eBay so decided to use that as it less resembled a sea side resort.

The loom on the bottom of the seats are different as it is ph2 leather and a ph1 car, the ph1 doesn't have air bags in the seats also the connections for the pre tensioners are different so had to splice the old connectors on.

The drivers side rear window wasn't playing ball so stripped it down an not it is


Fitting.....


[BREAK=CD Changer, tail gate struts]
Noticed chunkster on the forums had some coupe parts for sale, the deal was done on a CD changer and fitted it was.


Tail gate was a mare to open and wouldn't stay up spoperly, in the haul of parts I got from eBay were 2 tail gate struts so got them fitted.

I also decided that the gear knob and speaker grills on the parcel shelf were looking a bit tierd so decided to spray them.
Sanded and primed....

Sprayed and laqured

They are now fitted, will get pics up.
[BREAK=More Parts]
There was no question about it, the Coupe was in need of disc's and pads all round.
So picked up this lot:
Front disc's and pads (It has a 280mm setup up front)

Rear disc's with bearings already in and ABS rings and Mintex pads.

A Tinex Exhaust I picked up from someone on Coupe Club breaking a car due to cambelt failure. It was good as new doesn't look like it had been on very long at all

While there I was offerd and accepted a Gates aux belt at a good price

Also got new mounts as the current ones were let's say 'past their best'

[BREAK=Fitting the exhaust & Prepping rear arch's]
Up it goes...

Yes the drivers side rear spat is missing but I am in the process of sourcing one, they seem to be rare as hen's teeth.
The car has a tow bar decided to take it off out the way for now....

Rear bumper off....

After a clean with jet wash.... rear arch's were done also...
All the 13 years worth of mud etc caught around the fuel filler pipes were also removed.


Decided to attack the rear arch's, they were just starting to go but not to far gone to be saved.
Drivers side....

Passenger side...

Ground back...


Treated...

Primed up for now...

Also applied underseal to the rear arch's
Next job to hit, the exhaust.
It was siezed solid at the joint so out came the hack saw as it was being dumped any way...

The centre section diddn't take much...

Laid up....

Fitted.....

[BREAK=Time to give the front some attention]
Bumper off....

Arch liners removed....


Cleaned all the mud from within.

Ground the little but of rust back and applied some of the rust treatment.


Gave the front arch's a fresh lick of underseal.


[BREAK=Front Suspension]
When the struts were removed they were leaking and not looking to clever so a new pair were sourced.
KYB Gas ones.

Any how here is the transformation:
Before.....


After a lick of paint...

Bearing stripped cleaned and re greased.

Ready to assemble...

Built up....

Fitted.....


[BREAK=Spoiler Prepping]
Decided to attack the spoiler.
Removed all the lose paing etc and filled the gaps, here it is after a sand ready to be primed.


[BREAK=We have a leak!]
Went in the garage and noticed that there was a puddle of water on the floor, after further investigation it was coming from the rad.
So stripped it off and went about sourcing a new one.


New and old...


Gave the fan bracket a rub down and lick of paint.

And got it fitted....


While I was at it I cleaned up the K&N and gave it an oil. You would not believe the amout of crap that came out of it.

Also gave some bracket's that hold the plastic cover above the rad and the front cross member a freshen up


[BREAK= Bit of bodywork]
Before we got hold of it there had been a slight mishap with the front bumper.

There were also a couple of other bits that would need a slight touch up and polish.

So got the main area sanded and a coat of primer on a localised area of the bumper.

[BREAK=Stoppers and some bodywork]
Right, progress has been slow it has been sat in the garage looking and feeling sorry for itself only started on occasion. This bank holiday we decided to get something done on it.........
Decided to get these fitted, to clear some space in the shed (no doubt for me to fill with more crap).

Yes a simple task you may thing....
Decided to start up front, first task remove the two T30 disc retaining screws. Started on the N/S first one came out a piece of cake the other one was a little more stubborn. Gave it a dose of WD then came back to it the screw diddn't want to budge but I could see my T30 bit twisting in it's holder :evil: anyway loaded the ratchet up with enough torque just before it started to deform the bit and gave it a few hard belts with the hammer and it shifted. They were both siezed up the other side but this method got 'em out! Some people need introducing to a marvelous invention called copper grease! After that I thought I was on the homeward straight,, but no! The disc diddn't want to part company with the hub. Gave it numerous belts with a large ball pein hammer but it diddn't want to move, so off to get the 4lb lump hammer it still diddn't want to shift but eventually this happened....

So just chiseled away at the part of the disc still siezed up to the hub and used the crow bar and persuaded it that it was picking a fight with the wrong man.


Gave the hub a grease up to prevent a reoccurance.

Gave the discs a clean then the flange a lick of silver paint. Painted the calipers and carriers gold, creased up the retaining screws and got them fitted.


Next onto the rears....

Yes that is WD not brake fluid.
Disc off, pads and carrier off and was faced with this after a quick clean up.

Yes the seal/gaitor on the piston is shot, so will need to source a replacement.
Gave the rears a lick of paint to match the front..

Gave the retaining bar/shim a going over with the wire brush and emery cloth.

Then offered the new disc up.

When I removed the studs to take the wheel of I noticed that they were rather stiff, so gave them a once over with the wire brush and a bit of copper grease.
Same the other side, the seal was shot also.

(Yes that is brake cleaner not brake fluid)
All back together....

The rear arch's and bumper were also sprayed with colour and laquer and will be ready for a polish when we get round to doing the rest of the car prior to the MOT.
We also managed to get 2 of the 4 alloys sanded back..... will get pics up!
Well something needed to be done about the dust seals on the rear calipers, went down to Renault, they wanted £40 for the gaitors needles to say I declined.
I picked up a full rebuild kit for the grand sum of £24 from the bay. Yes it is from 'Big Red' which I know people have issues with....all I can say is the kit came complete as described.

Anyway the calipers are working fine so I will just use the dust seal out of the kit. The N/S/R is fitted.... diddn't get a pic but it is done.
Need to get the other side done and give it a brake fluid change and that is the brakes completed.
9th May 2010....
Got the O/S/R seal fitted.

Seen as the all discs and pads had been changed it made sense to do a fluid change.
This shot was meant to show the colour of the fluid in the reservoir but you can't really see.

Anyway, this was some of the fluid that came out.....

I also gave the reservoir a clean up while I was at it.

The brakes are now finished.
[BREAK=Wheels & Fuel Filter]
15th May 2010
Replacing the fuel filter had been on the 'To Do' list for a while. I had noticed that the mounting bracket had snapped while undersealing so this would have to be resolved also.

The filter that was fitted was a Renault Puraflux and looks original :roll:
I picked up a couple of fuel filters up off the bay at a good price. Below is the one I fitted.

All is in order again.... a bit safer than it was before

Next task was to crack on with the laborious task sanding of the wheels. Sam had done 2 1/2

Anyhow we got all the wheels sanded back ready to be primed and have them a wash. However we will need to go and see my man down at the tyre place as 2 have knackerd valves and won't hold any pressure. The reprobate I bought them from had some max power valve caps on which siezed on and he must have 'attempted' to remove them breaking the valve in the process! Anyhow it needs sorting and it makes sense to get it done before spraying them up.

We had a few 'refreshments' to ease the laborious task of getting the wheels sanded. :lol:

In addition to the above we also managed to get the undersealing and waxoyling comleted. At present she is up on axle stands in the garage taking the weight off her legs :lol: Hopefully tomorrrow we shall get the arch liners back in place and bumpers fitted.
[BREAK=MOT Booked]
Got both front and rear bumpers fitted and all 4 arch liners fitted. The spoiler has been fitted and t-cut, looks a good match and finish for rattle cans. Number plates are also fitted.
MOT Booked in for 8am this Saturday (29th May 2010).... fingers crossed
Once she has passed, new plates will be orderd to tidy her up and it willl get a full machine polish, resin polish and wax prior to it being taxed then hopefully be going to FCS
Friday 28th - After getting in from work, gave the car a once over, checked all bulbs put some fresh fuel in and swaped the rear tyres over for the 2 that had been sanded down as the tread on the current 2 rears were debatable as to wether it met MOT requirements or not :lol: The N/S screenwash jets were blocked so unblocked them and called it a night.
Saturday 29th, up early and primed the engine and Sam drove us to the pre booked MOT.....it passed :lol:
After getting home from the MOT we had planned on washing it and machine polishing it but the rain put the dampers on that. So decided to crack on with the wheels. As I mentioned previousley 2 diddn't hold pressure due to the valves being shot. So in went the wheels to the back of Sams cars and we set off to see my 'contact' at a tyre fitting place.....when we turned up it was shut :twisted: :twisted: We then tried a few other places to see if they would do back handers as I refuesed to spend the best part of £20 getting 2 valves replaced and wheels balanced. Eventually I struck gold and the deal was done. :lol: We then got the wheels back to base.
The wheels were wiped down with surgical spirit and masked off.

The primers that we will be using....

Here is the first coat of 'acid etch'

Then a coat of 'filler primer'

Then the final coat of box standard grey primer.....we will eventually be putting colour on honest

Then for the colour, Sam and I had been depating what colour to go for but we settled on 'Ford Graphite Grey'


After a few coats and masking off we have wheels....

I then let Sam loose with the tyre marker, she seemed to have the nack to it :lol:

That was the wheels complete.
I then added a bit of the good stuff to the tank.

Sunday 30th, the weather looked good today so up we got and cracked on with the task of valeting it and bringing the paintwork up to scratch.
Here is what we did....
1 - Gave the car a wash
2 - Dried it off with the leaf blower
3 - Machine polished it with 3M perfect it and a sponge pad
4 - 1 coat of Auto Glym Super-Resin Polish
5 - 1 coat of Conilite Wax to seal it
6 - Windows cleaned inside and out
7 - Plastics dressed
It was worth the effort. I will get pics up of the finished article, we are just awaiting the number plates to tidy it up.
Monday 31st
Got the tyres dressed
Also decided to give the cooling system a good flush, the rad was new and the water was staying reasonably clear but it coule be better. I thought this stuff could get to work on the heater matrix and block....

Well I ran that through on fast idle for 30 minutes and it seemed to get to work quite well.
I also gave the system another couple of flushs and it is currently say with water in at the moment.
The plan is that once it is on the road and the water stays fairly clear to add the correct coolant and also re seal the stat housing which are notorious for leaking on these lumps.
[BREAK=Ipod/Aux in]
15th August 2010
Well I haven't updated for a few weeks now mainly because I haven't done anything on it
First task was to sort the exhaust,, it was banging on the boot floor when driving and even at idle. Reversed her up on the ramps and, adjusted the joint where the centre pipe meets the cat such that there was more overlap on the joint. I then adjusted the rear joint where the back box meets the centre pipe. Took the car out for a quick spin and over a few speed bumps and it seems fine. So that is one thing to cross of my list.
Next thing was to re attach the tow bar. We had removed it when we took the bumper off,, it has had a couple of coats of Hammerite and now is back on.

I recently aquired myself an iPod touch, now there was nothing wrong with the standard stero with the CD changer I just wanted to be able to put my iPod through the standard HU. I wanted a solution that looked OEM so that ruled out one of the tape adaptors.
So I bought myself an FM modulator. For those of you that don't know what this does it basically sits between the aeriel and the HU and accepts a stero input via phono leads. I tapped a switched power supply from the back of the cigar lighter.


I decided to make myself up a loom....


Which I installed here....

Now all I have to do is tune the HU into a pre defined frequency and plug my iPod in and hey presto.
I then decided to call it a day.
The 'To-do' is as follows:
- Cambelt change (I picked up a genuine renault one from eBay)
- Oil Leak (Coming from O/S/F, not sure if it is engine oil or PAS fluid will need to investigate further when I change the cambelt)
- Gearbox oil change
- Rear gear box mount needs attention (I may re-enforce the current one with tiger seal or fabricate a new from from rose joints and threaded rod).
I will then feel comfty in putting it into daily service again.
[BREAK=Cambelt & Oil Leak]
4th September 2010.
Popped down the factors this morning to pick up some box oil to give that a change.
I decided I would tackle the cambelt/oil leak first that is coming from the N/S of the block. Now these things are never as straight forward as you can imagine.
Crack of the crank pulley bolt no issues. When I came to remove the top engine mount I find that it is shot. It was on my radar to take a look at as it diddn't look in the best condition from just looking at it but this.....


Yes the section of rubber with the bolt in it is totally detached. So I am after a replacement. I have been in touch with buypartsbuy to see if they come good, else an alternative will have to be sourced.
Got the lump supported and took the plugs out to make it easier to turn over. I took the bottom plastic belt housing off and there was a bit of engine oil in there. I got the other plastic cover and the top metal cover off (one of the bolts was missing from the top metal cover so I will have to find a suitable substitue from my array of random bolts I have). Now there was a bolt inside the plastic cambelt housing obviously left in there by the previous reprobate that changed the belt.
I set #1 piston to TDC and removed the belt.....
Looks like I got there just in time :roll:

It was a Gates belt though, just a shame they diddn't put everything back together properly when they last changed it.
Now I *seem* to have found the source of the oil leak, which looks to be coming from around the aux shaft. The area inside the plastic belt cover surounding the aux pulley is damp with engine oil,, also outside the belt cover around where the aux shaft goes into the block seems to be wet with engine oil and the surrounding area seems to be sprayed a bit ie around the gaitor on the rack etc. I am guessing it is just a case of removing the aux pulley, removing the back cambelt plastic cover and replacing the oil seal?? Hopefully this will be viable with the engine in situ?
Now the leak coming from this oil seal would explain why the leak only seems to occur acter the car is parked up after a drive...
Anyway, obviously there was no point putting the new cambelt on untill I have sorted this oil leak.
I will get some more pictures of the leak to see if any of you guys can confirm this or have any other ideas.
11th September 2010.
Today we went down to the the local Renault parts desk to be relieved of £13.55 for an aux shaft oil seal.

After returning home I decided I really needed to get the aux pulley removed. So as per the advice of Neal (Thanks

I think it is safe to say we have a leak!
I then removed the rear plastic cambelt cover


On further inspection of the crankshaft front oil seal, it looked to be weeping very slightly so I have a new one on order from the factors. While I was down there I picked up some RTV Silicone.
12th September 2010
Fabricated a puller to remove the crank pulley and got it removed...

The seal is not too bad in the grand scheme of things, however as everything is stripped down it makes sense to change it.

I gave the front casing from around the aux pulley a degrease and clean up

Then got the casing fitted along with the oil seal.

21st September 2010.
Had an hour or so spare this evening so decided to crack on a bit more.
Cleaned and degreased the side of the block that sits behind the lower cambelt case and crank oil seal. I then removed the crank shaft oil seal.
Here we have the aux and crank oil seals side by side.

Got the new crankshaft oil sealed lubed up in some fresh engine oil and got it fitted.

Bad picture it looks like the internal spring that sits against the internal side of the seal is showing the spring... its not its just the flash on the cam playing tricks..... I actuall went back out and removed the cambelt to be 100% sure.
The plastic cambelt covers were cleaned up and all the oil and other reminants were removed.

I then went about fitting the inner plastic cambelt cover and crank pulley back on.

Here is a bargain genuine cambelt I picked up from eBay for the price of £1.04, it would have been even more of a bargain if I diddn't have to pay the £4 p&p but can't complain to much I guess :lol:

I then got the engine timed up and the belt in situ.

The belt still needs tensioning, however I decided to call it a night.
The replacement engine mount arrived today; spot the difference

[BREAK=Getting it back on the road]
Got the cambelt tensioned and and the engine running again.
Next step was to change the box oil, no pics of the old oil but what came out diddn't look to bad coupled with the fact that there is a non factory hub nut on the N/S shaft leads me to belive it must have been changed at least once in it's life.

Took the dogbone/rear mount off and Tiger Sealed it. In addition with the new top engine mount and box oil the gear changes are a lot more precice!

I sprayed the engine/box and are where the aux shaft had been leaking with engine degreaser and worked it with a brush then got the pressure washer out to finish up. I guess I should have really taken a before and after pic, however a vast improvment was made.


One final task was to finish off the cooling system. The system had Previously been flushed and I had left water in the system, however it had been parked out on the road and the temeratures had been dropping so I had to drop the contents out. While I was at it I decided to re seal the stat housing as it had a very small leak and I had the RTV silicone I used on the casing of the aux shaft anyway. Once sealed up I gave the system another quick flush in both directions then added the correct concentration of anti-freeze and bled the system.

Basically it is now at a stage where I am comfty putting it into daily service; at present it is Sat in the garage plugged into the a maintenance charger untill it is insured.
[BREAK=On The Rollers]
6th November 2010
RenaultOnline.net rolling road day. Put out a respectable 132bhp at the wheels not bad after 14 years and 125k.
[nomedia="http://www.youtube.com/watch?v=t5V8BYZA3wE"]YouTube - Megane F7R rolling road‏[/nomedia]
[BREAK=Stat Housing]
5th December 2010
Finally had to bite the bullet and spend the £38.41 on a new stat housing. I had tried twice to seal the old one up but to no avail. After picking it up from Renault (and having a laugh at a fool in there paying nearly £37 for 5ltr of GM 10w/40 semi synthetic oil) I stopped off at the factors for some screen wash, anti-freeze and box of gloves.
You can see below that the oval apature has pretty much had it, one length of the internal channel has tottaly snapped off and the other is getting there.

The new replacement


Transfered everything over, the thermostat was changed a couple of months ago so got everything fitted and bled the cooling system yet again. Hopefully this will be the end of the old girls incontinence issues :lol:
Also changed the O/S headlamp bulb as it had blown.
[BREAK=Update...]
Well haven't updated it for a while.
It turned 130k a month or so ago so gave it an oil, filter and plug change. Noticed that one of the plugs wells contained oil so ordered a new cam cover gasket and got that fitted and cleaned up.
Took it for it's MOT and it passed with no advisories
Last edited by a moderator:

