There is more to life with TurboRenault.co.uk

Register a free account today to become a member! Once signed in, you'll be able to participate on this site by adding your own topics and posts, as well as connect with other members through your own private inbox!

My Matra Jet6 restoration.

Renoholic

Active Member
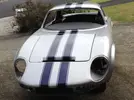
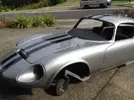
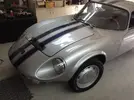
Me and my son came across a Matra Jet 6 for sale and he decided to buy this car and import it to NZ. The Matra history is quite a lengthy one and very interesting for me. What makes it outstanding is that with its design in 1962/63 Rene Bonnet built it as a true mid engined car. The very first, beating the likes of De Tomaso, Ferrari and Lamborghini. Being a good engineer and bad accountant he was soon in debt with MATRA from whom he rented workshop space and they did the body for him as MATRA had a lot to do with missiles and weaponry and aircraft. They decided to take him over instead of closing him down. From 1964 onwards the name changed from the RB to Matra. First ones were called Djet but the D was dropped in 1967 with the Jet 6.

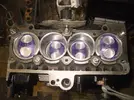
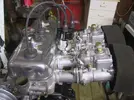
The car my son bought is a Jet 6 and is no 139 of 222 built during 1967 and 68. At first it looked like you could almost start and drive it but that was only wishfull thinking. The engine, a Gordini, was newly rebuilt and not yet oil in it, new filter etc. Curiosity opened the rocker cover and found some homemade pushrods far to thick and heavy to my liking, that lead to the removal of the head. Holy sh!t what I found was scary. Dome pistons so high that I later calculated would have been 19:1 compression ratio. The bottom end revealed a knife edged crank that I later threw out when it showed a run out on the flywheel and after checking found that it was cracked, the thrust washers were one standard and the other home made from brass. The head had 3 of the 5 extractor mounting holes stripped and some body increased the exhaust ports only to almost in the water jackets. With the extractor bolted on there will be a huge blockage as the gases trying to get out with the step created by the smaller standard extractor base. I decided to scrap that and started the build of a new engine.

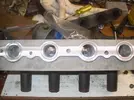
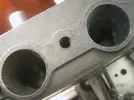
This is the huge outlet ports.
119p5dy.webp

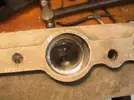
I then put it in my milling machine and made the ports parallel, or as close as possible to parallel.
14jsq52.webp

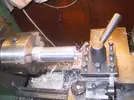
Then I turned new inserts to resize the standard size
2w2r621.webp

That are pressed into the new ports.

20r7olw.webp

That was only one aspect of the head repair because that is one item that can't be replaced. They are made from unobtanium.

To be continued.
 
Engine build continued.
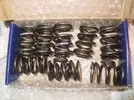
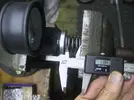
Valve springs followed and pressure calibrated, 55lbs on seat pressure and 185lbs on cam pressure.

140hgy.webp

2qjc2ld.webp

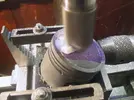
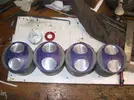
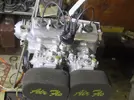
The bottom end. I used an R9 block and started with machining the pistons. Again, it is my old favourite Fiat 1500 pistons. First photo is the stock one, then it gets shortened to clear the crank at the bottom and then I pocket the heads for the valves and their clearance. The depth varies a little because that is my fine tune on the compression ratio.

20ii3uo.webp

29ny1b8.webp

vfurkk.webp

After this the wet liners gets sent away to be rebored to the new piston size. I cannot do it on my small machine. Once get them back I fit them in my lathe and cut 0.10mm (0.004") away on the top edge but leave a little bit on there to form an additional fire ring that indents itself into the head gasket to form a better seal. Then I fit them in the block and double check the protrusion which then will be below or maybe just flush with the block. With the sizes noted down I cut rings from shimstock to lift the sleeves back to standard.

nwerzr.webp

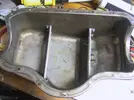
The sump gets a few baffles for safety when driven spiritedly. This is not as in depth and detailed as racing baffles.

bf48z4.webp

2d8jqe0.webp

Assembly starts with bottom end.

35hr1o1.webp

Cam timing after that,

1gsk11.webp

Completion.

i5yneq.webp

fddi06.webp

That's that for the engine build. I will follow this up with the chassis restoration.
 
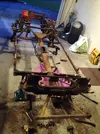
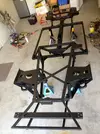
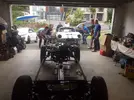
The chassis. We decided to remove the body and have a look at the chassis, clean and paint it. The design is a tubular backbone from where everything hangs off. It is a clever design in that I don't think there is any torsional twist in a tube. A propshaft comes to mind. He used mainly Renault R8 parts here as the rack and pinion, wishbones,coil springs front. The rear suspension is self designed Matra bits. but still using Renault bushes. It has twin coils and twin shocks at the rear. Because CV joints haven't been developed in those years the driveshafts had splined joints in the center to absorb the side ways movement of the engine. Normal cross U-joints were used at the outer ends. Remember this is true independent rear suspension and not a swing arm type like the R8's and VW of those days.

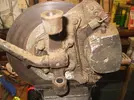
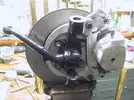
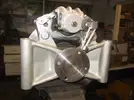
The brakes were Renault R8 as well in the earlier models which were upgraded to the R16 front ones when they were introduced in 1965. The rears remained R8. A few before and after photos.

2hmosv9.webp

b8a2r9.webp

Front stub axle and brake assembly.

34or48w.webp

vebxiu.webp

The rear.

ic05zb.webp

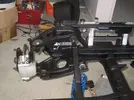
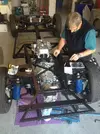
Assembly of the chassis.

2dl97b9.webp

90u6ft.webp

2s9zi9h.webp

There the car is back on its wheels and can be pushed around.

Regards, Renoholic.
 
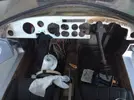
The previous owners wanted to convert the car to RH drive. They made a huge mess in the attempt. The dash was cut into tethers, the cubbyhole area was non-existing, the holes for the gauges were doubled up, the wiring was lying like spaghetti on the floor, luckily not cut. We decided to bring the car back to it's original LH drive. Our reason for that was that there was only one RH drive model built and that was for the Marques in England and this car still exists. So a second RH drive would not be a good idea. This decision brought back its own heap of issues of holes that had to be closed for the pedals on the RH side and the old holes to be re-opened on the LH side etc.
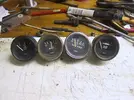
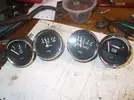
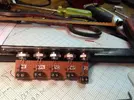
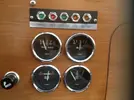
The instrumentation used in this model is that of the R8 Gordini and more, like an oil pressure gauge and an oil temp gauge. These were in a bad shape as well and the 2 oil gauges were missing, battery condition was from a Citroen 1220 GS and the outer didn't match. So they were stripped and I matched some white paint with the back grounds of the gauges and reconditioned them as well. The warning lights were all missing,5 of them, and if you found some on Ebay they would be around 50 Euro each. So I got a piece of hex aluminium bar and made them myself and used LEDs instead of miniature lamps. I could also change the intensity by varying the resistors. For eg, the fog and high beam is dim while the others can almost blind you.

The wood grain dash was of no particular stain. (a very knowledgeable gentleman in Europe helped us a lot and more than once we questioned him on differences between identical models. Everytime his answer came back to: "these cars were handbuilt and if the builder grabs a dash from the shelf and somebody else had the dark stain, then he would use the other can which could be a lighter stain. No one car was identical") So on the dash the colour choice was free. I made a few and decided on a colour.

The wiring remained a problem and it took me a while to figure out the method used by them. I changed it a little by mounting house wiring brass connector blocks in front, middle and at the back for the earths because of the fibre glass body and they always have earth issues. I re-wired the dash back and it is now a LH drive car as originally intended.

The inside mess.

24cfrtd.webp

Gauge refurbishment before and after.

2utm5ci.webp

2rdf3f5.webp

Warning lamps copies ala Renoholic.

2q1v4go.webp

2ikp2dz.webp

Regards, Renoholic.
 
Getting to the end. Thanks for those who watched. I am sure you all will realise that what I showed above is just the tip of an iceberg. There are so much more to the restoration of a car.

The body was sent to a spray painter after the home made jigsaw hole for the sunroof was closed up. We had that done by a ship builder and he repaired and reinforced a few things for us. I am not good with fiber glass, very little experience. First I built a little sub-frame where we put the body on so that it can be mobile.

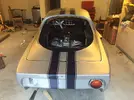
This was what it looked like after the paint job.

11wgf4j.webp

2n6yot5.webp

The time arrived to put everything together and my son got a few mates to do the lifting. The body is very light because between the 2 of us we could carry it around in his garage. I wanted a lot of hands in the case where I forgot something and the body had to be held for a long period while moving or removing the possible obstacles. Luckily that didn't happen and I thought of the most things and it went on straight away.

332ulo7.webp

23u4qbq.webp

Then the big work started by fitting all the things back. Headlights, fog lights, radiator, electric fan, fuel tank, dash, engine monitoring items wiring and tons more.

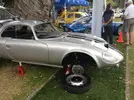
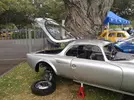
For some moral boosting we took it to its first show on a trailer and displayed it as "ongoing project" without windows, but driveable.

jrzcz9.webp

rit10j.webp

And then almost complete. It needs the side window aluminium beadings. It is some extrusions as used in the Caravelle and Alpine A110. But no stock could be found as yet. That remains the last things to do. The car runs well and pulls very strong with the Gordini engine and its 620kg kerb weight.

jrzmms.webp

That is a few highlights in the process.

Things that I came across in the process showed that Rene Bonnet/Matra used almost anything French he could lay his hands on. Renault engine, Renault Estafette gearbox, Rack and pinion, gauges, Caravelle bootlid handle for door handles, Simca 1200 taillights Simca Aronde wipers(modified, Peugeot ash tray, Citroen Ami 6 windscreen washer, Peugeot 304 front brake slave cylinder as clutch slave, to name a few.

Hope you enjoyed the story. Welcome to answer any questions.

Renoholic.
 
I'd never heard of a Jet6 before this! How long did that whole process take? Very cool little resto on those gauges too :)

It took about 5 years to do but that is working one day a weekend, sometimes both days, because the car was at my son's place and it is quite a distance away. I do not have the space to do at my place, the time period would have been much less.

Don't worry, I didn't know about the Jet 6 either until we found this one by accident. I was immediately interested when I found out that it was powered by a Gordini motor. That's the main factor that caused the purchase and restoration. I love the Gordinis.

Renoholic.
 
Back
Top