Chris H
master of boobies
This is my sisters bike, she bought it the day after she passed her CBT in October 2007. The bike was not yet 6 months old when she bought it off a boy she met at the CBT place who was selling it as he was doing his direct access and he had bought himself an R1 or something.
Last year some of you may recall it was up for sale, when there was no interest she decided to keep it and continue to use it until a suitable big bike came along.
So as www.retro-renault.com is an international super site for all things electrical/mechanical/biological (?) :lol: I decided might as well do a report on it.
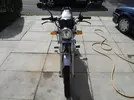
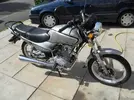
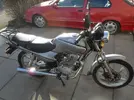
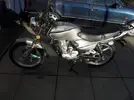
Pics of the bike last October when it was up for sale
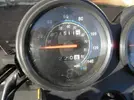
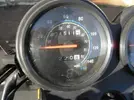
Mileage is now at 2500 ish
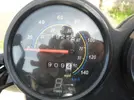
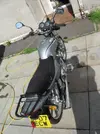
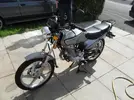
2 weeks ago the bike went for its first MOT. It passed first time no issues.
The bike has been reliable and despite the horror stories told by some the bike has never had any breakdowns etc.
The only issue it has was the battery went flat in the 6 months it was stored in her cellar and its slowly trying to recover. A new battery is a ridiculous 40 quid as its a funny size. What this means is the electric start will not start the bike from cold, however, ride it for 20 mins it will then start off the electric start just fine.
I recently changed the oil, I checked the filter for the first time, its a simple strainer mesh thing, there were 2 small flakes trapped in it which cleaned out. Some you see are covered in swarf.
Until recently the top speed of the bike was a pathetic 65mph, I cleaned the carb out and raised the needle by 1 groove, the new top speed is 75 on the flat and it will maintain 70 on a hill with Emma riding it.
The last 2 weeks myself and my friend Darren have been practising for our CBT's on the bike. Its a bit small for me (I'm 6 foot 5 and also 5kgs over the bikes maximum load capacity...) but in the small area we practise which might be a 1/4 mile at best I can get 55 out of it.
The only issues that have arrived since we have been using it and to be fair emergency stops from the 55mph so we don't hit a wall is technically abuse is the front brake loses its feel and the rear brake has got noisy.
So I will cover the front brake on the next page of this report!
[BREAK=Front Brakes]
2nd May 2010
Well today I lubed the chain. Horrible job, everything gets messy and I looked at the front brakes.
The front calliper on this machine is a single piston floating calliper, just like the cars we have.
Under a rubber cap is a 6mm Allen bolt slider and at the bottom of the calliper body is a 12mm hex bolt slider which is awkward to get to
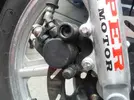
there are 2 slider pins, these have a 4mm Allen fitting. Crack them off before undoing the calliper
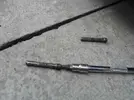
pads out, anti rattle spring and the rubber cap for the 6mm hex slider
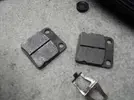
Note the dinky piston, also no dust seals, that's why bike callipers tend to stick!
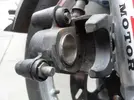
I pumped the piston out and I then cleaned it with paper towel and some cleaner, this way to remove that black dirt line etc. This got the piston back to a gleaming as new condition
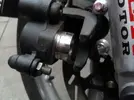
The pads were glazed a bit which would explain the dead feel, so I got the sandpaper out. The pad on the left is as it came out, the pad on the right after a few seconds on a flat surface and sandpaper.
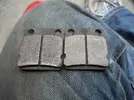
I done the same with the other pad, this restored them as new look and friction. I assembled it all back together and the brakes are mush improved according to Emma. I will get a go of it tomorrow so I will see how much its improved.
I haven't done anything to the rear brake which is a drum. To get the rear wheel off you have to remove the exhaust system as the silencer stops the spindle coming out. So I left it to another day when I can be bothered. I checked the wear indicator, its got loads of life left apparently, the brake works just a bit noisy.
The plans for the bike are to get a new battery or try and recover the one in it which is actually recovering I never thought it would and fit heated grips to it.
The bike will stay until as mentioned before a suitably nice big bike comes her way.
It is a good bike, never let her down. No bolts falling off, engine falling out, frame cracking or it catching fire.
Its not the best build quality or fit ever but its a cheap bike that most say will be in a skip by its first birthday and never pass an MOT. Well its lasted just fine.
[BREAK=Recent work/update]
18th September 2010
Well this bike is now being used by Darren as my sister now has the Vf750F.
So what's happened with it then?
Sadly no pictures but here goes.
I had a shot of it and the thing was pogo'ing around absolutely no damping.
So I decided lets change the fork oil. There is no specs for oil or the capacity for these Chinese bikes so I looked up some Yamaha and cg specs, oil grade varied but the capacity for these equivalent 125's were around 110 - 150cc per leg.
So I settled on the middle ground of roughly 130cc and used ATF (that's what I had and Honda's use it).
The old oil that came out was grey and done, you know when oils done its viscosity is away and it looks and smells wrong. So new ATF in and the damping was much improved.
Still leaves the bouncy back end but those are trickier as they are sealed twin units.
Adjusted the idle up a bit which helped prevent it stalling when coming to a stop.
Its required a few rear lights as well, so I looked at the charging system, typical poor wiring, added a nice earth direct from the battery to the chassis where the coil earth's and another direct to the starter motor mounting bolt. This improved starting and it runs a little more sweetly now.
I don't have any time to mess with it as its being used by my mate so I have limited time with it but I want it back in one piece so willing to spend time on it to maintain it as it is.
[BREAK=Tax and MOT time approach]
21st March 2011
Bought road tax online a couple of weeks ago as its up the end of this month. So £15 for another full years tax.
The MOT is up on the 12th of April, so the first task was to get the bike back off of Darren to sort it out for the MOT.
The bike has sat outside Darren's house not used since last October. So we were unsure of how much effort it would take to get going. Emma and I headed over to Darren's to pick it up, the bike wasn't there. 5 minutes later Darren showed up, started up fine it seems. Good old reliable. However the tyres needed pumped up so done that.
I then rode the thing home. Wow 125's are crap :lol:
They do grow on you though, flat out everywhere, never slow down or stop :lol:
So the plan was to go right through the bike cleaning everything I can and doing all maintenance tasks. I had never really had the time to do anything as in depth as today so a lot of things had never been touched since the bike was assembled new.
Anyway back to business, I never mentioned this but my mrs wanted to learn so Emma took her out last year, she managed to fall off it at a standstill, yes muppet, this broke the drivers side rear view mirror and also damaged the headlight surround. So I first saw what I could do with the headlight surround.
headlight off, 1 phillips screw holds it in, then to get access you have to pop those gold coloured clips out to separate the the light and surround
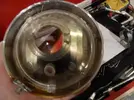
Hard to make out in the pictures but damage
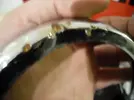
This shows the ding better
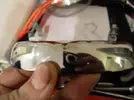
Knocked out, much better, still hard to see in the pictures though
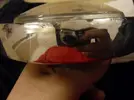
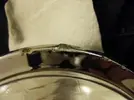
Then seat off and side panel removed, this gives access to the air box. Notice that the carb coot clip is missing its screw, must have vibrated off. 5 phillips screws hold the cover on
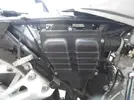
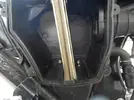
Its a foam filter, foam is sandwiched between 2 metal cages with a single screw
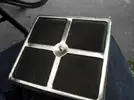
So take the screw out then wash out the filter and re-oil, easy peasy.
I then pulled the plug to check the colour, its only just over a year old and still fine so no point replacing, the mixture seems bang on
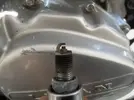
Then onto a valve gap adjustment. This engine is old fashioned pushrods. The manual says a gap of 0.05mm for both the inlet and exhaust. This is ridiculously tight. I settled on 0.1 inlet and a wee tad looser on the exhaust. Seems to run better at this gap as well, should run better on a long run especially as the gap won't be totally closed and perhaps holding the valves open now. 3 10mm bolts hold the rocker cover on, need to turn the engine a bit to get it past the rocker arms.
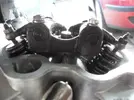
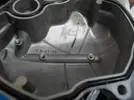
This is the inside of the rocker cover, this one is spotless as it should be, the black is writing on the inside of the cover, the 3 small holes are all clear as they should be, oil drips from these holes to provide additional top end lubrication
I removed the exhaust as it stopped easy access to the swing arm and the rear brake mechanism, it had some melted trouser leg parts on it and just needed a good polish. So the 2 10 mm domed nuts at the head and then the rear swingarm nut is all that holds it on.
This showed the swingarm bush, there was also no washer so I added one, now its bush washer, exhaust, washer, nut. Should maybe stop loosening off as quickly and prevent any more damage
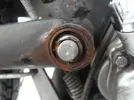
I of course greased up the swingarm bolt and cleaned it all up.
I then pulled off the osr shock absorber unit, 2 13mm bolts, flash wipes are awesome for cleaning oily stuff btw
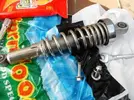
This is the top mounting stud, no grease on it at all, this was rectified on refitting of course.
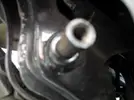
The bottom mounting this was cleaned up, its a poor set up tbh, the bolt is very loose ont he outside hole so the bolt has to be torqued right up to prevent it shearing
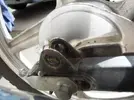
The shock was thoroughly cleaned and autosol'ed before re-fitting, its very bling now.
I then focused on the rear brake, the mechanism squeaked when applying the brakes, so i thought no messing rip it apart to clean and lube it as required.
The lever is held on with a split pin (in the picture the split pin has been straightened for removal), washer, return spring and light switch spring. The secret is to extend the spring then pack with washers/coins so theres no tension in the spring, this allows it to come off easily
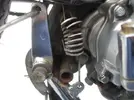
Lever off, very little dry sticky lube
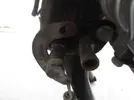
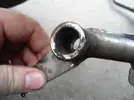
The lever was cleaned and polished then greased up, this cured the squeak and improved the feel a lot of the brake lever.
However I wasn't done with the rear brakes.
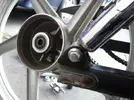
The rear wheel has never been off, so I wasn't sure if the shoes would be heavily worn or not. So I had to pull it off. This picture shows the wheel loose, the drum brake plate removed and notice the nice shiny shocker!
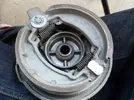
Shoes, yes they look new!
Slight glazing
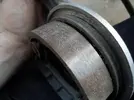
Look at the friction material thickness, easily 6mm
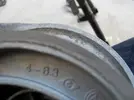
So I cleaned the dust from the drum, then roughed up the shoes with new emery paper to remove the glaze. I greased the activating rod and where the cam pushes the shoes, this made the action super smooth.
I then turned the bike round and took off the passenger side shocker, cleaned and greased as required.
The gear selector had rust on it so I removed it to clean and polish it up. To do this I had to remove the foot pegs (4 13mm bolts into the bottom of the engine), it came up well, I'm sure you agree, shame the paint on the engine is peeling
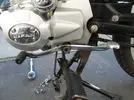
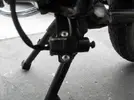
This also reminded me of the side stand switch, most remove these, it was still here on this bike but the original bolts had broken so it was sort of cable tied on. I decided to repair this properly and have it fully functioning. So I got out the drill and enlarged the holes on the bracket to accept some rivets. This means it won't fall off and it also works perfectly. heavy duty it may be but its not going to fall off now.
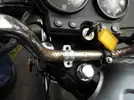
The handlebars again have succumbed to the rust bug, so I cleaned these up, heres a before picture, never got an after though.
Basically I removed 1 clamp cleaned the bar, put the clamp back on then removed the other clamp cleaned that and then pout it back on.
Mileage on the bike today
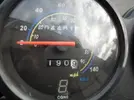
I need to sort out the front brake judder, I done a wee bit and its reduced it a lot, need to perfect it as its a fail on bikes.
I will also get some pictures of the bike as it looks great now its 90% polished up. After the MOT the plan is to sell it as its not needed, everyone now has a 750, so the 125 is not needed, its a good wee bike. Good fun but I wouldn't swap the 750 for it!
[BREAK=Shiny]
25th March 2011
Well finished the service on the bike and cleaning then took it for an MOT.
It sailed through as expected. the brakes were really good, almost 100%, still not quite the same as the 750's etc! So it has an MOT certificate until the 12th April 2012.
So I eventually got some pictures as it stands
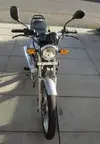
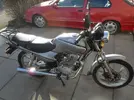
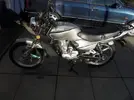
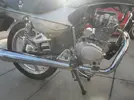
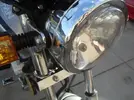
Headlight came out ok, you can see the ding and rusty spot, but you need to be a lot closer now to see it
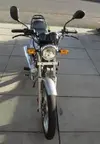
So all we need to do is sell it. Its a great bike but absolutely no use to us any more. We all have 750's minimum. So it needs to go, be a great learner bike (its used in a lot of riding schools for CBT's and lessons) or even a city hack. Its not to great on long fast journeys as it doesn't do fast really. Will hit 70 odd indicated but most bikers cruise a bit higher than that...
MOT £20
Road tax £15
Road legal for a year £35 :lol:
[BREAK=Sold!]
29th March 2011
Well at half 7 this evening the bike was sold. Got the full asking price for it.
Seems to have gone to a good home which is nice. I hope its looked after well.
Had a lot of jokers calling about it etc, I hate selling stuff.
So farewell old faithful.
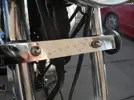
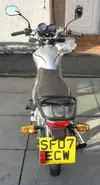
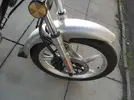
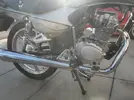
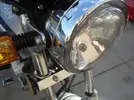
The final for sale pictures, some may be repeats
Last year some of you may recall it was up for sale, when there was no interest she decided to keep it and continue to use it until a suitable big bike came along.
So as www.retro-renault.com is an international super site for all things electrical/mechanical/biological (?) :lol: I decided might as well do a report on it.
Pics of the bike last October when it was up for sale


Mileage is now at 2500 ish


2 weeks ago the bike went for its first MOT. It passed first time no issues.
The bike has been reliable and despite the horror stories told by some the bike has never had any breakdowns etc.
The only issue it has was the battery went flat in the 6 months it was stored in her cellar and its slowly trying to recover. A new battery is a ridiculous 40 quid as its a funny size. What this means is the electric start will not start the bike from cold, however, ride it for 20 mins it will then start off the electric start just fine.
I recently changed the oil, I checked the filter for the first time, its a simple strainer mesh thing, there were 2 small flakes trapped in it which cleaned out. Some you see are covered in swarf.
Until recently the top speed of the bike was a pathetic 65mph, I cleaned the carb out and raised the needle by 1 groove, the new top speed is 75 on the flat and it will maintain 70 on a hill with Emma riding it.
The last 2 weeks myself and my friend Darren have been practising for our CBT's on the bike. Its a bit small for me (I'm 6 foot 5 and also 5kgs over the bikes maximum load capacity...) but in the small area we practise which might be a 1/4 mile at best I can get 55 out of it.
The only issues that have arrived since we have been using it and to be fair emergency stops from the 55mph so we don't hit a wall is technically abuse is the front brake loses its feel and the rear brake has got noisy.
So I will cover the front brake on the next page of this report!
[BREAK=Front Brakes]
2nd May 2010
Well today I lubed the chain. Horrible job, everything gets messy and I looked at the front brakes.
The front calliper on this machine is a single piston floating calliper, just like the cars we have.
Under a rubber cap is a 6mm Allen bolt slider and at the bottom of the calliper body is a 12mm hex bolt slider which is awkward to get to

there are 2 slider pins, these have a 4mm Allen fitting. Crack them off before undoing the calliper

pads out, anti rattle spring and the rubber cap for the 6mm hex slider

Note the dinky piston, also no dust seals, that's why bike callipers tend to stick!

I pumped the piston out and I then cleaned it with paper towel and some cleaner, this way to remove that black dirt line etc. This got the piston back to a gleaming as new condition

The pads were glazed a bit which would explain the dead feel, so I got the sandpaper out. The pad on the left is as it came out, the pad on the right after a few seconds on a flat surface and sandpaper.

I done the same with the other pad, this restored them as new look and friction. I assembled it all back together and the brakes are mush improved according to Emma. I will get a go of it tomorrow so I will see how much its improved.
I haven't done anything to the rear brake which is a drum. To get the rear wheel off you have to remove the exhaust system as the silencer stops the spindle coming out. So I left it to another day when I can be bothered. I checked the wear indicator, its got loads of life left apparently, the brake works just a bit noisy.
The plans for the bike are to get a new battery or try and recover the one in it which is actually recovering I never thought it would and fit heated grips to it.
The bike will stay until as mentioned before a suitably nice big bike comes her way.
It is a good bike, never let her down. No bolts falling off, engine falling out, frame cracking or it catching fire.
Its not the best build quality or fit ever but its a cheap bike that most say will be in a skip by its first birthday and never pass an MOT. Well its lasted just fine.
[BREAK=Recent work/update]
18th September 2010
Well this bike is now being used by Darren as my sister now has the Vf750F.
So what's happened with it then?
Sadly no pictures but here goes.
I had a shot of it and the thing was pogo'ing around absolutely no damping.
So I decided lets change the fork oil. There is no specs for oil or the capacity for these Chinese bikes so I looked up some Yamaha and cg specs, oil grade varied but the capacity for these equivalent 125's were around 110 - 150cc per leg.
So I settled on the middle ground of roughly 130cc and used ATF (that's what I had and Honda's use it).
The old oil that came out was grey and done, you know when oils done its viscosity is away and it looks and smells wrong. So new ATF in and the damping was much improved.
Still leaves the bouncy back end but those are trickier as they are sealed twin units.
Adjusted the idle up a bit which helped prevent it stalling when coming to a stop.
Its required a few rear lights as well, so I looked at the charging system, typical poor wiring, added a nice earth direct from the battery to the chassis where the coil earth's and another direct to the starter motor mounting bolt. This improved starting and it runs a little more sweetly now.
I don't have any time to mess with it as its being used by my mate so I have limited time with it but I want it back in one piece so willing to spend time on it to maintain it as it is.
[BREAK=Tax and MOT time approach]
21st March 2011
Bought road tax online a couple of weeks ago as its up the end of this month. So £15 for another full years tax.
The MOT is up on the 12th of April, so the first task was to get the bike back off of Darren to sort it out for the MOT.
The bike has sat outside Darren's house not used since last October. So we were unsure of how much effort it would take to get going. Emma and I headed over to Darren's to pick it up, the bike wasn't there. 5 minutes later Darren showed up, started up fine it seems. Good old reliable. However the tyres needed pumped up so done that.
I then rode the thing home. Wow 125's are crap :lol:
They do grow on you though, flat out everywhere, never slow down or stop :lol:
So the plan was to go right through the bike cleaning everything I can and doing all maintenance tasks. I had never really had the time to do anything as in depth as today so a lot of things had never been touched since the bike was assembled new.
Anyway back to business, I never mentioned this but my mrs wanted to learn so Emma took her out last year, she managed to fall off it at a standstill, yes muppet, this broke the drivers side rear view mirror and also damaged the headlight surround. So I first saw what I could do with the headlight surround.
headlight off, 1 phillips screw holds it in, then to get access you have to pop those gold coloured clips out to separate the the light and surround

Hard to make out in the pictures but damage

This shows the ding better

Knocked out, much better, still hard to see in the pictures though


Then seat off and side panel removed, this gives access to the air box. Notice that the carb coot clip is missing its screw, must have vibrated off. 5 phillips screws hold the cover on


Its a foam filter, foam is sandwiched between 2 metal cages with a single screw

So take the screw out then wash out the filter and re-oil, easy peasy.
I then pulled the plug to check the colour, its only just over a year old and still fine so no point replacing, the mixture seems bang on

Then onto a valve gap adjustment. This engine is old fashioned pushrods. The manual says a gap of 0.05mm for both the inlet and exhaust. This is ridiculously tight. I settled on 0.1 inlet and a wee tad looser on the exhaust. Seems to run better at this gap as well, should run better on a long run especially as the gap won't be totally closed and perhaps holding the valves open now. 3 10mm bolts hold the rocker cover on, need to turn the engine a bit to get it past the rocker arms.

This is the inside of the rocker cover, this one is spotless as it should be, the black is writing on the inside of the cover, the 3 small holes are all clear as they should be, oil drips from these holes to provide additional top end lubrication

I removed the exhaust as it stopped easy access to the swing arm and the rear brake mechanism, it had some melted trouser leg parts on it and just needed a good polish. So the 2 10 mm domed nuts at the head and then the rear swingarm nut is all that holds it on.
This showed the swingarm bush, there was also no washer so I added one, now its bush washer, exhaust, washer, nut. Should maybe stop loosening off as quickly and prevent any more damage

I of course greased up the swingarm bolt and cleaned it all up.
I then pulled off the osr shock absorber unit, 2 13mm bolts, flash wipes are awesome for cleaning oily stuff btw

This is the top mounting stud, no grease on it at all, this was rectified on refitting of course.

The bottom mounting this was cleaned up, its a poor set up tbh, the bolt is very loose ont he outside hole so the bolt has to be torqued right up to prevent it shearing

The shock was thoroughly cleaned and autosol'ed before re-fitting, its very bling now.
I then focused on the rear brake, the mechanism squeaked when applying the brakes, so i thought no messing rip it apart to clean and lube it as required.
The lever is held on with a split pin (in the picture the split pin has been straightened for removal), washer, return spring and light switch spring. The secret is to extend the spring then pack with washers/coins so theres no tension in the spring, this allows it to come off easily

Lever off, very little dry sticky lube


The lever was cleaned and polished then greased up, this cured the squeak and improved the feel a lot of the brake lever.
However I wasn't done with the rear brakes.
The rear wheel has never been off, so I wasn't sure if the shoes would be heavily worn or not. So I had to pull it off. This picture shows the wheel loose, the drum brake plate removed and notice the nice shiny shocker!

Shoes, yes they look new!

Slight glazing

Look at the friction material thickness, easily 6mm

So I cleaned the dust from the drum, then roughed up the shoes with new emery paper to remove the glaze. I greased the activating rod and where the cam pushes the shoes, this made the action super smooth.
I then turned the bike round and took off the passenger side shocker, cleaned and greased as required.
The gear selector had rust on it so I removed it to clean and polish it up. To do this I had to remove the foot pegs (4 13mm bolts into the bottom of the engine), it came up well, I'm sure you agree, shame the paint on the engine is peeling

This also reminded me of the side stand switch, most remove these, it was still here on this bike but the original bolts had broken so it was sort of cable tied on. I decided to repair this properly and have it fully functioning. So I got out the drill and enlarged the holes on the bracket to accept some rivets. This means it won't fall off and it also works perfectly. heavy duty it may be but its not going to fall off now.

The handlebars again have succumbed to the rust bug, so I cleaned these up, heres a before picture, never got an after though.
Basically I removed 1 clamp cleaned the bar, put the clamp back on then removed the other clamp cleaned that and then pout it back on.

Mileage on the bike today

I need to sort out the front brake judder, I done a wee bit and its reduced it a lot, need to perfect it as its a fail on bikes.
I will also get some pictures of the bike as it looks great now its 90% polished up. After the MOT the plan is to sell it as its not needed, everyone now has a 750, so the 125 is not needed, its a good wee bike. Good fun but I wouldn't swap the 750 for it!
[BREAK=Shiny]
25th March 2011
Well finished the service on the bike and cleaning then took it for an MOT.
It sailed through as expected. the brakes were really good, almost 100%, still not quite the same as the 750's etc! So it has an MOT certificate until the 12th April 2012.
So I eventually got some pictures as it stands


Headlight came out ok, you can see the ding and rusty spot, but you need to be a lot closer now to see it

So all we need to do is sell it. Its a great bike but absolutely no use to us any more. We all have 750's minimum. So it needs to go, be a great learner bike (its used in a lot of riding schools for CBT's and lessons) or even a city hack. Its not to great on long fast journeys as it doesn't do fast really. Will hit 70 odd indicated but most bikers cruise a bit higher than that...
MOT £20
Road tax £15
Road legal for a year £35 :lol:
[BREAK=Sold!]
29th March 2011
Well at half 7 this evening the bike was sold. Got the full asking price for it.
Seems to have gone to a good home which is nice. I hope its looked after well.
Had a lot of jokers calling about it etc, I hate selling stuff.
So farewell old faithful.
The final for sale pictures, some may be repeats


Last edited by a moderator:

