There is more to life with TurboRenault.co.uk
You are using an out of date browser. It may not display this or other websites correctly.
You should upgrade or use an alternative browser.
You should upgrade or use an alternative browser.
Brigsy
Media Mogul. Instagram legend.
The rear bars are the anti roll bars @Big Steve - Raider no need to remove them to adjust the rideheight. Lower models are a 2 bar setup too iirc campus etc. I believe they need to be set correctly to work properly too. Look like a nightmare to remove as always rusty as feck
Brigsy
Media Mogul. Instagram legend.
always outnumbered never out gunned
good work jon, great update too. Always suprises me how the newer stuff seems more worn out or seized and rusty. The 57 dauphine i had gave me no a single issue with undoing anything, get on the modern clio's and bits are seized and sheering off everywhere! Are you going for uprated shocks at all?
Its crazy how much grief this has given me. I have done 20 year old gtts in 15 mins on the car ! Im thinking about slipping a pair of Gaz gold gtt or clio valver rear shocks on - i reckon they will go straight on. Front is on 172 cup ahocks and springs - i reckon with a bit of work the handling will be epic on this - especially as n/a just keep your foot down on the corners. Its a shame it wont be ready for Blyton !
Brigsy
Media Mogul. Instagram legend.
Part 14 - The little things
Small mid week wiring update..the dash had a few bodges that needed sorting. First of all the clio hazard light & central locking switch were bodged into the centre console and looked shocking. The original hazard light switch was painted black to hide it anyway picked up a new hazard light switch and unbutchered centre console on the U-Pull it visit. I compared the clio and kangoo wiring on Renault visu and looked like the kangoo switches could be wired in easily.
Tracing the wiring - looks daunting but in reality very simple.
Trying to find various plugs - speaker wiring was located and wired up/speakers fitted. Obd plug has been cut off, wiring is in the rats nest behind centre console so need one from a breaker to rewire
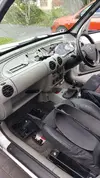
Centre console fitted - kangoo locking switch wired up - works fine as does hazard light switch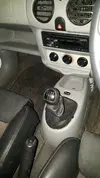
Next job was to modify the clock housing to fit the clio clock as the kangoo clock was still fitted & not working - could not be wired up as its tied into the kangoo clocks.
Choppy choppy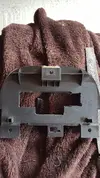
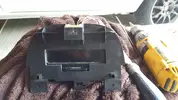
Done - kangoo locking switch even lights up.

Still more issues to look at though not done yet
Wire in obd port
Fix interior lights/ door plunger switches as not working right
Fix rear fog - no telltale on dash & not working
Fix engine warning light - noticed it does not illuminate with ign on - serv light etc works - can guarantee it will be on
A lot better now though. Its quite a nice place to be
Small mid week wiring update..the dash had a few bodges that needed sorting. First of all the clio hazard light & central locking switch were bodged into the centre console and looked shocking. The original hazard light switch was painted black to hide it
Tracing the wiring - looks daunting but in reality very simple.

Trying to find various plugs - speaker wiring was located and wired up/speakers fitted. Obd plug has been cut off, wiring is in the rats nest behind centre console so need one from a breaker to rewire

Centre console fitted - kangoo locking switch wired up - works fine as does hazard light switch

Next job was to modify the clock housing to fit the clio clock as the kangoo clock was still fitted & not working - could not be wired up as its tied into the kangoo clocks.
Choppy choppy


Done - kangoo locking switch even lights up.

Still more issues to look at though not done yet
Wire in obd port
Fix interior lights/ door plunger switches as not working right
Fix rear fog - no telltale on dash & not working
Fix engine warning light - noticed it does not illuminate with ign on - serv light etc works - can guarantee it will be on
A lot better now though. Its quite a nice place to be
Last edited:
Brigsy
Media Mogul. Instagram legend.
Turn in is a lot better than the Extra - not really tried it in anger yet though. The suspension setup is a lot better - wider track - plenty of negative camber - castor etc. Soon find out in a couple of weeksHow would you compare the handling to your other Van ?
Brigsy
Media Mogul. Instagram legend.
Part 15 - By any means necessary
Since last major update the van has sat on axle stands due to the fact i ordered bushes from Lithuania on ebay instead of uk ! This meant i had a few evenings spare so give the beam a lick of paint. Quick derust and one coat of POR15 as this is no concours project - just tidy up and the paint was already paid for so fuck it....nothing else to do as had to have week off gym as forearm totally shot from hammering the thing to bits
Got a bit carried away and painted the drums and spare wheel carrier (you might notice bushes/Sunday date in pic as lost pics through the week as my trusty S6 edge+ has died! work camera to the rescue)
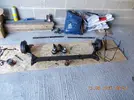
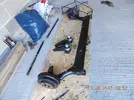
Waiting for the bushes to arrive, waiting, waiting as need it rolling asap as i don't want/need another garage ornament. Thursday comes and no parcel - Friday comes and goes no parcel. Pretty much wrote off refitting the beam last weekend but 1pm Sat get a knock at the door and a small parcel arrives with bush goodness. Quick compare and same dimensions as originals - should be good to go !?
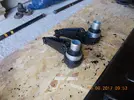
Its getting late and busy on the Sat evening so leave it until Sunday morning to rebuild the beam - a visit to my trusty 20ton press in my other lockup with @Sheryl_O in toe as its a two person job to juggle the beam. Press well worth the £140 it cost - used it a fair few times over the years. Pops the bush into the arm no problem using a socket and old wheelbearing outer race as mandrels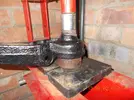
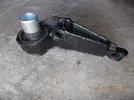
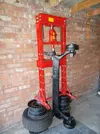
This is where it gets interesting - need to press the arms back onto the beam. The beam is far too big to fit in the press so its time to get creative. Initially i laid the press down but the bottle jack would not pump in that position. The only options left at this point are to use threaded bar or engineers vice to press them in - both pretty crap method but probably get away with it - Brute force with the hammer and knock them home - Forearm still shot to pieces so not really an option also high chance of damaging the new bushes. Look round and see a stack of gtt spare steel wheels - lets jack the press up a bit its a bit sketchy but anything goes in my lockup and press was solid so the H&S conscious need not worry !
Pop and we are in
Only had one incident where one bush started going in out of square - knocked it back out with hammer which made it fly out bouncing off my chest and landing on Shez's foot leaving a circle bruise - no tears here just laughing shes well hard ha

So job jobbed 1.5hrs later and the beam is back in the trusty dci (im thinking again it would be awesome to have a van for this job LOL)
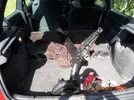
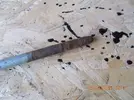
Next step in preparation for refitting the beam i chased the threads on the beam bolts. They were super tight on removal and couldn't be arsed going through the carry on of the nuts sticking n the rust etc so ran a m14x1.5 die down the thread. A few may question why not renew the bolts ? Bolts are a tenner each - die was about a fiver which is a lot more cost effective on a budget !
Rusty sea dog before
As good as new ?? maybe not but good enough for me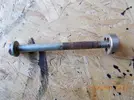
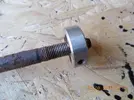
Since last major update the van has sat on axle stands due to the fact i ordered bushes from Lithuania on ebay instead of uk ! This meant i had a few evenings spare so give the beam a lick of paint. Quick derust and one coat of POR15 as this is no concours project - just tidy up and the paint was already paid for so fuck it....nothing else to do as had to have week off gym as forearm totally shot from hammering the thing to bits
Got a bit carried away and painted the drums and spare wheel carrier


Waiting for the bushes to arrive, waiting, waiting as need it rolling asap as i don't want/need another garage ornament. Thursday comes and no parcel - Friday comes and goes no parcel. Pretty much wrote off refitting the beam last weekend but 1pm Sat get a knock at the door and a small parcel arrives with bush goodness. Quick compare and same dimensions as originals - should be good to go !?

Its getting late and busy on the Sat evening so leave it until Sunday morning to rebuild the beam - a visit to my trusty 20ton press in my other lockup with @Sheryl_O in toe as its a two person job to juggle the beam. Press well worth the £140 it cost - used it a fair few times over the years. Pops the bush into the arm no problem using a socket and old wheelbearing outer race as mandrels


This is where it gets interesting - need to press the arms back onto the beam. The beam is far too big to fit in the press so its time to get creative. Initially i laid the press down but the bottle jack would not pump in that position. The only options left at this point are to use threaded bar or engineers vice to press them in - both pretty crap method but probably get away with it - Brute force with the hammer and knock them home - Forearm still shot to pieces so not really an option also high chance of damaging the new bushes. Look round and see a stack of gtt spare steel wheels - lets jack the press up a bit
Pop and we are in

Only had one incident where one bush started going in out of square - knocked it back out with hammer which made it fly out bouncing off my chest and landing on Shez's foot leaving a circle bruise - no tears here just laughing shes well hard ha

So job jobbed 1.5hrs later and the beam is back in the trusty dci (im thinking again it would be awesome to have a van for this job LOL)

Next step in preparation for refitting the beam i chased the threads on the beam bolts. They were super tight on removal and couldn't be arsed going through the carry on of the nuts sticking n the rust etc so ran a m14x1.5 die down the thread. A few may question why not renew the bolts ? Bolts are a tenner each - die was about a fiver which is a lot more cost effective on a budget !
Rusty sea dog before

As good as new ?? maybe not but good enough for me


Brigsy
Media Mogul. Instagram legend.
Part 16 - Lows
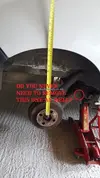
So refit beam which goes fairly straightforward. From pre beam removal measurements of 415mm i guesstimate the beam wants to come down 40mm from original height - so reset the torsion bars at the new height of 375mm off the floor estimating the beam will drop another 10mm when on the deck - approx 50mm drop. Grease fuck out of everything incase i need to revisit in the future (hopefully not !!)
However we are not done yet - need t renew the rusty sea dog brake pipes. £3 gives me a nice pair of pipes pre flared with fittings from local motor factors - Tell them about the kangoo and they laugh like fuck "you will buy these shite old Renaults" lol
Pipes on not too much drama, looks a bit cleaner overall and brake pipes done for next mot so not a fruitless job. Brakes bled with Motul RBF600 in preparation for track use - shoe adjustment checked etc all good. Pipes look a bit wavy in these pics for some reason however they follow the lines of the beam fine from the top just the angle of the pic. Freed off rear brake compensator as seized as per usual
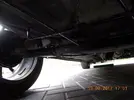
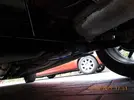
Note the bitsa exhaust - Decat - 2x small silencers - unknown back box god knows what it is looks shit poss diesel - works in a fashion and blows less now i have tightened the exhaust clamp up note clean sills etc
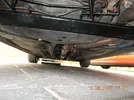
So the big question is how does it sit ??
Before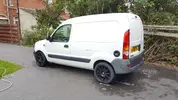 After
After
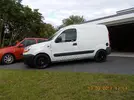
Worth the hassle ? god knows but looks a bit more pleasing to the eye. Back in the garage for now as leaving it idling reminded me how noisy the dephaser is. Im sure one day i will actually get to drive it instead of fixing it
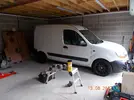
Drive was quite busy on Sunday too a rare visit from the GTT. Soon be all the cars on here cant wait
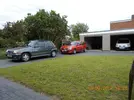
Next weekends job is belts and dephaser etc. List of jobs getting smaller stay tuned folks !!
So refit beam which goes fairly straightforward. From pre beam removal measurements of 415mm i guesstimate the beam wants to come down 40mm from original height - so reset the torsion bars at the new height of 375mm off the floor estimating the beam will drop another 10mm when on the deck - approx 50mm drop. Grease fuck out of everything incase i need to revisit in the future (hopefully not !!)
However we are not done yet - need t renew the rusty sea dog brake pipes. £3 gives me a nice pair of pipes pre flared with fittings from local motor factors - Tell them about the kangoo and they laugh like fuck "you will buy these shite old Renaults" lol
Pipes on not too much drama, looks a bit cleaner overall and brake pipes done for next mot so not a fruitless job. Brakes bled with Motul RBF600 in preparation for track use - shoe adjustment checked etc all good. Pipes look a bit wavy in these pics for some reason however they follow the lines of the beam fine from the top just the angle of the pic. Freed off rear brake compensator as seized as per usual


Note the bitsa exhaust - Decat - 2x small silencers - unknown back box god knows what it is looks shit poss diesel - works in a fashion and blows less now i have tightened the exhaust clamp up

So the big question is how does it sit ??
Before
 After
After
Worth the hassle ? god knows but looks a bit more pleasing to the eye. Back in the garage for now as leaving it idling reminded me how noisy the dephaser is. Im sure one day i will actually get to drive it instead of fixing it

Drive was quite busy on Sunday too a rare visit from the GTT. Soon be all the cars on here cant wait

Next weekends job is belts and dephaser etc. List of jobs getting smaller stay tuned folks !!
Sheryl_O
Active Member
Part 15 - By any means necessary
Since last major update the van has sat on axle stands due to the fact i ordered bushes from Lithuania on ebay instead of uk ! This meant i had a few evenings spare so give the beam a lick of paint. Quick derust and one coat of POR15 as this is no concours project - just tidy up and the paint was already paid for so fuck it....nothing else to do as had to have week off gym as forearm totally shot from hammering the thing to bits
Got a bit carried away and painted the drums and spare wheel carrier(you might notice bushes/Sunday date in pic as lost pics through the week as my trusty S6 edge+ has died! work camera to the rescue)
View attachment 22334 View attachment 22335
Waiting for the bushes to arrive, waiting, waiting as need it rolling asap as i don't want/need another garage ornament. Thursday comes and no parcel - Friday comes and goes no parcel. Pretty much wrote off refitting the beam last weekend but 1pm Sat get a knock at the door and a small parcel arrives with bush goodness. Quick compare and same dimensions as originals - should be good to go !?
View attachment 22336
Its getting late and busy on the Sat evening so leave it until Sunday morning to rebuild the beam - a visit to my trusty 20ton press in my other lockup with @Sheryl_O in toe as its a two person job to juggle the beam. Press well worth the £140 it cost - used it a fair few times over the years. Pops the bush into the arm no problem using a socket and old wheelbearing outer race as mandrelsView attachment 22337 View attachment 22338
This is where it gets interesting - need to press the arms back onto the beam. The beam is far too big to fit in the press so its time to get creative. Initially i laid the press down but the bottle jack would not pump in that position. The only options left at this point are to use threaded bar or engineers vice to press them in - both pretty crap method but probably get away with it - Brute force with the hammer and knock them home - Forearm still shot to pieces so not really an option also high chance of damaging the new bushes. Look round and see a stack of gtt spare steel wheels - lets jack the press up a bitits a bit sketchy but anything goes in my lockup and press was solid so the H&S conscious need not worry !
Pop and we are in
View attachment 22339
Only had one incident where one bush started going in out of square - knocked it back out with hammer which made it fly out bouncing off my chest and landing on Shez's foot leaving a circle bruise - no tears here just laughing shes well hard ha
View attachment 22340
So job jobbed 1.5hrs later and the beam is back in the trusty dci (im thinking again it would be awesome to have a van for this job LOL)
View attachment 22341
Next step in preparation for refitting the beam i chased the threads on the beam bolts. They were super tight on removal and couldn't be arsed going through the carry on of the nuts sticking n the rust etc so ran a m14x1.5 die down the thread. A few may question why not renew the bolts ? Bolts are a tenner each - die was about a fiver which is a lot more cost effective on a budget !
Rusty sea dog before
View attachment 22342
As good as new ?? maybe not but good enough for meView attachment 22343 View attachment 22344
Can't help but laugh at this :ag: my poor foot! I was just uncontrollable laughing! At least we got the job done...:bi:
Brigsy
Media Mogul. Instagram legend.
Really liking the Kangoo, just read the thread.
I got a bit curious, do the rear axle bush fit other cars as well? Clio mk1 and 19 for instance?
From what i gather the bushes should go straight into a gtt beam and clio1 & 19 arent a million miles away. Some bushes for sale have measurements so could soon compare
j_carter
Well-Known Member
I did Laugh reading this. Very well written thread Jon. Great work you have done on the van. Be as good as new before long.
Also, how on earth do you get your Mrs to help out? My Mrs does not even know how to open the garage door let alone get her hands dirty. If you haven't already, Marry her!
Also, how on earth do you get your Mrs to help out? My Mrs does not even know how to open the garage door let alone get her hands dirty. If you haven't already, Marry her!
|sAs|
Well-Known Member
From what i gather the bushes should go straight into a gtt beam and clio1 & 19 arent a million miles away. Some bushes for sale have measurements so could soon compare
Found these that are listed for R19:
Rear Axle Mounting Bush For Renault 19 Megane Ref. OE 7700776734 7700777092 | eBay
and these:
Länkarmsbussning RENAULT Megane,R19 1996-| HUTCHINSON 560277, 7700777092.
They don't seem to be listed in Dialogys though, I found them by starting with the part number from the one you posted in the pic.
If you haven't already, Marry her!
Yeah the pressure must be unbearable now @Brigsy... Would make a great National Day..? :ap:
Brigsy
Media Mogul. Instagram legend.
I did Laugh reading this. Very well written thread Jon. Great work you have done on the van. Be as good as new before long.
Also, how on earth do you get your Mrs to help out? My Mrs does not even know how to open the garage door let alone get her hands dirty. If you haven't already, Marry her!
Cheers mate hopefully be able to drive it soon
Yeah the pressure must be unbearable now @Brigsy... Would make a great National Day..? :ap:
One day
Found these that are listed for R19:
Rear Axle Mounting Bush For Renault 19 Megane Ref. OE 7700776734 7700777092 | eBay
and these:
Länkarmsbussning RENAULT Megane,R19 1996-| HUTCHINSON 560277, 7700777092.
They don't seem to be listed in Dialogys though, I found them by starting with the part number from the one you posted in the pic.
Diaologys only list full arm and bush which is mega money sadly ! Had a set years ago which i sold on. The bushes fit grand though
Brigsy
Media Mogul. Instagram legend.
Part 17 - The maiden voyage
So the kangoo is back on 4 wheels for the first time in ages. After all the work done needed a test run - not keen on going too far with rattly dephaser so stayed local. Got offered a freezer for the garage for almost free so went round and collected it. 3 mile journey and nothing fell off ! a milestone achieved first impressions is gearchange is now positive now engine is not falling out - the interior is a lot better now - still drives great but a bit flat low down (lack of boost ??
  cam timing out ?? ) we will look at this very soon.
Still awaiting the big clean - bumper plastics lookig unloved. Seen a fellow clio driver on the short journey got the nod of approval.
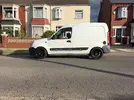
Like a glove

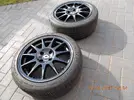
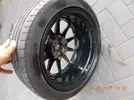
Weekend comes and got all the gear ready to do the timing belt/dephaser etc. Cracks driver wheel off and jack up - The bloody crank pulley is shot & rubber cracked - just generally fucked with age so job is on the stop as need one before doing belts ! Also noted wheelbolts up front are only 20mm long ! fuck me glad i found this out now before hard use, luckily they had been tightened ft & and a bit more required the breaker bar ad a crack to undo. Cleaned wheels/polished/sealed come up ok as nothing else to do and a few spare hours. Nut and bolt checked all suspension components up front not taking any chances due to finding too many bodges - nothing nasty to report. Give front calipers a lick of Por15 whilst wheels were off.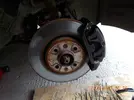 Rear beam looking fresh
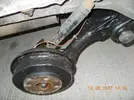
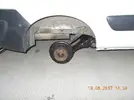 Polybushed lower dogbone - bonus
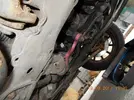

Turinis came up ok with a bit of graft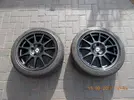
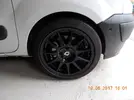 To be continued
So the kangoo is back on 4 wheels for the first time in ages. After all the work done needed a test run - not keen on going too far with rattly dephaser so stayed local. Got offered a freezer for the garage for almost free so went round and collected it. 3 mile journey and nothing fell off ! a milestone achieved
Still awaiting the big clean - bumper plastics lookig unloved. Seen a fellow clio driver on the short journey got the nod of approval.

Like a glove

Weekend comes and got all the gear ready to do the timing belt/dephaser etc. Cracks driver wheel off and jack up - The bloody crank pulley is shot & rubber cracked - just generally fucked with age so job is on the stop as need one before doing belts ! Also noted wheelbolts up front are only 20mm long ! fuck me glad i found this out now before hard use, luckily they had been tightened ft & and a bit more required the breaker bar ad a crack to undo. Cleaned wheels/polished/sealed come up ok as nothing else to do and a few spare hours. Nut and bolt checked all suspension components up front not taking any chances due to finding too many bodges - nothing nasty to report. Give front calipers a lick of Por15 whilst wheels were off.
 Rear beam looking fresh
 Polybushed lower dogbone - bonus

Turinis came up ok with a bit of graft


 To be continued
Last edited:
Brigsy
Media Mogul. Instagram legend.
Part 18 - Losing the will..
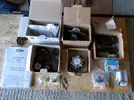
So Sunday comes and its belt time. Source a pulley locally so its all systems go - Borrowed a selection of pukka tools and spent my life savings on parts - F4r workshop manual printed out
Oem goodness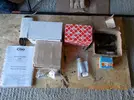
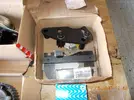
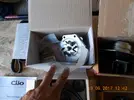
 Borrowed the beast to crack the crank pulley off
 i recall reading 950nm torque max. Snap on tech angle torque wrench as everything is angle tighten - why do they not specify a set NM i do not know !?
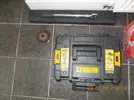
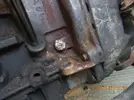
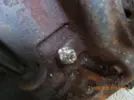
So strip the front end down and start to strip the bits off. Rad out to flush etc. Go to undo the crank bung to fit TDC pin in - loads of rust on it and looks ropey as somebody has been there before. Go to crack it with an E14 and the fecker spins due to mega tight etc. No problem i bang a 6 sided socket on it - fecker does not go just spins. FFS stuck at the easy bit as per usual Made a right mess of it trying to chisel it etc - tight as feck !! Close to chucking it back together and flogging it on at this point
Anyway crack on and strip inlet plenum top off - wiring etc - Taking pics for reference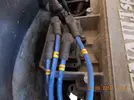
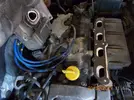
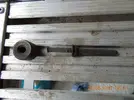
Makes a good table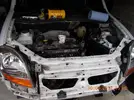 Cup aux tensioner bolt snaps when undoing it
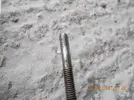
  Repaired - drilled/tapped & expoxy to lock

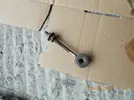
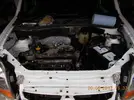
As the job is fucked im having to wait on a welder to crack the bung out so nothing else to do - give bay a once over - no concours just a quick wipe
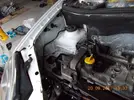
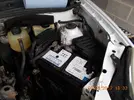
To be continued
So Sunday comes and its belt time. Source a pulley locally so its all systems go - Borrowed a selection of pukka tools and spent my life savings on parts - F4r workshop manual printed out
Oem goodness


 Borrowed the beast to crack the crank pulley off
So strip the front end down and start to strip the bits off. Rad out to flush etc. Go to undo the crank bung to fit TDC pin in - loads of rust on it and looks ropey as somebody has been there before. Go to crack it with an E14 and the fecker spins due to mega tight etc. No problem i bang a 6 sided socket on it - fecker does not go just spins. FFS stuck at the easy bit as per usual


Anyway crack on and strip inlet plenum top off - wiring etc - Taking pics for reference


Makes a good table
 Cup aux tensioner bolt snaps when undoing it
  Repaired - drilled/tapped & expoxy to lock


As the job is fucked im having to wait on a welder to crack the bung out so nothing else to do - give bay a once over - no concours just a quick wipe


To be continued
Brigsy
Media Mogul. Instagram legend.
Part 19 - Now or never
So im stuck on the fecking bolt in the block for the tdc pin. My usual hammer a socket method over the bolt has totally failed. Im stuck for a welder as my mates is borrowed out and thinking how the feck am i going to get this sorted asap. My man Alex was round that day finishing off the wiring in the garage - i show him the situation and he say he has a mig set in his garage. I convince him now is a good time to test out the new wiring with his welder
So first attempt was to weld a nut onto the bolt.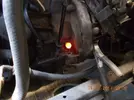
Bar on and snap ! penetration not great as hard to get in, oldskool stick welder and 2.5mm rods would be better. Try a few other nuts and no joy as its tight as feck !!
Last attempt was to blat a load of weld onto the bolt. this had the bolt glowing as cranked the settings up on the mig. Belted an irvin rounded bolt remover onto the blob of weld on the stud and the bolt cracks off with a bang, was tight as fuck !!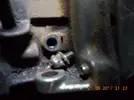
offending bolt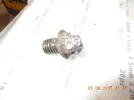
Time is cracking on at this point but keen to crack on, so next step was to pin the crank up. I pull the plugs out noting that they look about shot - makes the engine easier to crank over by hand. Wind the flywheel mark to the 0deg on the gearbox bellhousing and the tdc pin slides in lovely (pin wont go fully home when in the balancing holes on crank as messed about trying it for the crack)
Next step was to insert the horseshoe into the cams. I pop the seals out with a screwdriver and fit the horseshoe on the exhaust cam. Miles out as expected !
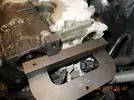
I leave it for now and start again the next day. First step was to buzz the crank pulley off. The bolt flies off with the beast i note more tippex marks !!
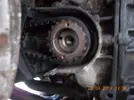
Cam covers off more tippex !!
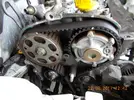
So next step is to fit the pulley lock
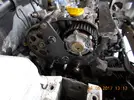
Dephaser allen key seal cracks off no bother and oil pisses out as expected. I manage to jack the engine up high enough to slip the buzz gun in to crack the dephaser bolt off which comes off easy. No room for buzz gun on exhaust so use the breaker bar and it comes undone with a crack.
Stripped
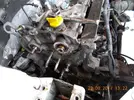
I then strip the cam cover off for resealing. Breather plate off first - then a load of m6 bolts of various lengths. Cams look to be in good condition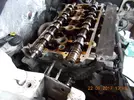
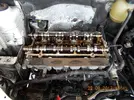
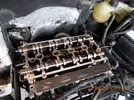 Cam cover gets a quick scrub with brake cleaner and stiff brush comes up ok. Inside is cleaned thoroughly
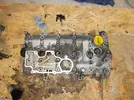
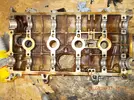
Anaerobic Gen Renault sealant applied - no pics as sticky and horrible. Cam cover back on and tightened in sequence / torqued to spec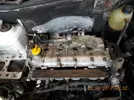 New cam seals fitted - note gap for dephaser pulley on inlet cam seal
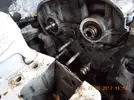
Exhaust pulley and new dephaser on, cam ends/pulleys & crank degreased thoroughly before fitting. New idler pulleys/tensioner and belt fitted. Rotate pulleys whilst still loose/pinned to equalise belt tension and set belt tensioner on the mark. Pulley lock back on & horse shoe back in the cams which have been reset to stock timing. Fit lower belt cover and fit crank pulley & new bolt and torque to spec.
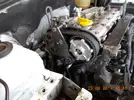
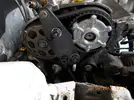
Torque cam pulley lock to 80nm as per autodata as no figures for the tool in the workshop manual. I torque the pulleys up to spec noting a bit of dwell on the cam pulleys when torquing. Remove cam lock and the bloody horseshoe is off a little bit timing is out ! i note the cam slots are rough as somebody has been there before and semi fucked them using a non genuine timing tool at a guess I then repeat the above a few times and timing is close but not bang on - no where near close enough for the horseshoe to slip in. This would probably be good enough for many technicians as the horseshoe will push in with a shove but as many of you know im pretty anal about stuff like this so its got to be bang on. At this point i have to ask for advice on whats going wrong and why timing is moving. The advice is to flog the cam locking tool up FT.
I nip the cogs up at 100nm. This makes the timing better as less movement but still slighty off. Next attempt i flog the cogs up to 140nm. This holds the pulleys rock solid - torque dephaser/exhaust cam to spec - remove all pins and rotate the engine a few times - Refit tdc pin and horseshoe slips straight in no worries. Good enough for me
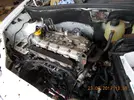 so fit new seal into the dephaser next
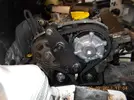 Then get the other stuff back on as must hear it fired up now to check its all ok. Refit old plugs and wanky magnecor leads temporary to get it going. Crank over with coil disconnected to prime the new dephaser - engine is cranking fine with compression so just plug the coil back in and hit the switch. Fires up lovely and settles to a nice idle. Job jobbed
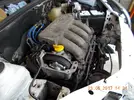
Long winded job but not too bad. Big thanks to @SP33DY for borrowing me his pukka snap on torque wrench, sorting out crank pulley and generally awesome advice on it when i was stuck with getting the timing bang on.
Big thanks to @R5turbo2 for borrowing the genuine renault timing tools
To be continued..
So im stuck on the fecking bolt in the block for the tdc pin. My usual hammer a socket method over the bolt has totally failed. Im stuck for a welder as my mates is borrowed out and thinking how the feck am i going to get this sorted asap. My man Alex was round that day finishing off the wiring in the garage - i show him the situation and he say he has a mig set in his garage. I convince him now is a good time to test out the new wiring with his welder
So first attempt was to weld a nut onto the bolt.

Bar on and snap ! penetration not great as hard to get in, oldskool stick welder and 2.5mm rods would be better. Try a few other nuts and no joy as its tight as feck !!
Last attempt was to blat a load of weld onto the bolt. this had the bolt glowing as cranked the settings up on the mig. Belted an irvin rounded bolt remover onto the blob of weld on the stud and the bolt cracks off with a bang, was tight as fuck !!

offending bolt

Time is cracking on at this point but keen to crack on, so next step was to pin the crank up. I pull the plugs out noting that they look about shot - makes the engine easier to crank over by hand. Wind the flywheel mark to the 0deg on the gearbox bellhousing and the tdc pin slides in lovely (pin wont go fully home when in the balancing holes on crank as messed about trying it for the crack)
Next step was to insert the horseshoe into the cams. I pop the seals out with a screwdriver and fit the horseshoe on the exhaust cam. Miles out as expected !

I leave it for now and start again the next day. First step was to buzz the crank pulley off. The bolt flies off with the beast

Cam covers off more tippex !!

So next step is to fit the pulley lock

Dephaser allen key seal cracks off no bother and oil pisses out as expected. I manage to jack the engine up high enough to slip the buzz gun in to crack the dephaser bolt off which comes off easy. No room for buzz gun on exhaust so use the breaker bar and it comes undone with a crack.
Stripped

I then strip the cam cover off for resealing. Breather plate off first - then a load of m6 bolts of various lengths. Cams look to be in good condition


 Cam cover gets a quick scrub with brake cleaner and stiff brush comes up ok. Inside is cleaned thoroughly

Anaerobic Gen Renault sealant applied - no pics as sticky and horrible. Cam cover back on and tightened in sequence / torqued to spec
 New cam seals fitted - note gap for dephaser pulley on inlet cam seal
Exhaust pulley and new dephaser on, cam ends/pulleys & crank degreased thoroughly before fitting. New idler pulleys/tensioner and belt fitted. Rotate pulleys whilst still loose/pinned to equalise belt tension and set belt tensioner on the mark. Pulley lock back on & horse shoe back in the cams which have been reset to stock timing. Fit lower belt cover and fit crank pulley & new bolt and torque to spec.


Torque cam pulley lock to 80nm as per autodata as no figures for the tool in the workshop manual. I torque the pulleys up to spec noting a bit of dwell on the cam pulleys when torquing. Remove cam lock and the bloody horseshoe is off a little bit timing is out ! i note the cam slots are rough as somebody has been there before and semi fucked them using a non genuine timing tool at a guess
I nip the cogs up at 100nm. This makes the timing better as less movement but still slighty off. Next attempt i flog the cogs up to 140nm. This holds the pulleys rock solid - torque dephaser/exhaust cam to spec - remove all pins and rotate the engine a few times - Refit tdc pin and horseshoe slips straight in no worries. Good enough for me
 so fit new seal into the dephaser next
 Then get the other stuff back on as must hear it fired up now to check its all ok. Refit old plugs and wanky magnecor leads temporary to get it going. Crank over with coil disconnected to prime the new dephaser - engine is cranking fine with compression so just plug the coil back in and hit the switch. Fires up lovely and settles to a nice idle. Job jobbed
Long winded job but not too bad. Big thanks to @SP33DY for borrowing me his pukka snap on torque wrench, sorting out crank pulley and generally awesome advice on it when i was stuck with getting the timing bang on.
Big thanks to @R5turbo2 for borrowing the genuine renault timing tools
To be continued..
Last edited:
Similar threads
- Replies
- 126
- Views
- 2K

