First things first, a massive thanks to Russo (Phil) for making these gaskets available.
If your otherwise immaculate Vee is suffering like this:
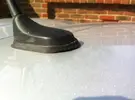
Then instead of spending £120+ with Renault for a complete new aerial base, you can now purchase a replacement lower gasket for only £12.
Here's the thread showing the amazing tooling Russo made: LINK
Should you wish to purchase a gasket, this can be done via the V6Clio.net store: LINK
As usual, only do this if you feel comfortable and don't blame me if something goes wrong!!!
Tools Required
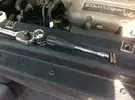
- Torx 20 Bit / Driver
- Torx 30 Bit / Driver
- 22mm Socket
- Suitable ratchet for socket (1/4" most likely)
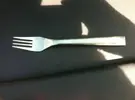
Oh and don't forget the trusty fork (or trim tool if you're posh)
Step One
Open boot
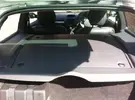
Remove first engine cover
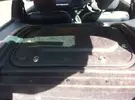
I removed the second engine cover, but in reality there's actually no need. In fact I would recommend NOT removing the 2nd engine cover as there's less chance of losing bits down the massive hole!
Step Two
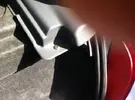
Using your T30 bit or driver, undo this screw holding the right-hand engine bay trim in place.
Step Three
Carefully pull the boot seal off, do this all around the boot, just leaving it in place along the bottom edge of the boot.
Step Four
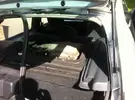
Fold driver's seat forwards, unhook the net, and unscrew the net clip:
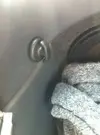
Now, using your T20 bit or driver, undo all the screws holding the middle trim piece in place.
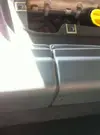
3 screws on the driver's side and 3 screws on the passenger side. Note that the 2 vertical screws are self-tapping screws, and the 4 horizontal screws are machine screws!
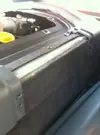
Once undone, remove the center trim piece:
Step 5
OK, you can now remove the long driver's side engine bay trim from the car. You can leave the heavy leaded foam underlay in place.
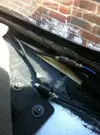
If you lift up this foam towards the rear, you'll find these two connectors. Disconnect them now; you don't need to note which way round they're connected as they only go one way. You'll also find a 3rd wire which is just wrapped in foam and taped down. Release this wire too.
Step 6
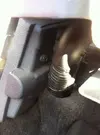
OK, so back at the rear of the car, looking at the bottom of the C-pillar trim, you'll see a smaller T20 screw holding it in place. I only photographed the passenger side screw, but it's a mirror image of this!
Undo this screw on the driver's side.
Step 7
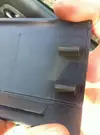
Now, the bit of trim at the top of the rear window (linking B and C pillar trims together) needs to be popped off. This uses quite robust plastic clips (see below) and just needs a bit of brute force to release it. DO THIS ON BOTH SIDES OF THE CAR!
Step 8
Now you can completely remove the C-pillar trim on the driver's side. There's a couple of clips holding it onto the C-pillar and then a fir-tree clip holding it into the roof. This is where the fork comes in handy!! With a bit of persuasion, it will come off completely.
On the passenger side, release the C-pillar trim as much as possible. This includes releasing the clips holding it to the C-pillar and also releasing the fir-tree clip at the top, pictured below:
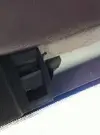
It's not necessary to completely remove the passenger side C-pillar trim and it's a real pain to get access to the T20 retaining screw due to the cable conduit in the way. You just need enough play in it to allow the roof lining to drop down sufficiently.
Step 9
MAKE SURE YOUR HANDS ARE CLEAN!!
Pull down on the headlining at the rear edge and in the middle. The retaining fir-tree clip should pop out easily. You can now gently pull the headlining down, concentrating mainly on the driver's side where there is more room for it to drop. You don't need it to come down much to get the access you need.
Step 10
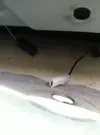
Follow the cables you disconnected earlier along their path and remove them from the various cable clips they run through up to the aerial. You'll also find another cable which you need to disconnect as shown:
Step 11
Get your 22mm hex socket and ratchet and undo this main retaining nut:
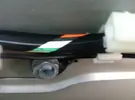
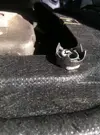
You'll notice it has an irregular tooth pattern. This is highly important and when you come to put it back on, you need to make sure the cables run through the open part (at the 12 o'clock position) on this photo:
Step 12
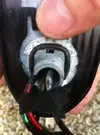
Right, lift up the aerial from outside and pull all the cables through.
Pull off the crappy old gasket and put the new one in place.
Also replace the o-ring around the inner part of the aerial as the old one has likely perished and/or lost its elastic memory.
Step 13
Replace the aerial, making sure the cables run down the middle of its stud.
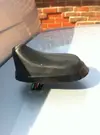
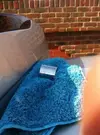
If you're on your own, put something heavy on top of the aerial base. I used a big socket. Otherwise, get someone to hold the aerial down for the next steps.
Step 14
From inside, re-route all the cables through their clips and reconnect them. Get the main nut and, as you put it back, MAKE SURE THE CABLES RUN THROUGH THE "OPEN" PART OF THE JAGGED TEETH.
Use your 22mm socket to tighten up the nut. Keep checking that the wires are loose and not getting snagged on the nut at all.
Step 15
Replace all the various trim, simply reverse the process above.
Step 16
Et Voila! You have a much nicer aerial that should last another few years. Russo recommends treating the rubber occasionally with a rubber treatment to keep the natural oils in place and prevent it from "drying out".
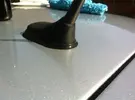
If your otherwise immaculate Vee is suffering like this:

Then instead of spending £120+ with Renault for a complete new aerial base, you can now purchase a replacement lower gasket for only £12.
Here's the thread showing the amazing tooling Russo made: LINK
Should you wish to purchase a gasket, this can be done via the V6Clio.net store: LINK
As usual, only do this if you feel comfortable and don't blame me if something goes wrong!!!
Tools Required

- Torx 20 Bit / Driver
- Torx 30 Bit / Driver
- 22mm Socket
- Suitable ratchet for socket (1/4" most likely)
Oh and don't forget the trusty fork (or trim tool if you're posh)

Step One
Open boot

Remove first engine cover

I removed the second engine cover, but in reality there's actually no need. In fact I would recommend NOT removing the 2nd engine cover as there's less chance of losing bits down the massive hole!
Step Two
Using your T30 bit or driver, undo this screw holding the right-hand engine bay trim in place.

Step Three
Carefully pull the boot seal off, do this all around the boot, just leaving it in place along the bottom edge of the boot.

Step Four
Fold driver's seat forwards, unhook the net, and unscrew the net clip:

Now, using your T20 bit or driver, undo all the screws holding the middle trim piece in place.

3 screws on the driver's side and 3 screws on the passenger side. Note that the 2 vertical screws are self-tapping screws, and the 4 horizontal screws are machine screws!
Once undone, remove the center trim piece:

Step 5
OK, you can now remove the long driver's side engine bay trim from the car. You can leave the heavy leaded foam underlay in place.
If you lift up this foam towards the rear, you'll find these two connectors. Disconnect them now; you don't need to note which way round they're connected as they only go one way. You'll also find a 3rd wire which is just wrapped in foam and taped down. Release this wire too.

Step 6
OK, so back at the rear of the car, looking at the bottom of the C-pillar trim, you'll see a smaller T20 screw holding it in place. I only photographed the passenger side screw, but it's a mirror image of this!

Undo this screw on the driver's side.
Step 7
Now, the bit of trim at the top of the rear window (linking B and C pillar trims together) needs to be popped off. This uses quite robust plastic clips (see below) and just needs a bit of brute force to release it. DO THIS ON BOTH SIDES OF THE CAR!

Step 8
Now you can completely remove the C-pillar trim on the driver's side. There's a couple of clips holding it onto the C-pillar and then a fir-tree clip holding it into the roof. This is where the fork comes in handy!! With a bit of persuasion, it will come off completely.
On the passenger side, release the C-pillar trim as much as possible. This includes releasing the clips holding it to the C-pillar and also releasing the fir-tree clip at the top, pictured below:

It's not necessary to completely remove the passenger side C-pillar trim and it's a real pain to get access to the T20 retaining screw due to the cable conduit in the way. You just need enough play in it to allow the roof lining to drop down sufficiently.
Step 9
MAKE SURE YOUR HANDS ARE CLEAN!!
Pull down on the headlining at the rear edge and in the middle. The retaining fir-tree clip should pop out easily. You can now gently pull the headlining down, concentrating mainly on the driver's side where there is more room for it to drop. You don't need it to come down much to get the access you need.
Step 10
Follow the cables you disconnected earlier along their path and remove them from the various cable clips they run through up to the aerial. You'll also find another cable which you need to disconnect as shown:

Step 11
Get your 22mm hex socket and ratchet and undo this main retaining nut:

You'll notice it has an irregular tooth pattern. This is highly important and when you come to put it back on, you need to make sure the cables run through the open part (at the 12 o'clock position) on this photo:

Step 12
Right, lift up the aerial from outside and pull all the cables through.
Pull off the crappy old gasket and put the new one in place.
Also replace the o-ring around the inner part of the aerial as the old one has likely perished and/or lost its elastic memory.

Step 13
Replace the aerial, making sure the cables run down the middle of its stud.

If you're on your own, put something heavy on top of the aerial base. I used a big socket. Otherwise, get someone to hold the aerial down for the next steps.

Step 14
From inside, re-route all the cables through their clips and reconnect them. Get the main nut and, as you put it back, MAKE SURE THE CABLES RUN THROUGH THE "OPEN" PART OF THE JAGGED TEETH.
Use your 22mm socket to tighten up the nut. Keep checking that the wires are loose and not getting snagged on the nut at all.
Step 15
Replace all the various trim, simply reverse the process above.
Step 16
Et Voila! You have a much nicer aerial that should last another few years. Russo recommends treating the rubber occasionally with a rubber treatment to keep the natural oils in place and prevent it from "drying out".

Last edited:

