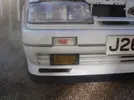
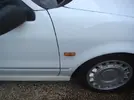
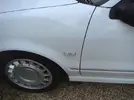
JR
Old enough to know better
SOLD ON IN 2014 TO PRABMIRE
28th September 2009
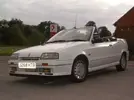
When i saw this on ebay i wanted it as it seemed to be in great nick and with a good history and even better from a www.Retro-Renault.com member. I made a trip down to check it out before committing to a bid. So i bid and got it for the reserve.
Took weeks to get round to arrange collecting it from Gloucester. I made a day trip out of it. Sean kindly picked me up at the station.
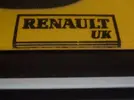
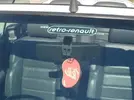
original sticker from 1991, somehow avoided being peeled off!
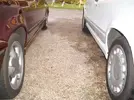
having both cars
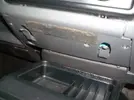
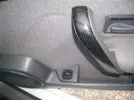
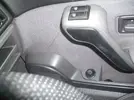
To be honest it took a while to adjust to the difference between phase 1 and 2. The front window switch location, wing mirror switch and dash dimmer on the steering column stood out initially.
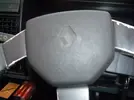
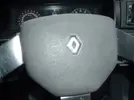
There were more subtle cosmetic differences too, like on the steering wheel, emblem changed from the stripy to the solid diamond.
The Philip's stereo is surprisingly good with some tape cassettes I got off ebay. The rear passenger side speaker is blown, I need to try and find an original replacement.
no stereo fascia clips on the phase one but now i got a fascia :lol:
[break=exterior]
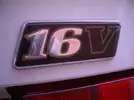
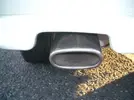
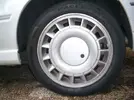
service and swaps
fitted new plugs, leads, distributor, rotor arm. New oil for the engine and gearbox waiting to go in. Re-routed the throttle cable along the brace, cleaned the exterior. Got a working auxiliary water pump relay. Put the clamp terminals on the battery
Cosmetics to sort:
There's a dent in the boot lid where it has been slammed. Scuff on each corner of the bumpers.
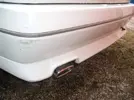
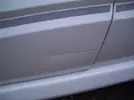
Line dent in the bottom of the passenger door.
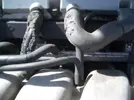
Swapping the hoses on the cam cover breather as it is perished.

[BREAK=more swaps]
After work with an hour or so before sundown i swapped the struts over on the 2 cars as they were new on the old car.
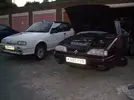
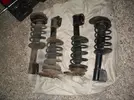
Easy job really, 12 nuts/bolts per side per car. It got dark before i could finish so the phase 2 has to spend the night on stands.
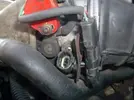
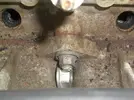
I guess this is for a TB heater as described in the tech. section, may look in to getting that wired up if it's worth it, cleaned the TB.
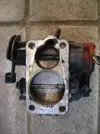
only recently got the injectors ultrasonically cleaned http://www.retro-renault.com/forums...ltrasonic-fuel-injector-cleaning-service.html so I'll swap them too. It'd be nice to keep the green ones in the phase 1 but i can't afford to pay to get them cleaned too.
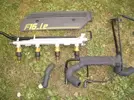
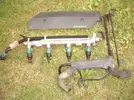
someone working on the car previously must've dropped the nut in the manifold and just left it...
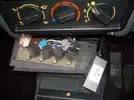
New bulb in the heater controls http://www.retro-renault.com/forums/ice-electrical/12783-heater-control-panel-bulb.html
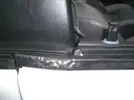
Other swap today was the window seal on the drivers side, small swap with a big difference.
I can happily say the injectors were well worth swapping. The sound and performance are noticeably improved, unlike the economy.
[BREAK=Cam belt munched]
Nearly had a major problem with the belt getting chewed as its working its way off the sprockets.
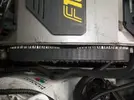
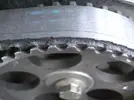
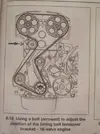
Going to take my time, being a novice and my first time and as the car isn't a daily drive and i can garage it over winter.
Also going to clean up the head and paint the cam cover. Took the rad off to get access and the cooling system needs a flush or three. I'll give the header tank a good scrub.
[BREAK=slowly slowly]
Wheeling the car in and out of the garage meant I'd left the windows down. and forgot the car had an immobilizer and couldn't put the windows up...(doh) Gave the battery a charge off the uno.
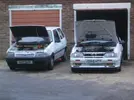
looks like the belt is slipping off the idler, fine on the sprockets and aux sprocket and tensioner.
Here's some shots of how mucky the inlets are
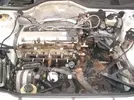
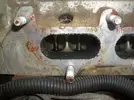
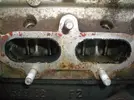
I've cleaned up the manifold, that was as grimy.
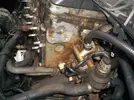
dunno if it's better to clean it up now or jet-wash it when it is back together?
[break=28th January 2010]
got a good bit of weather so took off the timing belt, at last.
Locked at TDC with a 7.9mm punch through the hole in the block. Odd sized punch eh?!
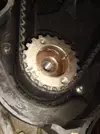
aux belt pulley on the crank sprocket was stuck, got the breaker out to undo it.
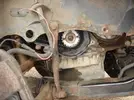
Cam sprockets align OK, but what about the crank sprocket?...
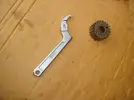
Forked out on a C spanner to get the aux sprocket off, probably only use it twice :roll:
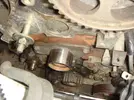
the plastic protector caked in fibers from the belt, as is the side of the head
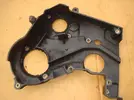
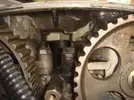
finally sorted, took from October to Feb :lol:
3rd February 2010
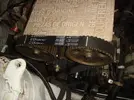
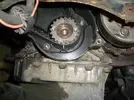
New idler
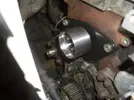
& belt
[break= wheel refurb]
the wheels are uncurbed but the finish has peeled on the diamond cut lip and center surround. Taking them to Wicked Wheels get them back to mint. No rush so 2 in this week and 2 next week when i pick up the 1st 2
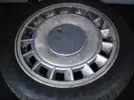
these are the front wheels
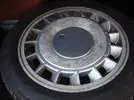
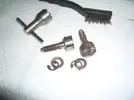
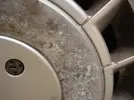
cleaned up the grimy cover locking bolts. They'll get the wire wheel treatment, should come up nice.
09.02.2010
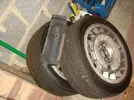
back two off to go to Wicked Wheels in the next few days
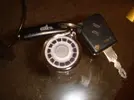
got these back along. the tyres are off now as they were all ruined. I'll get them sorted too and put some good tyres on.
[break=spare set]
i got some phase 1 speed-lines i want to get them sorted with some quality tyres. Then i started thinking about doing something a bit different with them.
i started to prepare them myself. Then i got my white cabby and it has the turbines on which i got professionally done and having seen the finish i know i need to get the speed-lines professionally done too. Will cost me but there's no rush.
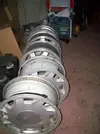
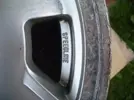
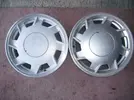
lips are quite chapped
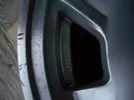
started off sanding down for a light respray
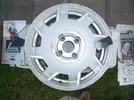
also tried stripping right back
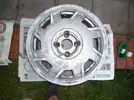
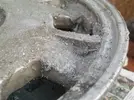
That's about as far as i got before winter kicked in. Now I'm thinking they'd look great in a dark metallic gray
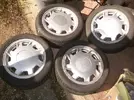
a few purchases
Saw these up for 99p good old ebay. 1's got a chunk missing though.
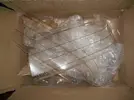
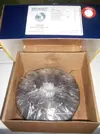
another bargain, £15 for branded grooved disc's. I don't need them at the mo but couldn't resist.
[break=water in the well]
I've read lots about this phase one problem. Last time i drove the car was October 2009 so this water has been sitting until 3rd February 2010! Explains the loss of power i thought was the timing belt issue. Perhaps it caused the belt issue.
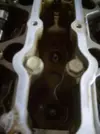
7th February
The rubber seals were in a bad way so i used the left over glue from a universal CV boot kit to sort out all the splits in them. Stripped the paint, unpleasant job.
It had some corrosion where the original paint had long since peeled. I'm going to use silver BBQ paint, that will sort it right out.
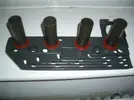
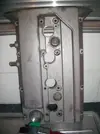
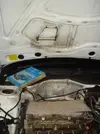
unfortunately one of the studs snapped taking off the vent
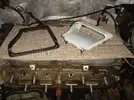
[break=wheely good]
Over 2 weeks ago now i dropped off 2 of my turbines to get refurbished at Wicked Wheels on the Slyfield Industrial Estate in Guildford. I said to the guys there there's no rush as the car isn't running. I called up today and they'd forgotten about the caps! i went and dropped off the other two wheels and picked up the finished 2.
They went from this;
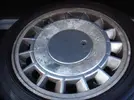
To this;
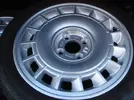
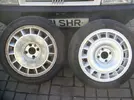
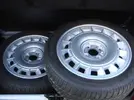
I'm pleased with the results, like new! The caps will be let down by the locks, i need to try and get them to a good standard somehow as the rattle can silver i tried is rubbish next to the finish on the wheels.
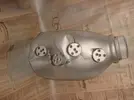
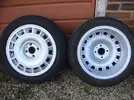
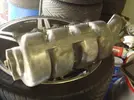
The fellas at Wicked Wheels are going to put my inlet manifold in the acid bath as it has gone moldy inside where i left it after attempting to wash it :roll: wish I'd taken the head in too :lol:
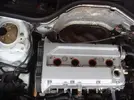
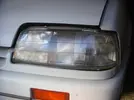
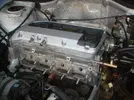
I got the headlight protectors on for a look see, bolted the rocker cover back on. Started to sand down the brace as it has rust. Also sanded the tray under the vent i painted that with the silver bbq paint i did the cover with.
[break=14th February]
Spent a while on the car today. As the cam belt had been chewed it'd shed billions of fibers everywhere. So i started off with a bucket of soapy water and scrubbed all the plastic covers. While they dried i put a new auxiliary belt on.
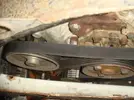
Cleaned this too
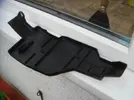
There was rust all over the brace so began sorting it out.
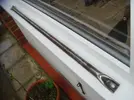
The drip tray for the vent is rusting too. I got it off OK but then when i took off the vent i broke off one of the studs, bugger.
[18th February]
Collected the manifold from the wheel refurbishing company. They'd offered to stick it in their vat of stripping acid as I'd left it wet (after cleaning) in the garage and it had mold inside but not any more! Looks and feels great. I doubt it'll stay this clean for long. When it is getting manky I'll wire brush it.
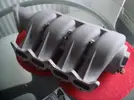
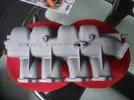
Also paid a visit to the Renault showrooms, one of the WSR edition Meganes was center place.
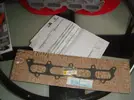
Got the injection system together. Was a pain in the arse because i had put the rad in and couldn't get in to do the bolts so off came the rad, air box etc.
Then i somehow lost a socket extension and elbow with 10mm socket on. It just vanished in the bay! Spent 1/2 an hour trying to find it. Instead i found a "snap on" long socket for the smaller drive (1/4 inch?) that must've been Sean's :lol:
I bought a load of new nuts for the manifold but decided to keep the original ones on there.
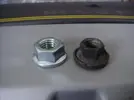
Here it is all sorted. I prefer this matt look to polished i think.
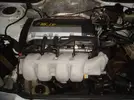
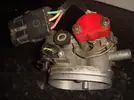
Now i need to put the rad in, clean up the TB (went moldy too) and finish the job.
I've lost the bracket off the side of the TB, has anyone got one spare? Also mislaid the nut that has the washer attached off the alternator bracket if someones got on of them too?
[23rd Feb]
Wheels all back after 3 weeks. Got them on the motor and put the airbox on. The cooling system needed some finishing touches, hose clips, coolant etc.
Just noticed how grim the uno seats are, time for some covers.
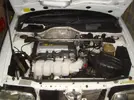
All sorted, nearly. Going to wait until daylight to start it...
[break=8th March '10]
It started the next day after my last report update. Took 5 goes.
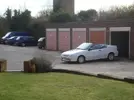
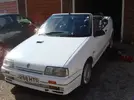
gave it a wash
Then I want away for 10 and now I'm back and driving it for the first time in 5 months I have rediscovered the exhaust rattle on left turns.
Annoying and alarming for passengers! the mid section box knocks on the heatshield right where it is bolted to the undercarriage. I don't really want to remove the shield permanently so for now the solution is a chunk of rubber wedged in between, probably fall out on the first right hand bend :lol:
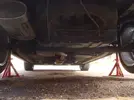
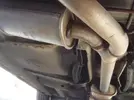
First i thought it was the box in the foreground but it's the one further back.
I got the headlamp covers on with new clear adhesive stops as the original ones were huge and had collected 20 years of dirt. Got the protectors from someone breaking a red phase 1 hatch on ebay still they look pretty tidy branded.
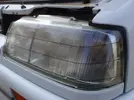
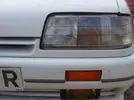
used a sticker that came with the gasket to create an air of newness!
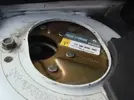
whilst under the back of the car for the first time in ages i had a look at the inevitable corrosion
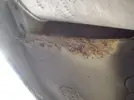
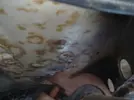
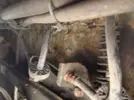
So next is the bodywork as that needs some attention here and there.
I've flushed the cooling system before at home with buckets (no hose available) but i wanted to give it a thorough rinse out at it is really rusty and neglected. So with some help got it done ran the water for about 5 mins before it came through clearer. Poured a couple of litres of the Comma brand coolant in after, nice luminous green sh#t.
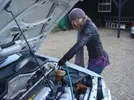
my lovely assistant (got rusty radiator water over her boots :lol: :roll: )
[break=13th March Detail]
Got the chance to visit Bidderman1969 and learn how to "detail". I'd always used a sponge and washing up liquid before but was about to learn how to care for the paint properly. Firstly i stopped and picked up this;
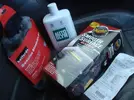
bit pricey just for washing the car! So headed round and got prepared, after a coffee. Learned the 2 bucket method Then came the gadgets and the car turned into a marshmallow
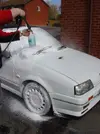
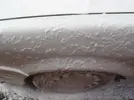
The foam drags the dirt off in prep for many stages including claying, polishing and waxing. I was dubious of claying but it works!
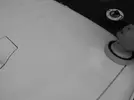
B&W better shows the effect of a machine polish on the white, you can see the line around the patch which has been polished
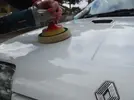
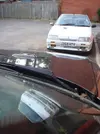
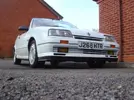
Pics don't do justice to the effect of the 5/6 hours graft. After the hard work i stopped to take some twilight shots at a beauty spot en route
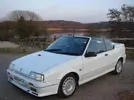
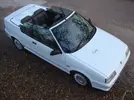
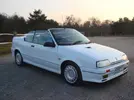
A BIG thanks to Bidderman1969 for the best part of a days work on getting the cabby to sparkle
When i got home the posty had delivered the mail, sweet!
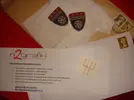 Cheers Jaser19 for the Karmann badges
[break=16.03.10 badge and decals]
Finished work at 4pm so got some smaller jobs on the car done. The liner in the compartment for the hood is held in-place with plastic rivets that don't work, so some carpet tape solved the problem
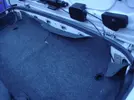
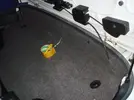
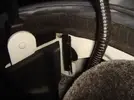
that wont catch on the back of the hood anymore! i noticed a random clip that appears to have no purpose whatsoever, anyone know what it is for?!
Put the Germanic marques emblem on the drivers side.
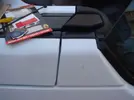
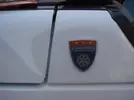
put the gear indicator transfer on and lacquered it. Yellow would've been a good choice as it'd tie in with all the other symbols. Red looks the business though.
If you look REALLY close you can see the faintest outline of the original numbers. The sticker i have is the same font and the same width but 2/3 mm shorter.
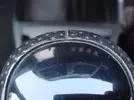
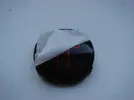
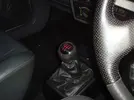
22.03.10
Yet another flush. My aim is to see thru the water to the bottom of the header tank with the cap off. Then fit a newer tank and some luminous green coolant.
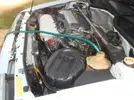
I checked the new timing belt for tension having covered 500 miles since i fitted it and it's fine. It has been said many times before but I'll say it again- the cover is a pain in the ass.
My battery cover/ parts tray!
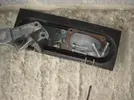
put a new CTS on hoping to cure the idle problem. Unfortunately it didn't.
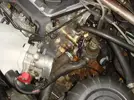
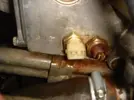
Whilst the TB was off i noticed the inside of the manifold was partially wet with what must be fuel, odd, possibly connected to the idling problem.
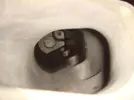
I tried unplugging the lambda sensor as i vaguely remember it being disconnected when i got the car but there was no change in the running so i plugged it back in. Next I disconnected the ICV again no change the car still idled bouncing between 900 and 1500 rpm. Next I'll try a second-hand ICV. If that doesn't change the idle I'll have to go to a Renault garage near here and get someone competent to solve it.
[break]
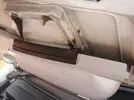
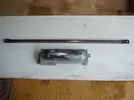
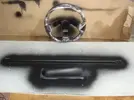
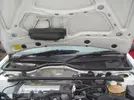
As I've twice had to mop water out of the spark plug wells for cylinders 3 and 4 i decided to reseal the vent. If it proves unsuccessful then I'll make a cover. I already had some black sealant from when i put in the kitchen ( i decided against using black in the kitchen and stuck to the conventional white stuff).
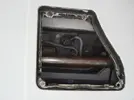
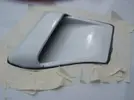
The next task was to paint the strut and drip tray as they don't look right anything but black. The silver looks odd on the tray, the brace was still bare from sanding the rust off. 4 coats of matt black should last a while. Water leaking through the vent seal has been an issue for some years as indicated by the rust.
Next on the list was the stereo steering column controls and steering wheel. The controls have been loose since i got the car, I'd always assumed that the column shroud would have to come off to access the screw to tighten it up. Only after dismantling the thing did i realize it was a very simple job! At least i got to give it a clean up. Now it is tightened I'll definitely enjoy driving more.
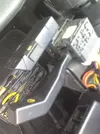
The other stalk has a rubber boot on, is this side missing one?
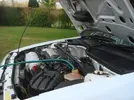
Flush 3 and it's getting there. Each time it runs clear(ish) quicker. One more and she'll be ready for the new header tank.
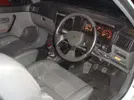
Wheel looks loads better, controls aren't wobbly to touch and i've adjusted the driving position from relaxed cruising to a more agressive racing one :twisted:
[break]
5th April - New engine and box oil, coolant flush 4 last week 5 this week.
Now when i flush it though it's clear immediately but after a drive it's rusty all over again. I'll either have to try a product for clearing rust out or get a new radiator. Struggling to make these flush pics interesting :lol:
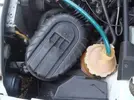
Took 1.5 hours to fill the gearbox with oil, at one point i went and put the oil container in hot water in the siink to try and speed it up.
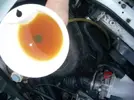
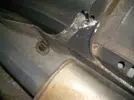
Whilst under the car i got a pic of my http://www.retro-renault.com/forums/general-chat/14660-pikey-fix.html Took the shield off the Lambda sensor to see how easy it'll be to remove when i get a replacement.
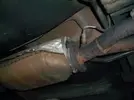
That cat don't look like it'll come off without a fight, either side.
I need to make a definative list to get this project finished or it'll ramble on indefinately...
[break]
New Lambda got from GSF, turns out there's one less than 2 mile from me. Bit annoyed as their price listed is without vat so the one on ebay would've been £15 cheaper inc post :x
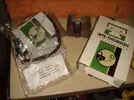
Couldn't get the old sensor off so splashed out on a blowtorch. Decided to take the mid section cat and downpipe off to hollow the cat. Unforunately one of the manifold studs snapped. There might be enough of it there to put a nut on if i compress the spring whilst fitting, i don't fancy having to change the stud. Lots of hassle to take the downpipe off.
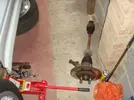
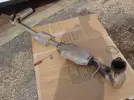
One of the 2 bolts between cat and downpipe snapped, this one;
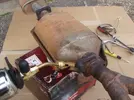
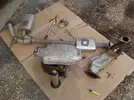
The cat is original and damn it's heavy! I would like to replace it with a pipe if i can find one. the guts are getting knocked out either way :lol:
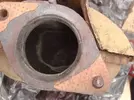
So the car is off the road for the time being, again.
[break]
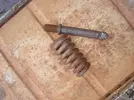
Had a good day. I got the manifold stud off without snapping it.
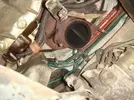
First try i cut a slot in the end and heated it up (shield back inplace ) then tried undoing it with a screwdriver, that didn't work!
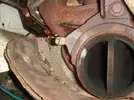
second try i cut some grip in to the shaft and tried the grips, not budging.
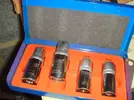
Third attempt after a visit to the local hardware store and purchasing a set of stud extractors was a success! Not sure if i'll need them again
The decat should be arriving by post this weekend. I'll get a new stud and nuts from Renault on thursday (£9.98/ 99p :x) so i should be all fixed and road-going by the end of the week
midweek i decided to get under the car and have the heatshield off as it wont be possible once it all gets put back together. Gave the brake lines a clean and made the shield shiny, bit pointless but had time to spare.
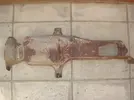
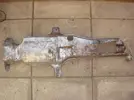
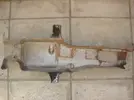
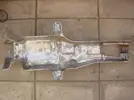
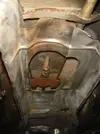
looks like the hand brake cables got done quite recently. Took off the fuel filter bracket, that needs the rust removing before it dissolves like a digestive in a cup of tea. I can't find a reciept for the fuel filter in the service history, it's a unipart one that doesn't look too old but I have a replacement filter to go on which i'll write the milage and date on before fitting.
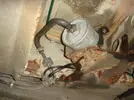
underside of the car needs cleaning up and an undercoat on, job for the end of summer.
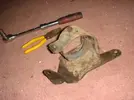
I might remove the shield again and paint it, perhaps just the top which rusted more.
[BREAK=decat and fuel filter/ bracket]
24.04.2010
Fixed the down pipe and exhaust on with the new manifold stud, Lambda and decat.
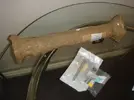
The sound has changed but it will take me a while to decide if i like it or not.
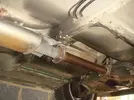
the decat is too short and pulls the bracket for the mid to back sections on to the chassis (the cross section that the bias valve / fuel filter bracket is bolted to).
Iffy paint job on the bracket.
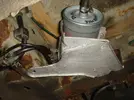
Whilst putting it all back together i couldn't get the roll pin in the driveshaft to gearbox join, the splines were correctly aligned but the holes were slightly out so the gap was reduced from 5mm to 3 mm. I setteled for a couple of split pins.
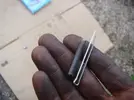
29.04.2010
I had a day off prior to working the May bank holiday weekend. I got some cleaning done.
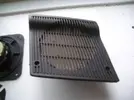
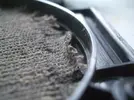
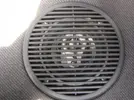
I got rid of the faded fabric that lines the speaker covers on the dash. Then had a bit of a clean of the speakers themselves, did a compare to the phase 2 ones. The size difference is quite significant.
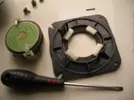
used the stick on draught excluder stuff to max effect...
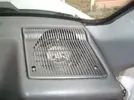
Cleaned the black gunk off the door hinges and surround, looks much better.
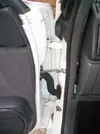
I also took of the handbrake surround and cleaned it up along with the switches and lever cover, no pics though. Removed and polished the gearstick gaiter, big improvement, especially as it wasn't put on right (tied up too high) so i fixed that.
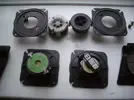
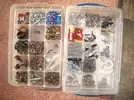
Next i took the rear speakers out. As you can see they're knackered. No wonder they distort on the bass notes! I'll see if there's a phillips replacement, they have a part number on the back so i'll check it out.
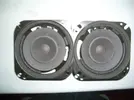
Now the workspace is organised, clean and tidy, sweet.
[BREAK=28/06/10]
What a hot day! Went and cleaned the car, probably got sunburn. Since the wheels were refurbed they have been getting less shiny. So I took them off one by one and cleaned them up, just used water, sponge and a bottle brush. I used the jack in the boot, looks like it might've been the first time its been used. Here's the before and afters.
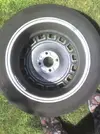
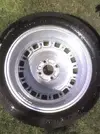
I flushed the cooling system through again, i've lost count now it's into double figures and still flushing rusty. I gave the glass a polish and the car a wax. Then it was ready for the club logo
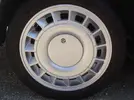
Spot the difference: these are the back wheels
no.1 drivers side
no.2 passengers side
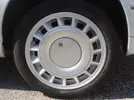
None right? That's the thing, the wheels are all from the same cast/ mould so being on drivers/ passengers side the blades of the turbines go round opposite ways. It's a bit fussy but it'd be great if they went round the same way :lol:
[BREAK=getting a head(er)]
Good day for the car today. MOT passed with no advisories, after i'd given it a hoover of course
With the rest of the day mostly free i took on the cooling system. i flushed the heater matrix bothways. I put some Holts radiator flush through. Then i got the radiator out and gave it blast with the hose. I put it all back together with a near-new header tank and filled it up with greenstuff and de-ionised water.
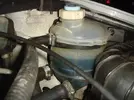
Atlast the thing looks rust-free. Its been along time coming.
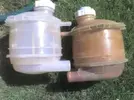
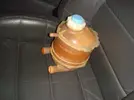
Next job is to clean up the bay from all the rusty water thas been sprayed about over the last few months.
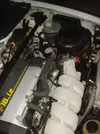
[break=recent activity]
been putting up the recent activity elsewhere so i thought i'd paste the links in to the project for prosperity.
http://www.retro-renault.com/forums/general-chat/15601-f-ng-ball-joint.html
http://www.retro-renault.com/forums/general-chat/15725-lost-my-phone.html
http://www.retro-renault.com/forums/bodywork-detailing/15790-flipside.html
http://www.retro-renault.com/forums/media/15825-tail-pipe.html
http://www.retro-renault.com/forums/items-cars-wanted/15826-ph1-16v-nsr-light.html
06/09/2010
Liner
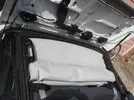
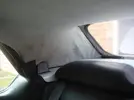
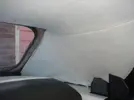
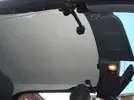
The roof liner is in need of attention due to it being a manky off white with some stitching stained and scuff marks. Also the velcro that holds on the rear quarter sections has come away (as usual) so that'll need addressing too.
I got a couple of bottles of trainer whitener, like i used before on the http://www.retro-renault.com/forums/renault-1990-1992/9477-soft-top-restoration.html?garpg=5 project, bit of a deja vu moment whilst doing the painting.
This time i also went to the trouble of painting the outside edge of the flaps that hang down covering the roof mechanism. That's the 1st coat on. It took one bottle @£2, 3 coats should do it. Alot cheaper than a new liner.
09/09/2010
2nd coat today, it rained yesterday so i had to wait. It may have to be 4 coats but we'll see. The brush marks look kinda cool after just the one coat and if i was lazy i'd leave it at that.
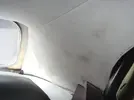
This pic is after the 1st, just before i started the 2nd coat, looks whiter already, even though the photo is taken in the shade this time.
Got into it and it was done in about an hour. Left it to dry and went and had a cuppa. Then i cleaned off the frame and seals. When putting the roof up/ down the edge is more visible & really benefits from being painted.
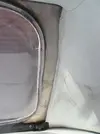
There's some mould as the layers act like reverse gore-tex, trapping moisture underneath and the foam never really dries out completely, even after weeks without getting wet. Amazing it has survived 20 years really!
I might try painting round the rear screen too as it looks manky. I'll have to test to make sure it doesn't show through from outside when i paint directly on the mohair.
Lenses
Also got some clear indicator lenses but i'm not sure if i like them, perhaps with chrome bulbs they'll grow on me. I'll leave them on for now and order the bulbs.
Neal spotted moisture in the OSR light in a pic, when i took it off there was about a third of a pint in there. This lurkes underneath...
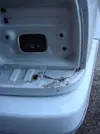
Repeaters
10/09/2010
Another delivery left with the neighbours, nice.
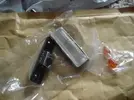
Got to be the simplest thing ever to fit, i had a set of reflector bulbs on the repeaters already i dicovered.
bad light for photos, these will make a big difference to the look of the car, more than the clear indicator lenses, for me (and that's what counts!) i don't like the chrome surrounds so i'll have to paint them black as the rubbers from the orange ones won't fit over.
[BREAK=25th September 2010]
There's been a couple more coats of white on the liner now. I used a rubbish brush (that's supposed to be good as it's branded & cost more) thats flicked spots all over the interior. Also stuck some reflector bulbs in the indicators, no more "fried egg" look.
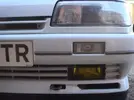
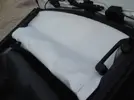
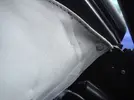
missed a bit :roll:
I cleaned behind the nsr light as that hadn't been done for years and i don't want it to corrode like the opposite side. Then i got the bonnet up. I got a bit of a rust issue on the removable part of the bulkhead. I took off all the brackets and the heat shield.
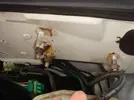
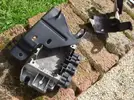
I painted the brackets after sanding off most the rust. Wire brushed the casing for the module. Taped up the engine earth lead. Managed to get all the bolts in for the cam belt cover (which is heat-warped), what a hassle a couple of them were!
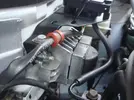
I had a look at the torsion bars. There's a bit of rust built up behind the cap. As is is a cabby there's not much room & I think i would have to take the whole thing off to access the bars, so it'll stay as it is for now.
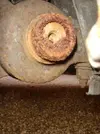
Bulbs. I put the reflectors in the indicators already as described previously. Now i got some festoon bulbs with white LEDs in. They're going in the cabby pilar lights that can be set on, off or on with the doors open by rolling the lense up, center or down. They're replacing the original 7 watt festoons. Depending how bright they are i might get some for the 2 number plate bulbs, which are currently original 5 watt festoons but i bet the LED ones are way too bright. One of the number plate bulbs has gone and i don't wanna get pulled over for it.
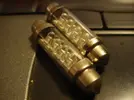
Next up in the exciting bulb selection is a replacement red brake & fog light bulb. I got these as an upgrade on the clear ones for the replacement n/s/r light i got off Neal. Whilst in daylight it's a good match to the o/s/r it's noticeably lighter in the dark, with the brake or fog lights on. It's a hard thing to photograph so just take my word for it
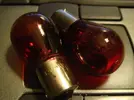
I'll put them on on the weekend and see how it goes
[BREAK=Fog Lights]
30th October 2010
I got some clear fogs from a R5GTT to complete the clear lights. They arent in the best nick. I decided to put a bit of work in before putting them on the car.I got the surrounds off and took out the bulbs. The reflective paint has dulled and where the water has got in the glass was grubby inside. I prised them open and gave the glass a good clean.

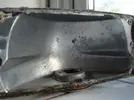
The sealant was slapped about real shabby, i thought the line in the pic below was a crack but i'm glad it's just sealant. I decided to use tin foil to increase the reflective properties so i stuck it in with some Uhu, hi-tec :lol: Looks loads better.
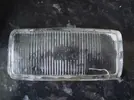
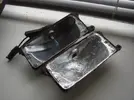
All i got to stick 'em back together is household sealant which takes 24 hours to dry so there they are until tomorrow.
The yellow ones on the car are almost off, just the inside screws are rusted to the crappy clip/bolts. Some wd4o and a bit of encouragement should sort it.
Fogs part 2
Here's a shot of the two sets.
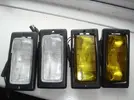
The yellow are branded Valeo/ Cibie and the clear say esime (or sm with some shit around it:?) The Cibie ones are much better made. The frames are slightly bigger on the clear ones.
All the original lights will stay with the car if & when i sell it. I personally prefer the look now with all clear lights. Here's the before and after pictures...
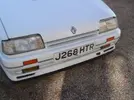
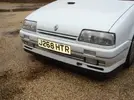
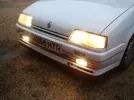
I did like the novelty of the yellow light but i don't have them on much, people tend to stare when i do :lol: The brightness of the refurbed clear ones is as good as, or brighter than, the high beam as you can see bellow
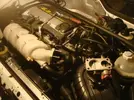
So now that's done the car will be static for a bit - i've whipped off the throttle body as it is getting sent of to a specialist (Chris H) to be set up properly, cheers Chris. Hoping that'll get me more than the 300 mile a tank i'm getting currently I purchased an inspection lamp today. Why did i not get one before? i cannot say. Here's a nice pic by the light of said new lamp
[BREAK eflector]
4th November 2010
Went and picked up my post at the office and refitted my throttle body.
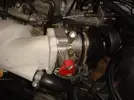
Car idles better, less lumpy and accelerates smoother. I assume it won't start bouncing like it did. Thanks again Chris.
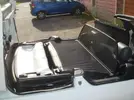
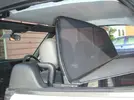
It happend to be a sunny day so I tried out my newly purchased rare and exotic accessory, a wind deflector. It makes a little "sssss" noise at high speed as the air pushes through the mesh but it reduces the amount of air swirl which means i can hear the noise! It's cool looking back through it in the rear view.
Fits with a molded plastic section that's secures by velcro strap around the door pillar grab handle. The back is elastic and fixed over the seatbelts anchorage.
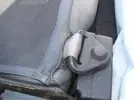
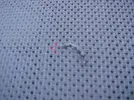
It has 2 small tears in which i recon are from a fingernails going through it.
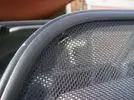
it can stay on with the roof up. Which makes the car feel smaller because of the barrier behind your head. Night driving the car especially feels like a 2 seater.
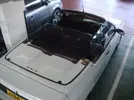
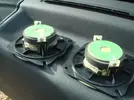
Fitted some 3 way speakers i got for a song... i used the ones i took out in the dash instead of the o.e. tweeters. Now i can hear the stereo with the hood down. The deflector helps too.
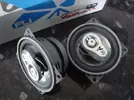
ops is that upside down
[BREAK=clutch pedal]
28th Nov 2010
A few weeks ago i replaced the clutch cable. It snapped at a very inconvenient time (not that there's a convenient time) 7.30 am on the way somewhere improtant. Forunately I was able to leave is on a side road for a few days until i could get a lift to it and do the work.
Since then the pedal has slipped 3/4 times just like the cable had broken. I figured it must be the ratchet failing and found a Renault pedal on ebay. Better done before it fails and leaves me in a lay-by cursing the car.
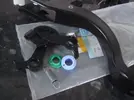
The bag was open and one of the retaining clips was missing but i could re-use the one on the car, no worries.
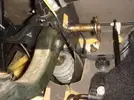
I got the old pedal off. The bar was really stiff and there's no room in the footwell to work. I'm pretty agile and not too large so i lay upside down on the drivers seat with it fully reclined :lol:
The ratchet, washers and spring were all knackered, as you can see
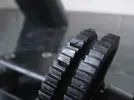
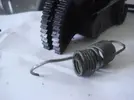
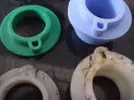
I kept the old assembly together and copied the setup with the new one. The old peadal was ok it just looked worn where the paint had rubbed off so I swapped over the rubber and used the new one.
In retrospect i was over zeallous with the multipurpose grease which made fitting the new assembly much harder, especially with a new spring. I put a bolt throughit and used that to keep it all together to get it in to place before pushing the bar through. Getting the retaining clip back on the end was tricky.
Once done i refitted the cable and tried it out. The biting point is now alot higher...
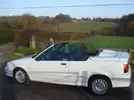
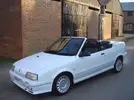
I gave the car a quick wash and went for a spin, here's some nice pics for the heck of it
[BREAK=lights and sounds]
21st January 2011
I have been concerned about the lack of power in the mainbeam. Nightdriving starts at 3.30pm in the winter. My eyes are pretty good in lowlight but the headlights are so weak compared to modern cars that look like they've got their high-beams on all the time.
It's partly to do with the proectors being dirty but i thought i'd get some of the bulbs that claim to be 90% brighter (buy one get one free).
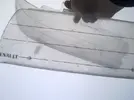
I can't see any difference in the design except the blue
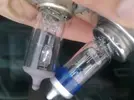
Hard to tell what the difference is until sundown. Now the proectors have been cleaned there'll be an improvement.
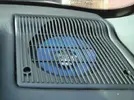
For the door I got some kenwood 2-way 6 1/2 inch speakers for £1.20 on ebay wich are hopefully an upgrade on the ageing phillips originals.
The design is a bit funky but they're tucked behing the grilles. I am ultimately after some quality 1-way speakers that'll cover the bass range and leave the treble for some tweeters in the dash. But 2-ways in both locations will do until i can get what i want. Afterall the sound quality is limited by the audio cassttes i play.
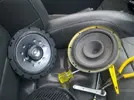
[BREAK=Recreational activity]
22nd Febuary 2011
I noticed a while back, whilst under the car, that the inner anti-roll bar bushes are cracked and perished. So i decided to replace them and the outer ones for good measure.
Unfortunately the factors ordered 2 sets of outer (in 2 different sizes) so the car remains balanced on axle stands overnight until i can finish the job.
I gave the car an oil change (cheapest comma stuff) and new filter, a genuine Renault item!
I have some braided lines to fit (front only) but the union between the hoses and the line is rounding off when i try and undo it with an adjustable so i splashed £3 on a forged 11mm spanner to tackle them tomorrow after they've soaked in wd40 overnight.
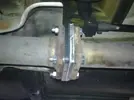
The biggest acomplishment today was the addition of two 8mm spacers between the decat and mid-section. The decat is too short so this should stop the exhaust knocking in right-hand corners. Better still it means the tail pipe isn't wonky under the bumper anymore (which looked shit) Not the best solution but it will tide me over til i get the stainless steel custom straight through system made....:lol:
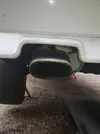
part 2
The bushes cracked on the outside probably good for a year or 2 but changing them is easy.
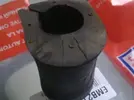
Or it would be if the factors get the right ones 1st time. The set i've got now are 23mm so they should fit. Exotic too.
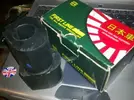
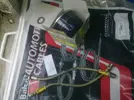
I have the goodridge lines to go on (note spare clutch cable underneath - it's going to live in the boot with some string )
)
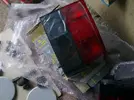
I've splashed out on a new light thats been floating on ebay for ages, i made the seller a cheeky offer. The one fitted collects water then drips it out over weeks and the rust underneath is the result.
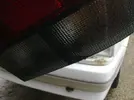
[BREAK=March]
fed up with the passenger window not going back up I got stuck in. I have been avoiding taking off the door card because i remember how Lewis77 had so many problems with his.
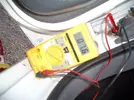
Following some good advice i checked the connections and switches then the power, all ok except the power. So time to grease the mech.
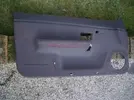
I got it off, only broke it a little bit :lol: note the 'orrible staining on the arm rest bit, that's going!
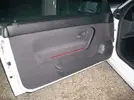
Greased the mechanism and cleaned the card. The water ran brown off the card - yuk! Now looks much better and although slow the window goes back up again.
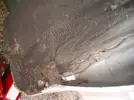
I took off the arch liner for a look. Not much mud to clear.
I changed the air filter as i got 2 Renault ones for a great price.
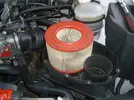
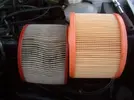
It was a fair bit fatter and needed squashing in.
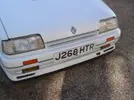
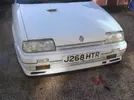
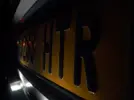
New plate pic
[BREAK=rusty patch]
I got a quote from a bodyshop to sort out some of the shabby bits on the car:
rusty section under o/s rear lights
dent in bootlid
rust along bottom and sides of doors
line dent (rusting) on the passenger door
dent in o/s rear quarter (car park incident)
assorted stone chips and rust spots in assorted locations
The shop sent me a quote for £1400 So i decided to do the best i could myself. I'll keep a running total of the cost.
Shopping list:
primer
topcoat
filler
wet & dry
kurust
total: £30
I splashed out on some extras: sealey machine polisher, silverline polishing pad & meguairs polish. Total: £80
I already have the clear coat and various other detailing stuff.
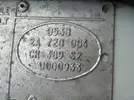
389 - glacier white. available straight off the shelf in halfords.
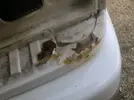
this is the first problem to tackle.
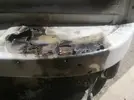
ground back, the underside is still okish
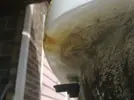
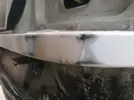
filled and sanded down, nearly ready to paint.
2 coats of primer, sanded, then 3 coats of colour, sanded then 3 coats of laquer, sanded and another 3 coats, sanded and a final coat.
Whilst i did it i was polishing the car panel by panel and sprucing up the engine bay. It isn't a brilliant job but it is better than it was.
The colour is visibly different but i tried to blend it. I was impatient and didn't get the filler perfect either. Not bad for a first attempt and i'm very happy i have not spent a packet in a body shop.
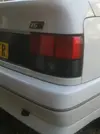
Now the car has been machine polished it is looking A1. I did the whole wash/ clay/ polish & wax thing, even dressed the tyres!
full details ; http://www.retro-renault.com/forums/bodywork-detailing/17819-cabby-htr-detailed.html
[BREAK=Long overdue]
Been ages since i updated this. Car has been my daily most of the time. It is a soldier on over 120k miles now. Its had a clutch fitted by professionals, i'd love to of done it but i didn't have the time or the guts. Sadly due to being in constant use the car has aged and gained numerous dents and scuffs. The roof also has a few holes now, nothing really horrible.
Put a new bearing on the front right as it was making a nails on blackboard kind of noise. Also changed the box oil, you can see in the pic the old stuff is rough and only 2 litres of it in there.
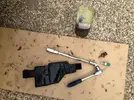
I changed the reverse switch hoping to cure the reverse lights not working, didn't do the job though. Also a weird issue with the front right indicator not working even though theres 12v there when on. MOT soon...
Then i will be moving her on, I can't carry on driving her as a daily.
28th September 2009
When i saw this on ebay i wanted it as it seemed to be in great nick and with a good history and even better from a www.Retro-Renault.com member. I made a trip down to check it out before committing to a bid. So i bid and got it for the reserve.
Took weeks to get round to arrange collecting it from Gloucester. I made a day trip out of it. Sean kindly picked me up at the station.


original sticker from 1991, somehow avoided being peeled off!

having both cars
To be honest it took a while to adjust to the difference between phase 1 and 2. The front window switch location, wing mirror switch and dash dimmer on the steering column stood out initially.
There were more subtle cosmetic differences too, like on the steering wheel, emblem changed from the stripy to the solid diamond.

The Philip's stereo is surprisingly good with some tape cassettes I got off ebay. The rear passenger side speaker is blown, I need to try and find an original replacement.

no stereo fascia clips on the phase one but now i got a fascia :lol:


[break=exterior]


service and swaps
fitted new plugs, leads, distributor, rotor arm. New oil for the engine and gearbox waiting to go in. Re-routed the throttle cable along the brace, cleaned the exterior. Got a working auxiliary water pump relay. Put the clamp terminals on the battery
Cosmetics to sort:
There's a dent in the boot lid where it has been slammed. Scuff on each corner of the bumpers.

Line dent in the bottom of the passenger door.


Swapping the hoses on the cam cover breather as it is perished.

[BREAK=more swaps]
After work with an hour or so before sundown i swapped the struts over on the 2 cars as they were new on the old car.


Easy job really, 12 nuts/bolts per side per car. It got dark before i could finish so the phase 2 has to spend the night on stands.

I guess this is for a TB heater as described in the tech. section, may look in to getting that wired up if it's worth it, cleaned the TB.

only recently got the injectors ultrasonically cleaned http://www.retro-renault.com/forums...ltrasonic-fuel-injector-cleaning-service.html so I'll swap them too. It'd be nice to keep the green ones in the phase 1 but i can't afford to pay to get them cleaned too.


someone working on the car previously must've dropped the nut in the manifold and just left it...

New bulb in the heater controls http://www.retro-renault.com/forums/ice-electrical/12783-heater-control-panel-bulb.html

Other swap today was the window seal on the drivers side, small swap with a big difference.


I can happily say the injectors were well worth swapping. The sound and performance are noticeably improved, unlike the economy.
[BREAK=Cam belt munched]
Nearly had a major problem with the belt getting chewed as its working its way off the sprockets.


Going to take my time, being a novice and my first time and as the car isn't a daily drive and i can garage it over winter.
Also going to clean up the head and paint the cam cover. Took the rad off to get access and the cooling system needs a flush or three. I'll give the header tank a good scrub.
[BREAK=slowly slowly]
Wheeling the car in and out of the garage meant I'd left the windows down. and forgot the car had an immobilizer and couldn't put the windows up...(doh) Gave the battery a charge off the uno.

looks like the belt is slipping off the idler, fine on the sprockets and aux sprocket and tensioner.

Here's some shots of how mucky the inlets are


I've cleaned up the manifold, that was as grimy.

dunno if it's better to clean it up now or jet-wash it when it is back together?
[break=28th January 2010]
got a good bit of weather so took off the timing belt, at last.
Locked at TDC with a 7.9mm punch through the hole in the block. Odd sized punch eh?!
aux belt pulley on the crank sprocket was stuck, got the breaker out to undo it.

Cam sprockets align OK, but what about the crank sprocket?...

Forked out on a C spanner to get the aux sprocket off, probably only use it twice :roll:


the plastic protector caked in fibers from the belt, as is the side of the head


finally sorted, took from October to Feb :lol:

3rd February 2010
New idler

& belt

[break= wheel refurb]
the wheels are uncurbed but the finish has peeled on the diamond cut lip and center surround. Taking them to Wicked Wheels get them back to mint. No rush so 2 in this week and 2 next week when i pick up the 1st 2

these are the front wheels


cleaned up the grimy cover locking bolts. They'll get the wire wheel treatment, should come up nice.
09.02.2010

back two off to go to Wicked Wheels in the next few days

got these back along. the tyres are off now as they were all ruined. I'll get them sorted too and put some good tyres on.
[break=spare set]
i got some phase 1 speed-lines i want to get them sorted with some quality tyres. Then i started thinking about doing something a bit different with them.
i started to prepare them myself. Then i got my white cabby and it has the turbines on which i got professionally done and having seen the finish i know i need to get the speed-lines professionally done too. Will cost me but there's no rush.


lips are quite chapped

started off sanding down for a light respray

also tried stripping right back


That's about as far as i got before winter kicked in. Now I'm thinking they'd look great in a dark metallic gray

a few purchases
Saw these up for 99p good old ebay. 1's got a chunk missing though.


another bargain, £15 for branded grooved disc's. I don't need them at the mo but couldn't resist.
[break=water in the well]
I've read lots about this phase one problem. Last time i drove the car was October 2009 so this water has been sitting until 3rd February 2010! Explains the loss of power i thought was the timing belt issue. Perhaps it caused the belt issue.

7th February
The rubber seals were in a bad way so i used the left over glue from a universal CV boot kit to sort out all the splits in them. Stripped the paint, unpleasant job.
It had some corrosion where the original paint had long since peeled. I'm going to use silver BBQ paint, that will sort it right out.


unfortunately one of the studs snapped taking off the vent

[break=wheely good]
Over 2 weeks ago now i dropped off 2 of my turbines to get refurbished at Wicked Wheels on the Slyfield Industrial Estate in Guildford. I said to the guys there there's no rush as the car isn't running. I called up today and they'd forgotten about the caps! i went and dropped off the other two wheels and picked up the finished 2.
They went from this;

To this;


I'm pleased with the results, like new! The caps will be let down by the locks, i need to try and get them to a good standard somehow as the rattle can silver i tried is rubbish next to the finish on the wheels.


The fellas at Wicked Wheels are going to put my inlet manifold in the acid bath as it has gone moldy inside where i left it after attempting to wash it :roll: wish I'd taken the head in too :lol:

I got the headlight protectors on for a look see, bolted the rocker cover back on. Started to sand down the brace as it has rust. Also sanded the tray under the vent i painted that with the silver bbq paint i did the cover with.


[break=14th February]
Spent a while on the car today. As the cam belt had been chewed it'd shed billions of fibers everywhere. So i started off with a bucket of soapy water and scrubbed all the plastic covers. While they dried i put a new auxiliary belt on.

Cleaned this too

There was rust all over the brace so began sorting it out.

The drip tray for the vent is rusting too. I got it off OK but then when i took off the vent i broke off one of the studs, bugger.
[18th February]
Collected the manifold from the wheel refurbishing company. They'd offered to stick it in their vat of stripping acid as I'd left it wet (after cleaning) in the garage and it had mold inside but not any more! Looks and feels great. I doubt it'll stay this clean for long. When it is getting manky I'll wire brush it.


Also paid a visit to the Renault showrooms, one of the WSR edition Meganes was center place.

Got the injection system together. Was a pain in the arse because i had put the rad in and couldn't get in to do the bolts so off came the rad, air box etc.
Then i somehow lost a socket extension and elbow with 10mm socket on. It just vanished in the bay! Spent 1/2 an hour trying to find it. Instead i found a "snap on" long socket for the smaller drive (1/4 inch?) that must've been Sean's :lol:
I bought a load of new nuts for the manifold but decided to keep the original ones on there.

Here it is all sorted. I prefer this matt look to polished i think.

Now i need to put the rad in, clean up the TB (went moldy too) and finish the job.
I've lost the bracket off the side of the TB, has anyone got one spare? Also mislaid the nut that has the washer attached off the alternator bracket if someones got on of them too?

[23rd Feb]
Wheels all back after 3 weeks. Got them on the motor and put the airbox on. The cooling system needed some finishing touches, hose clips, coolant etc.

Just noticed how grim the uno seats are, time for some covers.

All sorted, nearly. Going to wait until daylight to start it...
[break=8th March '10]
It started the next day after my last report update. Took 5 goes.


gave it a wash
Then I want away for 10 and now I'm back and driving it for the first time in 5 months I have rediscovered the exhaust rattle on left turns.
Annoying and alarming for passengers! the mid section box knocks on the heatshield right where it is bolted to the undercarriage. I don't really want to remove the shield permanently so for now the solution is a chunk of rubber wedged in between, probably fall out on the first right hand bend :lol:


First i thought it was the box in the foreground but it's the one further back.
I got the headlamp covers on with new clear adhesive stops as the original ones were huge and had collected 20 years of dirt. Got the protectors from someone breaking a red phase 1 hatch on ebay


used a sticker that came with the gasket to create an air of newness!

whilst under the back of the car for the first time in ages i had a look at the inevitable corrosion


So next is the bodywork as that needs some attention here and there.

I've flushed the cooling system before at home with buckets (no hose available) but i wanted to give it a thorough rinse out at it is really rusty and neglected. So with some help got it done

my lovely assistant (got rusty radiator water over her boots :lol: :roll: )
[break=13th March Detail]
Got the chance to visit Bidderman1969 and learn how to "detail". I'd always used a sponge and washing up liquid before but was about to learn how to care for the paint properly. Firstly i stopped and picked up this;

bit pricey just for washing the car! So headed round and got prepared, after a coffee. Learned the 2 bucket method

The foam drags the dirt off in prep for many stages including claying, polishing and waxing. I was dubious of claying but it works!


B&W better shows the effect of a machine polish on the white, you can see the line around the patch which has been polished


Pics don't do justice to the effect of the 5/6 hours graft. After the hard work i stopped to take some twilight shots at a beauty spot en route


A BIG thanks to Bidderman1969 for the best part of a days work on getting the cabby to sparkle
When i got home the posty had delivered the mail, sweet!
 Cheers Jaser19 for the Karmann badges
 [break=16.03.10 badge and decals]
Finished work at 4pm so got some smaller jobs on the car done. The liner in the compartment for the hood is held in-place with plastic rivets that don't work, so some carpet tape solved the problem


that wont catch on the back of the hood anymore! i noticed a random clip that appears to have no purpose whatsoever, anyone know what it is for?!

Put the Germanic marques emblem on the drivers side.


put the gear indicator transfer on and lacquered it. Yellow would've been a good choice as it'd tie in with all the other symbols. Red looks the business though.
If you look REALLY close you can see the faintest outline of the original numbers. The sticker i have is the same font and the same width but 2/3 mm shorter.


22.03.10
Yet another flush. My aim is to see thru the water to the bottom of the header tank with the cap off. Then fit a newer tank and some luminous green coolant.

I checked the new timing belt for tension having covered 500 miles since i fitted it and it's fine. It has been said many times before but I'll say it again- the cover is a pain in the ass.
My battery cover/ parts tray!

put a new CTS on hoping to cure the idle problem. Unfortunately it didn't.


Whilst the TB was off i noticed the inside of the manifold was partially wet with what must be fuel, odd, possibly connected to the idling problem.

I tried unplugging the lambda sensor as i vaguely remember it being disconnected when i got the car but there was no change in the running so i plugged it back in. Next I disconnected the ICV again no change the car still idled bouncing between 900 and 1500 rpm. Next I'll try a second-hand ICV. If that doesn't change the idle I'll have to go to a Renault garage near here and get someone competent to solve it.
[break]
As I've twice had to mop water out of the spark plug wells for cylinders 3 and 4 i decided to reseal the vent. If it proves unsuccessful then I'll make a cover. I already had some black sealant from when i put in the kitchen ( i decided against using black in the kitchen and stuck to the conventional white stuff).


The next task was to paint the strut and drip tray as they don't look right anything but black. The silver looks odd on the tray, the brace was still bare from sanding the rust off. 4 coats of matt black should last a while. Water leaking through the vent seal has been an issue for some years as indicated by the rust.


Next on the list was the stereo steering column controls and steering wheel. The controls have been loose since i got the car, I'd always assumed that the column shroud would have to come off to access the screw to tighten it up. Only after dismantling the thing did i realize it was a very simple job! At least i got to give it a clean up. Now it is tightened I'll definitely enjoy driving more.

The other stalk has a rubber boot on, is this side missing one?
Flush 3 and it's getting there. Each time it runs clear(ish) quicker. One more and she'll be ready for the new header tank.

Wheel looks loads better, controls aren't wobbly to touch and i've adjusted the driving position from relaxed cruising to a more agressive racing one :twisted:

[break]
5th April - New engine and box oil, coolant flush 4 last week 5 this week.
Now when i flush it though it's clear immediately but after a drive it's rusty all over again. I'll either have to try a product for clearing rust out or get a new radiator. Struggling to make these flush pics interesting :lol:


Took 1.5 hours to fill the gearbox with oil, at one point i went and put the oil container in hot water in the siink to try and speed it up.


Whilst under the car i got a pic of my http://www.retro-renault.com/forums/general-chat/14660-pikey-fix.html Took the shield off the Lambda sensor to see how easy it'll be to remove when i get a replacement.

That cat don't look like it'll come off without a fight, either side.
I need to make a definative list to get this project finished or it'll ramble on indefinately...
[break]
New Lambda got from GSF, turns out there's one less than 2 mile from me. Bit annoyed as their price listed is without vat so the one on ebay would've been £15 cheaper inc post :x

Couldn't get the old sensor off so splashed out on a blowtorch. Decided to take the mid section cat and downpipe off to hollow the cat. Unforunately one of the manifold studs snapped. There might be enough of it there to put a nut on if i compress the spring whilst fitting, i don't fancy having to change the stud. Lots of hassle to take the downpipe off.


One of the 2 bolts between cat and downpipe snapped, this one;


The cat is original and damn it's heavy! I would like to replace it with a pipe if i can find one. the guts are getting knocked out either way :lol:

So the car is off the road for the time being, again.
[break]
Had a good day. I got the manifold stud off without snapping it.

First try i cut a slot in the end and heated it up (shield back inplace

second try i cut some grip in to the shaft and tried the grips, not budging.
Third attempt after a visit to the local hardware store and purchasing a set of stud extractors was a success! Not sure if i'll need them again


The decat should be arriving by post this weekend. I'll get a new stud and nuts from Renault on thursday (£9.98/ 99p :x) so i should be all fixed and road-going by the end of the week
midweek i decided to get under the car and have the heatshield off as it wont be possible once it all gets put back together. Gave the brake lines a clean and made the shield shiny, bit pointless but had time to spare.


looks like the hand brake cables got done quite recently. Took off the fuel filter bracket, that needs the rust removing before it dissolves like a digestive in a cup of tea. I can't find a reciept for the fuel filter in the service history, it's a unipart one that doesn't look too old but I have a replacement filter to go on which i'll write the milage and date on before fitting.

underside of the car needs cleaning up and an undercoat on, job for the end of summer.

I might remove the shield again and paint it, perhaps just the top which rusted more.
[BREAK=decat and fuel filter/ bracket]
24.04.2010
Fixed the down pipe and exhaust on with the new manifold stud, Lambda and decat.

The sound has changed but it will take me a while to decide if i like it or not.

the decat is too short and pulls the bracket for the mid to back sections on to the chassis (the cross section that the bias valve / fuel filter bracket is bolted to).
Iffy paint job on the bracket.

Whilst putting it all back together i couldn't get the roll pin in the driveshaft to gearbox join, the splines were correctly aligned but the holes were slightly out so the gap was reduced from 5mm to 3 mm. I setteled for a couple of split pins.

29.04.2010
I had a day off prior to working the May bank holiday weekend. I got some cleaning done.


I got rid of the faded fabric that lines the speaker covers on the dash. Then had a bit of a clean of the speakers themselves, did a compare to the phase 2 ones. The size difference is quite significant.


used the stick on draught excluder stuff to max effect...

Cleaned the black gunk off the door hinges and surround, looks much better.

I also took of the handbrake surround and cleaned it up along with the switches and lever cover, no pics though. Removed and polished the gearstick gaiter, big improvement, especially as it wasn't put on right (tied up too high) so i fixed that.
Next i took the rear speakers out. As you can see they're knackered. No wonder they distort on the bass notes! I'll see if there's a phillips replacement, they have a part number on the back so i'll check it out.

Now the workspace is organised, clean and tidy, sweet.

[BREAK=28/06/10]
What a hot day! Went and cleaned the car, probably got sunburn. Since the wheels were refurbed they have been getting less shiny. So I took them off one by one and cleaned them up, just used water, sponge and a bottle brush. I used the jack in the boot, looks like it might've been the first time its been used. Here's the before and afters.


I flushed the cooling system through again, i've lost count now it's into double figures and still flushing rusty. I gave the glass a polish and the car a wax. Then it was ready for the club logo


Spot the difference: these are the back wheels
no.1 drivers side

no.2 passengers side

None right? That's the thing, the wheels are all from the same cast/ mould so being on drivers/ passengers side the blades of the turbines go round opposite ways. It's a bit fussy but it'd be great if they went round the same way :lol:
[BREAK=getting a head(er)]
Good day for the car today. MOT passed with no advisories, after i'd given it a hoover of course
With the rest of the day mostly free i took on the cooling system. i flushed the heater matrix bothways. I put some Holts radiator flush through. Then i got the radiator out and gave it blast with the hose. I put it all back together with a near-new header tank and filled it up with greenstuff and de-ionised water.

Atlast the thing looks rust-free. Its been along time coming.


Next job is to clean up the bay from all the rusty water thas been sprayed about over the last few months.

[break=recent activity]
been putting up the recent activity elsewhere so i thought i'd paste the links in to the project for prosperity.
http://www.retro-renault.com/forums/general-chat/15601-f-ng-ball-joint.html
http://www.retro-renault.com/forums/general-chat/15725-lost-my-phone.html
http://www.retro-renault.com/forums/bodywork-detailing/15790-flipside.html
http://www.retro-renault.com/forums/media/15825-tail-pipe.html
http://www.retro-renault.com/forums/items-cars-wanted/15826-ph1-16v-nsr-light.html
06/09/2010
Liner
The roof liner is in need of attention due to it being a manky off white with some stitching stained and scuff marks. Also the velcro that holds on the rear quarter sections has come away (as usual) so that'll need addressing too.
I got a couple of bottles of trainer whitener, like i used before on the http://www.retro-renault.com/forums/renault-1990-1992/9477-soft-top-restoration.html?garpg=5 project, bit of a deja vu moment whilst doing the painting.
This time i also went to the trouble of painting the outside edge of the flaps that hang down covering the roof mechanism. That's the 1st coat on. It took one bottle @£2, 3 coats should do it. Alot cheaper than a new liner.
09/09/2010
2nd coat today, it rained yesterday so i had to wait. It may have to be 4 coats but we'll see. The brush marks look kinda cool after just the one coat and if i was lazy i'd leave it at that.
This pic is after the 1st, just before i started the 2nd coat, looks whiter already, even though the photo is taken in the shade this time.
Got into it and it was done in about an hour. Left it to dry and went and had a cuppa. Then i cleaned off the frame and seals. When putting the roof up/ down the edge is more visible & really benefits from being painted.
There's some mould as the layers act like reverse gore-tex, trapping moisture underneath and the foam never really dries out completely, even after weeks without getting wet. Amazing it has survived 20 years really!
I might try painting round the rear screen too as it looks manky. I'll have to test to make sure it doesn't show through from outside when i paint directly on the mohair.
Lenses
Also got some clear indicator lenses but i'm not sure if i like them, perhaps with chrome bulbs they'll grow on me. I'll leave them on for now and order the bulbs.
Neal spotted moisture in the OSR light in a pic, when i took it off there was about a third of a pint in there. This lurkes underneath...

Repeaters
10/09/2010
Another delivery left with the neighbours, nice.

Got to be the simplest thing ever to fit, i had a set of reflector bulbs on the repeaters already i dicovered.
bad light for photos, these will make a big difference to the look of the car, more than the clear indicator lenses, for me (and that's what counts!) i don't like the chrome surrounds so i'll have to paint them black as the rubbers from the orange ones won't fit over.
[BREAK=25th September 2010]
There's been a couple more coats of white on the liner now. I used a rubbish brush (that's supposed to be good as it's branded & cost more) thats flicked spots all over the interior. Also stuck some reflector bulbs in the indicators, no more "fried egg" look.


missed a bit :roll:
I cleaned behind the nsr light as that hadn't been done for years and i don't want it to corrode like the opposite side. Then i got the bonnet up. I got a bit of a rust issue on the removable part of the bulkhead. I took off all the brackets and the heat shield.


I painted the brackets after sanding off most the rust. Wire brushed the casing for the module. Taped up the engine earth lead. Managed to get all the bolts in for the cam belt cover (which is heat-warped), what a hassle a couple of them were!

I had a look at the torsion bars. There's a bit of rust built up behind the cap. As is is a cabby there's not much room & I think i would have to take the whole thing off to access the bars, so it'll stay as it is for now.

--------------------------------------------------------------------------
30th Sept 2010Bulbs. I put the reflectors in the indicators already as described previously. Now i got some festoon bulbs with white LEDs in. They're going in the cabby pilar lights that can be set on, off or on with the doors open by rolling the lense up, center or down. They're replacing the original 7 watt festoons. Depending how bright they are i might get some for the 2 number plate bulbs, which are currently original 5 watt festoons but i bet the LED ones are way too bright. One of the number plate bulbs has gone and i don't wanna get pulled over for it.

Next up in the exciting bulb selection is a replacement red brake & fog light bulb. I got these as an upgrade on the clear ones for the replacement n/s/r light i got off Neal. Whilst in daylight it's a good match to the o/s/r it's noticeably lighter in the dark, with the brake or fog lights on. It's a hard thing to photograph so just take my word for it

I'll put them on on the weekend and see how it goes
[BREAK=Fog Lights]
30th October 2010
I got some clear fogs from a R5GTT to complete the clear lights. They arent in the best nick. I decided to put a bit of work in before putting them on the car.I got the surrounds off and took out the bulbs. The reflective paint has dulled and where the water has got in the glass was grubby inside. I prised them open and gave the glass a good clean.


The sealant was slapped about real shabby, i thought the line in the pic below was a crack but i'm glad it's just sealant. I decided to use tin foil to increase the reflective properties so i stuck it in with some Uhu, hi-tec :lol: Looks loads better.


All i got to stick 'em back together is household sealant which takes 24 hours to dry so there they are until tomorrow.

The yellow ones on the car are almost off, just the inside screws are rusted to the crappy clip/bolts. Some wd4o and a bit of encouragement should sort it.

Fogs part 2
Here's a shot of the two sets.

The yellow are branded Valeo/ Cibie and the clear say esime (or sm with some shit around it:?) The Cibie ones are much better made. The frames are slightly bigger on the clear ones.
All the original lights will stay with the car if & when i sell it. I personally prefer the look now with all clear lights. Here's the before and after pictures...


I did like the novelty of the yellow light but i don't have them on much, people tend to stare when i do :lol: The brightness of the refurbed clear ones is as good as, or brighter than, the high beam as you can see bellow

So now that's done the car will be static for a bit - i've whipped off the throttle body as it is getting sent of to a specialist (Chris H) to be set up properly, cheers Chris. Hoping that'll get me more than the 300 mile a tank i'm getting currently

[BREAK
4th November 2010
Went and picked up my post at the office and refitted my throttle body.

Car idles better, less lumpy and accelerates smoother. I assume it won't start bouncing like it did. Thanks again Chris.
It happend to be a sunny day so I tried out my newly purchased rare and exotic accessory, a wind deflector. It makes a little "sssss" noise at high speed as the air pushes through the mesh but it reduces the amount of air swirl which means i can hear the noise! It's cool looking back through it in the rear view.
Fits with a molded plastic section that's secures by velcro strap around the door pillar grab handle. The back is elastic and fixed over the seatbelts anchorage.


It has 2 small tears in which i recon are from a fingernails going through it.


it can stay on with the roof up. Which makes the car feel smaller because of the barrier behind your head. Night driving the car especially feels like a 2 seater.


Fitted some 3 way speakers i got for a song... i used the ones i took out in the dash instead of the o.e. tweeters. Now i can hear the stereo with the hood down. The deflector helps too.


ops is that upside down


[BREAK=clutch pedal]
28th Nov 2010
A few weeks ago i replaced the clutch cable. It snapped at a very inconvenient time (not that there's a convenient time) 7.30 am on the way somewhere improtant. Forunately I was able to leave is on a side road for a few days until i could get a lift to it and do the work.
Since then the pedal has slipped 3/4 times just like the cable had broken. I figured it must be the ratchet failing and found a Renault pedal on ebay. Better done before it fails and leaves me in a lay-by cursing the car.

The bag was open and one of the retaining clips was missing but i could re-use the one on the car, no worries.

I got the old pedal off. The bar was really stiff and there's no room in the footwell to work. I'm pretty agile and not too large so i lay upside down on the drivers seat with it fully reclined :lol:
The ratchet, washers and spring were all knackered, as you can see


I kept the old assembly together and copied the setup with the new one. The old peadal was ok it just looked worn where the paint had rubbed off so I swapped over the rubber and used the new one.
In retrospect i was over zeallous with the multipurpose grease which made fitting the new assembly much harder, especially with a new spring. I put a bolt throughit and used that to keep it all together to get it in to place before pushing the bar through. Getting the retaining clip back on the end was tricky.
Once done i refitted the cable and tried it out. The biting point is now alot higher...
I gave the car a quick wash and went for a spin, here's some nice pics for the heck of it


[BREAK=lights and sounds]
21st January 2011
I have been concerned about the lack of power in the mainbeam. Nightdriving starts at 3.30pm in the winter. My eyes are pretty good in lowlight but the headlights are so weak compared to modern cars that look like they've got their high-beams on all the time.
It's partly to do with the proectors being dirty but i thought i'd get some of the bulbs that claim to be 90% brighter (buy one get one free).

I can't see any difference in the design except the blue

Hard to tell what the difference is until sundown. Now the proectors have been cleaned there'll be an improvement.
For the door I got some kenwood 2-way 6 1/2 inch speakers for £1.20 on ebay wich are hopefully an upgrade on the ageing phillips originals.
The design is a bit funky but they're tucked behing the grilles. I am ultimately after some quality 1-way speakers that'll cover the bass range and leave the treble for some tweeters in the dash. But 2-ways in both locations will do until i can get what i want. Afterall the sound quality is limited by the audio cassttes i play.

[BREAK=Recreational activity]
22nd Febuary 2011
I noticed a while back, whilst under the car, that the inner anti-roll bar bushes are cracked and perished. So i decided to replace them and the outer ones for good measure.
Unfortunately the factors ordered 2 sets of outer (in 2 different sizes) so the car remains balanced on axle stands overnight until i can finish the job.
I gave the car an oil change (cheapest comma stuff) and new filter, a genuine Renault item!
I have some braided lines to fit (front only) but the union between the hoses and the line is rounding off when i try and undo it with an adjustable so i splashed £3 on a forged 11mm spanner to tackle them tomorrow after they've soaked in wd40 overnight.

The biggest acomplishment today was the addition of two 8mm spacers between the decat and mid-section. The decat is too short so this should stop the exhaust knocking in right-hand corners. Better still it means the tail pipe isn't wonky under the bumper anymore (which looked shit) Not the best solution but it will tide me over til i get the stainless steel custom straight through system made....:lol:

part 2
The bushes cracked on the outside probably good for a year or 2 but changing them is easy.

Or it would be if the factors get the right ones 1st time. The set i've got now are 23mm so they should fit. Exotic too.


I have the goodridge lines to go on (note spare clutch cable underneath - it's going to live in the boot with some string

I've splashed out on a new light thats been floating on ebay for ages, i made the seller a cheeky offer. The one fitted collects water then drips it out over weeks and the rust underneath is the result.

[BREAK=March]
fed up with the passenger window not going back up I got stuck in. I have been avoiding taking off the door card because i remember how Lewis77 had so many problems with his.
Following some good advice i checked the connections and switches then the power, all ok except the power. So time to grease the mech.

I got it off, only broke it a little bit :lol: note the 'orrible staining on the arm rest bit, that's going!

Greased the mechanism and cleaned the card. The water ran brown off the card - yuk! Now looks much better and although slow the window goes back up again.

I took off the arch liner for a look. Not much mud to clear.

I changed the air filter as i got 2 Renault ones for a great price.


It was a fair bit fatter and needed squashing in.
New plate pic

[BREAK=rusty patch]
I got a quote from a bodyshop to sort out some of the shabby bits on the car:
rusty section under o/s rear lights
dent in bootlid
rust along bottom and sides of doors
line dent (rusting) on the passenger door
dent in o/s rear quarter (car park incident)
assorted stone chips and rust spots in assorted locations
The shop sent me a quote for £1400 So i decided to do the best i could myself. I'll keep a running total of the cost.
Shopping list:
primer
topcoat
filler
wet & dry
kurust
total: £30
I splashed out on some extras: sealey machine polisher, silverline polishing pad & meguairs polish. Total: £80
I already have the clear coat and various other detailing stuff.

389 - glacier white. available straight off the shelf in halfords.

this is the first problem to tackle.

ground back, the underside is still okish


filled and sanded down, nearly ready to paint.
2 coats of primer, sanded, then 3 coats of colour, sanded then 3 coats of laquer, sanded and another 3 coats, sanded and a final coat.
Whilst i did it i was polishing the car panel by panel and sprucing up the engine bay. It isn't a brilliant job but it is better than it was.
The colour is visibly different but i tried to blend it. I was impatient and didn't get the filler perfect either. Not bad for a first attempt and i'm very happy i have not spent a packet in a body shop.

Now the car has been machine polished it is looking A1. I did the whole wash/ clay/ polish & wax thing, even dressed the tyres!
full details ; http://www.retro-renault.com/forums/bodywork-detailing/17819-cabby-htr-detailed.html
[BREAK=Long overdue]
Been ages since i updated this. Car has been my daily most of the time. It is a soldier on over 120k miles now. Its had a clutch fitted by professionals, i'd love to of done it but i didn't have the time or the guts. Sadly due to being in constant use the car has aged and gained numerous dents and scuffs. The roof also has a few holes now, nothing really horrible.
Put a new bearing on the front right as it was making a nails on blackboard kind of noise. Also changed the box oil, you can see in the pic the old stuff is rough and only 2 litres of it in there.

I changed the reverse switch hoping to cure the reverse lights not working, didn't do the job though. Also a weird issue with the front right indicator not working even though theres 12v there when on. MOT soon...
Then i will be moving her on, I can't carry on driving her as a daily.
Last edited by a moderator:


