There is more to life with TurboRenault.co.uk
You are using an out of date browser. It may not display this or other websites correctly.
You should upgrade or use an alternative browser.
You should upgrade or use an alternative browser.
Clio Big Steve Raider’s - Clio 200 Raider
- Thread starter Big Steve - Raider
- Start date
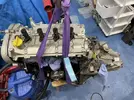
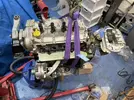
Good old @jas_racing came over this morning and gave me a hand to get this turd all properly timed up, and then new rear main seal on, flywheel, clutch and then gearbox:
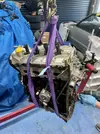
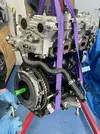
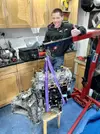
Work continues…


Work continues…
Yes & No. the cam locking tool doesn’t exactly slip in & out like a dream, but needs a little wrangling. It was by far the best I got working thru the process with @jas_racing . After a couple of turns of the engine, the tool went back in, rather than being circa 10 degrees out as I was finding before.did you manage to get it all timed up nicely in the end?
CreweTube
Well-Known Member
Late to the thread but nice car, when I was trading in my Clio GT they had a red Raider they were trying to push on me as a replacement and always regretted not taking it, especially with how rare they actually were compared to the planned run.
That said my car got keyed the following week from headlight to tail light so glad I didn't have the matte paint to deal with..
That said my car got keyed the following week from headlight to tail light so glad I didn't have the matte paint to deal with..
Saturday 20th November 2021, great day outside, and still quite mild (11°C) for winter, so got stuck into getting the engine, back into the bay.
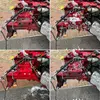
First step was to clean each 3 sides of the bay. Spray with degreaser, then rub round with a small brush, before rinsing off with water, then air drying with air blast from my compressor:
Offside Chassis Leg:
Scuttle Panel
Also changed the Air Conditioning expansion valve whilst I was in there:
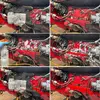
Nearside Chassis Leg:
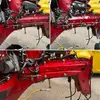
Think it certainly looks a lot better for itself now:
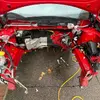
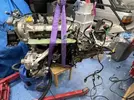
Then it was time to get the engine & gearbox out of the Garage, and back into the car.
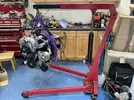
The old Engine Crane 🏗 took it all in its stride:
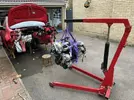
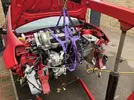
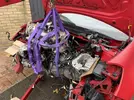
Was certainly as tight as the proverbial tiger doing it on my own, so I made sure I used the old cardboard trick both sides of the engine:
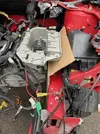
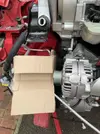
After a good bit of fenagling I got it all back in OK, then carried on re-assembling a few bits, until I got here:
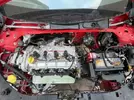
Thanks for dropping by!
First step was to clean each 3 sides of the bay. Spray with degreaser, then rub round with a small brush, before rinsing off with water, then air drying with air blast from my compressor:
Offside Chassis Leg:

Scuttle Panel
Also changed the Air Conditioning expansion valve whilst I was in there:

Nearside Chassis Leg:

Think it certainly looks a lot better for itself now:

Then it was time to get the engine & gearbox out of the Garage, and back into the car.

The old Engine Crane 🏗 took it all in its stride:


Was certainly as tight as the proverbial tiger


After a good bit of fenagling I got it all back in OK, then carried on re-assembling a few bits, until I got here:

Thanks for dropping by!
Forgot to mention, whilst I’m refreshing the engine bay, I’m also replacing items as I go to ensure the car is as good as new again. This process has stood me well over the years, with nothing ever giving me a moments issue after I’ve rebuilt it.
This Clio will/has had:
Keep your eyes peeled for a lot of that going back on in coming posts.
This Clio will/has had:
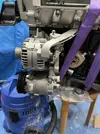
- New Alternator - Old one was definitely on its way out as the bearings were rumbling something chronic.
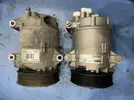
- New Aircon Compressor - Aircon wasn’t ice-cold before the rebuild, am hoping it should be tip-top afterwards
- New Aircon Expansion Valve - As above
- New Aircon Condenser and Receiver Dryer- As above
- New Engine Radiator
- New Front lower crossmember/Radiator Support
- New Front Wishbones - Both sides
- New Timing Belt Kit +Dephaser
- New Aux Belt Kit
- New Anti Roll Bar Bushes - Fitted them tonight. Interestingly I bought some Febi items, which are usually great, but the design was different to the OE style. With that I ordered a new pair from Renault and they arrived, and were the same design!! Thinking I’d f**ked up, I compared the Febi and OE anti roll bar bushes, and found that the genuine Renault ones, were CONSIDERABLY harder than the Febi items!! Obviously a harder shore strength (Degree in Polymer Science leaking out there, sorry
 )
) - New Anti-Roll Bar Droplinks
- Engine And Gearbox Oil and Filters
- New Engine Oil/Water heat exchanger
Keep your eyes peeled for a lot of that going back on in coming posts.
Sunday 28th November 2021 - A fabulously calm sunny winters day, after the storms of yesterday!! So with that, at I was all fed & watered, and WELL wrapped up from the 2C Temperature  at 08:47 made a start!
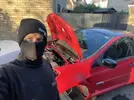
First was the new Starter motor, exhaust manifold, exhaust manifold to Catalyst coupling and then subframe.
Next up was a new pair of OE SNR Driveshafts:
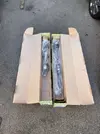
With the driveshafts fitted, I could then get the gearbox refilled with oil. Next was the new lower wishbones before I would fit the new front radiator support (Very clever how many things interlock on this car)
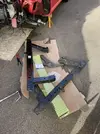
Everything then Torqued up to OE Specs.
Next was to switch over the fan & water bottle from the old Radiator (Which was looking well past its best!!) to the new:
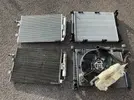
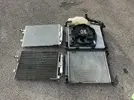
Quick progress check photo:
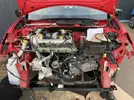
Then re-fitted the Radiator and Air-conditioning Evaporator:
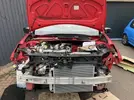
After a super successful ~6 hours, I called it a day at 15:08:
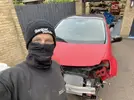
Not too far to go now, reckon if I can be lucky to get another clear dry day, I’ll have this puppy back together!
Thanks for dropping into the Big-Steve dome! ️
️

First was the new Starter motor, exhaust manifold, exhaust manifold to Catalyst coupling and then subframe.
Next up was a new pair of OE SNR Driveshafts:

With the driveshafts fitted, I could then get the gearbox refilled with oil. Next was the new lower wishbones before I would fit the new front radiator support (Very clever how many things interlock on this car)

Everything then Torqued up to OE Specs.
Next was to switch over the fan & water bottle from the old Radiator (Which was looking well past its best!!) to the new:


Quick progress check photo:

Then re-fitted the Radiator and Air-conditioning Evaporator:

After a super successful ~6 hours, I called it a day at 15:08:

Not too far to go now, reckon if I can be lucky to get another clear dry day, I’ll have this puppy back together!
Thanks for dropping into the Big-Steve dome!
Similar threads
- Question
preRS Clio
MK1 Clio seat subframes
- Replies
- 0
- Views
- 49
- Replies
- 2
- Views
- 121

