Chris H
master of boobies
Well I finally got my hands on a 2 litre for the right price, some of you may guess the right price.
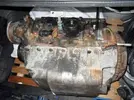
Its a Megane Coupe F7R 710 engine. No idea of its history.
However its already shown me a few things, water pump bearings totally collapsed, waterways look clogged due to never having the coolant changed, the clutch was very worn, the sumps been off as has the flywheel. So someone has been in at it. When I actually get started on it properly no doubt I will find more surprises.
It needs to be built properly and to my standards before I fit it to anything.
The basic requirements are, reliability, it must be fit for at least 5 years service so lets say 100k or so miles. Streetability, the engine will most likely end up in my daily driver or a daily driver anyway, so it has to have good low speed tractability. Economy, fuel economy is important to anyone especially with the rising costs. Emission compliance, the environment needs looked after and it also has to pass its MOT's.
Reliability, as some of you may know these can and do spin big end bearings, this sort of nonsense is not acceptable to me. So lubrication shall be dealt with.
Cooling, adequate cooling and temperature stability cylinder to cylinder is also required.
RPM's, this will be kept at a sensible limit 7500 rpm or so. Any higher and things start to become an issue for reliability. Power will also be tailing off here, so there will be no use in revving higher. RPM really means ruins peoples motors.
The flywheel will either be retained and adapted or the 1.8 flywheel will be used. It means a smaller clutch at 200mm instead of the meganes 215mm clutch plate but on the other hand the gearbox will spit its circlip before the clutch pops. As of yet I am unsure if I will further lighten the flywheel. Another area many folk don't understand fully.
Compression ratio may be raised, the numerous benefits from doing so outweigh any disadvantages and difficulties it may present. It will really depend on how much time/money I'm willing to sink into it. Although a high CR and very light flywheel will make engine control a bit of a hassle as it will rev to easily.
Fuelling and ignition control will be paramount to everything, hopefully I will be able to adjust these as I require.
I should have access to a dyno which will help to backup the improvements.
This build will most likely take a while as it will be done when time and money allows.
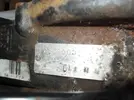
I have few pictures at the moment there are only 2 I have and here they are
[BREAK ulleys]
8th March 2010
The other day I had a free half hour so I decided to pull the crank pulley off, now some of you will know these are notorious for seizing on. This one was no different.
First job lock the crank and undo the bolt, remove the aux belt pulley then it was onto removing the cambelt pulley.
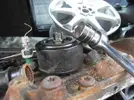
Theres 2 threaded holes on the pulley, this is where your best going to remove it. The engine was still in the boot so can't get a full size slide hammer in to do it easily, so I had to improvise. I got it off undamaged
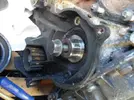
both crank pulleys
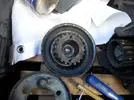
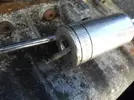
This is my high tech removal device, a long 10mm bolt with a washer on it passed through a 30mm deep socket. I used this as a slide hammer, it took a while to break the rust bond but it came away
Today I dug these out and freed them off. I'm unsure if I should use them on this build as they are not the best pulleys to use. However correct cam timing is critical to power and economy. So They have to be set bang on.
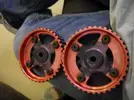
They are Piper Cams pulleys and have a known history of breaking.
I also removed the water pump which had collapsed, not a good sign tbh and removed the clutch which was worn to the rivets, again not a great sign. Still more weight for my scrap bin.
[BREAK=Stripdown begins]
12th March 2010
Today I wanted to remove the dipstick tube without damaging it so I could sit the engine up. It turned into a bit of a strip down.
I will start where I started, dipstick removal. This was awkward with it being in the boot of a car etc!
So off with the sump
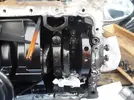
dipstick worms eye view
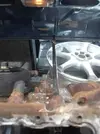
flywheel and dipstick
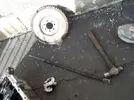
the hole left with it out
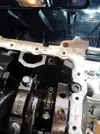
The next step was looking at the state of things. Clearly this engine has had some lubrication issues, old oil, diluted oil, whatever there's been issues. Its a bit of a state inside, there's a silvery tine to any oil that's about
This is the inside of the sump as removed oh dear.
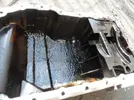
The pump pick up after a wipe on the top half, sadly it never came out but theres sealant stuck in the pickup
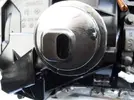
Then it was time top pull the pump off, this was ridiculous, eventually with a 1/2 drive 11mm socket I cracked it off, thats not all I cracked though! All were stupidly tight even after a knock on their heads
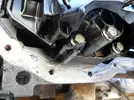
pump off, not too healthy looking
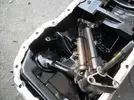
Knocked the metal coolant pipe out, kind of damaged it as I couldn't be bothered getting the right drift to do it, still I will buy a new one anyway
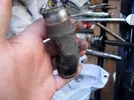
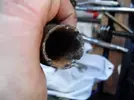
Then I pulled off the oil cooler, well the oil filter sandwich plate heat exchanger if you prefer, 27mm socket if your interested
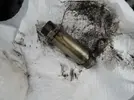
back to the block, this area will be re-worked to improve fluid transfer
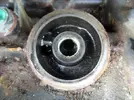
today's antics will be continued on the next page
[BREAK=Stripdown begins part II]
I removed the aux shaft pulley and found that there was nearly 1mm of radial movement, this is not good, axial movement was fine so the thrust plate is ok. The shaft runs on bearings but tbh they really don;t often wear, but the amount of movement I had told me they were worn or damaged.
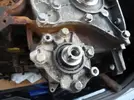
The eagle eyed among you may have noticed one of the dowels is further out than the other. As is often the case the dowels were stuck in the ally housing, to free it off use a punch on the dowel to free it off
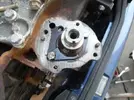
\this is the aux shaft removed, those that have dealt with the F7P engines will notice that the cam lobe is missing, the lobe btw is to drive the mechanical fuel pump on the older F series engines from the 80's. However more to the point noticed the heavily scored and indeed grooved journals!
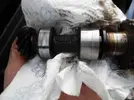
Not easy to see here but the bearing is ruined
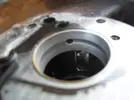
from another angle its easier to see here, badly scored
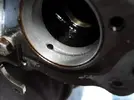
This is the plastic cover that covers the vertical drive to the oil pump, note the mess inside it, from a leaking head gasket obviously, these small clues let you know about a history
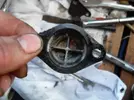
Bearing removed ignore big scores that was me
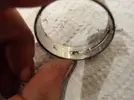
you can see the incoming lubrication oil was full of particles and thus its smeared away from the feed hole
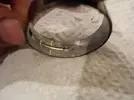
this is the thinner inner bearing
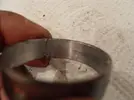
the fatter outer bearing, opened up to allow the damage to be seen better
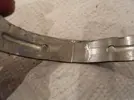
Now the very clever among you may think that damage is from and over tight cambelt, indeed this does cause damage like this and also damage to the front journals in the head but the fact its not limited to 1 bearing (the outer one) but both and the damage evidence emanating from the oil feed holes where if it was a tight belt it would have caused damage in another area of the bearing means it was debris in the oil that caused this problem.
Then it was onto removing the core plugs, ALL of them. Some may say this is overkill but as I stated before in this report and as I have said before on the forums I do things properly and anything I build I want it to last for as long as it when it came from the factory. the aux shaft for example, how many would have missed that? a lot would have - trust me.
First plug out, cambelt end, ohh dear clogged with crap build up, note casting lip, that will be dealt with
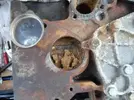
one of the rear ones popped out, also to the doubters out there I do believe that says F7R...
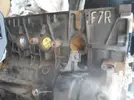
build up of debris
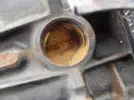
some compacted debris I fished out. The make up of which turns out to be, not through any sort of scientific testing but that of my own eyes and touch to be a mix of sand (from casting most likely), rusty scale with the occasional bit of sealant in it.
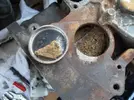
Onto the oil gallery plugs, this is beside the water pump housing, speaking of which note the rusty bobbled appearance, a mixture of coolant never being changed and also probably some cavitation damage
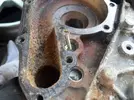
Fairly safe to say the engine was completed on the 25th of June 1996
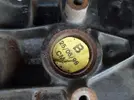
couple of oil gallery plugs out
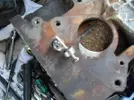
water pump housing oil gallery plugs removed
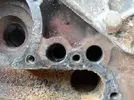
The small core plug covering the oil gallery feed tot he rear thin aux shaft bearing, note the gloop dripping out, there's metal in there
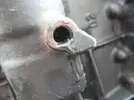
Main oil gallery that feed the main bearings, oil squirters and the big ends via the crank and the coolant jacket core plug also removed
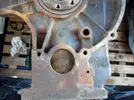
the core plugs removed
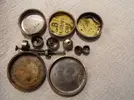
this is the main oil gallery, a torch at one end camera at the other, its clear through it, the thing intruding into the gallery with the flat bottom of the oil squirter bolts

There is a lot of work to be done on this block, the casting needs cleaned up internally and externally, for improved oil flow (both under pressure and drain back), so the block doesn't cut me and also for improved cylinder cooling (something I am very picky on).
As I have said my engines need to be reliable, they may make more power than stock in some instances a hell of a lot more and some may think I charge way to much but I do a thorough job and stand by my work.
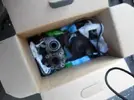
Back on topic a box filled with stuff removed from the engine
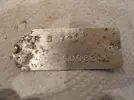
This also came off 'accidentally'
Need to try and sort out somewhere to actually work on it properly so I can remove the reciprocating components, then clean the block then get it dipped so its really clean then I can start working on it.
Its a Megane Coupe F7R 710 engine. No idea of its history.
However its already shown me a few things, water pump bearings totally collapsed, waterways look clogged due to never having the coolant changed, the clutch was very worn, the sumps been off as has the flywheel. So someone has been in at it. When I actually get started on it properly no doubt I will find more surprises.
It needs to be built properly and to my standards before I fit it to anything.
The basic requirements are, reliability, it must be fit for at least 5 years service so lets say 100k or so miles. Streetability, the engine will most likely end up in my daily driver or a daily driver anyway, so it has to have good low speed tractability. Economy, fuel economy is important to anyone especially with the rising costs. Emission compliance, the environment needs looked after and it also has to pass its MOT's.
Reliability, as some of you may know these can and do spin big end bearings, this sort of nonsense is not acceptable to me. So lubrication shall be dealt with.
Cooling, adequate cooling and temperature stability cylinder to cylinder is also required.
RPM's, this will be kept at a sensible limit 7500 rpm or so. Any higher and things start to become an issue for reliability. Power will also be tailing off here, so there will be no use in revving higher. RPM really means ruins peoples motors.
The flywheel will either be retained and adapted or the 1.8 flywheel will be used. It means a smaller clutch at 200mm instead of the meganes 215mm clutch plate but on the other hand the gearbox will spit its circlip before the clutch pops. As of yet I am unsure if I will further lighten the flywheel. Another area many folk don't understand fully.
Compression ratio may be raised, the numerous benefits from doing so outweigh any disadvantages and difficulties it may present. It will really depend on how much time/money I'm willing to sink into it. Although a high CR and very light flywheel will make engine control a bit of a hassle as it will rev to easily.
Fuelling and ignition control will be paramount to everything, hopefully I will be able to adjust these as I require.
I should have access to a dyno which will help to backup the improvements.
This build will most likely take a while as it will be done when time and money allows.
I have few pictures at the moment there are only 2 I have and here they are


[BREAK
8th March 2010
The other day I had a free half hour so I decided to pull the crank pulley off, now some of you will know these are notorious for seizing on. This one was no different.
First job lock the crank and undo the bolt, remove the aux belt pulley then it was onto removing the cambelt pulley.
Theres 2 threaded holes on the pulley, this is where your best going to remove it. The engine was still in the boot so can't get a full size slide hammer in to do it easily, so I had to improvise. I got it off undamaged

both crank pulleys

This is my high tech removal device, a long 10mm bolt with a washer on it passed through a 30mm deep socket. I used this as a slide hammer, it took a while to break the rust bond but it came away

Today I dug these out and freed them off. I'm unsure if I should use them on this build as they are not the best pulleys to use. However correct cam timing is critical to power and economy. So They have to be set bang on.

They are Piper Cams pulleys and have a known history of breaking.
I also removed the water pump which had collapsed, not a good sign tbh and removed the clutch which was worn to the rivets, again not a great sign. Still more weight for my scrap bin.
[BREAK=Stripdown begins]
12th March 2010
Today I wanted to remove the dipstick tube without damaging it so I could sit the engine up. It turned into a bit of a strip down.
I will start where I started, dipstick removal. This was awkward with it being in the boot of a car etc!
So off with the sump

dipstick worms eye view

flywheel and dipstick

the hole left with it out

The next step was looking at the state of things. Clearly this engine has had some lubrication issues, old oil, diluted oil, whatever there's been issues. Its a bit of a state inside, there's a silvery tine to any oil that's about
This is the inside of the sump as removed oh dear.

The pump pick up after a wipe on the top half, sadly it never came out but theres sealant stuck in the pickup

Then it was time top pull the pump off, this was ridiculous, eventually with a 1/2 drive 11mm socket I cracked it off, thats not all I cracked though! All were stupidly tight even after a knock on their heads

pump off, not too healthy looking

Knocked the metal coolant pipe out, kind of damaged it as I couldn't be bothered getting the right drift to do it, still I will buy a new one anyway


Then I pulled off the oil cooler, well the oil filter sandwich plate heat exchanger if you prefer, 27mm socket if your interested


back to the block, this area will be re-worked to improve fluid transfer

today's antics will be continued on the next page
[BREAK=Stripdown begins part II]
I removed the aux shaft pulley and found that there was nearly 1mm of radial movement, this is not good, axial movement was fine so the thrust plate is ok. The shaft runs on bearings but tbh they really don;t often wear, but the amount of movement I had told me they were worn or damaged.

The eagle eyed among you may have noticed one of the dowels is further out than the other. As is often the case the dowels were stuck in the ally housing, to free it off use a punch on the dowel to free it off

\this is the aux shaft removed, those that have dealt with the F7P engines will notice that the cam lobe is missing, the lobe btw is to drive the mechanical fuel pump on the older F series engines from the 80's. However more to the point noticed the heavily scored and indeed grooved journals!

Not easy to see here but the bearing is ruined

from another angle its easier to see here, badly scored

This is the plastic cover that covers the vertical drive to the oil pump, note the mess inside it, from a leaking head gasket obviously, these small clues let you know about a history

Bearing removed ignore big scores that was me

you can see the incoming lubrication oil was full of particles and thus its smeared away from the feed hole

this is the thinner inner bearing

the fatter outer bearing, opened up to allow the damage to be seen better

Now the very clever among you may think that damage is from and over tight cambelt, indeed this does cause damage like this and also damage to the front journals in the head but the fact its not limited to 1 bearing (the outer one) but both and the damage evidence emanating from the oil feed holes where if it was a tight belt it would have caused damage in another area of the bearing means it was debris in the oil that caused this problem.
Then it was onto removing the core plugs, ALL of them. Some may say this is overkill but as I stated before in this report and as I have said before on the forums I do things properly and anything I build I want it to last for as long as it when it came from the factory. the aux shaft for example, how many would have missed that? a lot would have - trust me.
First plug out, cambelt end, ohh dear clogged with crap build up, note casting lip, that will be dealt with

one of the rear ones popped out, also to the doubters out there I do believe that says F7R...

build up of debris

some compacted debris I fished out. The make up of which turns out to be, not through any sort of scientific testing but that of my own eyes and touch to be a mix of sand (from casting most likely), rusty scale with the occasional bit of sealant in it.

Onto the oil gallery plugs, this is beside the water pump housing, speaking of which note the rusty bobbled appearance, a mixture of coolant never being changed and also probably some cavitation damage

Fairly safe to say the engine was completed on the 25th of June 1996

couple of oil gallery plugs out

water pump housing oil gallery plugs removed

The small core plug covering the oil gallery feed tot he rear thin aux shaft bearing, note the gloop dripping out, there's metal in there

Main oil gallery that feed the main bearings, oil squirters and the big ends via the crank and the coolant jacket core plug also removed

the core plugs removed

this is the main oil gallery, a torch at one end camera at the other, its clear through it, the thing intruding into the gallery with the flat bottom of the oil squirter bolts

There is a lot of work to be done on this block, the casting needs cleaned up internally and externally, for improved oil flow (both under pressure and drain back), so the block doesn't cut me and also for improved cylinder cooling (something I am very picky on).
As I have said my engines need to be reliable, they may make more power than stock in some instances a hell of a lot more and some may think I charge way to much but I do a thorough job and stand by my work.
Back on topic a box filled with stuff removed from the engine

This also came off 'accidentally'

Need to try and sort out somewhere to actually work on it properly so I can remove the reciprocating components, then clean the block then get it dipped so its really clean then I can start working on it.
Last edited by a moderator:

