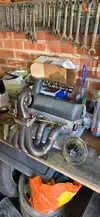
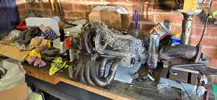
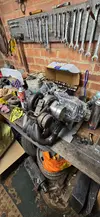
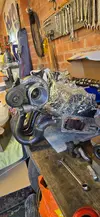
csaster was different side to side, i totally forgot about tweaking it tbh. Something to definitely play with next time. LHS was +8°19' RHS +7°43
At the 5:13 mark in the wheel alignment video you stated you cannot adjust rear toe, where you actually can. There is an eccentrically drilled hex adjuster under the nut and large washer where the arm is bolted to the disc backing plate to allow toe adjustment.
Hi Aln,
I think that you may possibly be getting the rear suspension "Toe Adjustment" terminology confused with the alignment of the "Whole of the Rear axle set up" with respect to the true centre line of the car, and as to what can be altered via the 2 hexagonal eccentrics at the rear hubs/trailing "A" arms, which allow for some adjustment of the whole assembled axle and gearbox/engine combo.
This rear axle aligning adjustment is relatively easy to mechanically undertake, but difficult to achieve say without the engine also being present as modern optical alignment systems need a target on the front wheel rims to be attached and ditto to the rear wheel rims, its a bit difficult to know where the rear axle is actually at in respect to the cars bodywork centre line. But if the engine is installed with all the std Factory rubber mountings on the box and at the chassis rail end ends, then the whole mechanical engine /box /axle combo is installed within the cars chassis as the factory designed it to be, but in use when driving on the road the whole lot is still "floating around" inside the bodyshell as the flexing insulating rubber mountings flex quite a lot allowing some degree of rear wheel steering and axle "wind up". This is movement was acceptable for these daily driven std family cars.
There is also another factor involved i.e. the Factory designed inclination of the whole rear end combo i.e. the front nose of the box is pointing downwards to the road while the engine crank pulley is pointing upwards direction, this "rake" has in theory little effect on alignment, but the flexing rubber mountings do. The engine by design can rise and fall on its rear mountings. This general 360 degree flexing or is further exacerbated by say fitting wider rear wheels and tyres which create more negative camber and leverage on the rear end.
For the Coup Gordini Racing series in the 1960s, Renault offered an Homologated Group 2 suspension kit which comprised of harder rubber in the engine mountings ditto the gearbox side mountings, and also a pair of steel straps acting as "girdles" which attached to the side mountings and gearbox studs effectively acting as a Watts linkage, hence keeping the rear axle better located, and improving the handing performance by reducing "porpoiseing" of the engine and box/axle. The R8 Gordini models were also lower in height and stiffer sprung etc.
We have to remember that these rear engined cars were mass produced family saloons starting Post War with the humble 4CV, which had its gearbox rigidly bolted to a transverse steel tube attached at the chassis rails with some rubber cup shells , no trailing arms and a rigid engine crossmember attached to the chassis with 2 inboard rubber monts next to the timing cover.
Next through evolution along came the new design Dauphine and its spin off models now fitted with Mr Gregoire's infamous rubber rear axle mounting blocks and Aerostable cushions introduced to reduce noise inside the car and with no trailing arms, by comparison to the previous 4CVs these later cars were suffering from poorer road holding and worse handling, usually resulting in lurid spins or rollovers, as the rear drive end was now flexing on its squidgy rubber mounts alarmingly, and it had also inherited the 4CVs kingpin front suspension design all set in squidgy silent bloc bushes.
Next was the R8/R10 family and spin offs, now sporting the pair of rear "A" frame bars , and some more negative camber at the rear wheels and of course a new design of front wishbones and hubs now thankfully with ball joints [ junking the Dauphine/4CV kingpins finally] As a result of this new suspension the driving feel, handling and road holding was vastly improved but still leaves a lot to be desired by todays standards. Hence the Dongle bush kit is around give up to 6mm of eccentric adjustment and allowing negative camber to the front suspension.
Summing up the R8 steel body shell can be upgraded by adding strategic stiffeners as Renault call them, and say by fitting a multi point roll cage and so forth, so the shell flexing is reduced, and feel when driving is improved but for a car project such as Adey's R8, its the look or stance that is desired most, by sacrificing the ride quality and passenger comfort by running it on the " bump stops" and undertaking radical suspension lowering. Perfectly acceptable for local meets etc.
I ran my R8G like this for Hillclimbing and Sprint events , but driving it to Europe and around the UK to events was very tiring and the noise factor a pain.
Going back to the axle trunnions or Dice as the French call them, these themselves underwent a design change from the 4CV small diameter pins to the common larger pin diameter current sizes and now with specialists offering options to fit ptfe bushes , bronze and of course new needles, the stresses must be enormous on them.
Cheers
Dave
