This shell has had some major body restoration already, and I dont think I need to do much body wise save tarting the paint up a bit from storage so we’re going to go straight to the bit where it all goes together and makes a whole car.
I’ve kicked the R9 out of the garage to start laying out the puzzle, started tidying some stuff in the engine bay, cable routing etc. Nothing too exciting, so here are some pics of the incredibly clean shell.
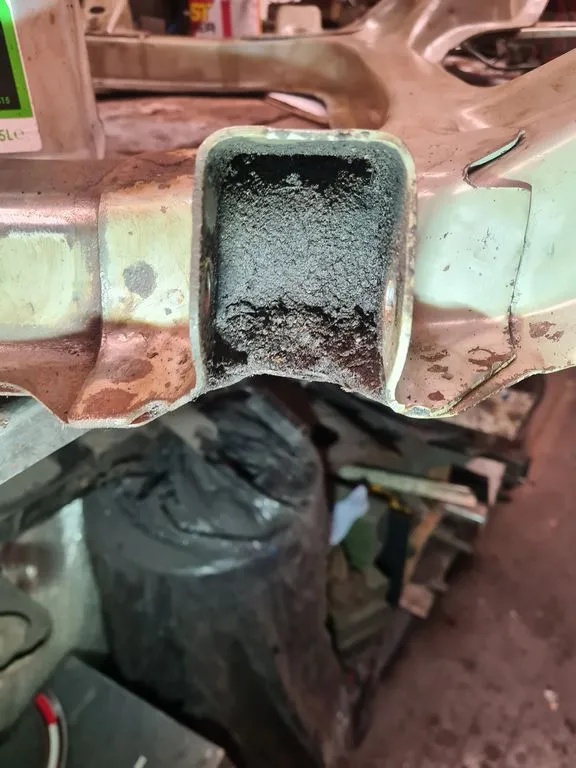
I cleaned off some sticky goop stuff, I assume an underseal of sorts from the subframe, think I might gravitex it. I think I saw new subframe bushes in the parts boxes as well so may just be easier to drop it, coat it and lob the bushes in at the same time.
I put the flywheel on the engine also, however that got cut short of fitting the clutch as the one that came in the boot supplied to the last owner as a Turbo clutch…isnt I knew as soon as I looked at it, but hey ho, I guess now I need to find one lol
That spigot bearing doesn’t look very good, surely it should be a sealed bearing as that isn’t going to get any lubrication and will soon clog up with dust from the clutch.
Pretty much, bit better midrange, not quite as much top end (8v to 16v)
Just for fitting up the clutch as the centering tool locates in it, i’ve got sealed ones in the cupboard (somewhere) but this was the first one to hand.
Prepping the subframe for fitting, the nuts and washers I replaced but the bolts were OK so I cleaned and greased them, then fitted the subframe bushes. The old large washers under a 36mm socket are perfect for this.
Bit of elbow grease and it’s looking a lot better. Note the holes in the back of the piston that feed fluid in to the U-profile seal to expand it into the wall of the cylinder
Then, in anticipation of refitting the engine on Sunday I put the steering hydraulic lines back in, and unfortunately as I tightened the back union the threaded segment broke out of the rack! FUMING!
Came back to it Sunday and had decided I wanted the engine back in come hell or high water so I had to swap out the rack for the rebuilt one from my white quadra, I can source and rebuild another for that one I guess! Pipes went back in OK this time.
Annoyed at the waste of time and money. Anyway. Reconnected the speedo cable while the engine wasnt in the way. Old skool mechanical cable, none of this electronic bumfluffery!
Got the engine ready to go in, brand new engine mounts to go with the new gearbox mounts and subframe bushes, new clutch, new spigot bearing, the whole 9 yards
Then (i’ve learned this the hard way) I checked the locating dowels were all there and that I didnt have dowels in both holes on the engine/box. One was missing in the end so I dug a new one out of the cupboard still in its Renault bag
Only just found this thread for some reason Dave! WOW! What a beauty of a bodyshell!! Smashing condition for the age! Wonder if it’s been sitting in a flippin Museum all it’s life!?
Look forwards to reading about your furious work on this before you get distracted by the next beautiful butterfly :stop.gif:
The previous owner started an extensive resto, its had new sills and jack points and a paint job and all sorts but he got waylaid by other things including a stunning Austin Healey resto and an air cooled Porsche and this one stalled…so along comes old muggins here being a sucker for a needy 21 Turbo and here we are. I know he wants to see it finished and I believe is following the thread along
Garage is like a sweat box at the moment! I lost nearly two kilos on Saturday lol - still, cracked on! Got all the bellhousing bolts in, I couldnt find the ones with the car so I had to raid my stash of spares.
Water pump back housing threads cleaned and fitted
Starter motor fitted, i cleaned and painted the rear bracket but i’m missing the L brackets to the block, might have to make some… then the alternator top bracket.
Carried on refitting bits and bobs, working on these things so long gives the advantage of knowing stuff like this particular little woggle clips on one of the fins on the gearbox bellhousing and holds the TDC sensor wire between the sensor and loom.


 I knew as soon as I looked at it, but hey ho, I guess now I need to find one lol